Introduction
As the storage needs of digital devices continue to grow, SD cards have become an essential accessory for many people. Whether you use an SD card in your camera, smartphone, or tablet, it is important to ensure that it is in optimal working condition. Testing an SD card can help detect any potential issues, such as read/write speed problems, errors, or capacity discrepancies. By conducting a thorough test, you can confidently rely on your SD card to store and transfer your valuable data.
In this article, we will guide you through the process of testing an SD card. We will cover the physical inspection of the SD card, testing the read and write speed, checking for errors, verifying the capacity, performing a file system check, and running a longevity test. By following these steps, you can identify any potential issues and take appropriate action to ensure the reliability of your SD card.
Before we dive into the testing process, it is important to note that different devices and operating systems may have varying ways to perform these tests. We will provide general guidelines applicable to most situations, but it is always recommended to consult the device’s user manual or specific software documentation for accurate instructions.
So, without further ado, let”s begin testing your SD card to ensure its optimal performance and reliability!
Requirements for Testing an SD Card
Before you begin testing an SD card, there are a few essential requirements you should consider. These requirements will ensure that you have the necessary tools and knowledge to accurately evaluate the performance and integrity of your SD card.
1. Compatible Device: You will need a device that supports SD cards, such as a camera, smartphone, tablet, or a computer with an SD card reader. Make sure the device is in good working condition to avoid any potential issues during the testing process.
2. Testing Software: Depending on the specific tests you want to perform, you may require specialized software. There are various options available online, both free and paid, that can help you assess the read and write speed, check for errors, and perform other tests on your SD card. Research and choose a reliable software program that suits your testing needs.
3. USB Card Reader: If your device doesn’t have an SD card slot, you will need a USB card reader to connect the SD card to your computer. Ensure that the card reader is compatible with your specific SD card type (SD, microSD, etc.) to facilitate a smooth testing process.
4. Backup Storage: Before testing your SD card, it is vital to backup all the important data stored on it. Testing can involve potential risks, and having a backup will protect your valuable files from accidental loss.
5. Time and Patience: Testing an SD card may take some time, especially if you are performing multiple tests. Allow yourself sufficient time to complete the process and be patient throughout the testing phase.
By fulfilling these requirements, you are setting yourself up for a successful SD card testing experience. It is essential to be well-prepared to ensure accurate results and avoid any potential issues.
How to Physically Inspect an SD Card
Performing a physical inspection of your SD card is the first step in testing its overall condition. This inspection allows you to identify any visible signs of damage or wear that could affect the performance of the card. Here’s how you can conduct a thorough physical inspection of your SD card:
1. Examine the Exterior: Carefully look for any visible signs of physical damage on the outer casing of the SD card. Check for scratches, dents, or cracks that could indicate potential issues. If you notice any damage, it is advisable to replace the SD card.
2. Inspect the Gold Contacts: The gold contacts on the back of the SD card are essential for establishing a connection with the device. Check if these contacts are clean and free from dirt, dust, or corrosion. If there is any debris or corrosion present, gently clean the contacts using a clean, lint-free cloth or a soft brush.
3. Check the Lock Switch: Depending on the type of SD card, there may be a physical lock switch on the side. This switch prevents accidental deletion or modification of the data on the card. Ensure that the lock switch is in the correct position, allowing read and write operations. If the switch is in the locked position, you may encounter issues while testing the SD card.
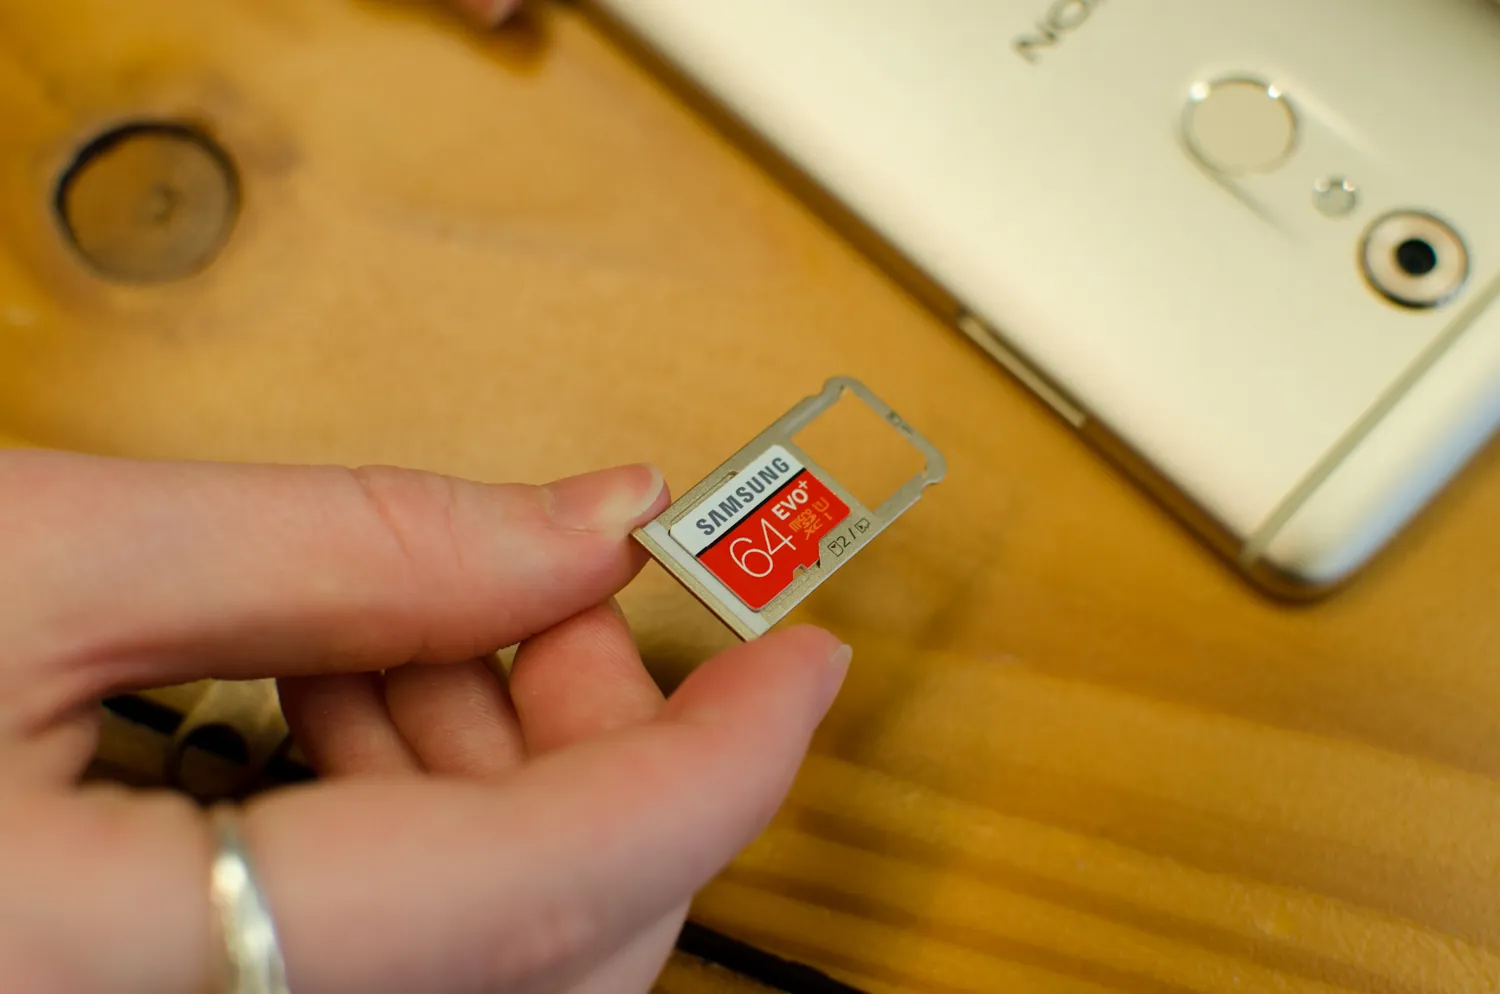
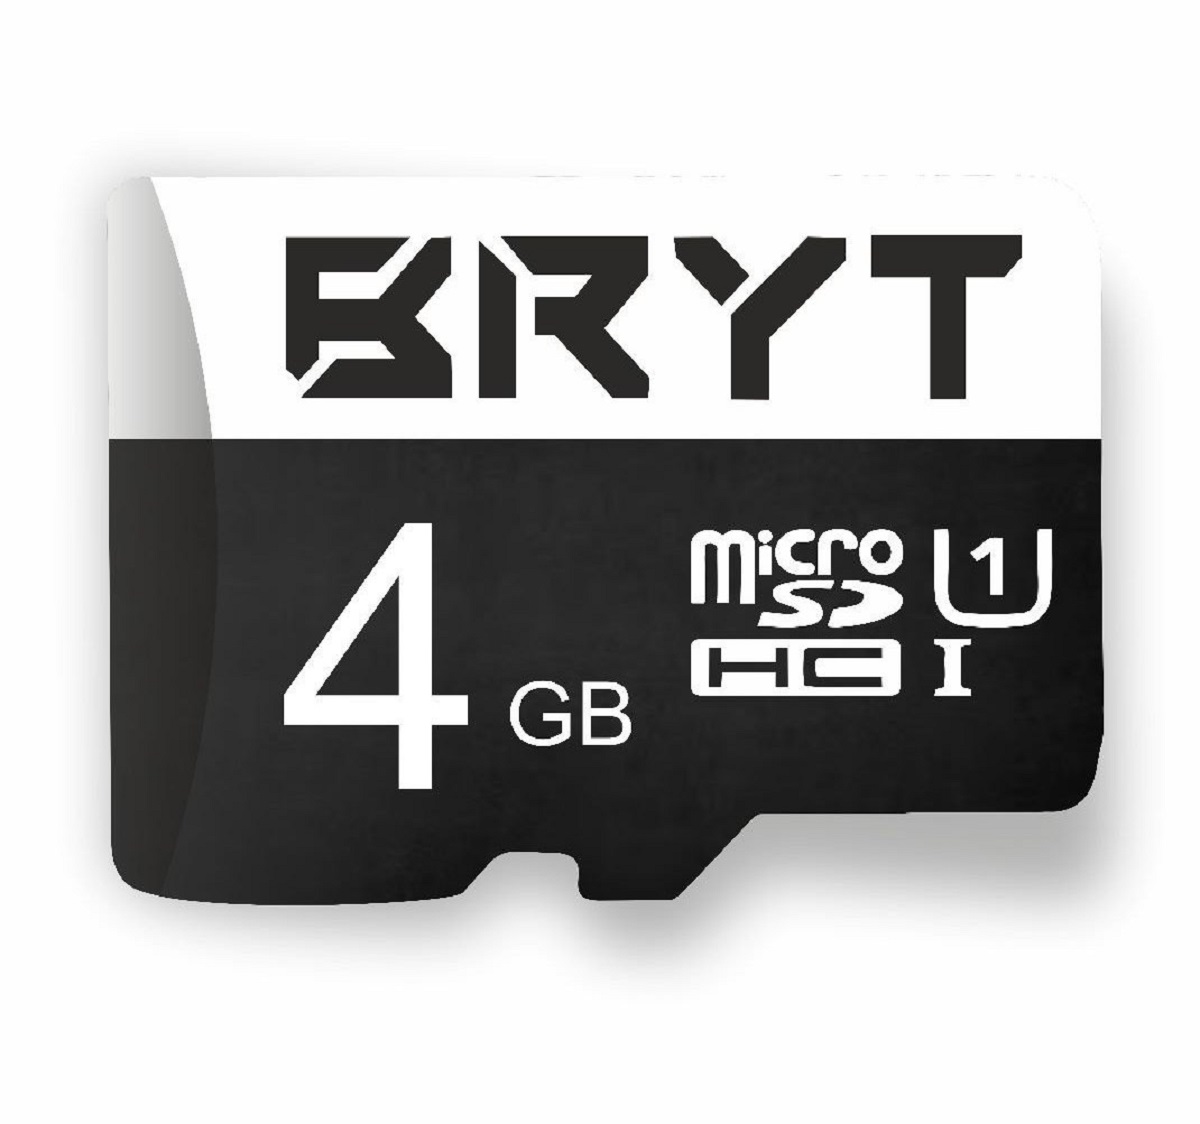
4. Inspect the Label: Take a close look at the label on the front of the SD card. Verify that the card’s capacity matches the specifications mentioned on the label. Mismatches in capacity may indicate counterfeit or faulty SD cards.
5. Observe the Design and Branding: Genuine SD cards usually have clear branding and a consistent design. Counterfeit SD cards often have poor quality printing or misspellings. Familiarize yourself with the design and branding of your specific SD card to easily identify any discrepancies.
By conducting a thorough physical inspection, you can identify any visible issues with your SD card. If you notice any significant damage, it is recommended to replace the card to ensure reliable performance during testing and everyday use.
Testing the Read and Write Speed of an SD Card
The read and write speed of an SD card is a crucial factor in determining its performance and usability. Faster read and write speeds allow for smoother data transfer and improved overall performance. Here’s how you can test the read and write speed of your SD card:
1. Choose a Testing Software: Select a reliable testing software that is specifically designed to assess the read and write speed of SD cards. There are various free and paid options available online. Ensure that the software is compatible with your operating system and supports your SD card type.
2. Insert the SD Card: If your device has an SD card slot, insert the card into the appropriate slot. If not, connect the SD card using a USB card reader.
3. Open the Testing Software: Launch the testing software on your device. Follow the instructions provided by the software to initiate the read and write speed test.
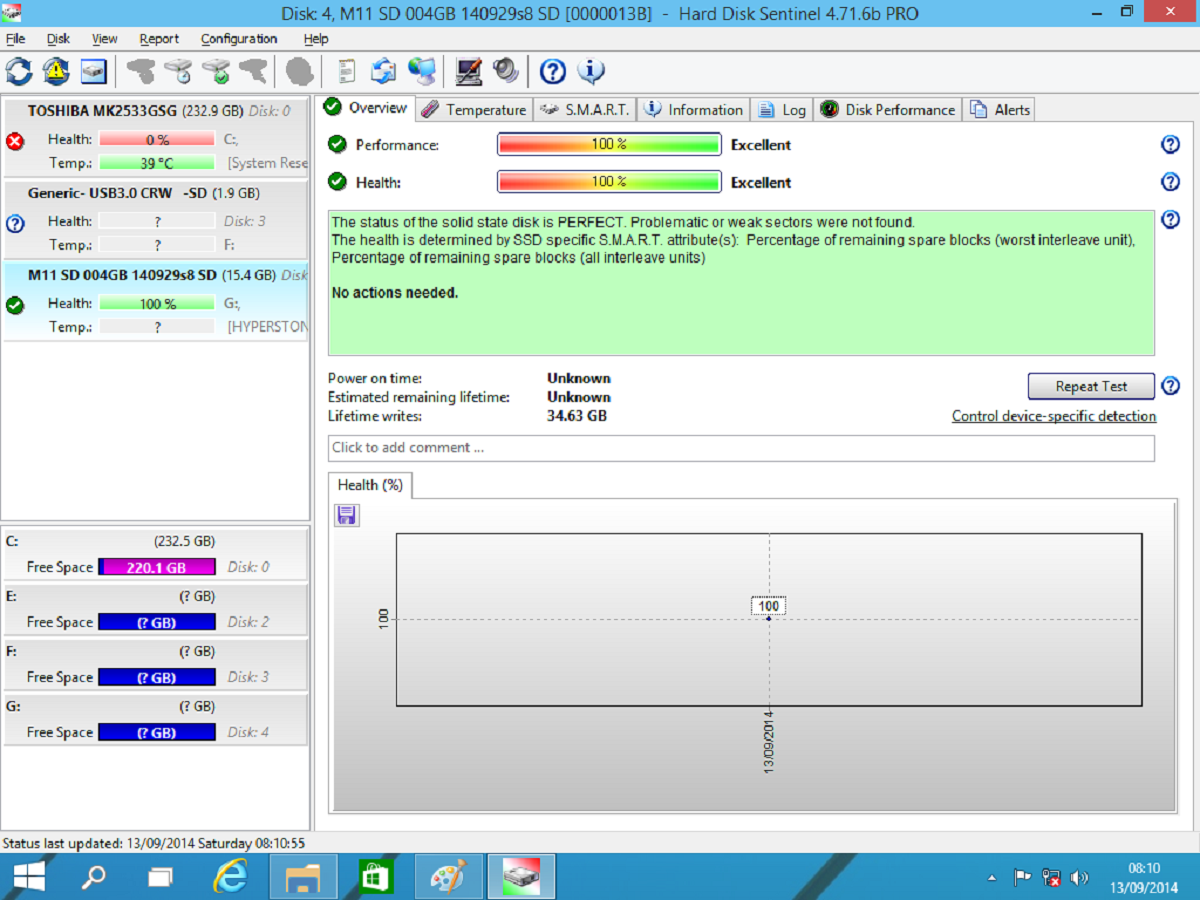
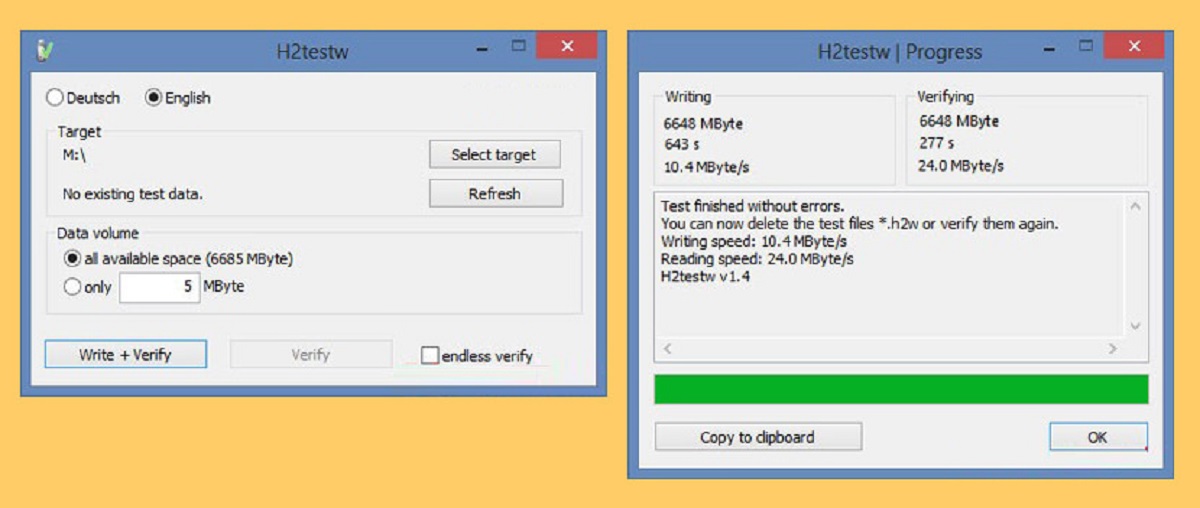
4. Perform the Test: Start the testing process and wait for it to complete. The software will measure the speed of both reading and writing data to the SD card. The results will be displayed, indicating the speed in megabytes per second (MB/s).
5. Interpret the Results: Analyze the test results to assess the read and write speed of your SD card. Compare the obtained speeds with the specifications provided by the SD card manufacturer. If the actual speed falls significantly below the claimed speed, it may indicate a potential issue with the card.
6. Repeat the Test: For accurate results, it is advisable to perform multiple test runs and calculate an average speed. This will help eliminate any variations caused by external factors.
By testing the read and write speed of your SD card, you can determine if it meets the performance standards required for your intended use. If the speed falls below expectations or is significantly lower than the manufacturer’s claims, you may consider upgrading to a higher performance SD card for improved efficiency and reliability.
Checking for Errors on an SD Card
Checking for errors on your SD card is an important step in ensuring its integrity and functionality. Errors can lead to data corruption or loss, impacting the performance and reliability of the card. Here’s how you can perform an error check on your SD card:
1. Windows:
– Connect your SD card to your computer using a card reader or the SD card slot.
– Open “File Explorer” and locate the SD card under “This PC” or “My Computer”.
– Right-click on the SD card and select “Properties” from the context menu.
– In the Properties window, navigate to the “Tools” tab.
– Under the “Error checking” section, click on the “Check” button.
– Follow the on-screen instructions to initiate the error check process.
2. Mac:
– Connect your SD card to your Mac using a card reader or the SD card slot.
– Open “Disk Utility” from the “Applications > Utilities” folder.
– In the Disk Utility window, select your SD card from the left-hand panel.
– Click on the “First Aid” tab located at the top of the window.
– Click on the “Run” button to start the error check process.
– Follow the on-screen instructions to complete the process.
3. Third-Party Software:
– Alternatively, you can use third-party software specifically designed to check for errors on SD cards.
– Research and choose a reliable software program that is compatible with your operating system and supports SD card error checking.
– Follow the instructions provided by the software to perform the error check.
During the error check process, the system will scan the SD card for any corrupted files, bad sectors, or other errors. If any errors are found, the system may attempt to fix them automatically. However, severe errors may require manual intervention or professional assistance.
It is important to note that regular error checks should be part of your SD card maintenance routine, especially if you frequently transfer or modify data on the card. By checking for errors, you can identify and resolve any issues early on, ensuring the optimal performance and longevity of your SD card.
Verifying the Capacity of an SD Card
Verifying the capacity of an SD card is crucial to ensure that it matches the specifications provided by the manufacturer. Counterfeit or faulty SD cards are known to falsely claim higher capacities than they actually have, which can lead to data loss and compatibility issues. Here’s how you can verify the capacity of an SD card:
1. Check the Label: The label on the front of the SD card usually indicates its capacity. Verify that the capacity mentioned on the label matches the one you expect. Keep in mind that the actual usable capacity may be slightly lower than the advertised capacity due to formatting and system files.
2. Use SD Card Manager: Many devices, including smartphones and cameras, have built-in features that allow you to check the capacity of an SD card. Look for the “SD Card Manager” or similar settings in the device’s settings menu. This feature will display the used and available storage capacity of the SD card.
3. Use Disk Management (Windows): If you are using a Windows computer, you can verify the capacity of the SD card through the Disk Management utility.
– Connect your SD card to the computer using a card reader.
– Press Windows + X and select “Disk Management” from the context menu.
– In the Disk Management window, locate your SD card.
– Right-click on the SD card volume and select “Properties” from the menu.
– In the Properties window, go to the “General” tab, where the capacity of the SD card will be displayed.
4. Use Disk Utility (Mac): If you are using a Mac, you can verify the capacity of the SD card through the built-in Disk Utility tool.
– Connect your SD card to the Mac using a card reader.
– Open “Disk Utility” from the “Applications > Utilities” folder.
– From the left-hand panel, select your SD card.
– The capacity of the SD card will be displayed in the “Capacity” field.
By verifying the capacity of your SD card, you can ensure that it meets the specifications and expectations. If you discover any significant deviations in capacity or suspect that the SD card is counterfeit, it is recommended to contact the manufacturer or retailer for further assistance. Always purchase SD cards from trusted sources to minimize the risk of encountering counterfeit or faulty products.
Performing a File System Check on an SD Card
Performing a file system check on your SD card is essential to ensure that the file system structure is intact and free from errors. File system errors can lead to data corruption and may cause the SD card to become unresponsive or unreadable. Here’s how you can perform a file system check on an SD card:
1. Windows:
– Connect your SD card to your computer using a card reader or the SD card slot.
– Open “File Explorer” and locate the SD card under “This PC” or “My Computer”.
– Right-click on the SD card and select “Properties” from the context menu.
– In the Properties window, navigate to the “Tools” tab.
– Under the “Error checking” section, click on the “Check” button.
– Follow the on-screen instructions to initiate the file system check process.
2. Mac:
– Connect your SD card to your Mac using a card reader or the SD card slot.
– Open “Disk Utility” from the “Applications > Utilities” folder.
– In the Disk Utility window, select your SD card from the left-hand panel.
– Click on the “First Aid” tab located at the top of the window.
– Click on the “Run” button to start the file system check process.
– Follow the on-screen instructions to complete the process.
3. Third-Party Software:
– If you prefer to use third-party software, there are various options available that specialize in file system checks for SD cards.
– Research and choose a reliable software program that is compatible with your operating system and supports file system checks for SD cards.
– Follow the instructions provided by the software to perform the file system check.
During the file system check, the system will scan the SD card’s file system for any inconsistencies, errors, or corrupted files. If any issues are detected, the system may attempt to fix them automatically. In some cases, manual intervention or professional assistance may be required for more severe errors.
Performing regular file system checks is highly recommended to maintain the integrity of your SD card. It helps ensure that the file system structure remains stable, preventing data loss and promoting optimal performance. If you encounter persistent file system errors, it is advisable to backup your data and consider formatting the SD card to start with a fresh file system.
Running a Longevity Test on an SD Card
Running a longevity test on your SD card can help assess its durability and reliability over an extended period. This test involves continuously writing and erasing data on the SD card to simulate consistent usage. By performing a longevity test, you can gain insights into the card’s endurance and identify any potential issues. Here’s how you can run a longevity test on an SD card:
1. Select Testing Software: Choose a reliable testing software specifically designed for longevity testing. Look for options that allow you to customize the duration and intensity of the test. Research and select a program that is compatible with your operating system and supports SD card longevity tests.
2. Backup Important Data: Before starting the longevity test, make sure to backup any crucial data stored on the SD card. Running a longevity test involves continuous writing and erasing, which may lead to data loss.
3. Insert the SD Card: Insert the SD card into your device, whether it be a camera, smartphone, tablet, or a computer with an SD card slot. Ensure that the device is connected to a stable power source to avoid interruptions.
4. Open the Testing Software: Launch the testing software and navigate to the longevity testing section. Follow the instructions provided by the software to configure the test parameters, such as the duration and amount of data to be written and erased.
5. Start the Longevity Test: Begin the longevity test by selecting the appropriate options within the testing software. The test will continuously write and erase data on the SD card in order to simulate long-term usage. Allow the test to run for the specified duration.
6. Monitor the Test: During the longevity test, keep an eye on the progress and any notifications or warnings provided by the testing software. This will help you identify any potential issues or errors that may arise.
7. Review the Test Results: Once the longevity test is complete, examine the test results provided by the testing software. Look for any anomalies, inconsistencies, or errors that may have occurred during the test. Compare the results with the expected performance and consult the manufacturer’s specifications for reference.
By running a longevity test on your SD card, you can gain a better understanding of its durability and performance over time. It is important to note that running a longevity test can put significant stress on the SD card, so it is advisable to conduct this test with caution and not to exceed the recommended limits specified by the manufacturer.
Conclusion
Testing an SD card is an essential process to ensure its optimal performance, reliability, and longevity. By following the guidelines outlined in this article, you can effectively assess the physical condition, read and write speed, error status, capacity, file system integrity, and longevity of your SD card.
Starting with a thorough physical inspection, you can identify any visible damage or wear that may affect the card’s performance. Then, by testing the read and write speed, you can determine if the SD card meets your expectations and specifications. Checking for errors and verifying the capacity of the card help ensure data integrity and prevent potential compatibility issues.
Performing a file system check is crucial to maintaining the stability and functionality of the SD card, while running a longevity test allows you to assess its durability over time.
Remember to consult the user manuals or specific software documentation for accurate instructions tailored to your device and operating system.
Regularly testing your SD card is an important part of maintenance and can help prevent data loss, ensure smooth operations, and prolong the lifespan of your card. By staying proactive and taking appropriate actions based on the testing results, you can maximize the performance and reliability of your SD card.
In conclusion, by following these guidelines and incorporating regular testing into your routine, you can confidently rely on your SD card to store and transfer your valuable data, knowing that it is in optimal working condition.