Introduction
Welcome to the world of technology and innovation! In today’s era, portable storage solutions like SD cards have become an integral part of our lives. SD cards provide us with the convenience of easily transferring and storing data. But did you know that you can also make an SD card bootable?
A bootable SD card is a storage device that contains an operating system or bootable image, allowing you to start up a computer or device directly from the SD card. This feature can be incredibly useful in various scenarios, such as installing a new operating system, recovering data from a non-bootable computer, or running specialized software.
So, why would you want to make an SD card bootable? The answer is simple: flexibility and convenience. By creating a bootable SD card, you can have a portable and easily accessible way to carry and use different operating systems or software on multiple devices without the need for installation. It frees you from the constraints of relying solely on internal storage options.
Turning an SD card into a bootable device may sound complex, but fear not! In this guide, we will walk you through each step, making the process easy to understand and follow. Whether you’re a tech enthusiast, a software developer, or simply someone looking to explore new possibilities, this tutorial will provide you with the knowledge and skills to create your very own bootable SD card.
Before we dive into the step-by-step instructions, let’s first take a look at the requirements you’ll need to complete this process successfully.
What is a Bootable SD Card?
A bootable SD card is a storage device that contains all the necessary files and configurations to start up a computer or device. It acts as a portable operating system, allowing you to boot into an environment without relying on the computer’s built-in storage.
Traditionally, computers and devices boot from their internal hard drives or solid-state drives (SSDs). However, by creating a bootable SD card, you can override the default booting process and instruct the computer to load the operating system or software from the external storage device.
When a computer starts up, it looks for specific files and instructions in a predefined order to initiate the booting process. This sequence is known as the boot order. By configuring your computer’s BIOS or UEFI settings, you can designate the SD card as the primary bootable device.
Once the computer recognizes the bootable SD card, it loads the necessary files and executes the instructions to start up the desired operating system. This allows you to run different operating systems or software on your computer without altering or replacing the existing system on the internal storage.
A bootable SD card is not limited to computers alone; it can also be used with various devices such as single-board computers, embedded systems, or even Android smartphones. This versatility makes bootable SD cards an invaluable tool for software developers, system administrators, and anyone who needs to perform system recovery, testing, or troubleshooting.
The flexibility offered by a bootable SD card is especially useful in scenarios where you want to try out an operating system without committing to a full installation. You can simply insert the bootable SD card, boot from it, and explore the features and capabilities of the operating system without affecting your computer’s internal storage.
In the next section, we will discuss the requirements to create a bootable SD card, ensuring that you have everything you need before proceeding with the process.
Why Use a Bootable SD Card?
Bootable SD cards offer a range of benefits and opportunities that make them a valuable tool for tech enthusiasts, professionals, and anyone seeking a versatile computing experience. Let’s explore some of the key reasons why you might want to use a bootable SD card:
1. Portable Operating System
A bootable SD card allows you to carry an entire operating system in your pocket. Whether you’re a system administrator needing to perform maintenance tasks on multiple computers or a traveler who wants to have access to their preferred system on any device, a bootable SD card provides the flexibility and convenience of a portable operating system.
2. Easy System Recovery
In the unfortunate event of a system failure or data corruption, a bootable SD card can be a lifesaver. It enables you to boot into a recovery environment and access crucial tools to help diagnose and fix issues. Whether you need to recover deleted files, repair system files, or troubleshoot hardware problems, a bootable SD card can be an essential recovery tool.
3. Testing and Experimentation
If you’re a software developer or a technology enthusiast who loves to experiment with different operating systems, a bootable SD card allows you to try out new software and configurations without making permanent changes to your main system. You can install and test various operating systems and software packages in a safe and isolated environment without the risk of affecting your primary setup.
4. Enhanced Security
Bootable SD cards provide an added layer of security by segregating your sensitive data and your primary operating system. By booting from a separate SD card, you can keep your personal files and data isolated from potential malware or security threats that may exist on the main system. This can be particularly useful when dealing with sensitive information or when using public computers.
5. Customized Computing Environment
A bootable SD card allows you to create a customized computing environment tailored to your specific needs. You can install and configure your preferred software, applications, and settings on the SD card and have them readily available wherever you go. This level of customization ensures a consistent and familiar experience across different devices.
These are just a few examples of the many advantages a bootable SD card offers. Whether you’re looking for flexibility, convenience, versatility, or enhanced security, a bootable SD card can revolutionize the way you use and interact with your devices.
Now that we understand the benefits of a bootable SD card, let’s move on to the next section, where we will discuss the requirements needed to create one.
Requirements
Before you begin creating a bootable SD card, it’s essential to ensure you have all the necessary requirements in place. Here’s a list of what you’ll need:
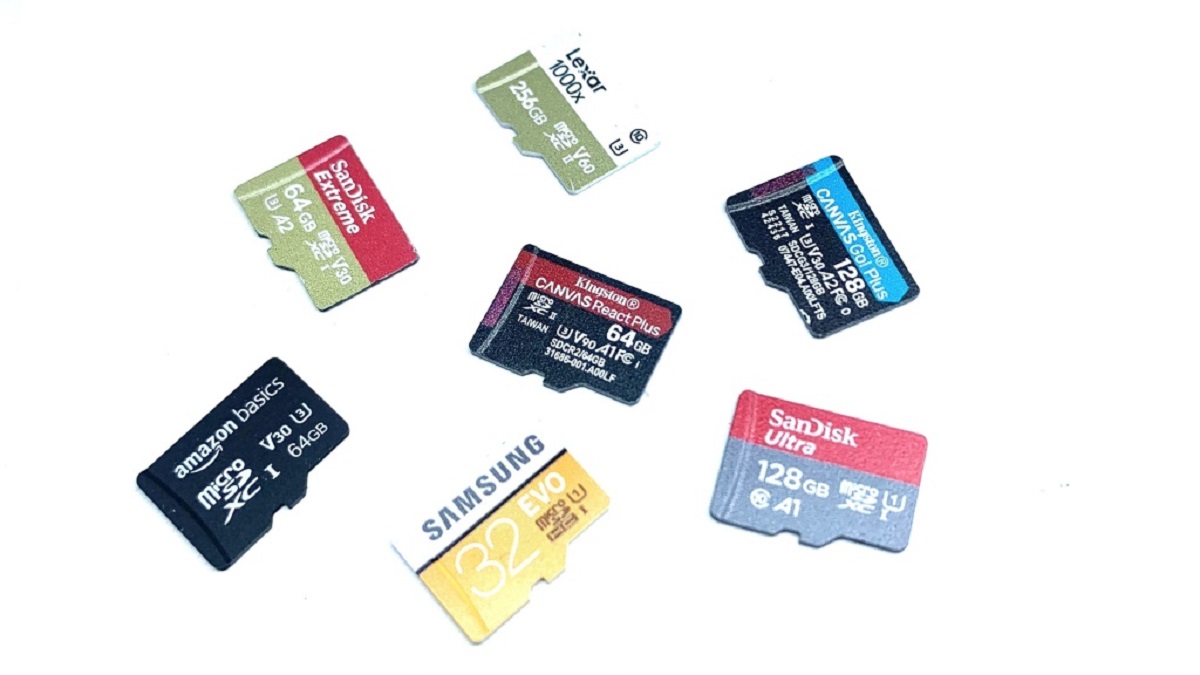
1. An SD Card
You’ll need an SD card with sufficient storage capacity to hold the operating system or bootable image you want to install. Make sure the SD card is not write-protected, as you’ll need to modify its contents during the process. It’s recommended to use a high-quality SD card for better performance and reliability.
2. Computer or Device
You’ll need access to a computer or device that has an SD card slot or an SD card reader. This will allow you to connect the SD card and perform the necessary steps to create a bootable SD card. Ensure that the computer or device supports booting from external devices, as some older systems may have restrictions in this regard.
3. Bootable Image Software
To create a bootable SD card, you’ll need specialized software that can write the bootable image to the SD card. There are various tools available, such as Etcher, Rufus, or Win32 Disk Imager, which are compatible with different operating systems. Choose a software tool that supports your operating system and offers an easy-to-use interface.
4. Bootable Image or Operating System
You’ll need a bootable image file or an operating system ISO that you want to install on the SD card. This can be an official ISO file provided by the operating system’s developer or a custom bootable image created for a specific purpose. Make sure to download the correct version and architecture that matches your requirements.
5. Stable Internet Connection
It’s recommended to have a stable and reliable internet connection to download the necessary bootable image file and software tools. This ensures that you have the latest and most secure versions available. A stable internet connection also comes in handy if you need to troubleshoot or seek additional resources during the process.
With these requirements in place, you’re ready to move on to the next section, where we will begin the step-by-step process of creating a bootable SD card.
Step 1: Formatting the SD Card
The first step in creating a bootable SD card is to format it properly. Formatting ensures that the SD card is clean and ready to receive the bootable image. It’s important to note that formatting will erase all existing data on the SD card, so be sure to back up any important files before proceeding.
1. Insert the SD Card
Insert the SD card into the SD card slot or connect it via an SD card reader to your computer. Ensure that the computer recognizes the SD card and assigns it a drive letter.
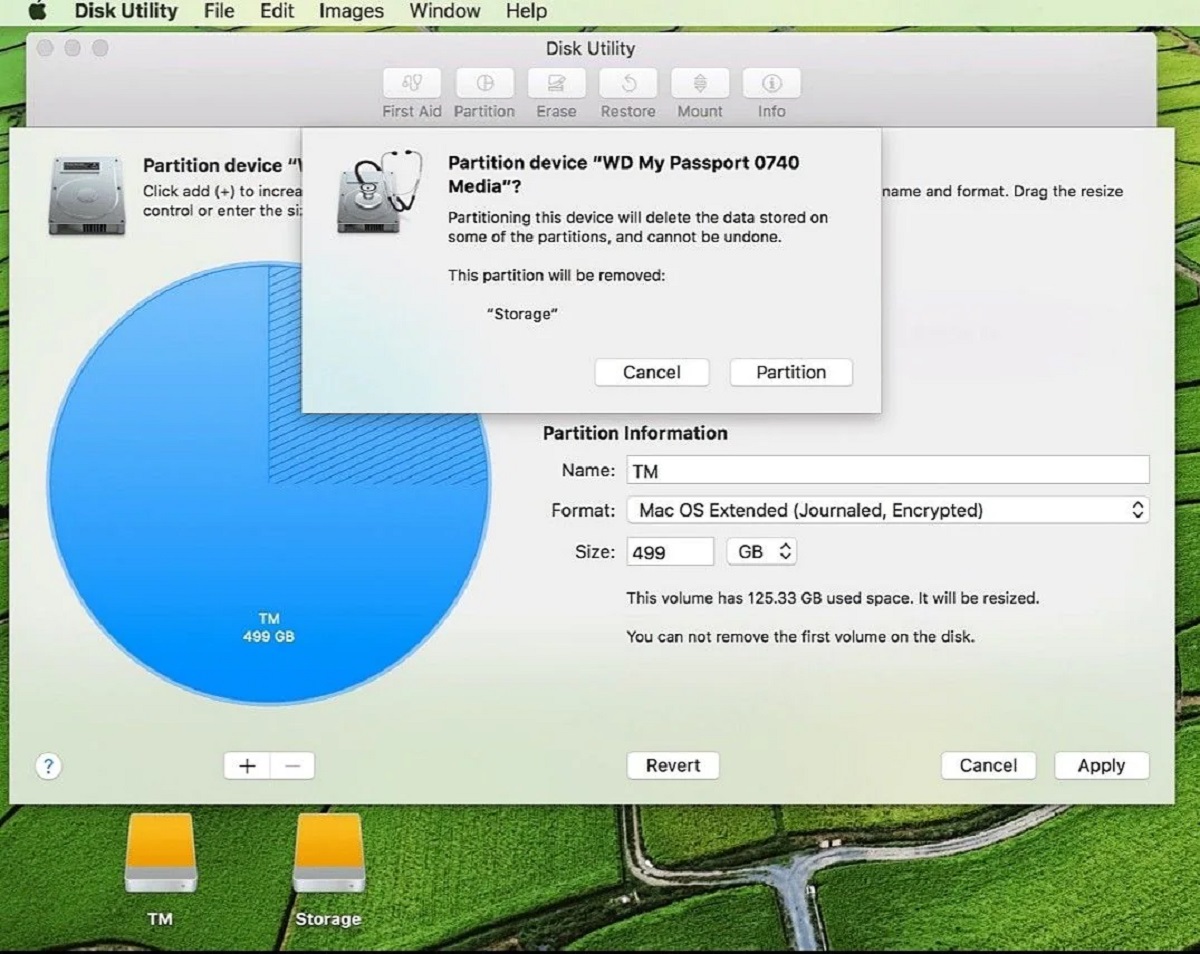
2. Open Disk Management (Windows) or Disk Utility (Mac)
On Windows, you can access the Disk Management tool by right-clicking on the Start button and selecting “Disk Management” from the context menu. On Mac, go to the “Applications” folder, then “Utilities,” and open “Disk Utility.”
3. Select the SD Card
In Disk Management (Windows), locate the SD card in the list of drives. It will typically be labeled as “Removable” or “External.” Right-click on the SD card and select “Format.” On Disk Utility (Mac), select the SD card from the list on the left-hand side.
4. Choose the File System and Format Options
In the format settings, choose the desired file system for your SD card. For Windows, the recommended file system is “FAT32” for compatibility. On Mac, choose “MS-DOS (FAT)” for wider compatibility. Make sure to leave the “Allocation Unit Size” at the default setting, as it optimizes the performance of the SD card.
5. Format the SD Card
Click “Format” and confirm any warning prompts to begin the formatting process. This will erase all data on the SD card and prepare it for the bootable image.
6. Finalize the Formatting Process
Once the formatting process is complete, you’ll receive a confirmation message. Close the formatting tool, and your SD card is now ready to be used for creating a bootable image.
Formatting the SD card ensures that it has a clean and compatible file system, ready to receive the bootable image. With the SD card formatted, we can now move on to the next step: downloading the necessary bootable image software.
Step 2: Downloading Bootable Image Software
Now that you have formatted your SD card, the next step is to download the bootable image software. This software will allow you to write the bootable image onto the SD card. There are several software options available, and in this guide, we will use Etcher as an example. Etcher is a user-friendly and widely used tool for creating bootable SD cards and other storage devices.
1. Open a Web Browser
Launch your preferred web browser and go to the official website of the bootable image software you wish to download. In this case, head to the Etcher website at etcher.io.
2. Download the Software
On the website, look for the download section or the download button for your specific operating system. Click on the appropriate download link to start downloading the software to your computer. Make sure to download the version that is compatible with your operating system.
3. Wait for the Download to Complete
Once the download is initiated, wait for it to complete. The time taken will depend on the size of the software and the speed of your internet connection. During this time, you can review any documentation or guides provided by the software developers to familiarize yourself with the tool and its features.
4. Install the Software
Locate the downloaded software file on your computer and double-click on it to start the installation process. Follow the on-screen instructions to install the bootable image software. This typically involves selecting a destination folder, agreeing to the software’s terms and conditions, and clicking on the install button.
5. Launch the Bootable Image Software
Once the installation is completed, you can launch the bootable image software. Look for the software in your computer’s applications or programs menu and open it by double-clicking on the icon.
With the bootable image software installed and ready, it’s time to proceed to the next step: creating a bootable image using the software.
Step 3: Creating a Bootable Image
Now that you have the bootable image software installed, it’s time to create a bootable image using the software. In this section, we will provide a general overview of the steps involved in creating a bootable image using Etcher as an example, but the process may vary slightly depending on the software you are using.
1. Launch the Bootable Image Software
Open the bootable image software that you installed in the previous step. If using Etcher, you can find it in your computer’s applications or programs menu and open it by double-clicking on the icon.
2. Select the Bootable Image
Click on the “Select Image” or similar button within the software’s interface. Navigate to the location where you have the bootable image file saved on your computer and select it. Ensure that you are choosing the correct bootable image file that you want to write to the SD card.
3. Choose the Target SD Card
In the software’s interface, you should see a “Select Drive” or similar option. Click on it to choose the SD card that you want to make bootable. Double-check that you are selecting the correct SD card, as all existing data on the selected SD card will be overwritten during the process.
4. Start the Bootable Image Creation Process
Once you have selected the bootable image and the target SD card, verify that everything is correct. Double-check the image and the target drive, ensuring there is enough free space on the SD card. Once you are certain, click on the “Start” or “Flash” button within the software to begin the bootable image creation process.
5. Wait for the Process to Complete
Now you need to wait for the software to write the bootable image onto the SD card. The time taken will depend on the size of the image file and the speed of your computer and SD card. Do not remove or disconnect the SD card until the process is completed to avoid any potential data corruption.
6. Confirmation and Completion
Once the bootable image creation process is finished, you should receive a confirmation message or progress bar indicating the successful completion. At this point, you can safely remove the SD card from your computer or SD card reader as it is now ready to be used as a bootable device.
With the bootable image created successfully, we can move on to the next step of writing the image to the SD card.
Step 4: Writing the Image to the SD Card
Now that you have created the bootable image, the next step is to write the image onto the SD card. In this section, we will cover the general steps involved in writing the image to the SD card using the software. Please note that the exact steps may vary based on the software you are using, but the overall process remains similar.
1. Insert the SD Card
Insert the SD card into the SD card slot on your computer or connect it using an SD card reader. Ensure that the computer recognizes the SD card and assigns it a drive letter.
2. Launch the Bootable Image Software
Open the bootable image software that you installed in earlier steps. Look for the software in your computer’s applications or programs menu and launch it by double-clicking on the icon.
3. Select the Bootable Image
Click on the “Select Image” or similar button within the software’s interface. Navigate to the location where you saved the bootable image file on your computer and select it.
4. Choose the Target SD Card
In the software’s interface, you should see a “Select Drive” or similar option. Click on it to choose the SD card as the target drive. Make sure you select the correct SD card, as the writing process will erase all data on the chosen drive.
5. Start Writing the Image
Once you have selected the bootable image and the target SD card, verify that everything is correct. Double-check the image and the target drive to ensure accuracy. When you are ready, click on the “Write” or “Start” button within the software to begin writing the image to the SD card.
6. Wait for the Writing Process to Complete
The software will start writing the bootable image onto the SD card. The duration of the process depends on the size of the image file and the speed of your computer and SD card. Be patient and do not disconnect the SD card during this process.
7. Eject the SD Card
Once the writing process is completed, you will receive a confirmation message or progress bar indicating the successful completion. Safely eject the SD card from your computer or SD card reader. Your SD card is now ready to be used as a bootable device.
With the bootable image successfully written to the SD card, you can now proceed to the next step and verify if the SD card is indeed bootable.
Step 5: Verifying the Bootable SD Card
After creating and writing the bootable image to the SD card, it is important to verify that the SD card is indeed bootable. This step ensures that the SD card was properly written and can successfully start up a device. Here are the general steps to verify the bootable SD card:
1. Insert the SD Card
Insert the bootable SD card into the appropriate slot or connect it via an SD card reader to the computer or device you wish to boot from.
2. Restart or Power On the Device
Restart or power on the computer or device. Make sure to configure the BIOS or UEFI settings to boot from external devices or SD card, depending on the device’s setup.
3. Check for Boot Options
During the startup process, keep an eye out for any messages such as “Press [key] to enter boot menu” or “Boot options.” Press the corresponding key as indicated to access the boot menu or boot options.
4. Select the SD Card as Boot Device
In the boot menu or boot options screen, you should see a list of available bootable devices. Look for the entry corresponding to your SD card and select it as the boot device.
5. Start the Device from the SD Card
Once you have selected the SD card as the boot device, proceed to start the device. The device will attempt to boot from the SD card, and if successful, you will see the operating system or software that you installed on the bootable image.
6. Test the Functionality
Once the device has successfully booted from the SD card, test the functionality of the operating system or software to ensure it is working properly. Check for any errors, glitches, or compatibility issues that may arise.
7. Repeat the Verification (optional)
If needed, you can repeat the verification process on multiple devices to ensure the bootable SD card is compatible and functioning correctly with different hardware configurations.
If the device successfully boots from the SD card, then congratulations! You have created a working bootable SD card. Now you can enjoy the freedom and convenience of having a portable operating system or software ready to use on multiple devices. In case the SD card fails to boot, you may need to go back and review the previous steps to ensure that the bootable image was created correctly and written to the SD card without any errors. Troubleshooting the specific issue may require further investigation or assistance from technical resources.
Conclusion
Creating a bootable SD card can open up a world of possibilities for tech enthusiasts, professionals, and anyone seeking portable and versatile computing solutions. With a bootable SD card, you can easily carry and use different operating systems or software on multiple devices without the need for installation or modification of internal storage. It provides flexibility, convenience, and a customized computing environment.
In this guide, we walked through the step-by-step process of creating a bootable SD card. We covered the importance of formatting the SD card, downloading bootable image software, creating the bootable image, writing it onto the SD card, and verifying its bootability. Each step plays a crucial role in ensuring a successful bootable SD card creation process.
Remember that the specific steps and software used may vary, but the overall concept remains the same. Adapt the process and tools to your specific needs and operating system requirements.
Now that you have the knowledge and skills to create a bootable SD card, you can explore various use cases, such as system recovery, testing, experimentation, or creating a personalized computing environment. The possibilities are endless.
Always keep in mind that creating a bootable SD card involves technical steps and may carry some risks. Take precautions, back up your important data, and refer to official documentation or seek assistance if needed.
Enjoy the freedom and convenience that a bootable SD card provides, and let your creativity and exploration thrive in the world of portable computing!