Introduction
Welcome to the world of solid-state drives (SSDs), where storage technology has evolved to provide faster and more reliable performance for your personal computer or laptop. With the growing popularity of NVMe (Non-Volatile Memory Express) SSDs, it becomes crucial to understand how to properly format these drives to unleash their full potential.
An NVMe SSD is a type of storage drive that utilizes the NVMe protocol, designed explicitly for enhanced data transfer speeds and reduced latency. Compared to traditional hard disk drives (HDDs), NVMe SSDs can deliver significantly faster read and write speeds, providing a noticeable boost to your system’s overall performance.
Formatting a new NVMe SSD is an essential step in preparing it for use. This process involves initializing the drive, creating partitions, and formatting them to a specific file system, such as NTFS or exFAT. These steps ensure that the SSD is ready to store your data efficiently and can be easily recognized by your operating system.
Properly formatting your new NVMe SSD offers several advantages. Firstly, it allows you to optimize the drive’s performance by ensuring it is set up correctly. Secondly, it helps to organize your data more effectively, allowing for faster access and retrieval of files. Additionally, formatting also ensures compatibility across different systems and prevents any potential errors or issues that may arise from an incorrectly formatted drive.
In this article, we will guide you through the process of formatting your new NVMe SSD, step by step. Whether you are an experienced computer user or a beginner, this guide will help you get your NVMe SSD up and running, maximizing its performance and ensuring seamless data storage.
So, let’s dive into the world of formatting NVMe SSDs and unlock the full potential of your storage device!
What is an NVMe SSD?
An NVMe (Non-Volatile Memory Express) SSD is a type of solid-state storage drive that is specifically designed to deliver high-performance and low latency. In simpler terms, it is a faster and more advanced version of a traditional SSD.
NVMe is a communication protocol that allows the SSD to connect to the computer’s motherboard via the PCIe (Peripheral Component Interconnect Express) interface. This direct connection eliminates the bottlenecks that occur with other storage interfaces like SATA (Serial ATA), resulting in significantly faster data transfer speeds.
Compared to traditional hard disk drives (HDDs), NVMe SSDs offer several advantages. Firstly, they provide significantly faster read and write speeds, which translates to shorter boot times, quicker application load times, and faster file transfers. This enhanced performance can make a noticeable difference in the overall responsiveness and efficiency of your system.
Another advantage of NVMe SSDs is their reduced latency. The NVMe protocol is designed to minimize communication delays, resulting in quicker data access and improved responsiveness. This is especially beneficial for tasks that rely heavily on random access, such as gaming, video editing, and data analysis.
Furthermore, NVMe SSDs are known for their superior reliability and durability. Unlike HDDs, which rely on spinning disks and mechanical parts, NVMe SSDs utilize NAND flash memory technology, which has no moving parts. This makes them more resistant to physical shocks and vibrations, reducing the risk of data loss due to accidental drops or movements.
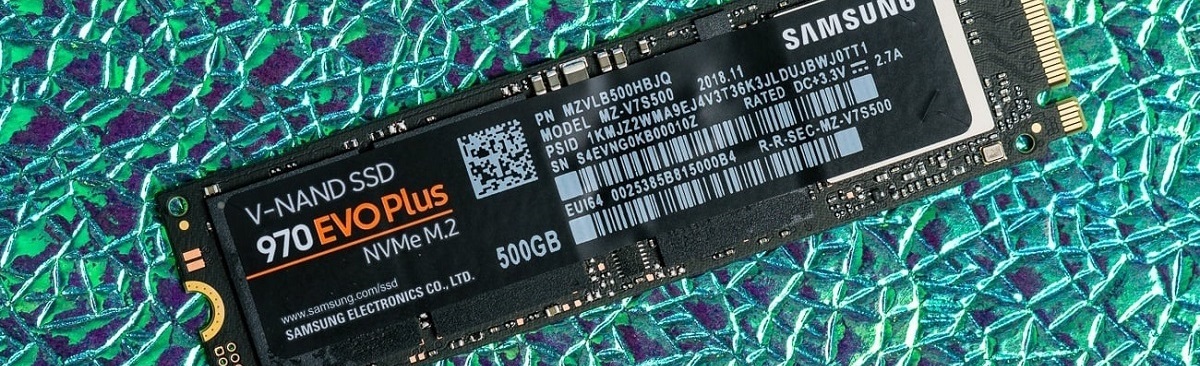
In terms of form factor, NVMe SSDs come in various shapes and sizes to accommodate different devices. The most common form factors are M.2 and U.2, which are typically used in laptops and desktops. These small and compact designs enable easy installation and integration into modern computer systems.
Overall, NVMe SSDs are revolutionizing storage technology by offering incredible speed, low latency, and improved reliability. Their efficient data transfer and faster access times make them an ideal choice for gamers, content creators, and anyone seeking superior performance from their storage devices.
Now that we understand what NVMe SSDs are and their benefits, let’s delve into the process of formatting these drives to ensure optimal performance and compatibility.
Why should you format your new NVMe SSD?
Formatting your new NVMe SSD is a crucial step in preparing it for use and ensuring optimal performance. Let’s explore the various reasons why formatting is important:
Optimizing Performance: By formatting your NVMe SSD, you can optimize its performance and ensure that it is set up correctly. Formatting helps to align partitions and file systems, allowing data to be stored and retrieved more efficiently. This optimization can result in faster read and write speeds, enhancing the overall responsiveness of your system.
Organizing and Managing Data: Formatting allows you to create partitions on your NVMe SSD and assign specific file systems to them, such as NTFS or exFAT. This partitioning helps in organizing and managing your data more effectively. You can separate your operating system files, applications, and personal data into different partitions, making it easier to locate and access files when needed.
Ensuring Compatibility: Properly formatting your NVMe SSD ensures compatibility with your operating system. By formatting the drive to a specific file system supported by your OS (such as NTFS for Windows or exFAT for cross-platform compatibility), you reduce the chances of encountering errors or compatibility issues when accessing or transferring data.
Enhancing Reliability: Formatting a new NVMe SSD helps to identify and correct any potential errors or issues that may exist on the drive. The formatting process performs a low-level scan of the SSD, identifying and marking any problematic sectors. These sectors are then excluded from use, improving the overall reliability and longevity of the drive.
Preparing for Data Security: Formatting your NVMe SSD allows you to securely erase any existing data on the drive. This is particularly important if you are repurposing the SSD or selling it to someone else. By formatting the drive, you can ensure that all previous data is completely erased and cannot be recovered, protecting your privacy and sensitive information.
Streamlined System Setup: When installing a new operating system on your computer, formatting the NVMe SSD is an essential step. Formatting ensures a clean slate for the operating system installation, reducing the likelihood of conflicts or compatibility issues during the setup process.
By taking the time to properly format your new NVMe SSD, you can unleash its full potential, optimize performance, ensure compatibility, and organize your data efficiently. Now that we understand the importance of formatting, let’s move on to the steps involved in preparing your NVMe SSD for use.
Preparing for Formatting
Before diving into the formatting process for your new NVMe SSD, there are a few important steps to take in preparation. These steps will help ensure a smooth and successful formatting experience. Let’s explore them:
Back up your data: Prior to formatting your NVMe SSD, it is crucial to back up any important data or files that you may have stored on the drive. Formatting will erase all existing data, so having a backup ensures that you don’t lose any valuable information during the process. You can transfer your files to an external hard drive, cloud storage, or another storage device.
Gather necessary tools: To format your NVMe SSD, you will need a few tools and resources. Firstly, ensure that you have your computer or laptop powered on and ready for use. You will also need an NVMe SSD connector or enclosure, depending on your system’s configuration. This will allow you to connect the NVMe SSD to your computer for formatting. Additionally, make sure to have access to the appropriate software or operating system resources required for formatting the drive.
Ensure uninterrupted power supply: It is essential to have a stable power supply while formatting your NVMe SSD. Sudden power outages or disruptions during the formatting process can lead to data corruption or incomplete formatting. Make sure your computer or laptop is connected to a reliable power source or consider using an Uninterruptible Power Supply (UPS) if available.
Check for firmware updates: Before formatting, it is a good practice to check for any firmware updates for your NVMe SSD. Manufacturers release firmware updates occasionally to improve performance, fix bugs, and enhance compatibility with different systems. Updating your SSD’s firmware prior to formatting can help ensure that you have the latest enhancements and maximize the drive’s performance.
Research formatting guidelines: Familiarize yourself with the specific formatting guidelines for your NVMe SSD, as these may vary depending on the manufacturer and model. Check the manufacturer’s website or user manual for instructions and recommendations on how to format the drive. Following the guidelines provided by the manufacturer will help ensure that you format the NVMe SSD correctly and avoid any potential issues.
By taking these preparatory steps, you can ensure a hassle-free and successful formatting process for your new NVMe SSD. Backing up your data, gathering the necessary tools, ensuring uninterrupted power supply, checking for firmware updates, and researching formatting guidelines are all critical in preparing for the formatting process. With these preparations in place, you are ready to move on to the next steps of connecting and initializing your NVMe SSD.
Connecting the NVMe SSD
Once you have prepared for formatting your NVMe SSD, the next step is to connect it to your computer or laptop. Here are the steps to follow:
1. Power down your computer: Before connecting the NVMe SSD, make sure to shut down your computer or laptop completely. This ensures that the system is not in an active state during the connection process.
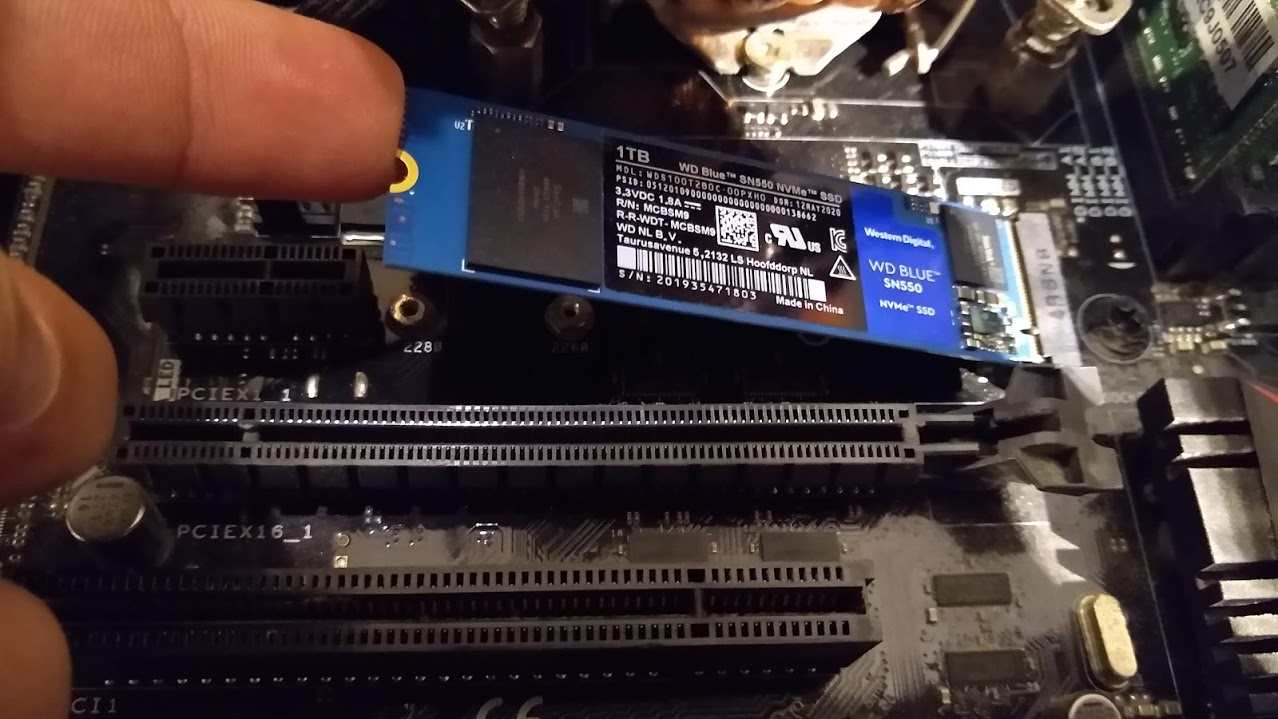
2. Locate the NVMe slot: Identify the NVMe slot on your motherboard or laptop. In most cases, this slot is labeled, or you can consult your system’s user manual or manufacturer’s website for the location. It is important to note that NVMe SSDs use different form factors, such as M.2 or U.2, so ensure that your motherboard or laptop supports the specific form factor of your NVMe SSD.
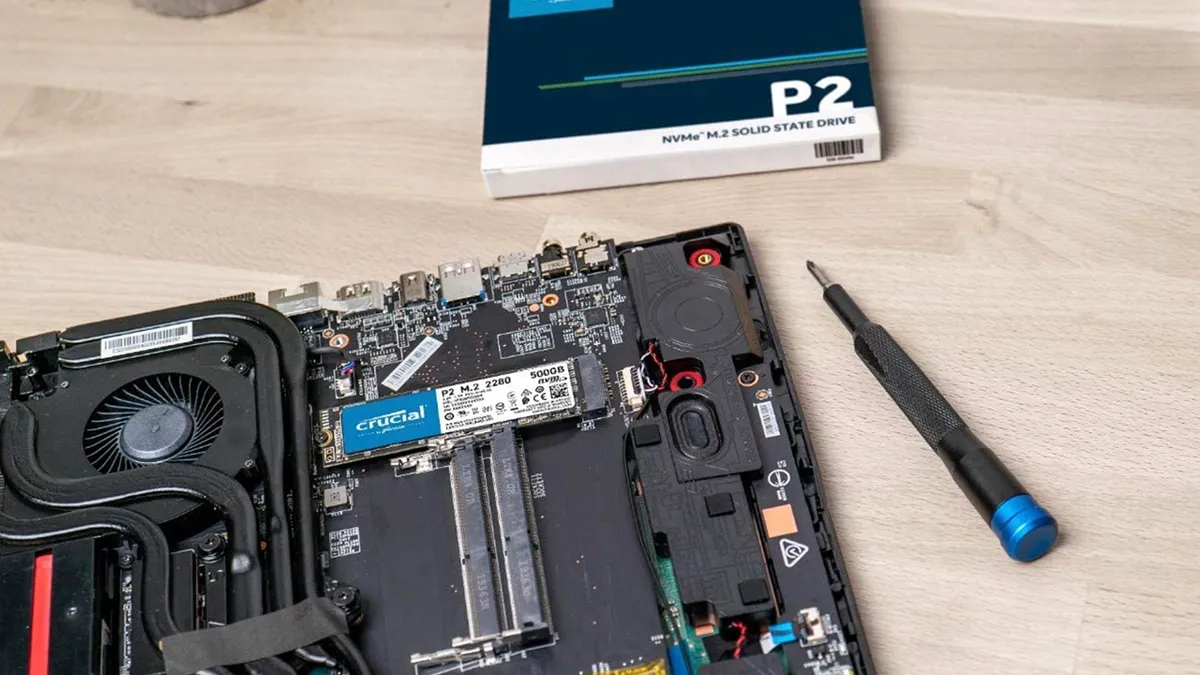
3. Unpack the NVMe SSD: If your NVMe SSD came in a sealed package, carefully open it and take out the drive. Be mindful of static electricity and handle the drive by its edges to avoid any unnecessary contact with the electronic components.
4. Insert the NVMe SSD: Align the notches on the NVMe SSD with the slot on the motherboard or laptop. Gently insert the NVMe SSD into the slot at a slight angle. Apply a small amount of pressure until the NVMe SSD is fully seated in the slot. Do not force the drive or use excessive pressure, as this may damage the NVMe SSD or the motherboard.
5. Secure the NVMe SSD: Depending on the design of your motherboard or laptop, there may be a retention mechanism or screw to secure the NVMe SSD in place. Consult the user manual or manufacturer’s instructions to determine if securing the drive is necessary. If required, use the provided screw or retention mechanism to secure the NVMe SSD firmly in place.
6. Close your computer/laptop: Once the NVMe SSD is properly connected and secured, close your computer or laptop. Ensure that all connections are tight and secure.
After connecting the NVMe SSD to your computer or laptop, you are ready to move on to the next step: opening Disk Management to initialize and format the drive. Properly connecting the NVMe SSD ensures that it is recognized by your system, allowing you to proceed with the formatting process smoothly.
Opening Disk Management
Once you have connected your NVMe SSD to your computer or laptop, the next step in the formatting process is to open Disk Management. Disk Management is a built-in utility in Windows that allows you to manage and format storage devices. Here’s how you can open Disk Management:
1. Open the Start menu: Click on the Windows Start button located at the bottom-left corner of your screen. You can also press the Windows key on your keyboard to open the Start menu.
2. Search for “Disk Management”: In the search bar located at the bottom of the Start menu, type “Disk Management” and press Enter. Alternatively, you can also type “diskmgmt.msc” in the Run dialog box (Win + R) and hit Enter.
3. Launch Disk Management: The Disk Management utility will open, displaying a list of all connected drives and their corresponding partitions. The NVMe SSD that you connected should be listed here, labeled as “Unknown” or “Not Initialized”. It may also show the capacity of the drive.
4. Initialize the NVMe SSD: Right-click on the NVMe SSD and select “Initialize Disk”. A dialog box will appear, asking you to select the partition style: Master Boot Record (MBR) or GUID Partition Table (GPT). Choose the appropriate partition style and click “OK”. Note that if you are planning to use the NVMe SSD as a boot drive, choose GPT as the partition style.
5. Create a New Partition: After initializing the NVMe SSD, right-click on the “Unallocated” space and select “New Simple Volume”. The New Simple Volume Wizard will open, guiding you through the process of creating a new partition on the NVMe SSD. Follow the on-screen instructions, specifying the size, drive letter, and file system for the new partition. The default settings will usually suffice, but you can customize them according to your preferences.
6. Format the NVMe SSD: Once the new partition is created, right-click on it and select “Format”. Choose the desired file system (such as NTFS or exFAT) and provide a volume label for the partition. Click “OK” to start the formatting process. Note that formatting will erase all data on the NVMe SSD, so ensure that you have backed up any important files beforehand.
7. Wait for the formatting to complete: The Disk Management utility will display the progress of the formatting process. Wait until the process is complete, and you will see the new partition listed as a healthy, formatted volume.
Opening Disk Management allows you to initialize the NVMe SSD and create a new partition with the desired file system. After formatting, your NVMe SSD will be ready for use, and you can assign a drive letter to it for easy accessibility.
Initializing the NVMe SSD
After connecting your NVMe SSD to your computer and opening Disk Management, the next step in the formatting process is to initialize the NVMe SSD. Initialization is necessary to prepare the drive for partitioning and formatting. Here’s how you can initialize the NVMe SSD:
1. Locate the NVMe SSD: In the Disk Management window, look for the NVMe SSD that you connected. It will be labeled as “Unknown” or “Not Initialized”. Right-click on it and select “Initialize Disk”.
2. Choose the partition style: After selecting “Initialize Disk”, a dialog box will appear, asking you to choose the partition style for the NVMe SSD. The two options available are Master Boot Record (MBR) and GUID Partition Table (GPT). Select the appropriate partition style based on your needs. If you plan to use the NVMe SSD as a boot drive or if the drive is greater than 2TB in size, choose GPT. Otherwise, MBR should suffice.
3. Confirm the initialization: After selecting the partition style, click on “OK” to confirm the initialization process. This will start the initialization of the NVMe SSD, preparing it for partitioning and formatting.
4. Wait for the initialization to complete: The Disk Management utility will display the progress of the initialization process. The time it takes to complete the initialization may vary based on the size of the NVMe SSD. Once the initialization is finished, the NVMe SSD will be shown as “Online” and ready for partitioning.
Initializing the NVMe SSD is a vital step in preparing it for formatting. It establishes the basic structure of the drive, enabling you to create partitions and format them with the desired file system. After successfully initializing the NVMe SSD, you can proceed to the next step of creating a partition on the drive.
Creating a Partition
Once you have initialized your NVMe SSD, the next step in the formatting process is to create a partition. Creating a partition allows you to divide the storage space on your NVMe SSD into separate sections, each with its own file system and purpose. Here’s how you can create a partition:
1. Open Disk Management: Launch the Disk Management utility by searching for “Disk Management” in the Start menu or by pressing the Windows key + R and typing “diskmgmt.msc”.
2. Locate the NVMe SSD: In the Disk Management window, find your NVMe SSD, which should now be displayed as “Online” and initialized. It will likely be labeled as “Disk X”, with X representing the assigned disk number.
3. Right-click on unallocated space: Right-click on the unallocated space on the NVMe SSD and select “New Simple Volume”. This will open the New Simple Volume Wizard.
4. Follow the wizard: The New Simple Volume Wizard will guide you through the process of creating a partition. Click “Next” to proceed and specify the size for the new partition. You can use the maximum available space for a single partition, or allocate a specific size depending on your requirements.
5. Assign a drive letter or mount path: Next, choose a drive letter to assign to the partition. Windows will automatically assign the next available drive letter, but you can manually select a specific letter if desired. Alternatively, you can choose to mount the partition as an empty folder on an existing drive.
6. Select the file system: Choose the file system for the partition, such as NTFS or exFAT. NTFS is the most common choice for Windows systems, while exFAT offers cross-platform compatibility. You can also select the Allocation Unit Size, which determines the cluster size for file storage.
7. Provide a volume label: Lastly, provide a volume label or name for the partition. This label will appear as the name of the drive in File Explorer, making it easier to identify and access.
8. Complete the partition creation: Once you have specified all the necessary settings, click “Next” and review the summary of the new partition’s specifications. If everything looks correct, click “Finish” to create the partition.
Once the partition is created, you will see it listed as a new volume in the Disk Management window. The creation of a partition allows you to better organize and manage your data on the NVMe SSD. You can repeat this process to create multiple partitions on the SSD if needed.
Now that we have created a partition on the NVMe SSD, the next step is to format the partition with a file system to make it usable for storing data.
Formatting the NVMe SSD
After creating a partition on your NVMe SSD, the next step in the formatting process is to format the partition with a specific file system. Formatting prepares the partition for data storage and ensures compatibility with your operating system. Here’s how you can format the NVMe SSD:
1. Open Disk Management: Launch the Disk Management utility by searching for “Disk Management” in the Start menu or by pressing the Windows key + R and typing “diskmgmt.msc”.
2. Locate the partition: In the Disk Management window, find the partition on the NVMe SSD that you want to format. It will be labeled with the assigned drive letter or label.
3. Right-click on the partition: Right-click on the partition and select “Format” from the context menu. This will open the Format dialog box.
4. Choose the file system: In the Format dialog box, choose the desired file system for the partition. The most common file systems are NTFS and exFAT. NTFS is recommended for Windows systems, while exFAT offers cross-platform compatibility.
5. Set the allocation unit size: You can also specify the allocation unit size, which determines the cluster size for file storage. It is usually recommended to leave it as the default allocation size unless you have specific requirements.
6. Provide a volume label: Optionally, you can provide a volume label or name for the partition. This label will appear as the name of the drive in File Explorer, making it easier to identify and access.
7. Enable quick format (optional): If you want to speed up the formatting process, you can enable the “Quick Format” option. This option skips the scanning and testing phases, resulting in faster formatting. However, note that a quick format does not check for bad sectors on the NVMe SSD.
8. Start the formatting process: After specifying the file system, allocation unit size, and volume label, click “OK” to start formatting the partition. A warning message may appear, notifying you that all data on the partition will be deleted. Make sure you have backed up any important data before proceeding.
9. Wait for the format to complete: The Disk Management utility will display the progress of the formatting process. Wait until the process is complete. The time it takes to format the partition may vary depending on the size of the partition and the speed of your NVMe SSD.
Once the formatting is complete, the partition will be displayed as a healthy, formatted volume in Disk Management. You can now start using the NVMe SSD to store and access your data. Repeat this process if you have multiple partitions on the NVMe SSD that need formatting.
Formatting the NVMe SSD ensures that it is ready for storing data and compatible with your operating system. Now that the NVMe SSD is formatted, the next step is assigning a drive letter for easy accessibility.
Assigning a Drive Letter
After formatting the partition on your NVMe SSD, the next step in the formatting process is to assign a drive letter. A drive letter allows you to easily identify and access the partition in your file explorer. Here’s how you can assign a drive letter to your NVMe SSD:
1. Open Disk Management: Launch the Disk Management utility by searching for “Disk Management” in the Start menu or by pressing the Windows key + R and typing “diskmgmt.msc”.
2. Locate the formatted partition: In the Disk Management window, find the formatted partition on your NVMe SSD. It should appear as a healthy, formatted volume.
3. Right-click on the partition: Right-click on the partition and select “Change Drive Letter and Paths” from the context menu. This will open the Change Drive Letter and Paths window.
4. Add or change the drive letter: In the Change Drive Letter and Paths window, click on the “Add” or “Change” button. A dialog box will appear, allowing you to select or modify the drive letter.
5. Choose a drive letter: Select an available drive letter from the drop-down menu. Windows will automatically assign the next available letter, but you can choose any available letter according to your preference.
6. Confirm the drive letter assignment: Click “OK” to confirm the drive letter assignment. You will see a warning message informing you that some programs or services may rely on drive letters for proper functionality. Make sure you update any shortcuts or references that may be affected by the drive letter change.
7. Verify the drive letter: After clicking “OK”, the drive letter will be assigned to the partition. You can now see the NVMe SSD partition with its assigned drive letter displayed in Disk Management.
Once the drive letter is assigned, you can easily access the NVMe SSD partition through your file explorer. The assigned drive letter provides a convenient and recognizable way to interact with the partition, allowing you to store, retrieve, and manage your data effortlessly.
You can repeat this process for any additional partitions you have on your NVMe SSD that need drive letters assigned. With the drive letters assigned, you have successfully completed the formatting process for your NVMe SSD, making it ready for efficient data storage and retrieval.
Verifying the Format
After assigning a drive letter to the partition on your NVMe SSD and completing the formatting process, it is important to verify the format to ensure it was successful. Verifying the format confirms that the NVMe SSD is correctly formatted and ready to store data. Here’s how you can verify the format:
1. Open your file explorer: Open the file explorer on your computer or laptop. You can do this by clicking on the file explorer icon in the taskbar or by pressing the Windows key + E.
2. Look for the NVMe SSD: In the file explorer window, navigate to the “This PC” or “My Computer” section. Look for the NVMe SSD drive with the assigned drive letter you specified during the formatting process. It should now be listed as a separate drive in the file explorer.
3. Access the NVMe SSD: Double-click on the NVMe SSD drive to access its contents. Verify that the drive is accessible without any errors or prompts. You should be able to open the drive and view its empty storage space.
4. Check the properties: Right-click on the NVMe SSD drive in the file explorer and select “Properties” from the context menu. In the properties window, check the file system listed. It should match the file system you chose during the formatting process, such as NTFS or exFAT.
5. Test data storage and retrieval: To further verify the format, you can perform a simple test by copying a file to the NVMe SSD and then retrieving it. Create a new folder on the NVMe SSD, copy a small file into the folder, and then open the file to ensure it opens correctly. This verifies that the NVMe SSD is functioning properly and can store and retrieve data effectively.
If you encounter any errors, prompts, or difficulties accessing the NVMe SSD or its contents, it may indicate an issue with the format or the NVMe SSD itself. In such cases, you can repeat the formatting process or seek assistance from technical support or the SSD manufacturer.
Verifying the format of your NVMe SSD ensures that it is correctly formatted and ready for data storage. By following the steps mentioned above, you can confirm that the NVMe SSD is in the expected format and functioning properly, ready to fulfill your storage needs.
Conclusion
Formatting a new NVMe SSD is an essential step in preparing it for use and maximizing its performance. Through the process of connecting the NVMe SSD, opening Disk Management, initializing the drive, creating partitions, formatting the SSD, and assigning drive letters, you can ensure that your NVMe SSD is ready to store and access data in a reliable and efficient manner.
The benefits of formatting your NVMe SSD are manifold. By optimizing performance, organizing data, ensuring compatibility, enhancing reliability, and streamlining system setup, formatting sets the foundation for seamless data storage and retrieval.
Remember to take precautions before formatting, such as backing up your data and ensuring a stable power supply. Additionally, consulting the manufacturer’s guidelines and checking for firmware updates will help guarantee a successful formatting process.
Throughout this guide, we have outlined the necessary steps to format your NVMe SSD, emphasizing the importance of each stage. From the initial preparations to connecting the drive, opening Disk Management, initializing the SSD, creating partitions, formatting the drive, assigning drive letters, and verifying the format—each step contributes to a properly formatted and optimized NVMe SSD.
By properly formatting your NVMe SSD, you can unleash its full potential, experience faster read and write speeds, organize your data more effectively, and ensure compatibility with your operating system. Taking the time to format your NVMe SSD will result in a smoother and more efficient storage experience, whether you’re a casual user or a professional requiring high-performance capabilities.
Now that you have a comprehensive understanding of how to format your new NVMe SSD, it’s time to apply these steps and get your SSD ready for storage. Enjoy the improved speed and efficiency that a properly formatted NVMe SSD can bring to your computing experience!