Introduction
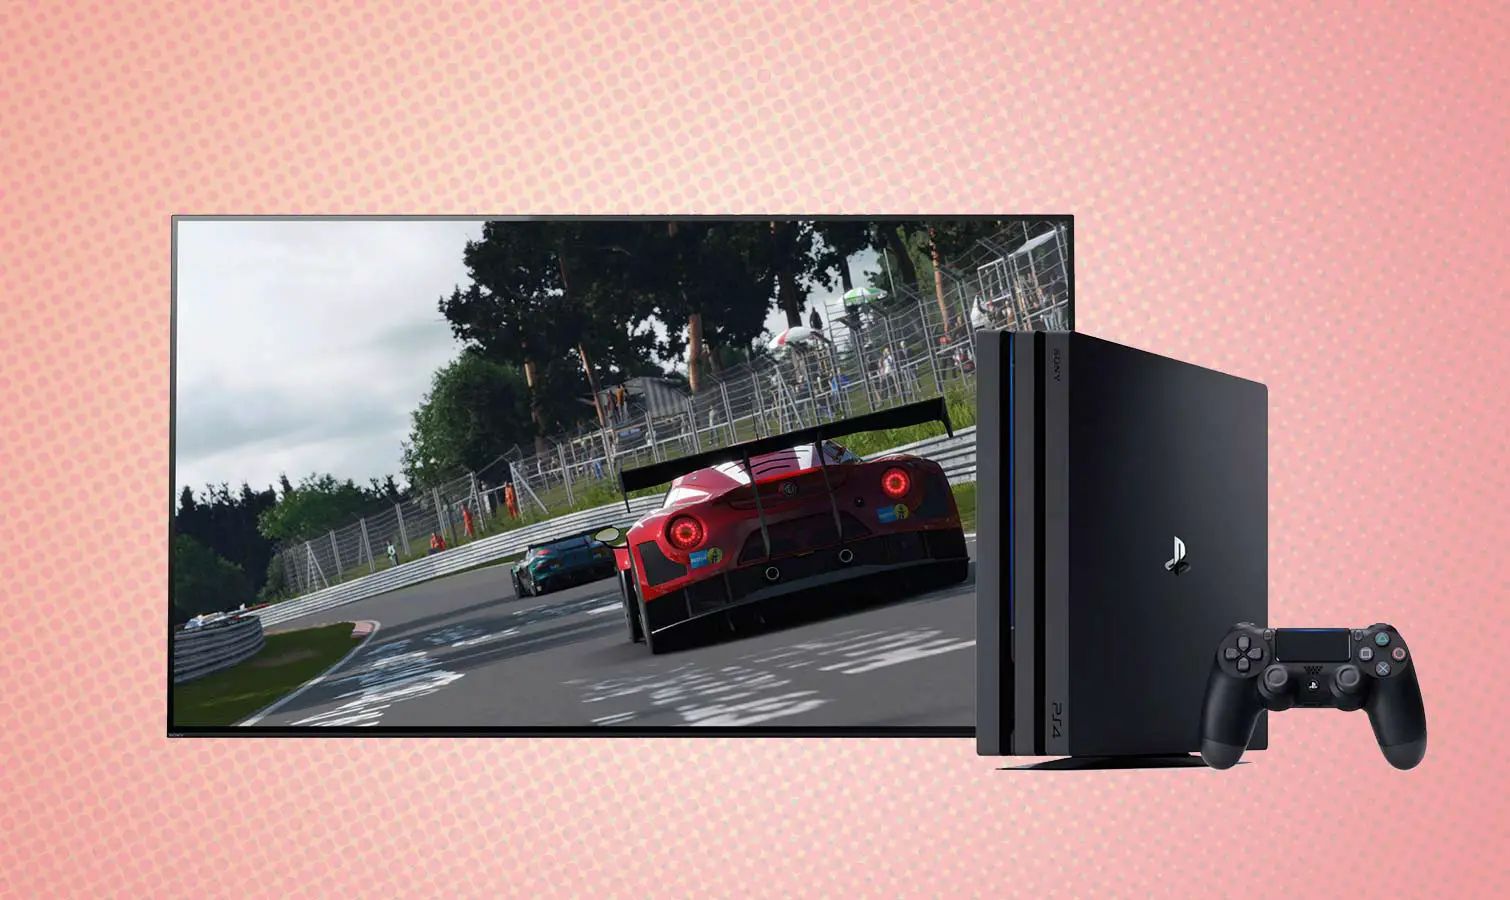
Welcome to our guide on how to fix a broken HDMI port on your PS4. The HDMI port is an essential component of your gaming console, responsible for transmitting the audio and video signals from your PS4 to your TV or monitor. Unfortunately, HDMI ports can become damaged or loose over time, resulting in a frustrating loss of connection and an inability to enjoy your gaming experience.
Don’t worry, though! In this article, we will walk you through the process of fixing a broken HDMI port on your PS4, whether it’s loose or damaged. We’ll provide you with step-by-step instructions, along with the tools and materials you’ll need to complete the repair. So, let’s get started and get your PS4 back up and running again!
Before we dive into the step-by-step guide, it’s essential to understand why the HDMI port on your PS4 is vital and how to identify signs of a broken port. The HDMI port serves as the primary connection point between your gaming console and your display device. It allows for the transmission of high-definition audio and video signals, ensuring a seamless and immersive gaming experience.
Now, let’s discuss the signs that indicate you may have a broken HDMI port. One of the most common symptoms is a complete loss of signal between your PS4 and your TV or monitor. If you’ve checked your cables and verified that your display device is functioning correctly, a faulty HDMI port may be the culprit. Another sign is intermittent signal loss or flickering on the screen while playing games or watching videos. These issues can be frustrating, but fortunately, they can often be resolved by repairing or replacing the HDMI port on your PS4.
In the following sections, we’ll walk you through the necessary tools and materials you’ll need, as well as the step-by-step process to fix a loose or damaged HDMI port on your PS4. Let’s jump right in and get your gaming experience back on track!
The Importance of HDMI Ports on PS4
The HDMI (High-Definition Multimedia Interface) ports on your PS4 play a crucial role in delivering high-quality audio and video signals from your console to your TV or monitor. These ports have become the standard connection method for transmitting digital audio and video signals, offering superior clarity and fidelity compared to analog connections.
One of the main advantages of HDMI ports is their ability to support high-definition resolutions, such as 1080p and even 4K, providing you with stunning visuals and lifelike graphics. This is particularly important for gaming, where every detail counts, and immersive visuals can significantly enhance your gaming experience.
In addition to video quality, HDMI ports also support high-quality audio signals, including surround sound formats like Dolby Digital and DTS. This allows you to fully immerse yourself in the game’s audio, hearing every explosion, whisper, and musical note in crisp and clear detail.
Furthermore, HDMI ports offer a convenient and versatile connectivity solution. With HDMI, you only need a single cable to transmit both audio and video signals, simplifying the setup process and reducing cable clutter. HDMI cables are also widely available and compatible with various devices, making it easy to connect your PS4 to different display devices, such as TVs, monitors, and projectors.
Another significant advantage of HDMI ports is their support for HDCP (High-bandwidth Digital Content Protection), which prevents unauthorized copying of copyrighted material, such as Blu-ray movies or digital content. This ensures that you can enjoy protected content on your PS4 without compromising on quality or security.
Given the importance of HDMI ports for delivering an exceptional gaming experience, it’s essential to maintain their functionality and address any issues promptly. A broken HDMI port can not only disrupt your gaming sessions but also limit your ability to enjoy high-quality visuals and audio that your PS4 is designed to deliver.
Now that we understand the significance of HDMI ports on your PS4, let’s move on to the next section, where we will discuss the signs that indicate a broken HDMI port. Understanding these signs will help you identify when it’s time to repair or replace the HDMI port on your console.
Signs of a Broken HDMI Port
Identifying the signs of a broken HDMI port on your PS4 is essential for diagnosing the issue and determining whether you need to repair or replace it. Here are some common signs that indicate a problem with your HDMI port:
1. No signal: One of the most apparent signs of a broken HDMI port is a complete loss of signal between your PS4 and your TV or monitor. If you’re experiencing no picture or sound on your display device, and you’ve ruled out issues with cables or the display itself, there’s a high possibility that the HDMI port is to blame.
2. Intermittent signal loss: Another indication of a broken HDMI port is intermittent signal loss. If you notice that the screen flickers, goes black, or shows visual artifacts randomly while playing games or watching videos, it could be due to a faulty connection at the HDMI port.
3. Loose or wobbly connection: If your HDMI cable doesn’t fit snugly into the HDMI port or feels loose when connected to your PS4, it may be a sign of a damaged or loose HDMI port. A loose connection can result in a poor quality signal or intermittent signal loss.
4. Bent or damaged pins: Take a close look at the HDMI port on your PS4. If you notice any bent, missing, or damaged pins inside the port, it’s a clear indication that the port needs attention. Damaged pins can prevent a proper connection between the console and display device, resulting in no signal or reduced signal quality.
5. Physical damage: Inspect the HDMI port for any signs of physical damage, such as cracks, breaks, or bent metal contacts. Physical damage can affect the overall functionality of the port and require repair or replacement.
If you encounter any of these signs, it’s crucial to address the issue promptly to restore the connection between your PS4 and your display device. Depending on the severity of the damage, you may be able to fix a loose HDMI port with some troubleshooting steps. However, if the port is severely damaged or broken, you may need to replace it to ensure a reliable and stable connection.
Now that we’ve identified the signs of a broken HDMI port, let’s move on to the next section, where we’ll discuss the tools and materials you’ll need to fix a broken HDMI port on your PS4.
Tools and Materials Needed
Before you begin fixing a broken HDMI port on your PS4, you’ll need to gather the necessary tools and materials. Here’s a list of what you’ll need:
- Screwdriver: You’ll need a small Phillips head screwdriver to remove the screws holding the PS4’s cover in place and access the internal components.
- Replacement HDMI port: If your HDMI port is damaged beyond repair, you’ll need a new HDMI port to replace the faulty one. You can purchase a replacement port online or from an electronics store. Make sure to get a compatible HDMI port specifically designed for your PS4 model.
- Soldering iron: If you’re planning to fix a loose or broken connection at the HDMI port, you may need a soldering iron to reattach any loose or damaged wires. Make sure you have the necessary soldering skills and safety precautions before attempting any soldering work.
- Soldering wire: This is required if you need to solder any loose wires to the HDMI port. Select a suitable gauge and type of soldering wire for the task.
- Desoldering pump or wick (optional): If you’re removing an old, damaged HDMI port, you may need a desoldering pump or wick to remove the existing solder from the circuit board.
- Tweezers (optional): Tweezers can be handy for handling small components or positioning wires during the repair process.
- Anti-static wrist strap (optional): To protect sensitive electronic components from electrostatic discharge, you may consider using an anti-static wrist strap.
It’s important to note that the specific tools and materials required may vary depending on the extent of the damage and the repair method you choose. Ensure that you have the necessary items readily available before attempting any repair work on your PS4’s HDMI port.
Once you have gathered all the tools and materials, you’re ready to proceed to the next section, where we will discuss the essential preparation steps before fixing your broken HDMI port.
Preparation
Before you begin the process of fixing your broken HDMI port on the PS4, it’s important to take some necessary preparatory steps. These steps will ensure that you have a safe and organized work environment and make the repair process smoother. Here’s what you need to do:
1. Ensure a clean workspace: Find a well-lit and clutter-free area to work on your PS4. Clear any objects or debris from the workspace to prevent accidental damage to your console.
2. Power off and unplug the PS4: Before you start any repair work, it’s essential to power down your PS4 and unplug it from the power source. This will prevent the risk of electric shock and protect your console from potential damage.
3. Gather the necessary tools and materials: Refer to the previous section where we discussed the tools and materials needed to fix the HDMI port. Ensure that you have all the necessary items within reach before proceeding further.
4. Familiarize yourself with the console’s internal components: Take a moment to understand the layout of the PS4 and locate the HDMI port. This will help you navigate through the repair process with ease and confidence.
5. Review the repair method: Depending on the nature of the issue with your HDMI port, you may need to follow different repair methods. Familiarize yourself with the chosen repair method by referring to the relevant section in this guide.
6. Protect against static discharge: To protect the sensitive electronic components of your PS4 from static electricity, consider wearing an anti-static wrist strap. This will prevent accidental static discharge that could damage your console during the repair process.
By completing these preparatory steps, you’ll be ready to tackle the process of fixing your broken HDMI port confidently. Now, let’s move on to the next section, where we will discuss the step-by-step instructions to fix a loose HDMI port on your PS4.
Step 1: Power Down the PS4
Before you start working on fixing the broken HDMI port on your PS4, it’s important to power down the console properly. This will ensure your safety and prevent any potential damage during the repair process. Here’s how to power down your PS4:
1. Save and close any ongoing games or applications: Prior to powering down your PS4, make sure to save your progress in any games or applications that you have open. This will prevent any data loss or interruption during the repair process.
2. Navigate to the power options: From the PS4 home menu, scroll up to the top menu bar and select the “Power” option.
3. Select “Turn Off PS4”: In the power options menu, choose the “Turn Off PS4” option to initiate the shutdown process.
4. Confirm the power down: A confirmation prompt will appear on the screen. Select “OK” to proceed with powering down the console.
5. Wait for the PS4 to shut down: Give the console some time to complete the shutdown process. You will see the power indicator on the PS4 system, located on the front panel, turn off completely when it has powered down.
6. Unplug the power cord: Once the PS4 is fully shut down, unplug the power cord from the electrical outlet. This will ensure that there is no power running to the console during the repair process.
By following these steps, you have successfully powered down your PS4 and are ready to proceed with the repair. Remember, it’s crucial to handle the console with care and ensure it is powered off and unplugged before performing any maintenance or repair tasks.
Next, let’s move on to Step 2, where we will learn how to remove the cover of the PS4 to access the internal components.
Step 2: Remove the Cover
Now that you have powered down your PS4, the next step is to remove the cover to gain access to the internal components, including the HDMI port. Follow the instructions below to remove the cover:
1. Place the PS4 on a stable surface: Find a flat and stable surface to work on, ensuring that there is enough space to maneuver the console.
2. Prepare the screwdriver: Grab the screwdriver that you gathered earlier, ensuring that it is the appropriate size for the screws on the PS4’s cover.
3. Locate the screws: Look for the screws on the back of the PS4. There should be a few screws holding the top cover in place. Typically, these screws are located at the corners or edges of the console.
4. Remove the screws: Use the screwdriver to carefully unscrew and remove the screws from their respective positions. Keep the screws in a safe place to avoid misplacing them.
5. Slide off the cover: Once all the screws are removed, gently slide off the cover of the PS4. Be cautious not to force it or apply excessive pressure, as you don’t want to damage any internal components.
6. Set aside the cover: Place the cover in a secure spot, ensuring that it is away from potential hazards or objects that could cause damage.
With the cover removed, you now have access to the internal components of the PS4, including the HDMI port. Take a moment to inspect the inside of the console and locate the HDMI port, which will be positioned near the back of the console.
Next, in Step 3, we’ll explore how to locate the HDMI port and assess the damage, helping you determine the best course of action for repairing or replacing the port.
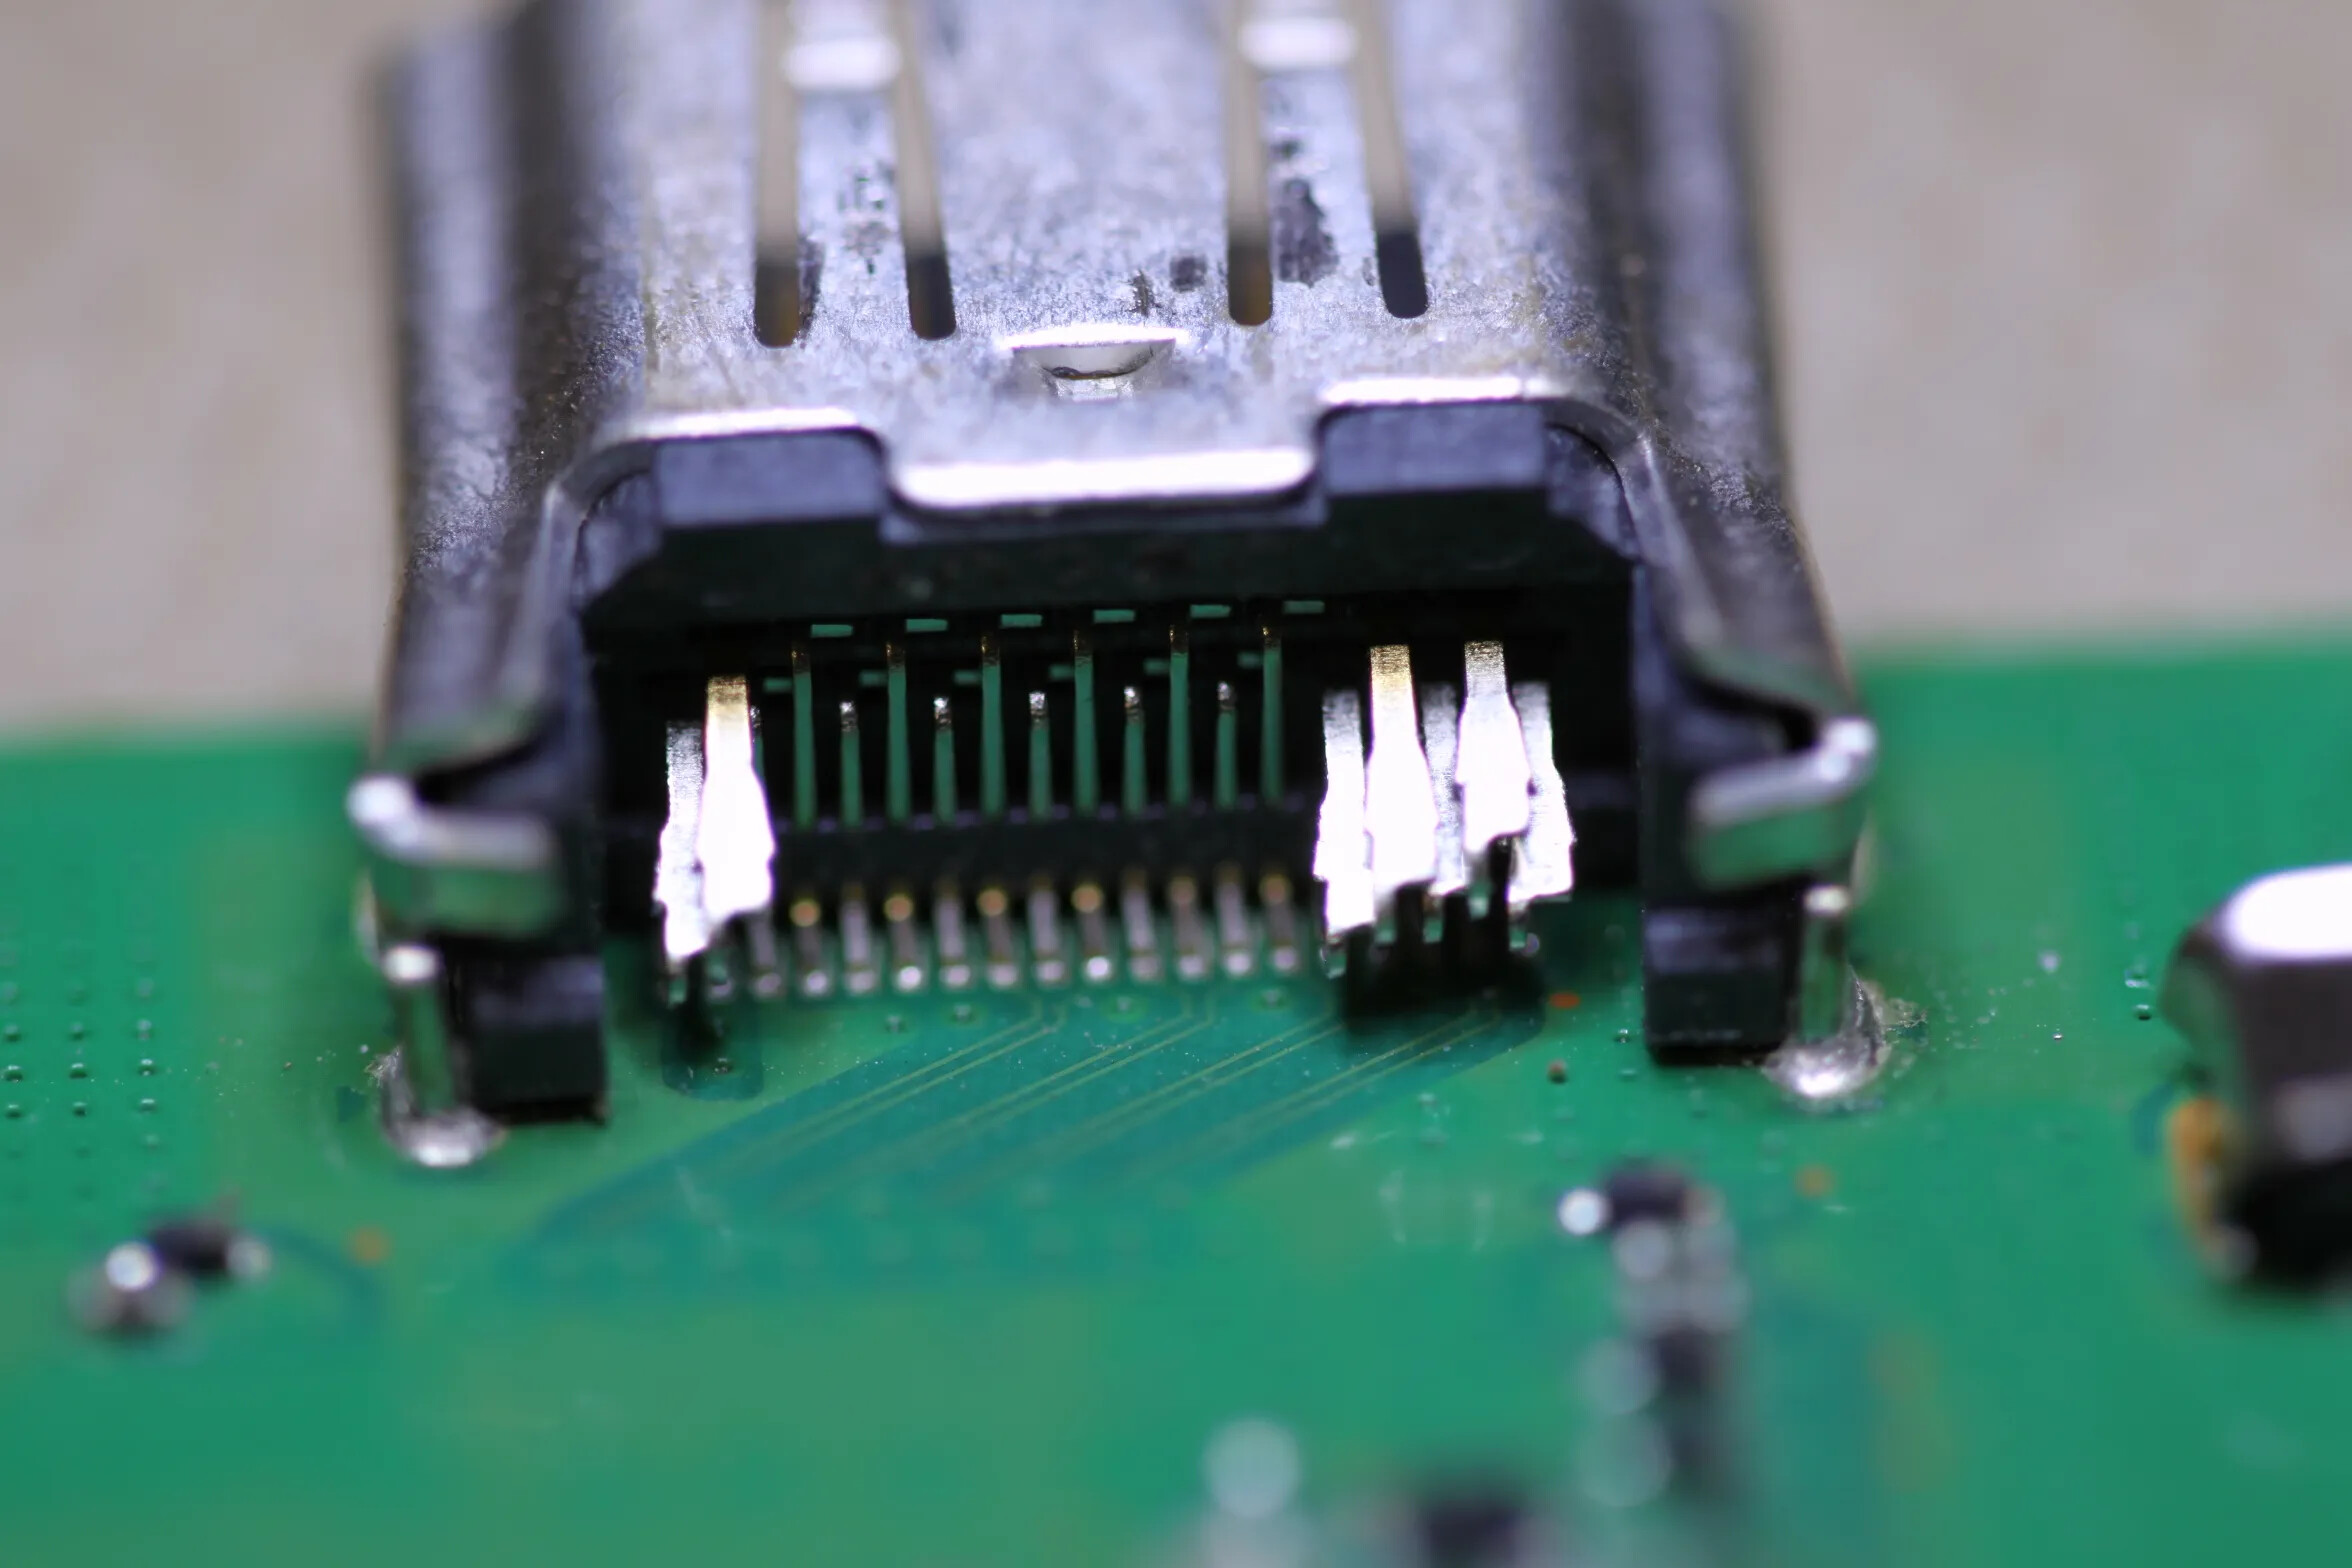
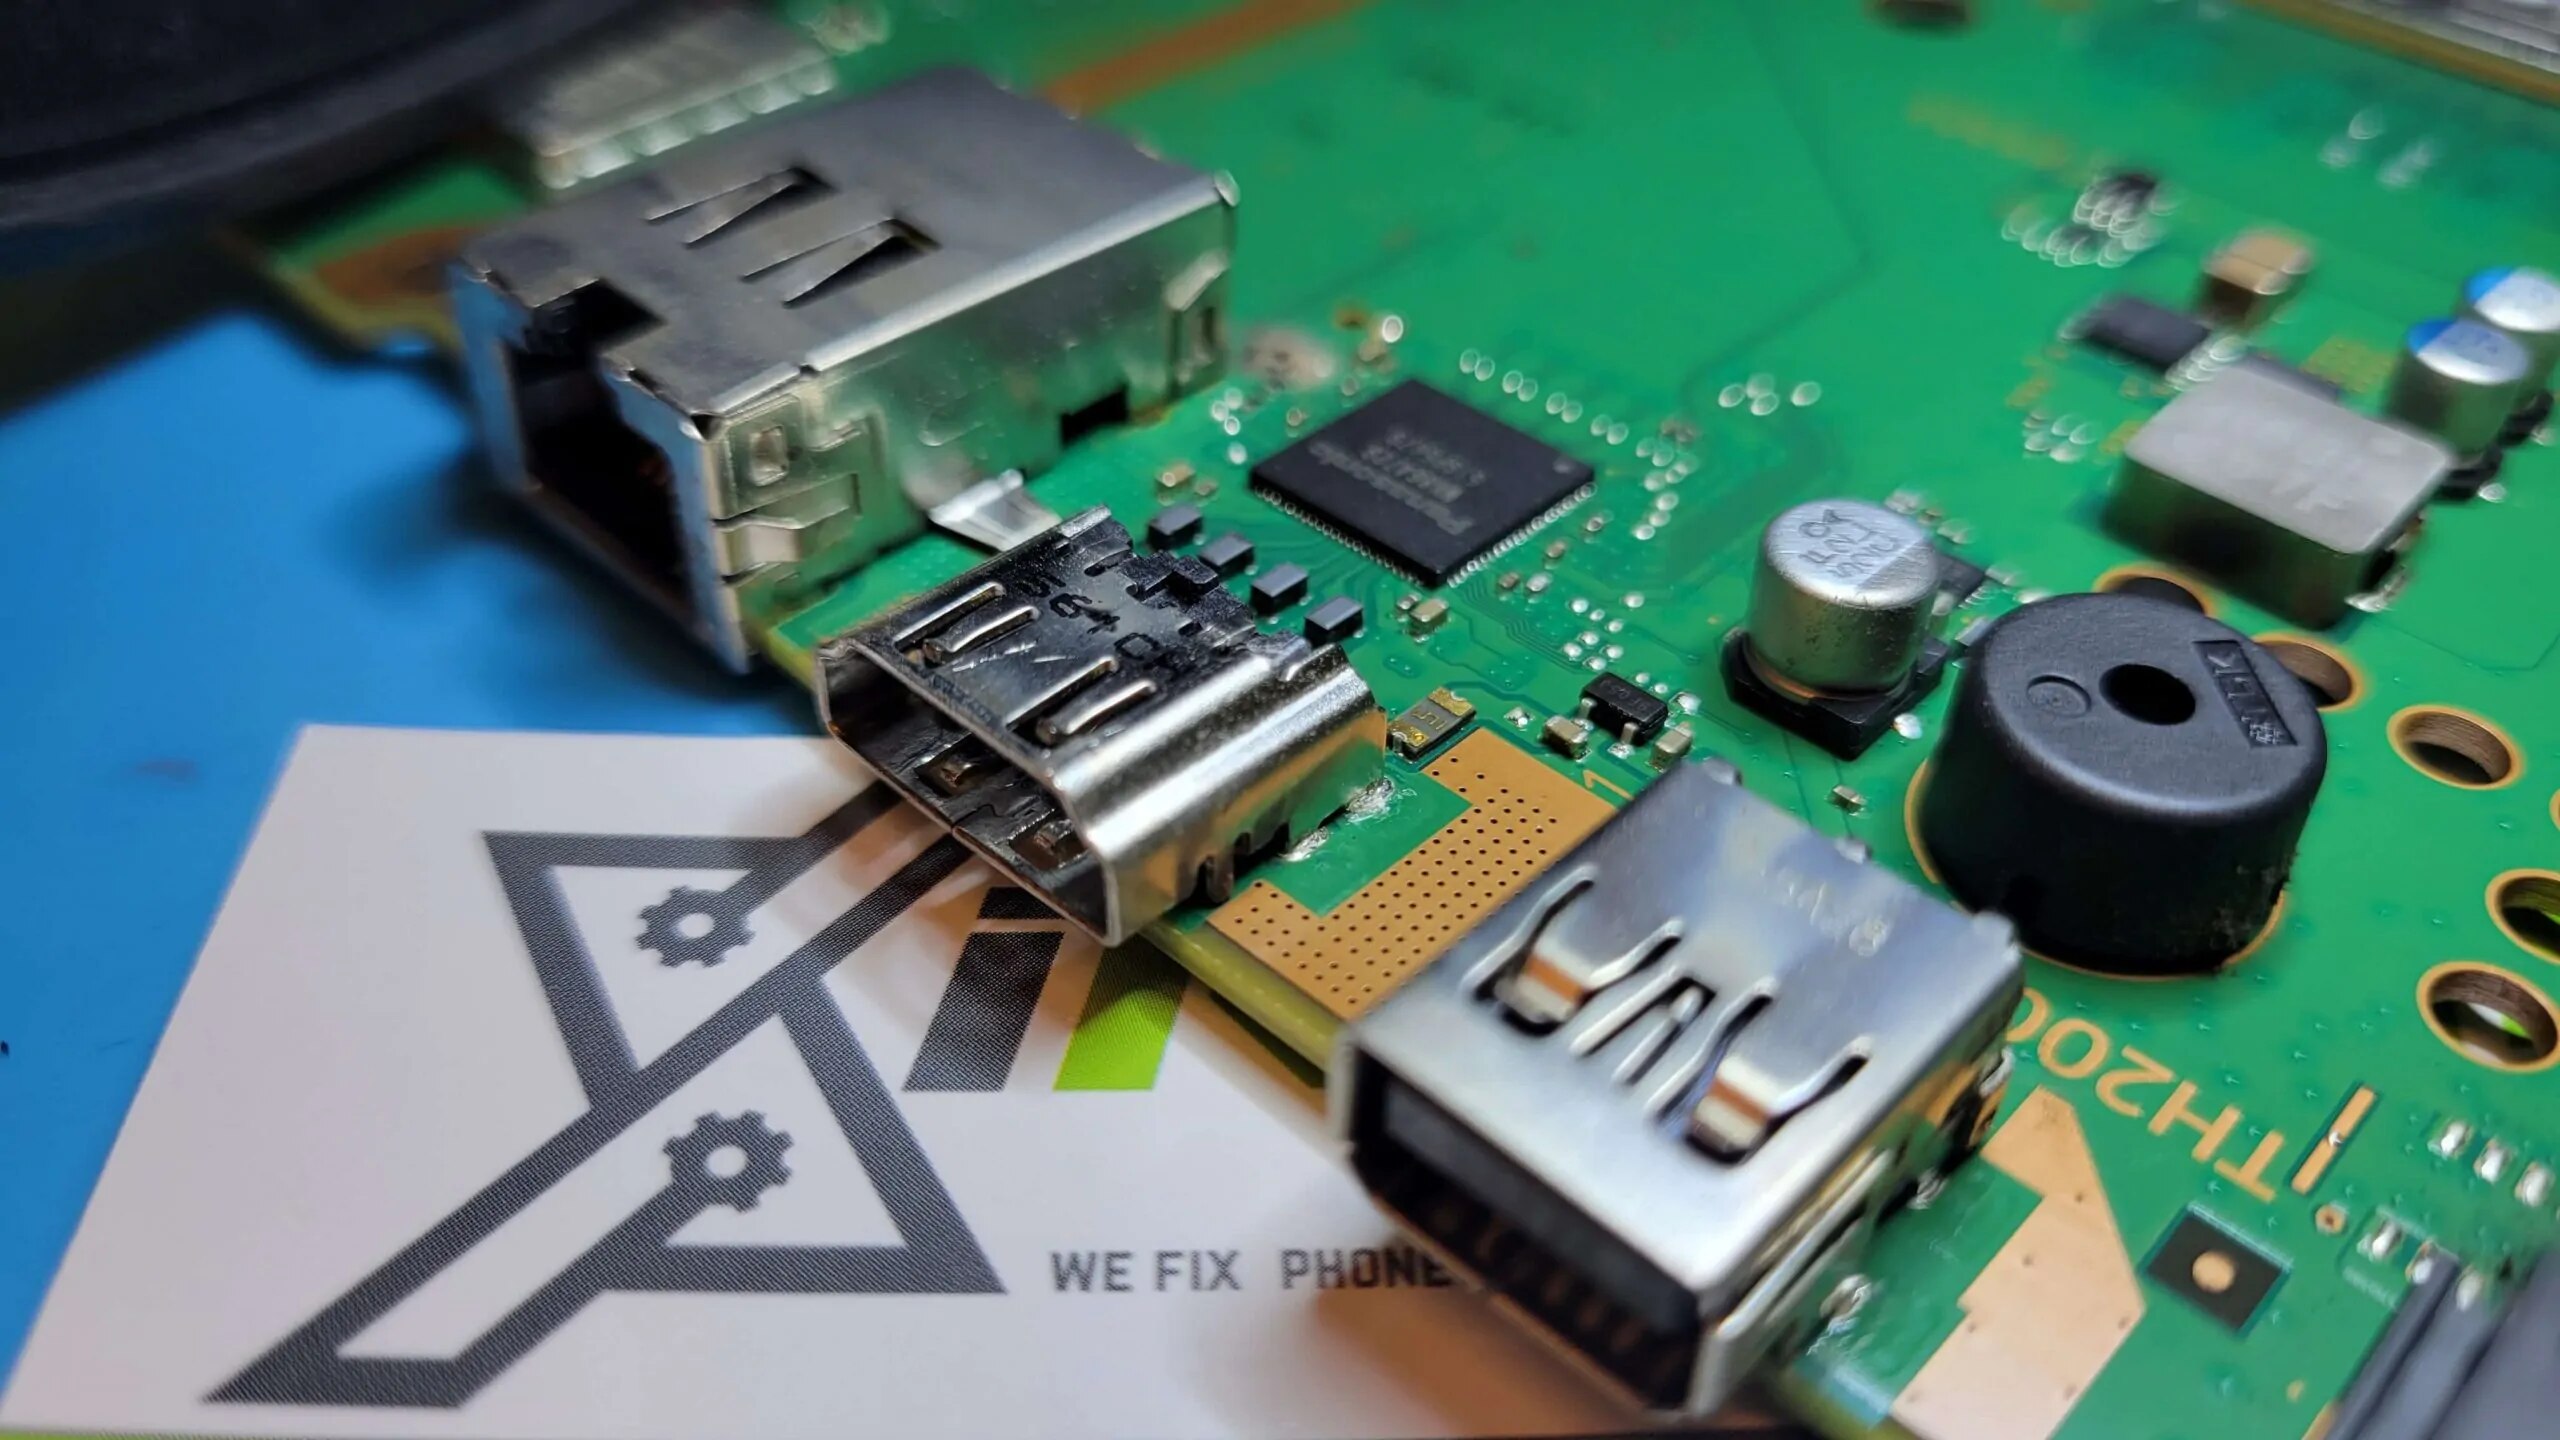
Step 3: Locate the HDMI Port
Now that you have removed the cover of your PS4, it’s time to locate the HDMI port. The HDMI port is a vital component responsible for transmitting audio and video signals from your console to your TV or monitor. Follow the steps below to find the HDMI port:
1. Orient the PS4: Ensure that the PS4 is facing upwards, with the rear side of the console facing you. This is the side where the various ports and connectors are located.
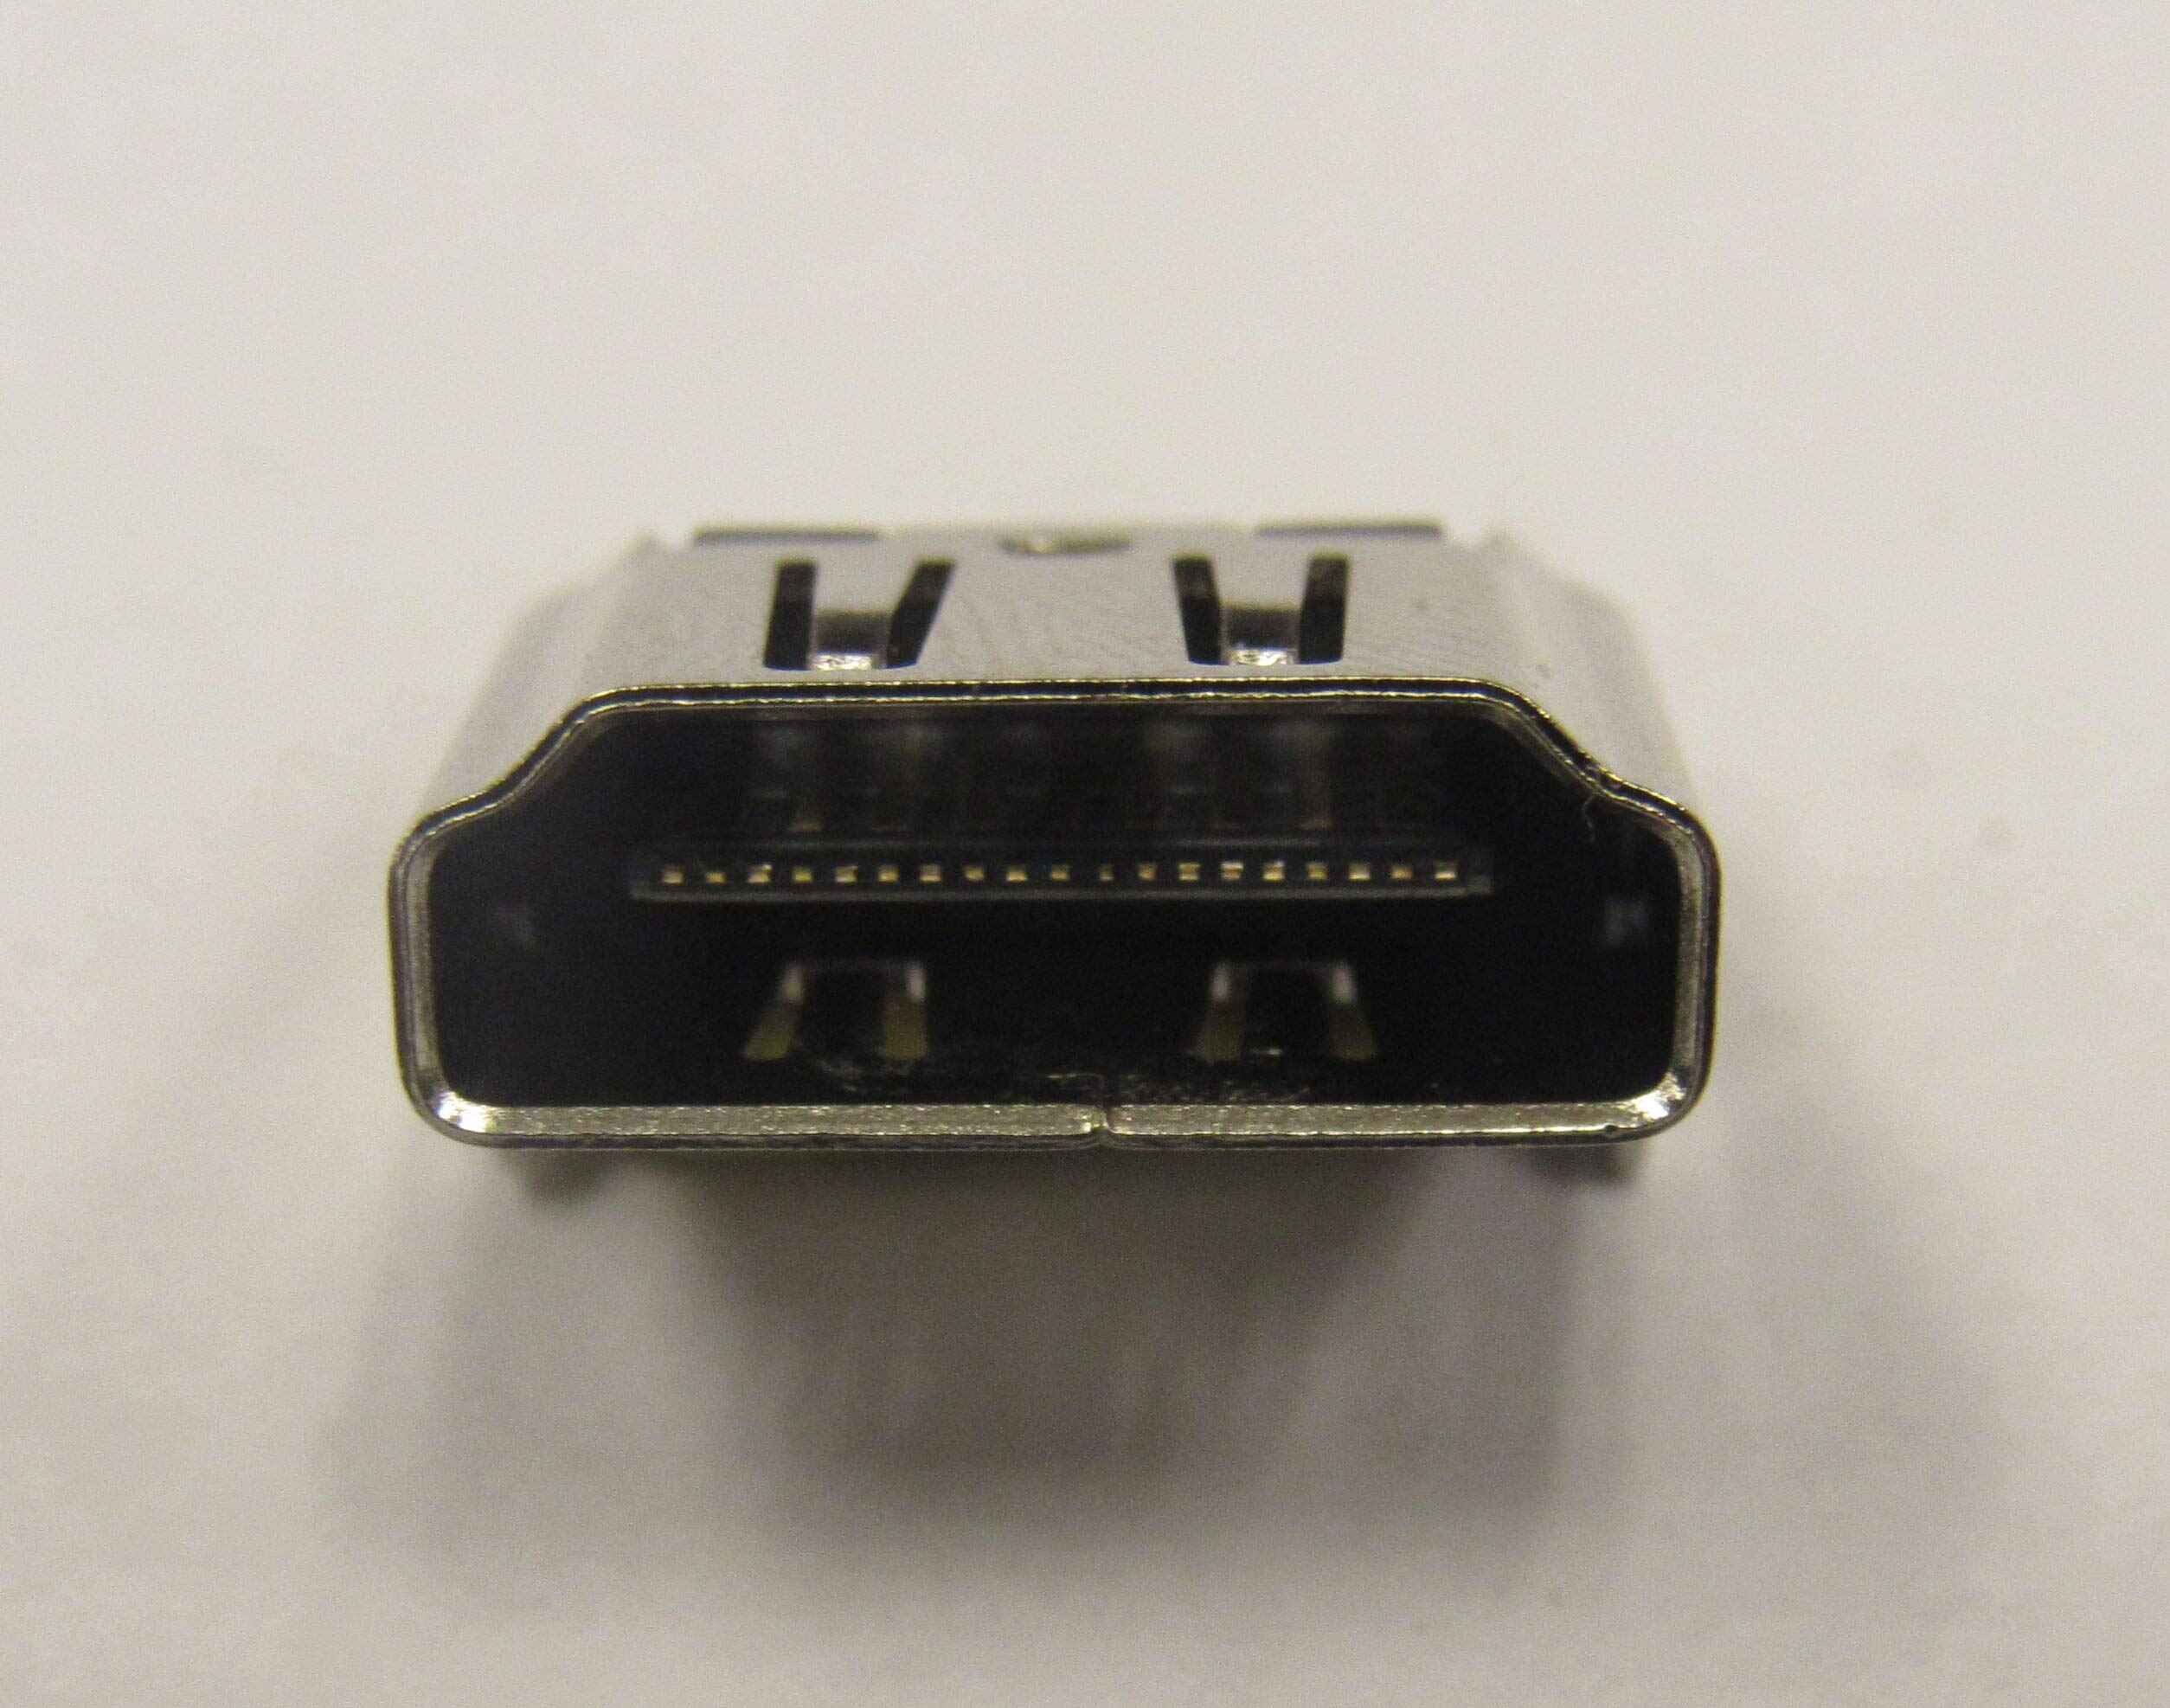
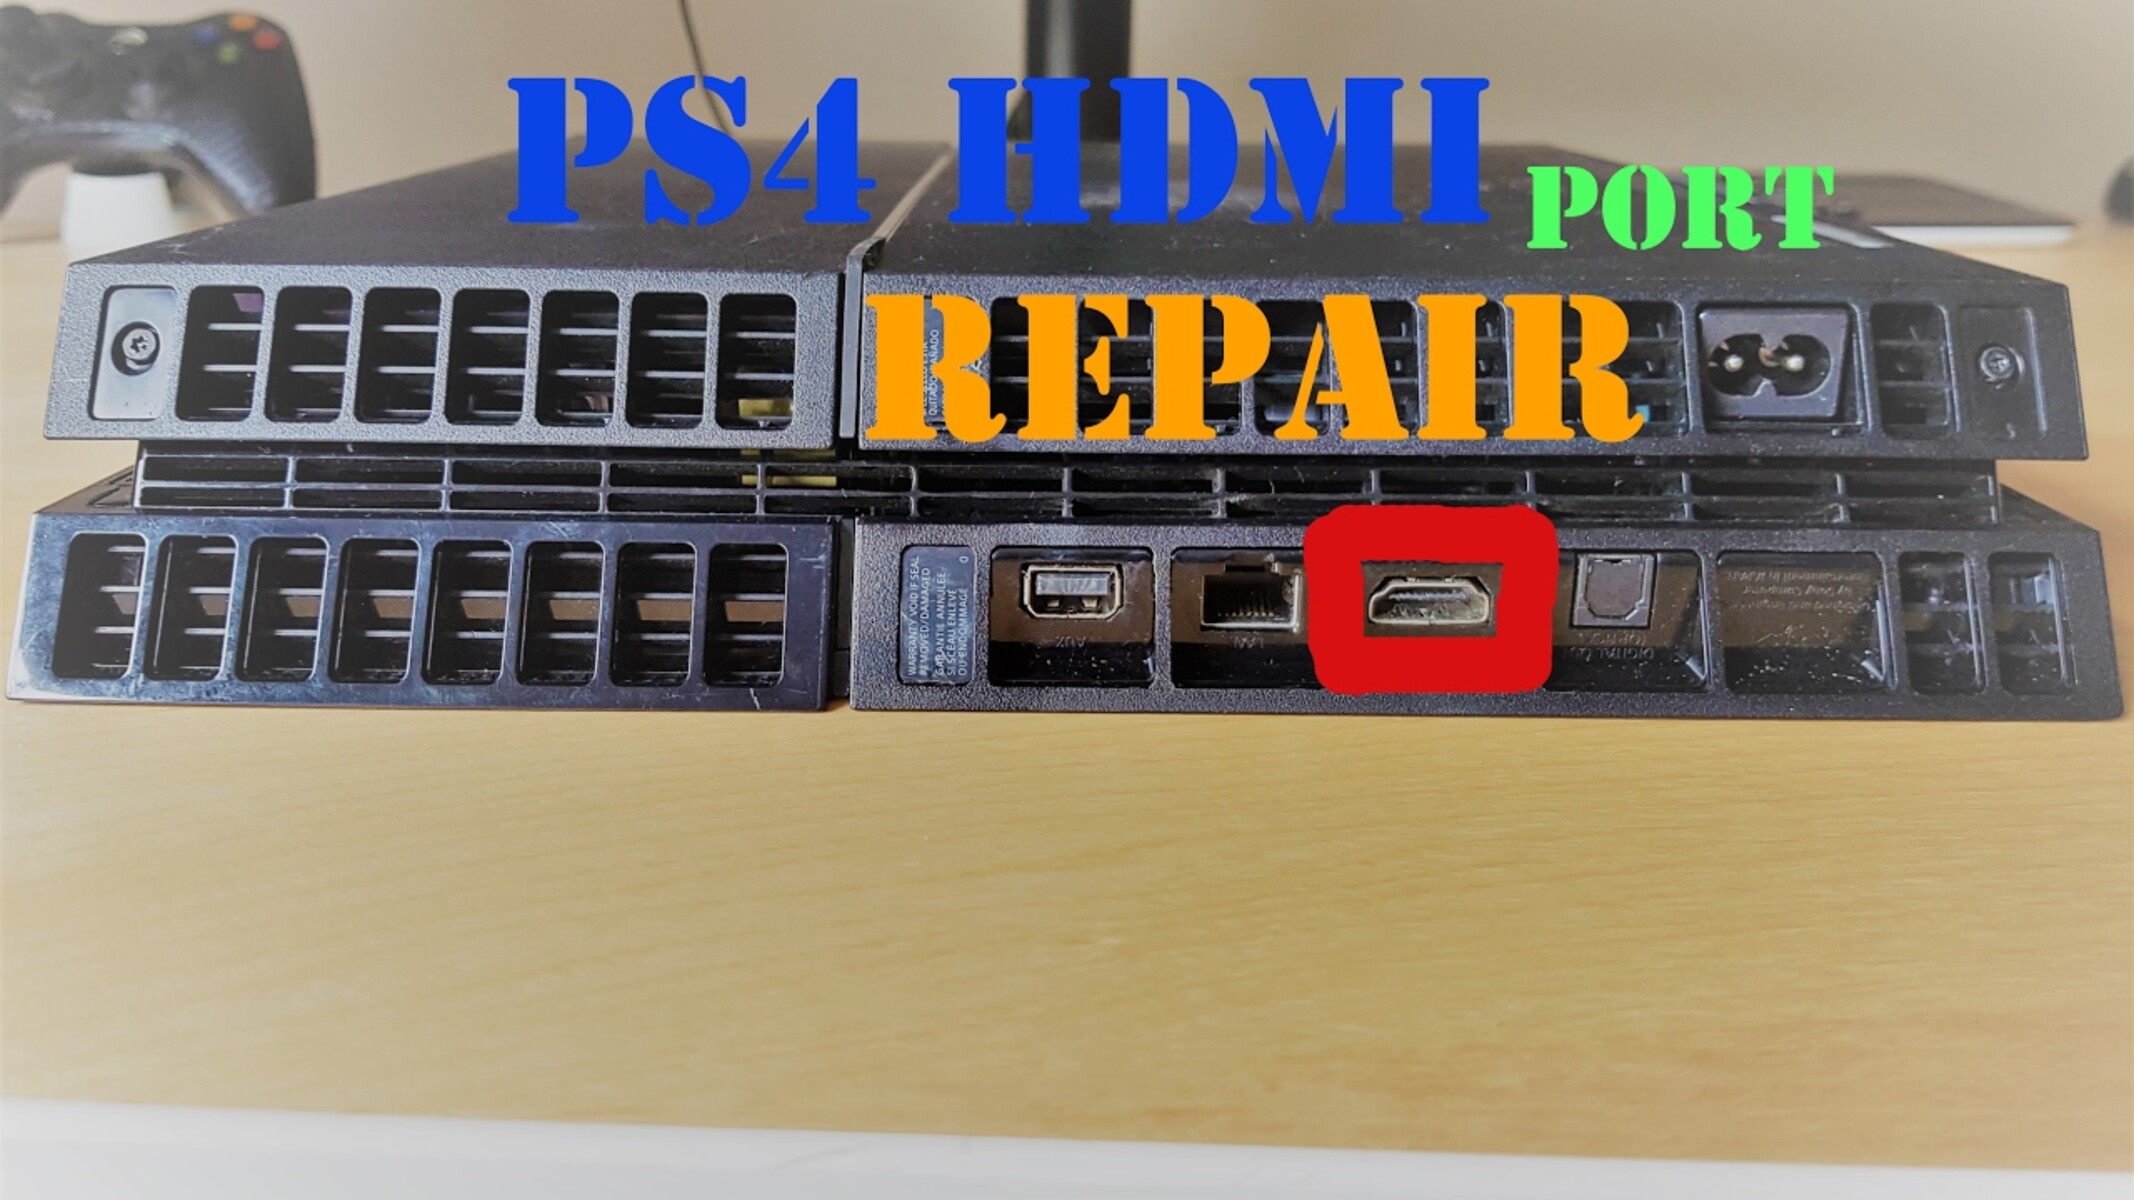
2. Identify the HDMI port: Look along the back of the PS4 for a small rectangular port with a thin metal frame. The HDMI port should be labeled as “HDMI” and may be marked with an HDMI logo.
3. Check the port’s location: Depending on the model of your PS4, the HDMI port may be located toward the center or to one side of the back panel. Take note of the port’s position as you will need to access it for further repair or replacement tasks.
4. Inspect the port for any visible damage: With the HDMI port located, examine it closely for any signs of physical damage. Look for bent pins, cracks, or other visible issues that may indicate a problem with the port.
5. Take note of the surroundings: While inspecting the HDMI port, make sure to take note of the nearby components and cables. These include any other audio/video ports, USB ports, or the power supply connector. It’s important to be aware of the surroundings to avoid accidentally damaging any other components during the repair process.
6. Document the port’s condition (optional): Consider taking pictures or making notes of the HDMI port’s condition before proceeding with any repair or replacement. This documentation can serve as a reference point and help you track your progress as you work on fixing the port.
By following these steps, you should now have successfully located the HDMI port on your PS4 and assessed its condition. Identifying the port’s position and noting any visible damage will help you proceed with the appropriate repair method tailored to the specific issue.
In the next step, Step 4, we will discuss how to assess the damage to the HDMI port, helping you determine the necessary steps to fix it.
Step 4: Assess the Damage
After locating the HDMI port on your PS4, the next crucial step is to assess the damage to determine the best course of action for repair or replacement. By thoroughly evaluating the condition of the HDMI port, you can make an informed decision on how to proceed. Follow the steps below to assess the damage:
1. Examine the port visually: Take a close look at the HDMI port on your PS4. Check for any signs of physical damage, such as bent or broken pins, cracks, or loose connection points. Pay attention to the overall condition and any visible abnormalities.
2. Test the connection: Connect an HDMI cable to the port and your TV or monitor. Gently wiggle the cable while it is inserted to see if there is any indication of a loose connection. Observe the quality of the signal, such as flickering, artifacts, or no signal at all. This will help determine if the issue lies with the port itself or with the cable connection.
3. Try a different HDMI cable: If you suspect that the issue might be with the HDMI cable, try using a different one. A faulty cable can sometimes cause problems that appear to be a port issue. Testing with a known working cable can help confirm or rule out cable-related problems.
4. Consider any previous incidents: Reflect on any events that might have caused the damage to the HDMI port. It could be accidental physical damage, excessive force when inserting or removing the cable, or any other incidents that may have affected the port’s integrity.
5. Take note of the extent of the damage: Assess the severity of the damage to the port. Determine if it is a minor issue that can be fixed by reattaching loose wires or if there is significant damage that requires a full port replacement. Consider the impact of the damage on the functionality of the port and the quality of the audio and video signals.
6. Document the assessment (optional): Optionally, record your assessment findings, including any supporting evidence such as photos or notes. This documentation can serve as a reference throughout the repair process and help track progress and any changes made.
By following these steps, you will have successfully assessed the damage to the HDMI port on your PS4. This assessment will guide you in determining the appropriate repair method, whether it involves fixing a loose connection or replacing the damaged port entirely.
In the next step, Step 5, we will discuss the process of fixing a loose HDMI port on your PS4, providing step-by-step instructions to resolve this common issue.
Step 5: Fixing a Loose HDMI Port
If you have determined that the HDMI port on your PS4 is loose, you can attempt to fix it before considering a replacement. Follow the steps below to fix a loose HDMI port:
1. Power down and unplug the PS4: Before you begin any repair work, make sure your PS4 is powered off and unplugged from the power source to ensure your safety.
2. Discharge static electricity: To prevent damaging sensitive components, discharge any static electricity buildup in your body by touching a grounded metal object.
3. Access the HDMI port: Remove the cover of your PS4 as discussed in previous steps to gain access to the internal components, including the HDMI port.
4. Inspect the HDMI port: Examine the HDMI port closely, checking for any loose connectors, pins, or wires. If you identify any loose or disconnected components, proceed to the next steps to fix them.
5. Solder loose wires: If there are any loose wires within the HDMI port, use a soldering iron and soldering wire to carefully and firmly reattach them to their respective connection points. Ensure that the solder joints are well-made and secure.
6. Reinsert loose pins or connectors: If you find any loose pins or connectors within the HDMI port, use a pair of tweezers to carefully reposition and reattach them. Make sure they are aligned correctly to ensure a proper connection.
7. Test the connection: Once the loose components have been reattached, connect an HDMI cable between your PS4 and the display device. Power on your PS4 and check for a stable and clear signal. Wiggle the cable gently to ensure there is no signal loss.
8. Reassemble the PS4: If the connection is stable and the HDMI port is no longer loose, you can proceed to reassemble your PS4 by placing the cover back and screwing it into place with the screws you removed earlier.
By following these steps, you can attempt to fix a loose HDMI port on your PS4 and restore a stable connection for audio and video signals. However, if the issue persists or if the HDMI port is significantly damaged, it may be necessary to consider replacing the port, as discussed in later sections.
In the next step, Step 6, we will explore the process of replacing a damaged HDMI port on your PS4, providing you with the necessary guidance to carry out this repair.
Step 6: Replacing a Damaged HDMI Port
If you have assessed that the HDMI port on your PS4 is significantly damaged and cannot be repaired, replacing the port is the recommended solution. Follow the steps below to replace a damaged HDMI port:
1. Power down and unplug the PS4: Ensure your PS4 is powered off and disconnected from the power source for safety during the replacement process.
2. Discharge static electricity: To prevent static discharge, touch a grounded metal object to discharge any static electricity buildup in your body.
3. Remove the cover: Open the PS4 by removing the cover as explained in earlier steps to access the internal components.
4. Locate the damaged HDMI port: Identify the damaged HDMI port and carefully disconnect any cables or wires connected to it. Take note of how the cables are connected to ensure proper reinstallation later.
5. Desolder the damaged HDMI port: Use a desoldering pump or wick, if necessary, to remove the solder from the damaged HDMI port’s connection points. Take caution to avoid damaging the surrounding circuitry during the desoldering process.
6. Remove the damaged HDMI port: Once the solder is removed, gently lift the damaged HDMI port from the circuit board. Be careful not to exert excessive force or damage any nearby components.
7. Install the replacement HDMI port: Take the new HDMI port, ensuring it is compatible with your PS4 model, and align it with the empty port space on the circuit board. Carefully insert it into place, making sure it is seated correctly and aligns with the surrounding connections.
8. Solder the new HDMI port: Use a soldering iron and soldering wire to solder the new HDMI port’s connection points securely to the circuit board. Ensure that the solder joints are well-made and free of any short circuits.
9. Reconnect the cables: Reconnect any cables or wires that were previously connected to the damaged HDMI port, following the notes or documentation you made during disassembly.
10. Test the new HDMI port: Reassemble the PS4’s cover and secure it with the screws. Connect an HDMI cable between the new HDMI port and your display device. Power on your PS4 and test the connection for a clear and stable signal.
By following these steps, you can successfully replace a damaged HDMI port on your PS4. This will allow you to restore a fully functioning HDMI connection for your gaming console.
In the next section, we will conclude our guide and summarize the key steps and recommendations for fixing a broken HDMI port on your PS4.
Step 7: Reassembling the PS4
After completing the necessary repairs or replacements, it’s time to reassemble your PS4 to its original state. Follow the steps below to properly reassemble your PS4:
1. Position the PS4 cover: Take the PS4 cover and align it with the appropriate slots and openings on the console. Make sure the cover is positioned correctly and ready for reattachment.
2. Secure the cover: Carefully slide the cover back into place, ensuring that all sides are aligned properly. Apply gentle pressure to make sure it fits snugly and securely, without any gaps or misalignment.
3. Insert and tighten the screws: Use the screwdriver to insert and tighten the screws into their respective positions on the PS4 cover. Start by tightening each screw partially and then go back to fully tighten them, working in a diagonal pattern to ensure even pressure.
4. Verify the screws are properly tightened: Check that all screws are secured tightly, but be cautious not to overtighten, as it may damage the cover or strip the screw holes.
5. Double-check connections: Before powering on your PS4, make sure all cables and wires are properly reconnected. Check the HDMI cable, power cable, and any other peripheral connections to ensure they are secure.
6. Power on the PS4: Once you are satisfied with the reassembly, plug the power cable back into the PS4 and connect it to a power source. Power on your PS4 and ensure it starts up without any issues.
7. Test the HDMI port: Connect your PS4 to your TV or monitor using an HDMI cable and ensure that the HDMI port is working correctly. Check for a stable and clear audio and video signal without any flickering or interruptions.
By following these steps, you can successfully reassemble your PS4 after fixing the broken HDMI port. Always take care to ensure that all connections are secure and that the components fit back into place properly.
With the reassembly complete, you can now enjoy your repaired PS4 and resume your gaming experience with a fully functional HDMI port.
In the next section, we will provide a brief summary of the key steps to fix a broken HDMI port on your PS4.
Conclusion
Fixing a broken HDMI port on your PS4 is an achievable task with the right tools, materials, and guidance. Whether you’re dealing with a loose connection or a damaged port, following the necessary steps can help you regain a stable and high-quality audio and video transmission for your gaming console.
In this guide, we discussed the importance of HDMI ports on the PS4 and identified common signs of a broken HDMI port. We then provided a list of the tools and materials needed for the repair, along with the preparatory steps to ensure a safe and organized work environment.
We then explored step-by-step instructions for locating the HDMI port, assessing the damage, fixing a loose HDMI port, and replacing a damaged HDMI port. Each step was explained thoroughly to guide you through the repair process and help you make informed decisions based on the condition of your HDMI port.
Remember to exercise caution throughout the repair process, handling the console and tools with care. If you’re not confident in your repair skills or if the damage is extensive, it’s recommended to seek professional assistance or consider contacting Sony for repair options.
By following this guide, you can save yourself the hassle and cost of replacing your PS4 with a new console. Restoring the functionality of your HDMI port will allow you to enjoy your gaming experience to the fullest and ensure that you can connect your PS4 to your TV or monitor without any issues.
We hope this guide has been helpful to you in fixing your broken HDMI port on your PS4. Now, it’s time for you to put the steps into action and get your PS4 back in working order.
Happy gaming!