Introduction
If you’re experiencing a loose HDMI port on your device, you’re not alone. It’s a common issue that can be frustrating, especially when you’re trying to enjoy your favorite shows or movies. A loose HDMI port can result in a poor connection, leading to a loss of audio or video quality.
But fear not! In this guide, we’ll walk you through the steps to fix a loose HDMI port so you can get back to enjoying crisp and uninterrupted entertainment. From cleaning the port to tightening screws and even replacing the HDMI port if necessary, we’ll cover all the necessary steps to remedy this issue.
Before we dive into the details, it’s important to note that while some fixes can be done easily at home, others may require professional assistance. If you’re not comfortable working with electronics or if your device is still under warranty, it’s always a good idea to consult a professional or contact the manufacturer for support.
To ensure the safety of both yourself and your device, it’s crucial to follow the instructions carefully and take the necessary precautions. Remember, each device may have different components and configurations, so the steps provided here may vary slightly depending on your specific device.
Now, let’s take a closer look at what could be causing a loose HDMI port and the tools you’ll need to fix it.
What Causes a Loose HDMI Port?
A loose HDMI port can be caused by a variety of factors, ranging from normal wear and tear to accidental damage. Understanding the potential causes can help you diagnose the issue and determine the appropriate course of action.
One common cause is continuous plugging and unplugging of the HDMI cable. Over time, the repeated pressure exerted on the port can cause it to become loose. This is especially true if the cable is inserted at an angle or with excessive force.
In some cases, the HDMI port may become loose due to a loose or missing screw that holds it in place. This can happen with repeated use or if the device has been subjected to physical vibrations or movements.
Another possible cause is a buildup of dust, dirt, or debris inside the HDMI port. Over time, these particles can accumulate and interfere with the connection, causing the port to become loose or lose its grip on the cable.
In rare cases, a loose HDMI port can be a sign of a more serious underlying issue, such as a faulty solder connection or a damaged circuit board. If you suspect this to be the case, it’s recommended to seek professional help to avoid further damage to your device.
Now that we understand some of the potential causes of a loose HDMI port, let’s move on to the tools you’ll need to fix it.
Tools Needed
Before you begin fixing a loose HDMI port, it’s essential to gather the necessary tools to complete the task. Having the right tools at hand will ensure a smoother and more efficient repair process. Here are the tools you’ll need:
- Small screwdriver set: A set of small screwdrivers will come in handy for removing screws and accessing the interior components of your device.
- Cotton swabs: These are useful for cleaning the HDMI port and removing any dust or debris that may be causing the loose connection.
- Isopropyl alcohol: This alcohol can be used to clean the port effectively. Make sure to use a high concentration of isopropyl alcohol for best results.
- Adhesive or glue: If the port is loose due to a missing screw or broken plastic component, you may need an appropriate adhesive or glue to secure it back into place.
- Replacement HDMI port (optional): In some cases, if the port is severely damaged or beyond repair, you may need to replace the HDMI port altogether. Ensure you have a compatible replacement on hand if necessary.
It’s important to mention that not all repairs will require all of these tools. The specific tools needed may vary depending on the nature of the problem and the device you’re working with. Having these tools ready before you start the repair will save you time and frustration.
Now that you have the tools prepared, let’s move on to the step-by-step process of fixing a loose HDMI port.
Step 1: Safety Precautions
Before diving into the repair process, it’s important to prioritize your safety. Working with electronic devices requires caution, so follow these safety precautions:
- Power off and unplug the device: Ensure that the device you’re working on is powered off and unplugged from the electrical outlet. This will prevent any potential electrical shocks or damage to the device.
- Work on a static-free surface: Static electricity can damage sensitive electronic components. Find a static-free surface to work on, such as an anti-static mat, to prevent any static discharge during the repair process.
- Wear an anti-static wrist strap: By wearing an anti-static wrist strap, you can further minimize the risk of static electricity damaging the internal components of your device. Attach the strap to a grounded metal object or wear it as instructed in the wrist strap manual.
- Keep track of screws and small parts: As you disassemble your device, be sure to keep track of the screws and any small parts you remove. Consider using a magnetic mat or small containers to organize and store these components, preventing loss or confusion during reassembly.
- Avoid excessive force: When handling the device and its components, be gentle and avoid using excessive force. Forcing any parts may cause further damage.
By following these safety precautions, you can minimize the risk of accidents or additional damage to your device during the repair process. Once you have taken the necessary safety measures, you can proceed to the next step: cleaning the HDMI port.
Step 2: Clean the Port
Now that you’ve taken the necessary safety precautions, it’s time to clean the HDMI port. Dust, dirt, and debris can accumulate over time, causing a poor connection and a loose HDMI port. Follow these steps to clean the port:
- Use a bright light source: Before you start cleaning, use a flashlight or any other bright light source to examine the HDMI port. Look for any visible debris or obstructions inside the port.
- Unplug the HDMI cable: Gently unplug the HDMI cable from the port. Ensure that the device is still powered off and unplugged from the electrical outlet.
- Dip a cotton swab in isopropyl alcohol: Take a cotton swab and dip it in isopropyl alcohol. Make sure to use a higher concentration of isopropyl alcohol for better cleaning results.
- Gently clean the port: Carefully insert the cotton swab into the HDMI port and gently swirl it around. Be cautious not to apply too much pressure to avoid damaging the port.
- Remove stubborn debris: If there is stubborn debris that the cotton swab couldn’t remove, you can use a can of compressed air to blow it out gently. Hold the can upright and spray short bursts of air into the port.
- Allow the port to dry: After cleaning, give the HDMI port some time to air dry. Ensure it is completely dry before reconnecting the HDMI cable.
Cleaning the HDMI port can often resolve connection issues and help tighten a loose HDMI port. However, if you still experience problems, proceed to the next step: tightening the screws.
Step 3: Tighten Screws
If cleaning the HDMI port didn’t solve the problem, the next step is to check and tighten the screws that hold the port in place. Loose screws can cause a wobbly HDMI port and result in a poor connection. Follow these steps to tighten the screws:
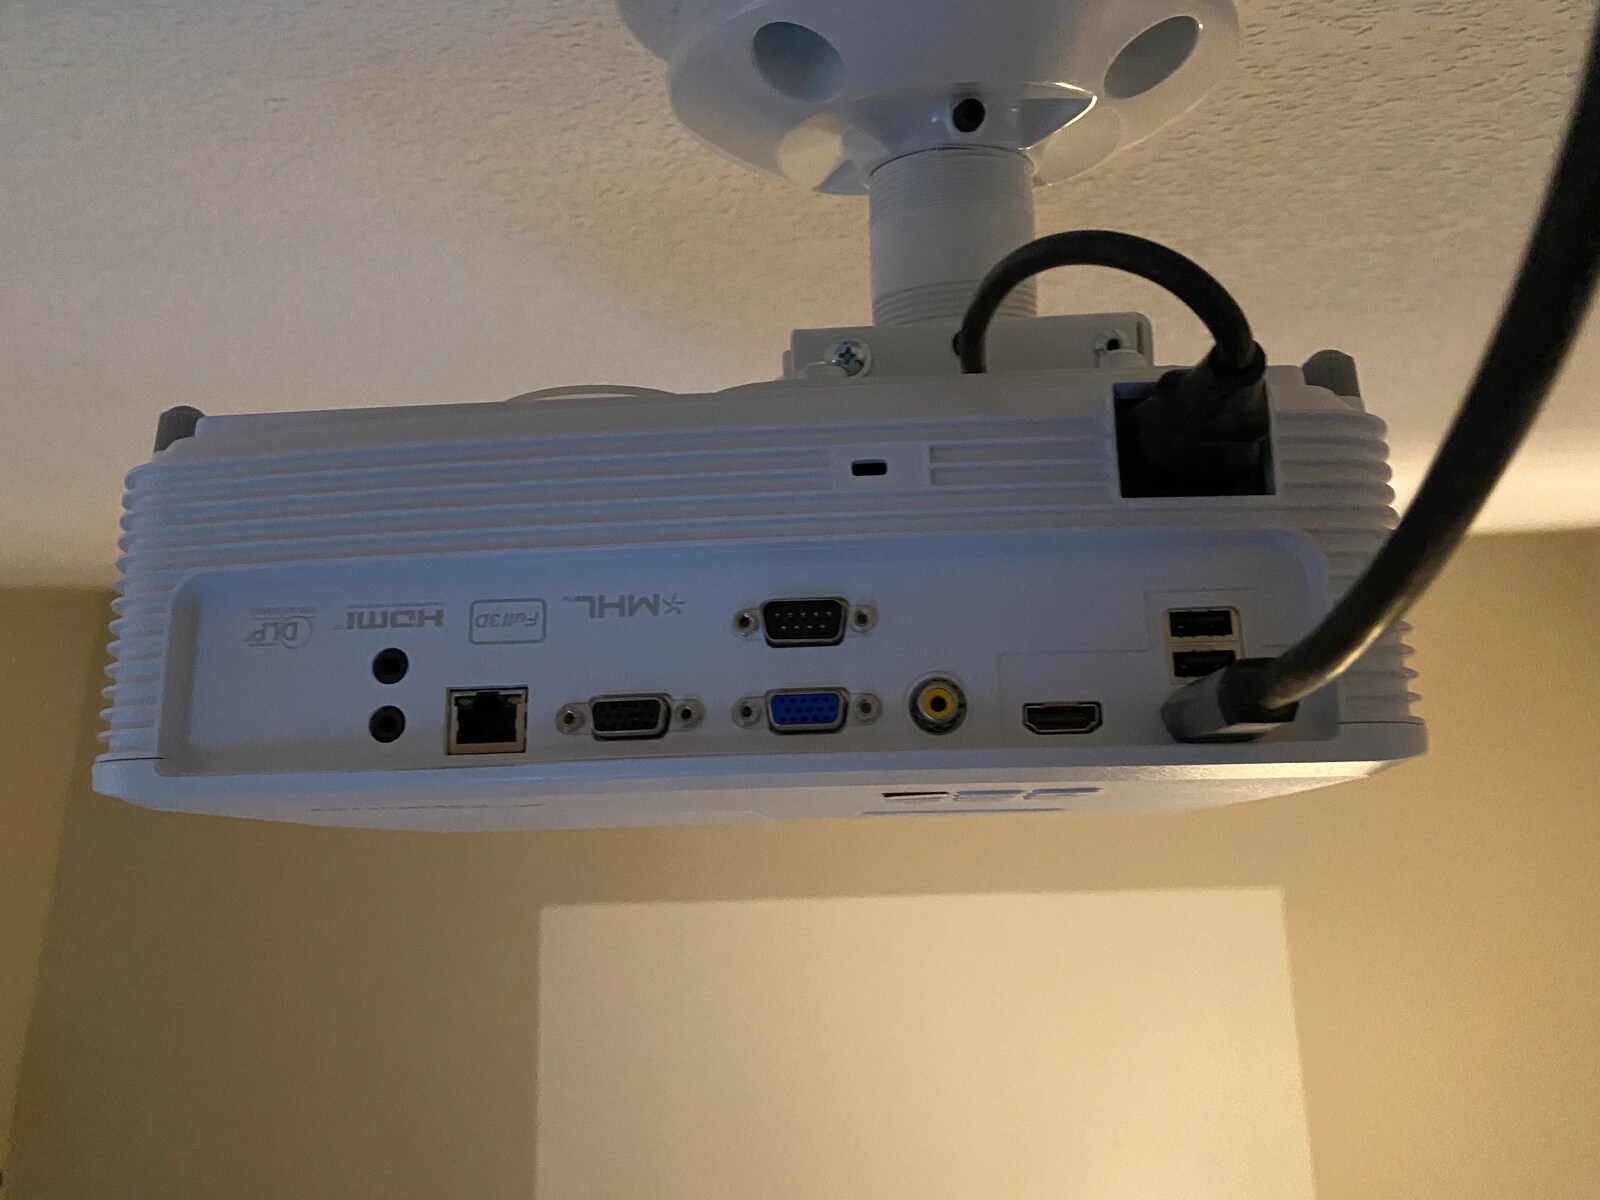
- Locate the screws: Examine your device and identify the screws that secure the HDMI port. You may need to remove a cover or panel to access the screws.
- Use the appropriate screwdriver: Select the appropriate screwdriver from your toolkit to fit the screws. Make sure the screwdriver fits securely into the screw head to avoid stripping or damaging the screw.
- Gently tighten the screws: Insert the screwdriver into each screw head and gently tighten them in a clockwise direction. Be careful not to overtighten, as this can cause damage.
- Check the port’s stability: After tightening the screws, gently wiggle the HDMI port to ensure it feels stable and secure. If there is still some movement, tighten the screws a little more until the port is firmly in place.
By tightening the screws, you can eliminate any looseness in the HDMI port and improve the connection. However, if the port is still loose or the connection issues persist, it may be necessary to move on to the next step: supporting the port with glue.
Step 4: Support with Glue
If tightening the screws did not resolve the issue, providing additional support to the HDMI port using glue can help secure it in place. Follow these steps to support the port with glue:
- Ensure the device is powered off and unplugged: Before applying any glue, ensure that the device is powered off and disconnected from the electrical outlet. Safety should always be a priority.
- Inspect the port and surrounding area: Examine the HDMI port and its surroundings for any visible damage or missing plastic components. If there are broken pieces or missing parts, take note of them.
- Select an appropriate adhesive or glue: Choose an adhesive or glue that is suitable for your device’s materials. It’s recommended to use a strong epoxy or adhesive specifically designed for electronics.
- Apply a small amount of glue: Carefully apply a small amount of glue to the areas that need support. Be cautious not to apply too much glue, as it can overflow and cause more issues.
- Hold the port in place: Position the HDMI port correctly and hold it firmly in place for the glue to bond. Follow the instructions provided with the adhesive for the recommended drying and setting time.
- Allow the glue to set: After holding the port in place, give the glue sufficient time to set and dry. Avoid moving or disturbing the device during this period.
Adding support with glue can reinforce a loose HDMI port and provide it with the necessary stability. However, if the port remains loose or the connection issues persist, it may be necessary to consider replacing the HDMI port altogether, which brings us to the next step.
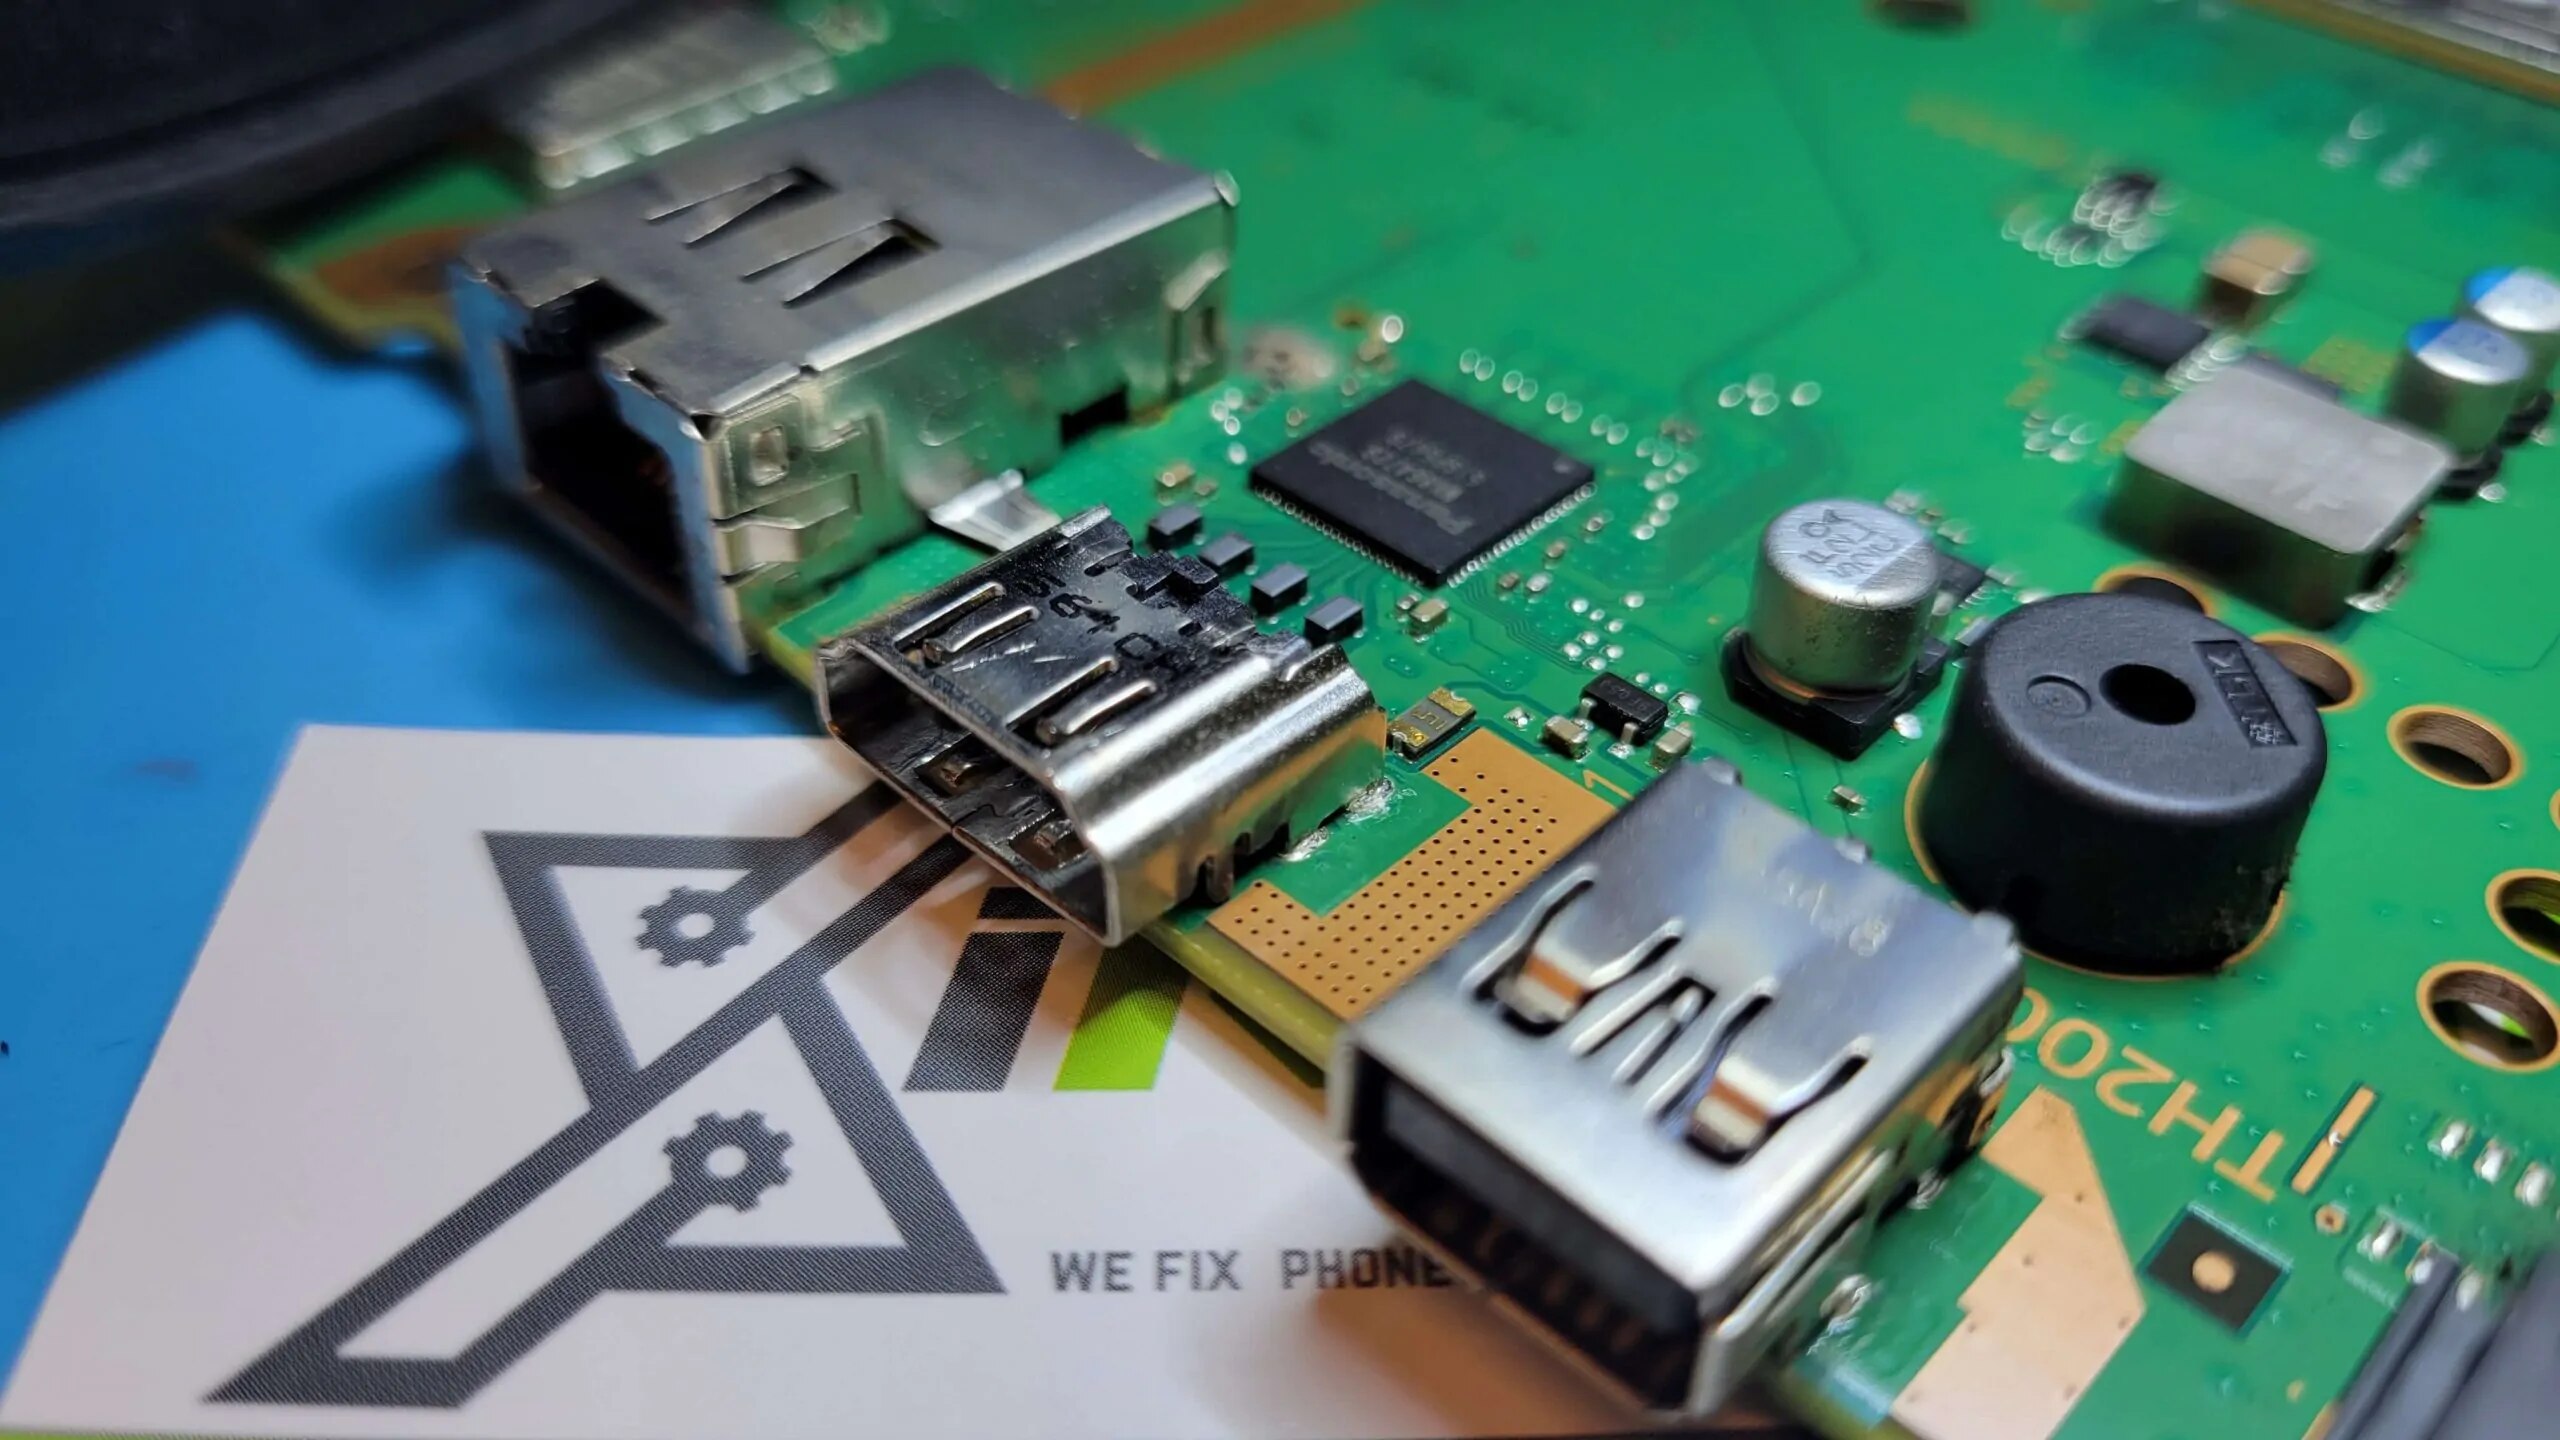
Step 5: Replace the HDMI Port
If all previous steps have failed to resolve the issue, it may be necessary to replace the HDMI port. Keep in mind that this step requires some technical expertise and should only be attempted if you are comfortable working with electronics. Here’s how you can replace the HDMI port:
- Refer to the device’s manual or online resources: Consult the user manual or search online for specific instructions on how to replace the HDMI port on your device. Different devices may have varying procedures, so it’s essential to follow the correct guidelines.
- Gather the necessary tools and replacement parts: Ensure you have the appropriate tools, such as a screwdriver set, and the replacement HDMI port that is compatible with your device. If needed, order the replacement part from a reputable source.
- Disconnect and open the device: Power off and disconnect the device from the electrical outlet. Carefully remove any covers, panels, or screws necessary to access the internal components.
- Locate the HDMI port: Identify the defective HDMI port and disconnect any cables or connectors attached to it. Take note of its position and how it is secured in place.
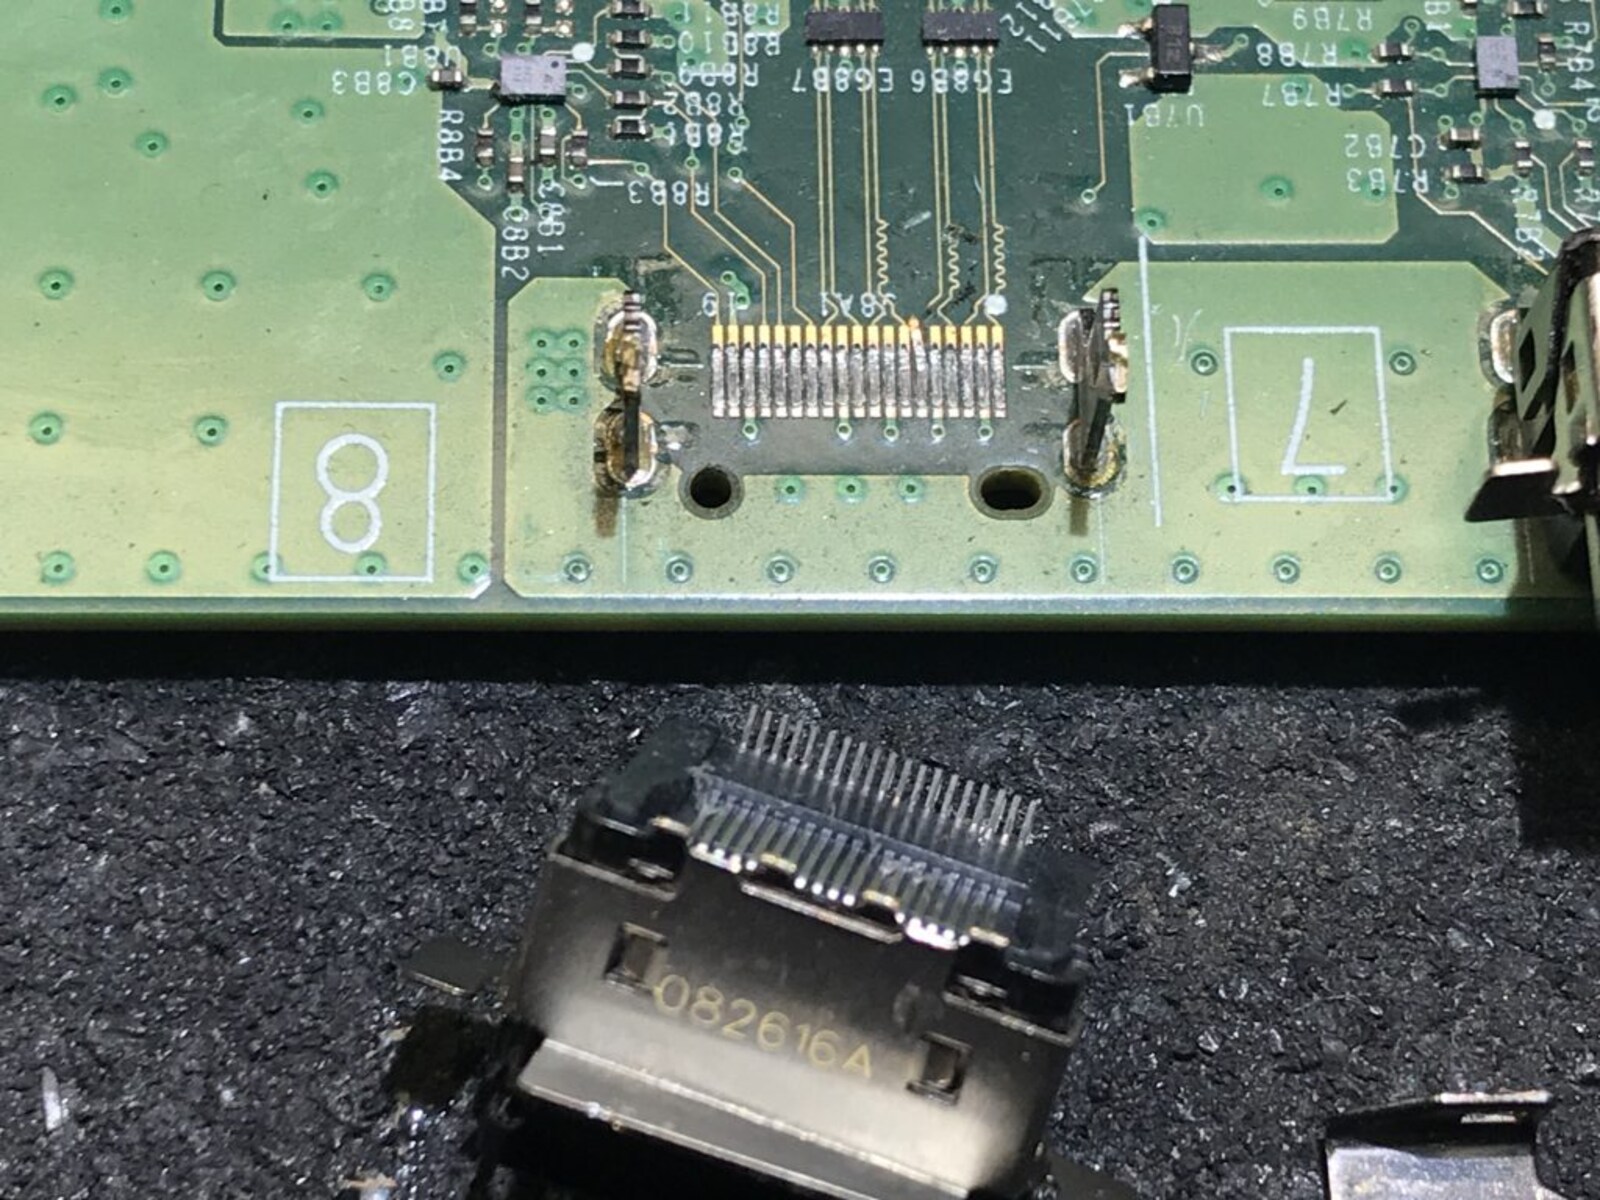
- Remove the old HDMI port: Follow the manufacturer’s instructions to safely remove the faulty HDMI port. This typically involves unscrewing or detaching it from the device’s circuit board.
- Install the new HDMI port: Carefully install the replacement HDMI port into the designated position, ensuring it aligns correctly with the circuit board. Secure it in place by following the reverse steps of the removal process.
- Reassemble and test: Once the new HDMI port is securely in place, reassemble the device, making sure to tighten any screws and properly connect any cables or connectors. Power on the device and test the HDMI port to confirm that the connection issues are resolved.
If you’re uncomfortable or inexperienced with electronics, it’s recommended to seek professional assistance or contact the manufacturer for support. They can provide guidance or arrange for a certified technician to perform the replacement.
By completing these steps, you should have successfully addressed the issue of a loose HDMI port. However, always remember to take the necessary precautions and proceed with caution when working with electronic devices.
Conclusion
Dealing with a loose HDMI port can be frustrating, but with the right knowledge and tools, it is possible to fix the issue and restore a reliable connection for your devices. We’ve covered the steps to clean the port, tighten screws, support with glue, and even replace the HDMI port if necessary.
Remember, safety should always come first when working with electronics. Follow the safety precautions outlined in this guide, and if you’re unsure or uncomfortable with any step, it’s best to seek professional assistance. Properly cleaning the HDMI port and tightening screws can often solve the problem, but if those steps prove unsuccessful, supporting the port with glue or replacing it may be required.
Keep in mind that each device may have its own unique components and configurations, so it’s important to consult your device’s manual or seek specific instructions for your model. If your device is still under warranty, it’s always advisable to reach out to the manufacturer for guidance or professional repair.
By taking the appropriate steps and precautions, you can fix a loose HDMI port and enjoy uninterrupted audio and video quality once again. So, roll up your sleeves, gather your tools, and get ready to tackle this common issue!