Introduction
The Xbox Series S is a popular gaming console known for its impressive graphics and immersive gameplay. However, one common issue that users may encounter is a faulty HDMI port, which can lead to no video or audio output. If you’re facing this problem, don’t worry! In this article, we will guide you through the steps to fix the HDMI port on your Xbox Series S.
A faulty HDMI port can occur due to various reasons, such as loose connections, dirt or debris in the port, or even a defective HDMI cable. Before reaching out to professional help or considering a replacement, it’s essential to try some troubleshooting steps to fix the issue yourself. Not only can this save you time and money, but it can also provide a quick solution to get your gaming experience back on track.
In the following sections, we will outline a step-by-step process to help you identify and fix the problem with your Xbox Series S HDMI port. From checking for loose connections to performing a hard reset, we will cover all the possible solutions. So, let’s dive in and get your Xbox Series S HDMI port back up and running!
Step 1: Check for Loose Connections
The first and simplest step to fix a faulty HDMI port on your Xbox Series S is to check for loose connections. Sometimes, the HDMI cable may not be securely plugged into the port, resulting in no video or audio output.
Start by gently removing the HDMI cable from both the console’s HDMI port and the TV or monitor’s HDMI input port. Inspect the cable for any visible damage or frayed ends. If you notice any defects, it’s advisable to replace the cable with a new one.
Next, carefully reconnect the HDMI cable to both the console and the TV or monitor. Ensure that it is firmly inserted into the HDMI port, with a slight click sound indicating a secure connection.
If the issue persists, try using a different HDMI cable to rule out the possibility of a faulty cable. Sometimes, the cable can become damaged over time or due to excessive bending, resulting in no signal transmission.
Once you have checked and reconnected the HDMI cable, power on your Xbox Series S and see if the video and audio output are restored. If not, proceed to the next step for further troubleshooting.
Step 2: Clean the HDMI Port
If your Xbox Series S HDMI port is still not functioning correctly after checking for loose connections, the next step is to clean the port. Over time, dust, dirt, or debris can accumulate in the HDMI port, obstructing the connection and causing interference with the signal.
To clean the HDMI port, you will need a soft, dry brush, such as a clean toothbrush or a small electronics cleaning brush. Make sure the console is turned off and unplugged before proceeding.
Gently insert the brush into the HDMI port and carefully brush away any visible debris or dust particles. Be cautious not to apply excessive force, as this could damage the delicate pins inside the port. Use a small flashlight or magnifying glass to inspect the port for any stubborn dirt or debris that may require further cleaning.
If you notice any sticky residue or stubborn grime, you can dampen a cotton swab or a lint-free cloth with a small amount of isopropyl alcohol. Lightly swab the affected area, being careful not to let any liquid enter the port. Allow the port to air dry completely before reconnecting the HDMI cable.
After cleaning the HDMI port, reconnect the HDMI cable to both the console and the TV or monitor. Ensure a secure connection and power on the Xbox Series S to check if the video and audio output have been restored. If the issue persists, move on to the next step for further troubleshooting.
Step 3: Inspect the HDMI Cable
If you’re still experiencing problems with the HDMI port on your Xbox Series S, it’s time to inspect the HDMI cable itself. A damaged or faulty cable can prevent proper signal transmission and lead to issues with video and audio output.
Start by examining the length of the HDMI cable for any visible signs of damage, such as frayed ends or cuts. If you spot any such issues, it’s recommended to replace the cable with a new one.
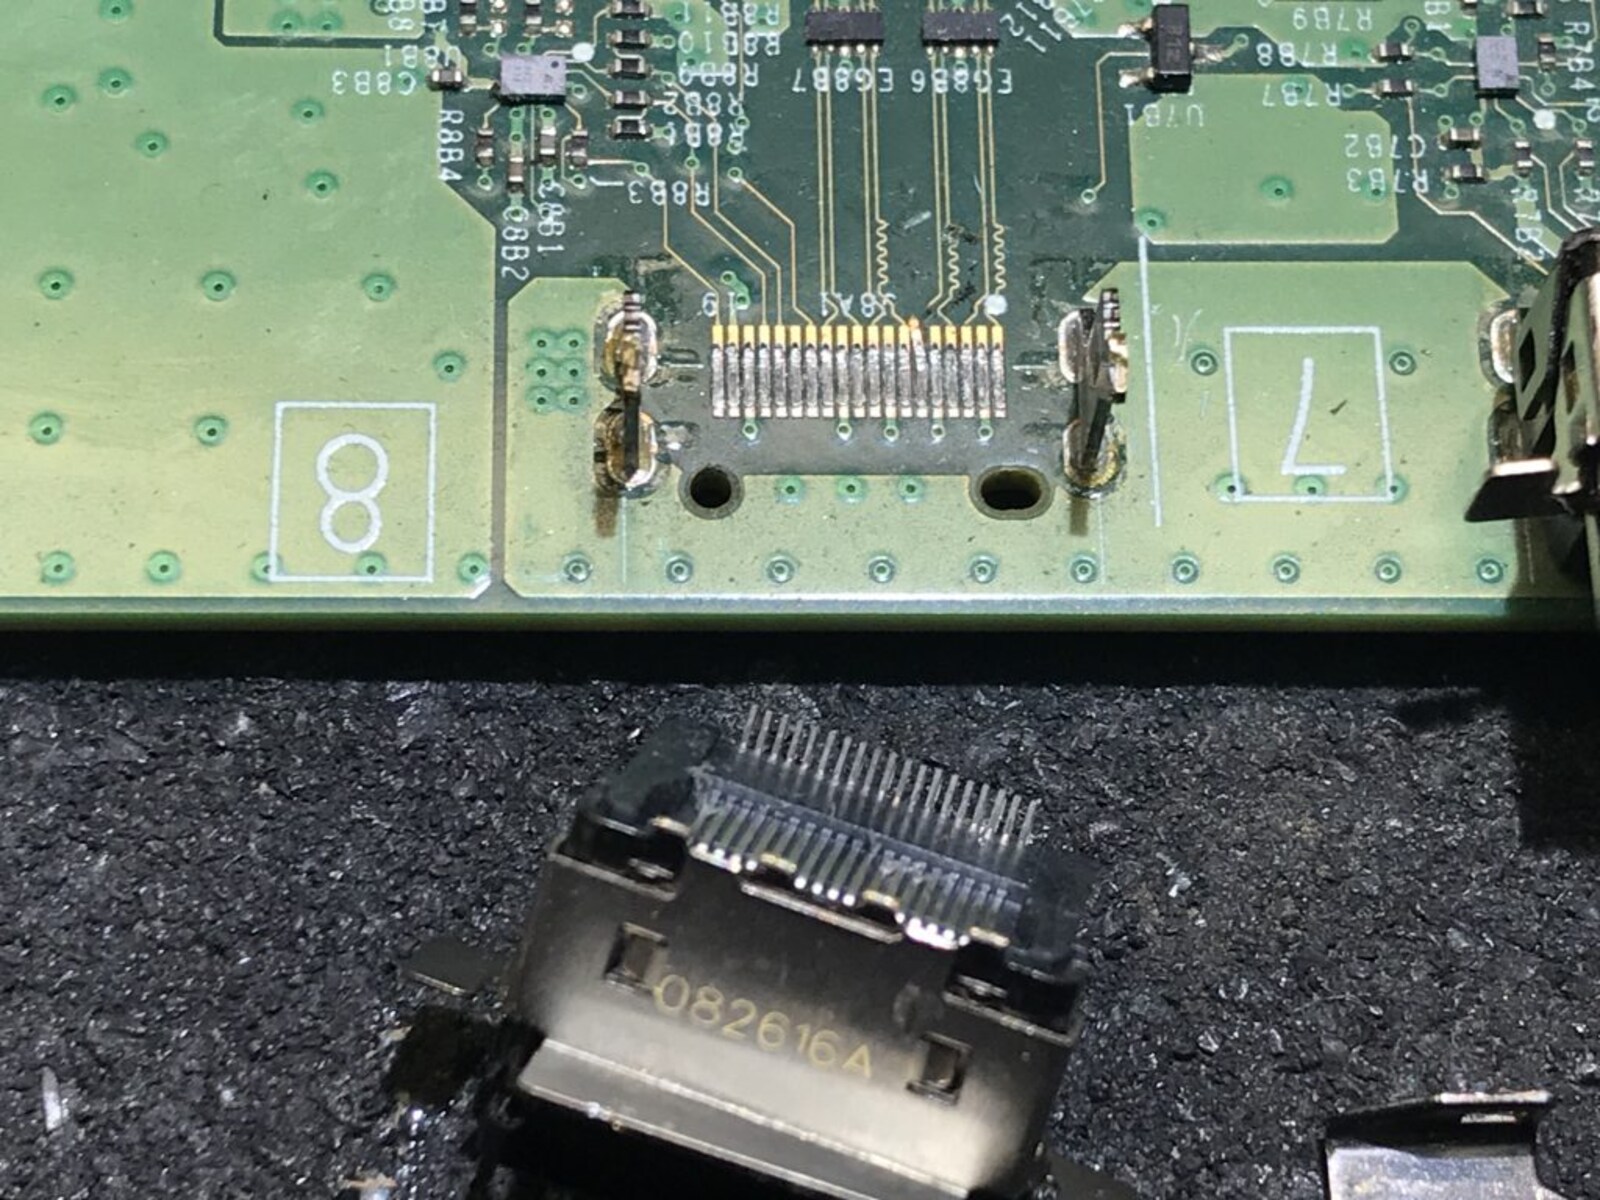
Next, check the connectors at both ends of the HDMI cable. Look for any bent pins, corrosion, or dirt buildup that could impede the connection. If you notice any of these issues, you can try gently straightening the bent pins using a pair of tweezers. For dirt or corrosion, you can use a soft, dry cloth to carefully clean the connectors.
It’s also worth checking the length and gauge of the HDMI cable. If the cable is excessively long or has a lower gauge rating, it may not be capable of transmitting the necessary signal strength. In such cases, consider using a shorter and higher-quality HDMI cable that meets the recommended specifications for your Xbox Series S.
After inspecting the HDMI cable and ensuring that it is in good condition, reconnect it to both the console’s HDMI port and the TV or monitor’s HDMI input port. Make sure the connection is secure, and then power on your Xbox Series S to check if the issue has been resolved. If the problem persists, proceed to the next step for further troubleshooting.
Step 4: Try a Different HDMI Cable
If you’ve gone through the previous steps and the HDMI port on your Xbox Series S is still not functioning properly, it’s time to try using a different HDMI cable. Sometimes, the original cable may be faulty or incompatible, leading to issues with video and audio output.
Start by acquiring a known working HDMI cable from a reliable source. It’s important to use a cable that meets the necessary HDMI specifications for your Xbox Series S, such as HDMI 2.1 or HDMI 2.0. Avoid using older or lower-quality HDMI cables, as they may not support the required bandwidth for optimal performance.
Disconnect the current HDMI cable from both the console’s HDMI port and the TV or monitor’s HDMI input port. Then, connect the new HDMI cable to both ends, ensuring a secure and snug fit. Ensure that the connectors are properly aligned and inserted fully into the HDMI ports.
Once the new HDMI cable is connected, power on your Xbox Series S and check if the video and audio output are restored. If the issue persists, it’s possible that the problem lies elsewhere, such as in the console’s hardware or settings.
However, if the new HDMI cable resolves the issue and your Xbox Series S is now displaying video and audio correctly, it indicates that the original HDMI cable was faulty. It’s advisable to replace the faulty cable or consider using the new cable as a permanent solution.
If you’re still experiencing problems despite using a different HDMI cable, don’t worry. There are still additional troubleshooting steps you can take to resolve the issue. Continue to the next step for further troubleshooting.
Step 5: Update Xbox Series S Software
If you’re facing persistent issues with the HDMI port on your Xbox Series S, it’s essential to ensure that your console’s software is up to date. Software updates often include bug fixes and improvements that can address compatibility issues and enhance system performance.
To update the software on your Xbox Series S, follow these steps:
- Ensure that your console is connected to the internet.
- Power on your Xbox Series S and sign in to your Xbox account.
- Press the Xbox button on your controller to open the Guide menu.
- Select “Settings” and navigate to the “System” tab.
- Choose “Updates & downloads” and select “Console update available” if prompted.
- Follow the on-screen instructions to download and install the software update.
It may take some time for the update to download and install, depending on your internet connection speed. Ensure that your console remains powered on and connected to the internet throughout the process.
Once the update is complete, restart your Xbox Series S and check if the HDMI port issue is resolved. If not, proceed to the next step for further troubleshooting.
Note that software updates may not always fix hardware-related issues with the HDMI port. However, it’s still an important step to ensure that your console is running on the latest software version, which can potentially address any known compatibility or performance issues.
Step 6: Perform a Hard Reset
If you’ve reached this step and the HDMI port on your Xbox Series S is still malfunctioning, performing a hard reset can sometimes help resolve underlying software or hardware issues. A hard reset essentially forces the console to restart and clears temporary data that may be causing the HDMI port problem.
Before performing a hard reset, it’s important to note that this process will turn off your Xbox Series S and potentially interrupt any ongoing downloads or background processes. However, it will not delete your saved games or settings.
To perform a hard reset on your Xbox Series S, follow these steps:
- Ensure that your console is turned on.
- Press and hold the power button on the front of the console for approximately 10 seconds.
- Release the power button and wait for the console to shut down completely.
- Once the console is completely powered off, unplug the power cable from the back of the Xbox Series S.
- Wait for around 10-15 seconds.
- Reconnect the power cable to the console.
- Press the power button to turn on your Xbox Series S.
After performing a hard reset, check if the issue with the HDMI port has been resolved. Reconnect the HDMI cable to both the console and the TV or monitor, ensuring a secure connection. Power on your Xbox Series S and see if the video and audio output are restored.
If the problem persists even after a hard reset, it’s recommended to contact Xbox support or a professional repair service to further diagnose and resolve the issue. They can provide expert assistance and potentially offer solutions or repairs specific to your Xbox Series S.
Step 7: Contact Xbox Support or Repair Service
If you’ve followed all the previous steps and are still experiencing issues with the HDMI port on your Xbox Series S, it’s time to reach out to Xbox support or a professional repair service. They have the expertise and resources to handle more complex hardware or software problems.
Xbox support can provide guidance and troubleshooting assistance over the phone, chat, or email. They may be able to offer additional solutions or recommend specific actions to address the HDMI port issue. Before contacting support, make sure to have your console’s serial number and purchase information at hand, as they may ask for these details.
If your Xbox Series S is still within the warranty period, you may be eligible for a repair or replacement at no cost. Xbox support will guide you through the warranty claim process and provide instructions on how to proceed.
If your console is no longer covered by warranty or if you prefer professional assistance, consider contacting a reputable repair service. These services specialize in console repairs and may have the necessary expertise and equipment to diagnose and fix the HDMI port issue. Research and choose a reliable repair service with positive customer reviews and a track record of quality repairs.
Remember to inquire about the cost, estimated turnaround time, and any warranty or guarantee offered by the repair service before proceeding.
By contacting Xbox support or a professional repair service, you can ensure that your Xbox Series S receives the necessary attention and expert care to resolve the HDMI port problem. Their assistance can provide you with peace of mind and a reliable solution to get your console back to its optimal performance.