Introduction
Welcome to this guide on how to repair the HDMI port on your PS4. The PlayStation 4 (PS4) is a popular gaming console that provides gamers with an immersive gaming experience. The HDMI port on the PS4 is a crucial component that allows you to connect your console to your television or monitor, enabling you to enjoy games in high definition.
However, over time, you may encounter issues with your PS4’s HDMI port. These issues can range from the port not working at all to the presence of audio or video glitches. While it can be frustrating to encounter these problems, the good news is that many HDMI port issues can be resolved with some basic troubleshooting and repair techniques.
In this guide, we’ll explore common issues with HDMI ports on the PS4, and provide you with a step-by-step guide on how to repair the HDMI port yourself. We’ll also discuss the tools and materials you’ll need for the job, as well as tips on preventing future HDMI port damage. Additionally, we’ll look at possible alternatives to HDMI for connecting your PS4, just in case you need a temporary solution while you’re repairing the port.
So, if you’re ready to bring your PS4 HDMI port back to life and get back to gaming, let’s dive into the world of HDMI port repair!
What is HDMI and why is it important?
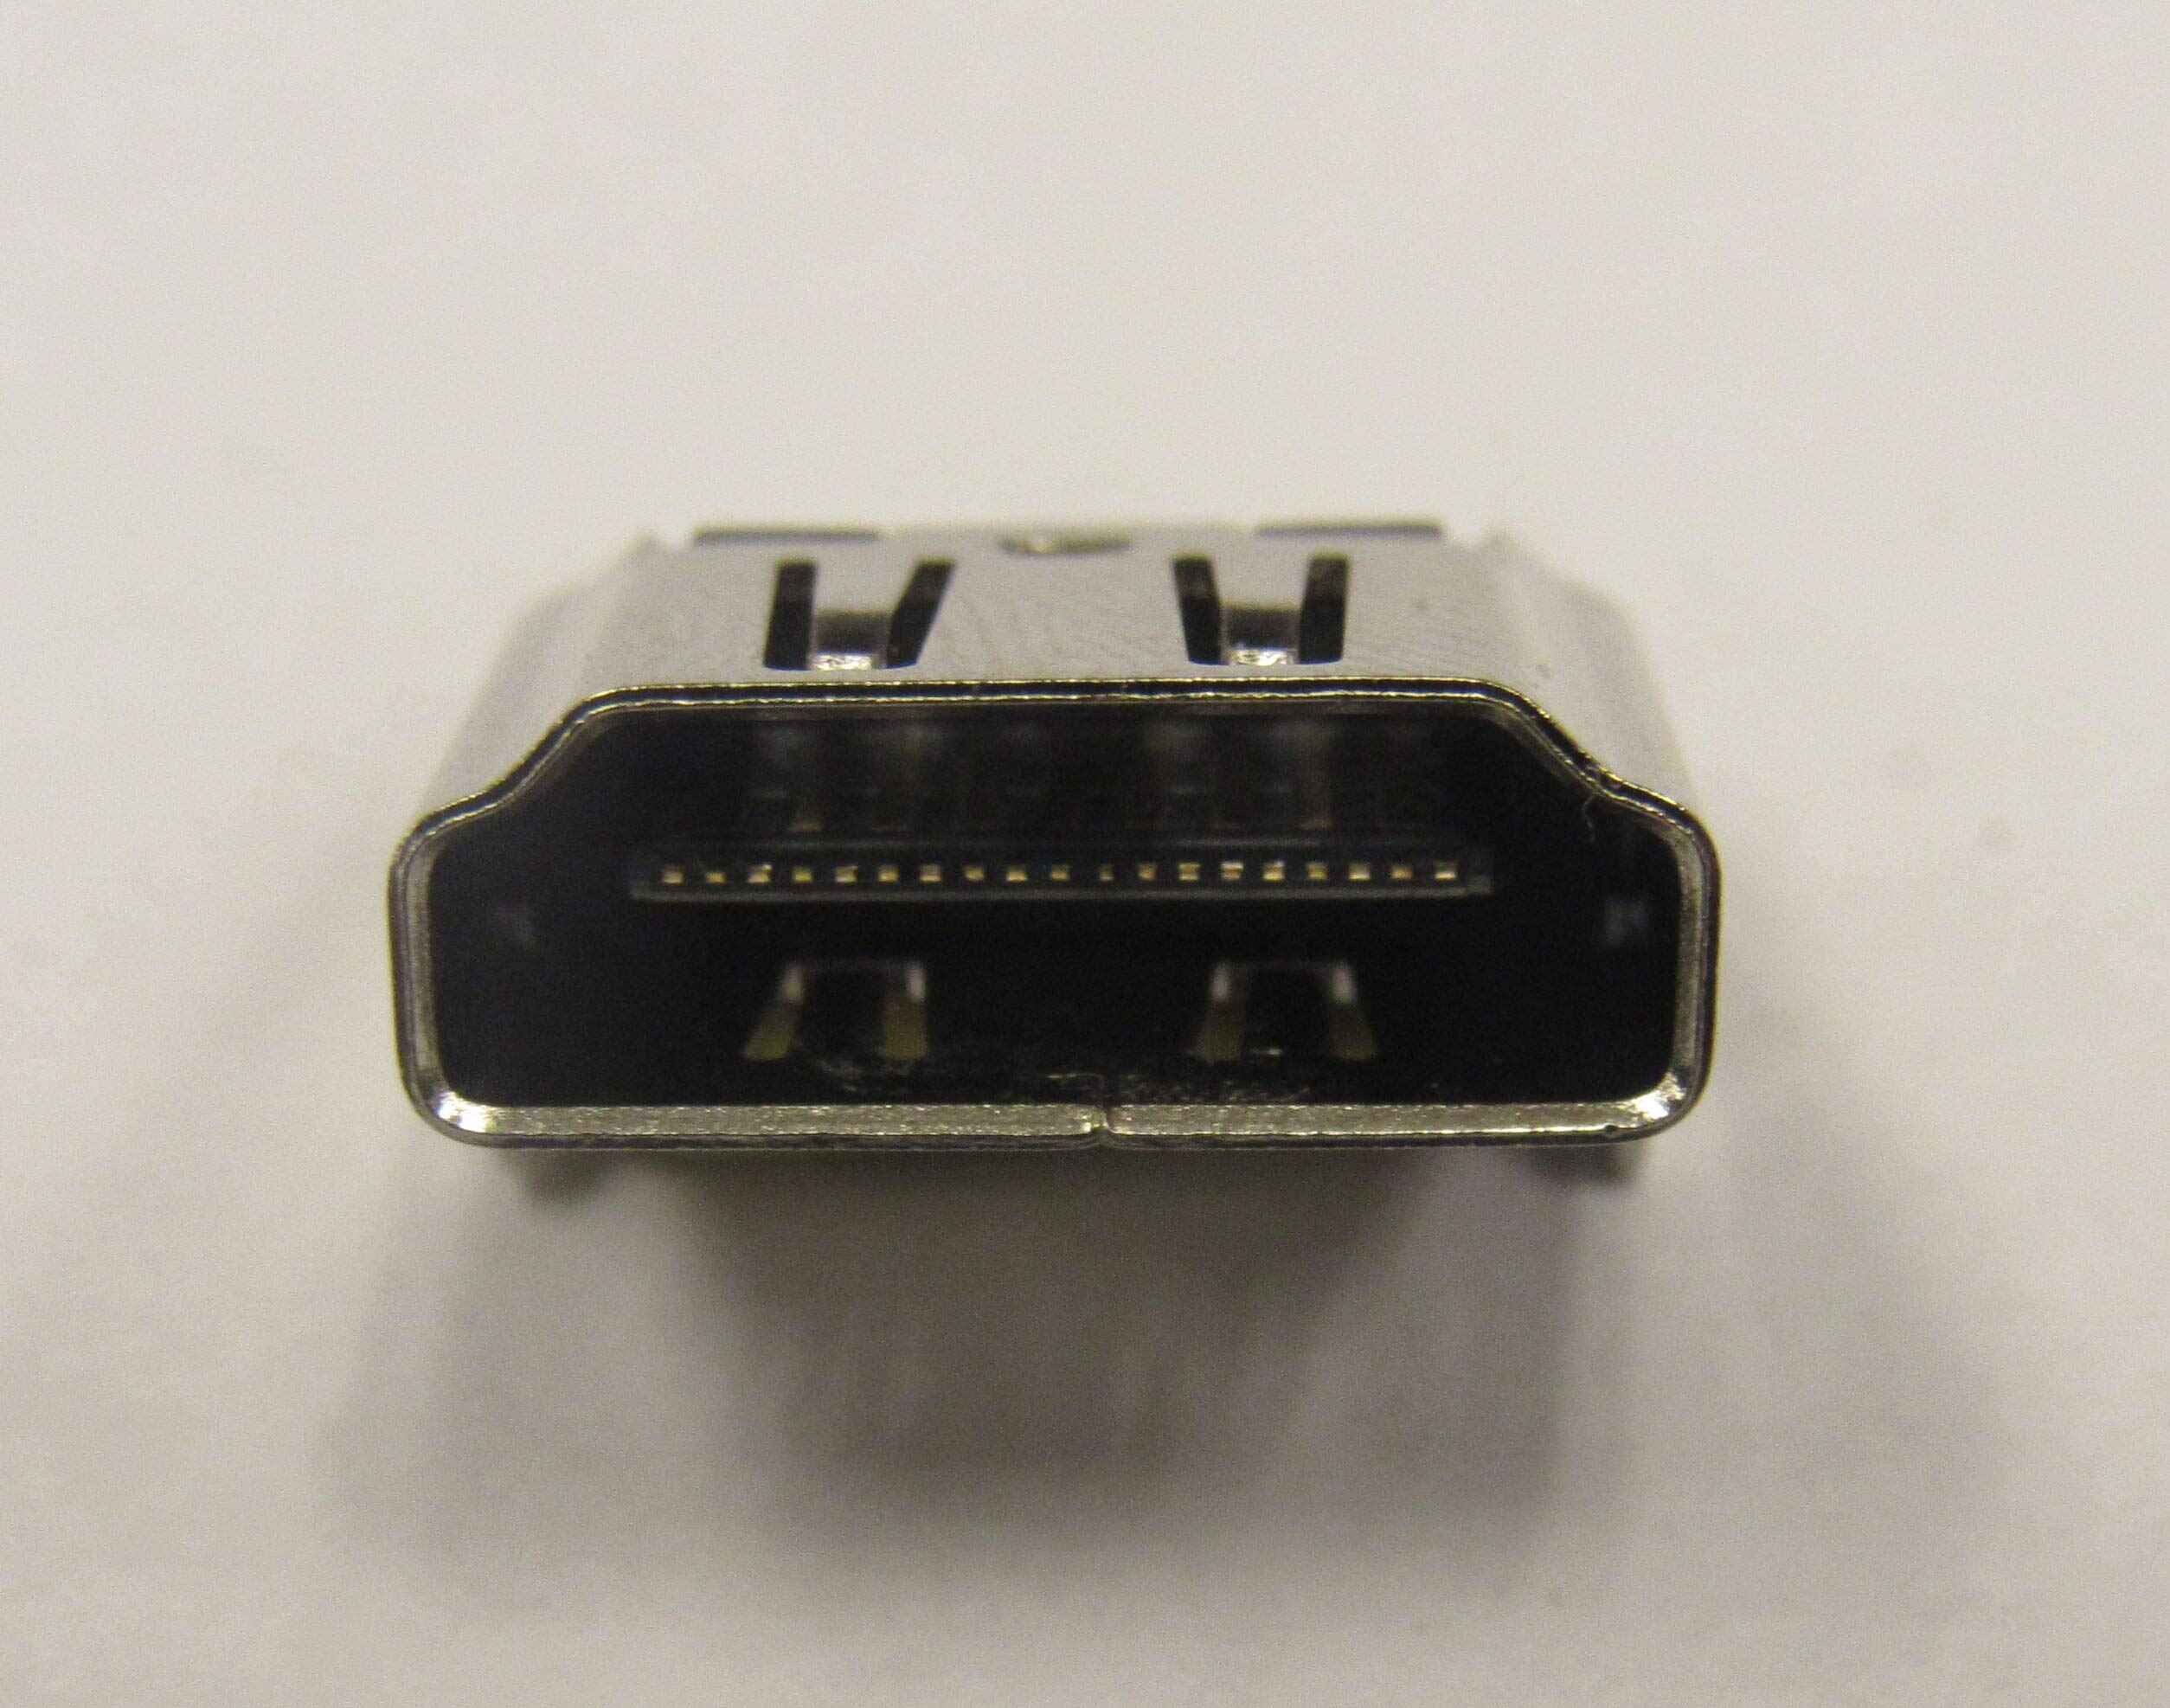
HDMI stands for High-Definition Multimedia Interface. It is a standard connection for transmitting high-quality audio and video signals between devices such as gaming consoles, televisions, and audio/video receivers. HDMI has become the go-to option for connecting devices due to its ability to transmit uncompressed digital signals, resulting in superior audio and video quality.
The HDMI port on your PS4 plays a crucial role in connecting your console to a display device like a television or monitor. It allows you to enjoy your gaming experience in stunning high-definition resolution, immersing you in vibrant visuals and crisp audio.
With HDMI, you can stream games, watch movies, and enjoy other multimedia content with exceptional clarity and detail. It supports various video resolutions, including Full HD (1080p), 4K Ultra HD, and even 8K, providing you with a visually stunning experience.
In addition to superior video quality, HDMI also delivers high-quality audio. It can transmit multi-channel audio formats, such as Dolby TrueHD and DTS-HD Master Audio, providing immersive sound to complement your gaming sessions. This ensures that you can enjoy every sound effect, dialogue, and musical score with clarity and precision.
Another advantage of HDMI is its simplicity and convenience. With just a single cable, you can connect your PS4 to your display device, eliminating the need for multiple cables and connections. HDMI also supports HDMI CEC (Consumer Electronics Control), which allows you to control multiple devices with a single remote control.
Given the importance of HDMI in delivering high-quality audio and video signals, it is crucial to ensure that the HDMI port on your PS4 is in proper working condition. Any issues or damage to the HDMI port can significantly impact your gaming experience, leading to frustrating audio or video interruptions or a complete loss of connection.
Now that we understand what HDMI is and why it is important, let’s explore the common issues that can arise with the HDMI ports on the PS4 and how to address them.
Common issues with HDMI ports on PS4
While the HDMI port on your PS4 is designed to provide seamless connectivity, it can sometimes encounter issues that prevent you from enjoying your gaming experience to its fullest. Here are some of the common problems that PS4 users may face with their HDMI ports:
- No signal: This occurs when the HDMI port fails to establish a connection with the display device. It can be due to a faulty cable, loose connections, or an issue with the port itself.
- Video or audio distortion: You may experience video or audio glitches, such as flickering, pixelation, or static noise. This can be caused by a damaged HDMI cable, improperly configured display settings, or a faulty HDMI port.
- Intermittent connection: The HDMI signal may randomly drop, causing the display to go black or the audio to cut out momentarily. This can be frustrating and disrupt your gaming experience.
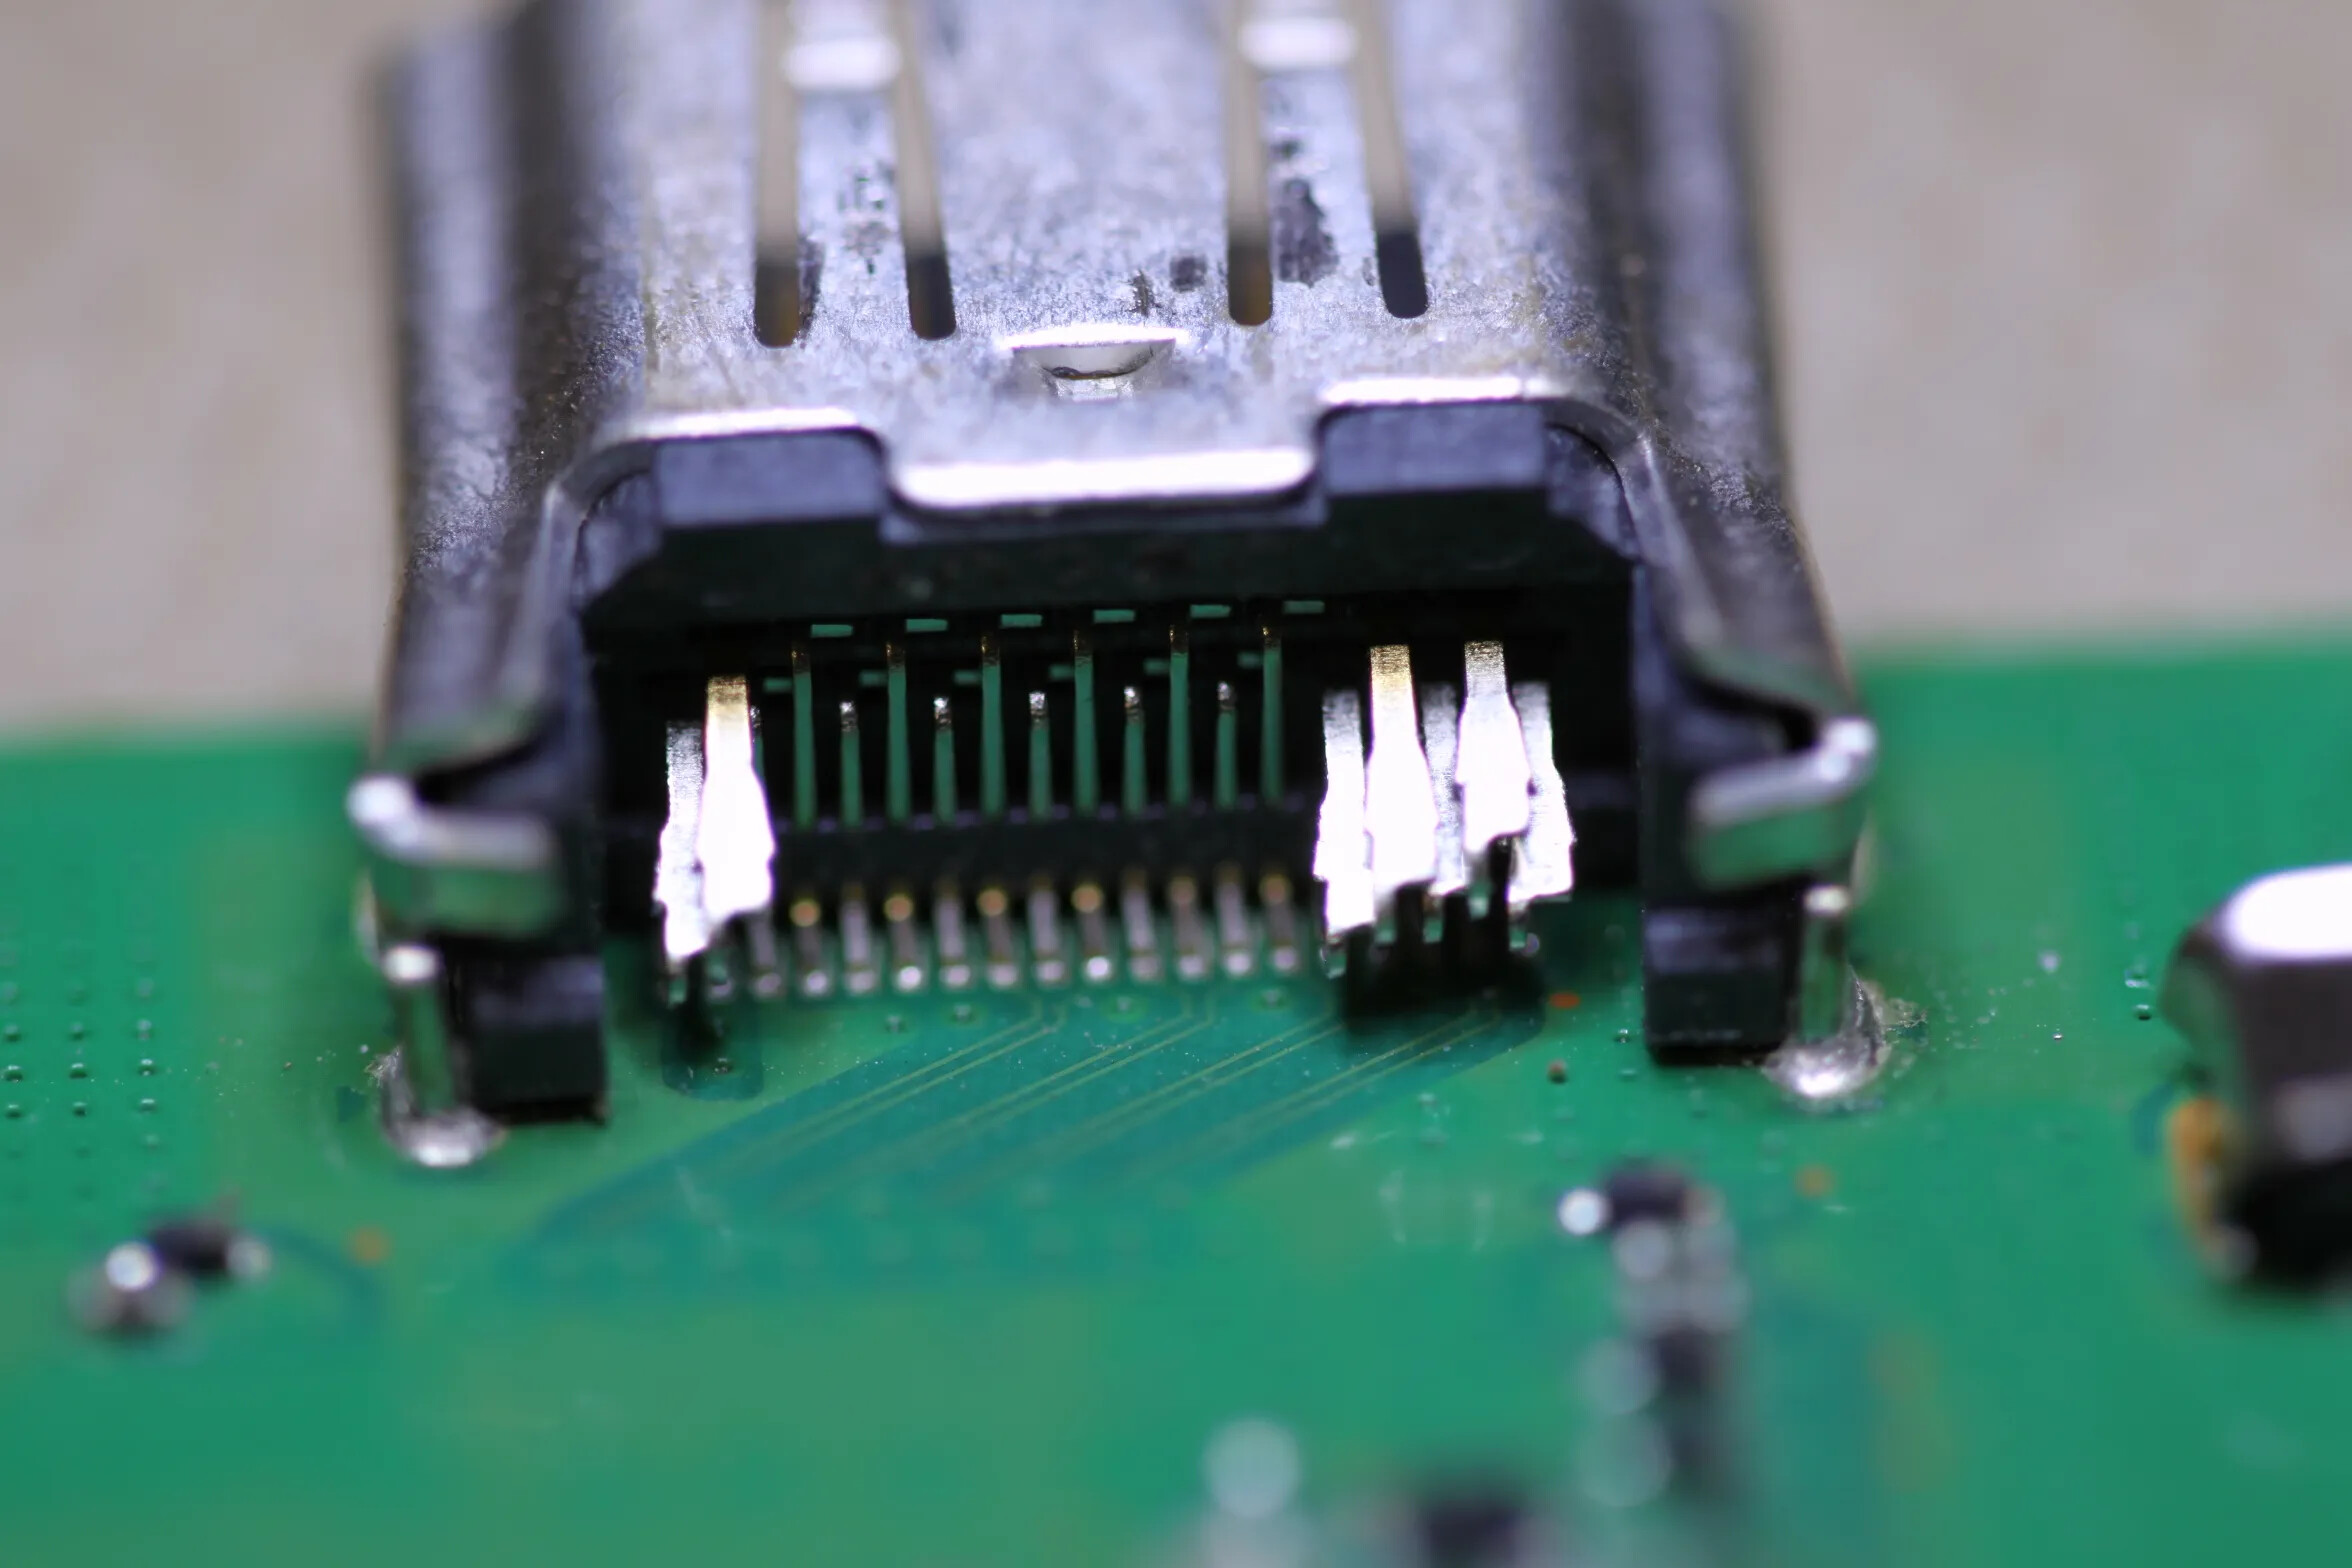
- Physical damage to the port: Over time, the HDMI port may become loose or suffer damage due to accidental tugs, bent pins, or exposure to dust and debris. This can result in a faulty connection or no connection at all.
These issues can be frustrating but rest assured that many of them can be resolved without the need for professional repair services. In the following sections, we will walk you through the steps to troubleshoot and repair your PS4’s HDMI port.
Remember, before proceeding with any repairs, it is important to verify that the issue lies with the HDMI port and not with the display device or HDMI cable. Testing your PS4’s HDMI port with different cables and connecting it to a different display device can help identify the source of the problem.
Now that we have identified the common issues with HDMI ports on the PS4, let’s move on to the tools and materials required for repairing the HDMI port.
Tools and materials needed for HDMI port repair
Repairing the HDMI port on your PS4 requires some basic tools and materials. Here are the items you will need to gather before starting the repair process:
- Screwdriver: You will need a screwdriver that matches the type of screws used to secure the PS4’s casing. Most commonly, a Phillips or Torx screwdriver is required.
- Opening tool: An opening tool, such as a plastic spudger or a guitar pick, is essential for prying open the PS4’s casing without causing any damage.
- HDMI port replacement: Depending on the extent of the damage to your HDMI port, you may need to purchase a replacement port. Ensure that the replacement port is compatible with your PS4 model.
- Heat gun or hairdryer: In some cases, the HDMI port might require reflowing to fix any internal connection issues. A heat gun or hairdryer can be used to apply focused heat on the port for a short duration. Be cautious not to overheat the components or cause any damage.
- Soldering iron and solder: If there are specific soldering connections that need to be repaired or replaced on the HDMI port, a soldering iron and solder will be necessary.
- Heat-resistant tape or adhesive: This is optional but can be useful to secure the HDMI port or provide additional stability after repair.
- Cleaning supplies: It is important to clean the HDMI port area and remove any dust, debris, or oxidation that may affect the connection. Cotton swabs, isopropyl alcohol, and compressed air can be used for cleaning purposes.
Before you begin the repair process, make sure you have these tools and materials readily available. It is also important to work in a clean and well-lit area to avoid misplacing any small components or causing accidental damage to other parts of your PS4.
Now that you have gathered the necessary tools and materials, let’s move on to the step-by-step guide for repairing your PS4’s HDMI port.
Step-by-step guide to repairing the HDMI port on PS4
Repairing the HDMI port on your PS4 can be done with some basic tools and careful execution. Here is a step-by-step guide to help you through the process:
- First, ensure that your PS4 is completely powered off and unplugged from the power source before starting any repair work. This is essential to avoid any potential electrical hazards.
- Use the appropriate screwdriver to remove the screws securing the outer casing of your PS4. Carefully lift off the casing to expose the internal components.
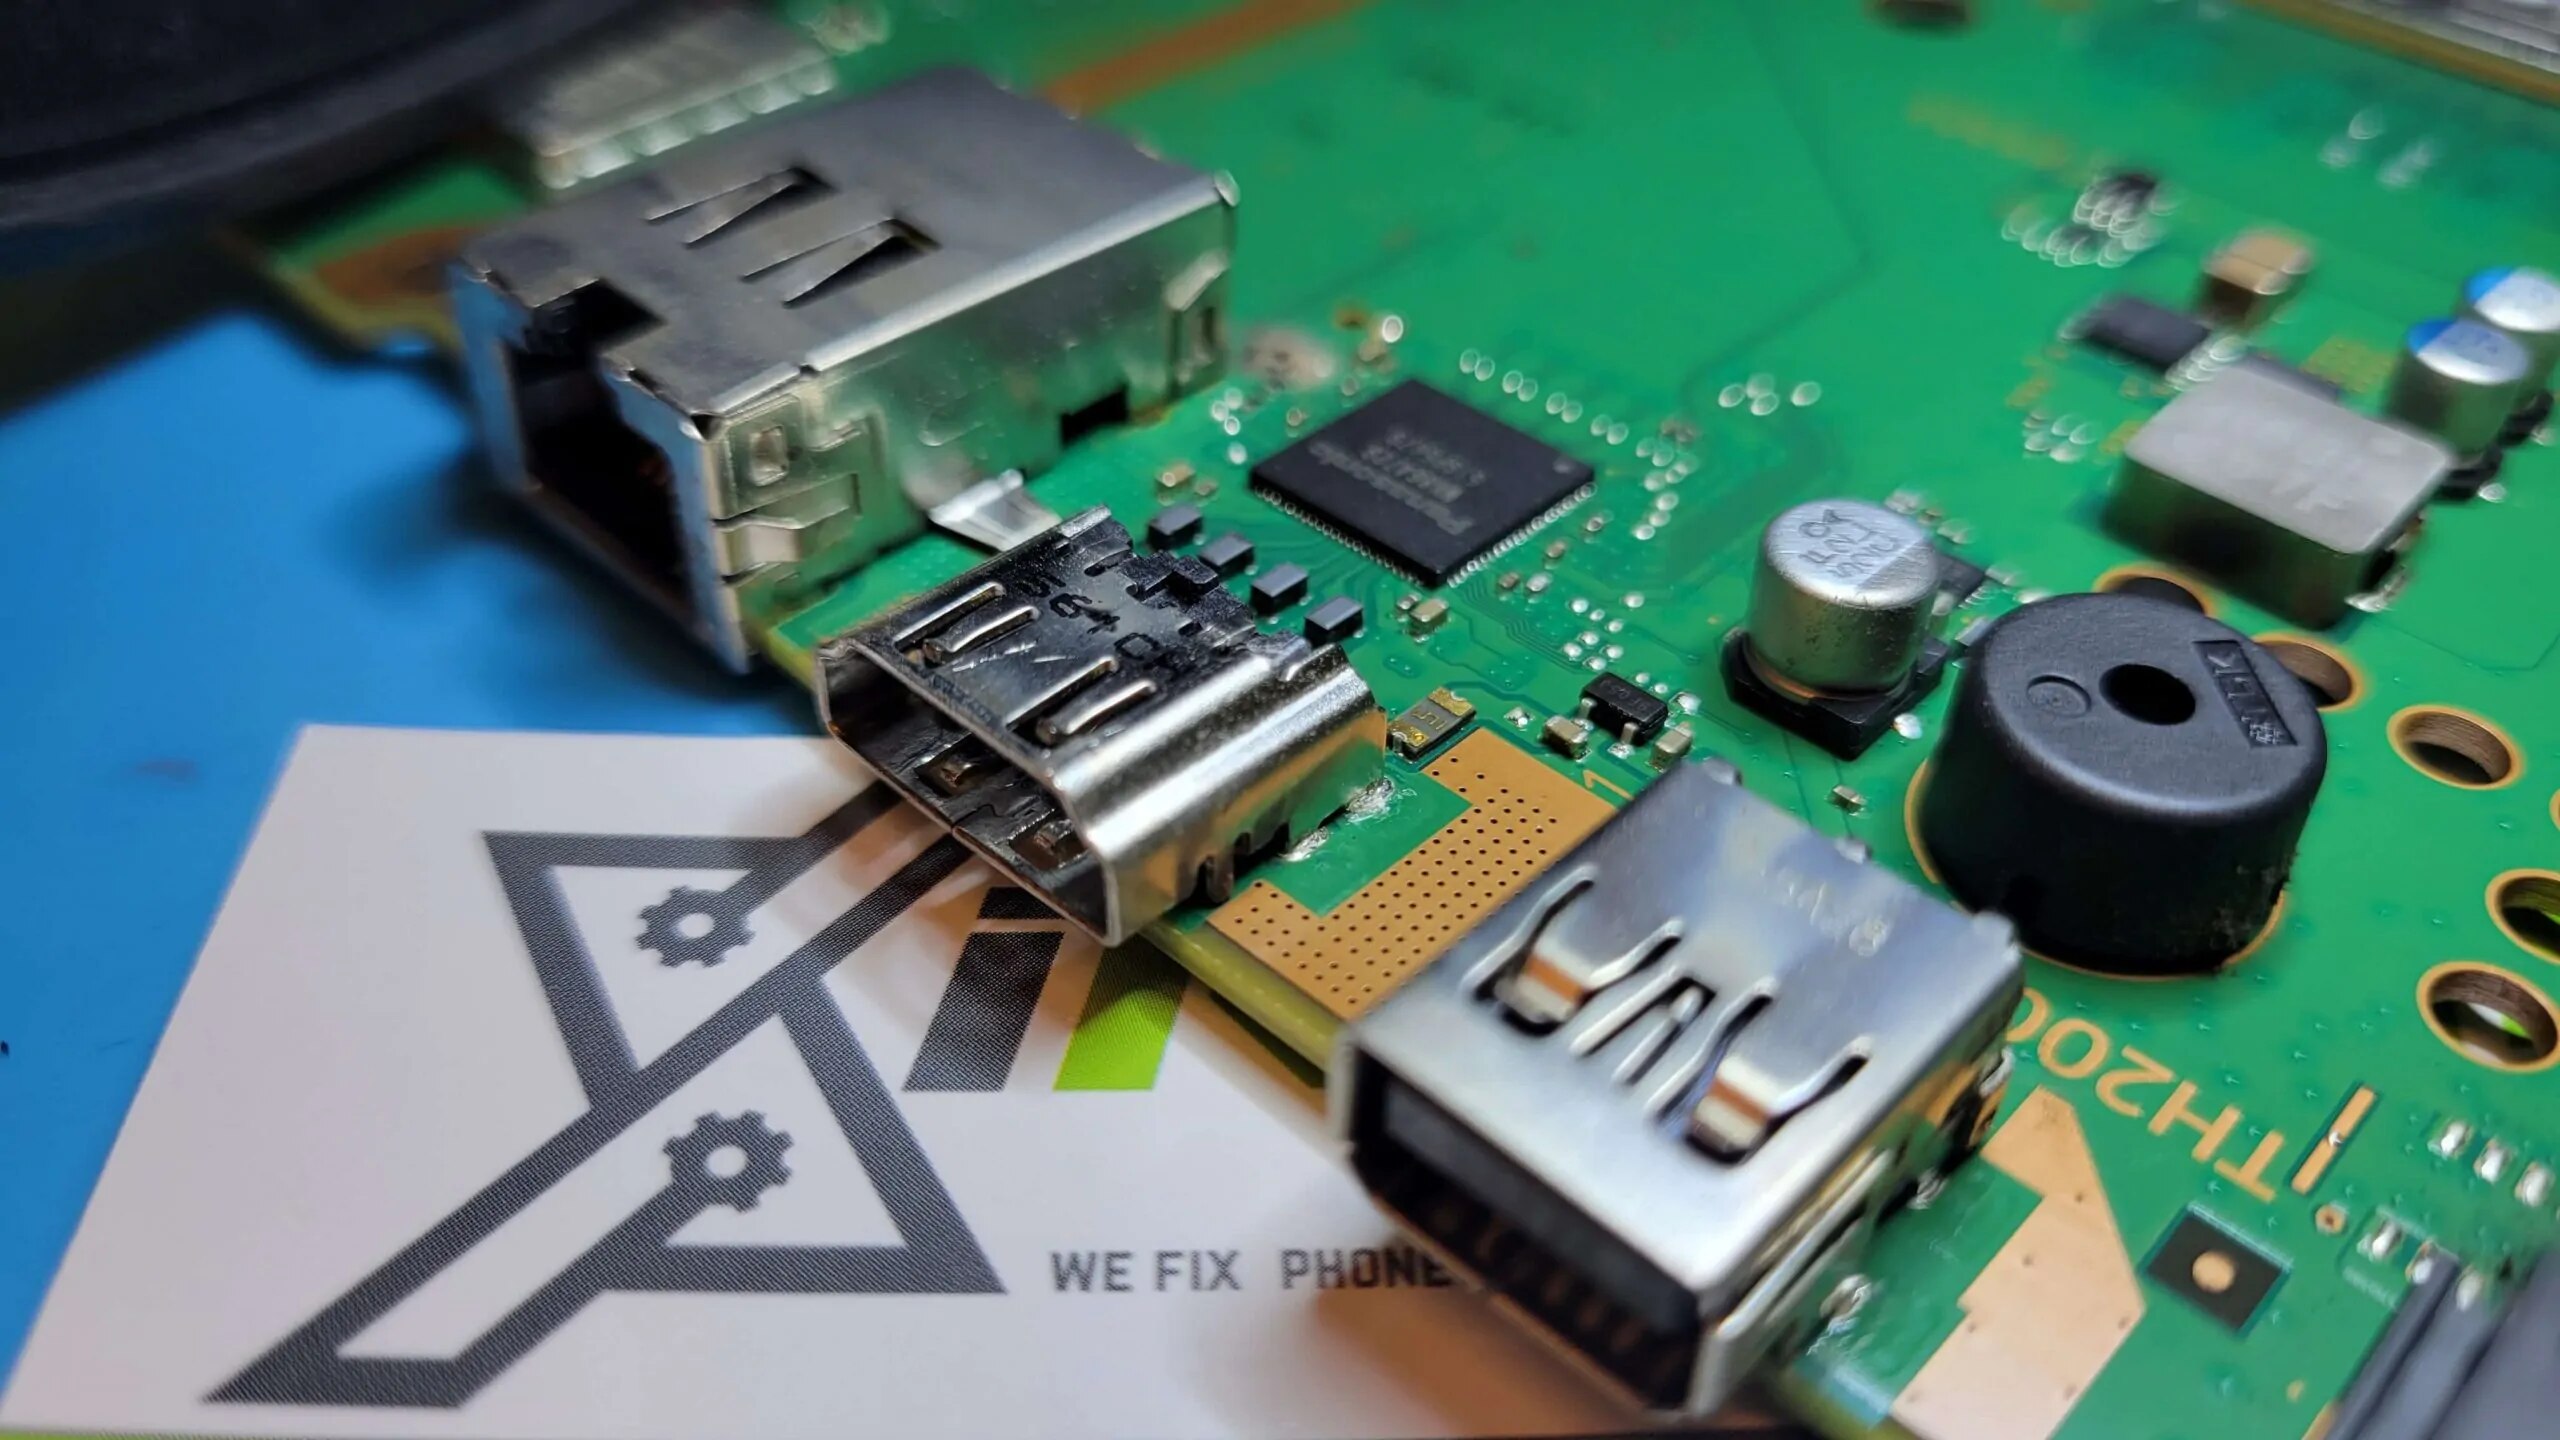
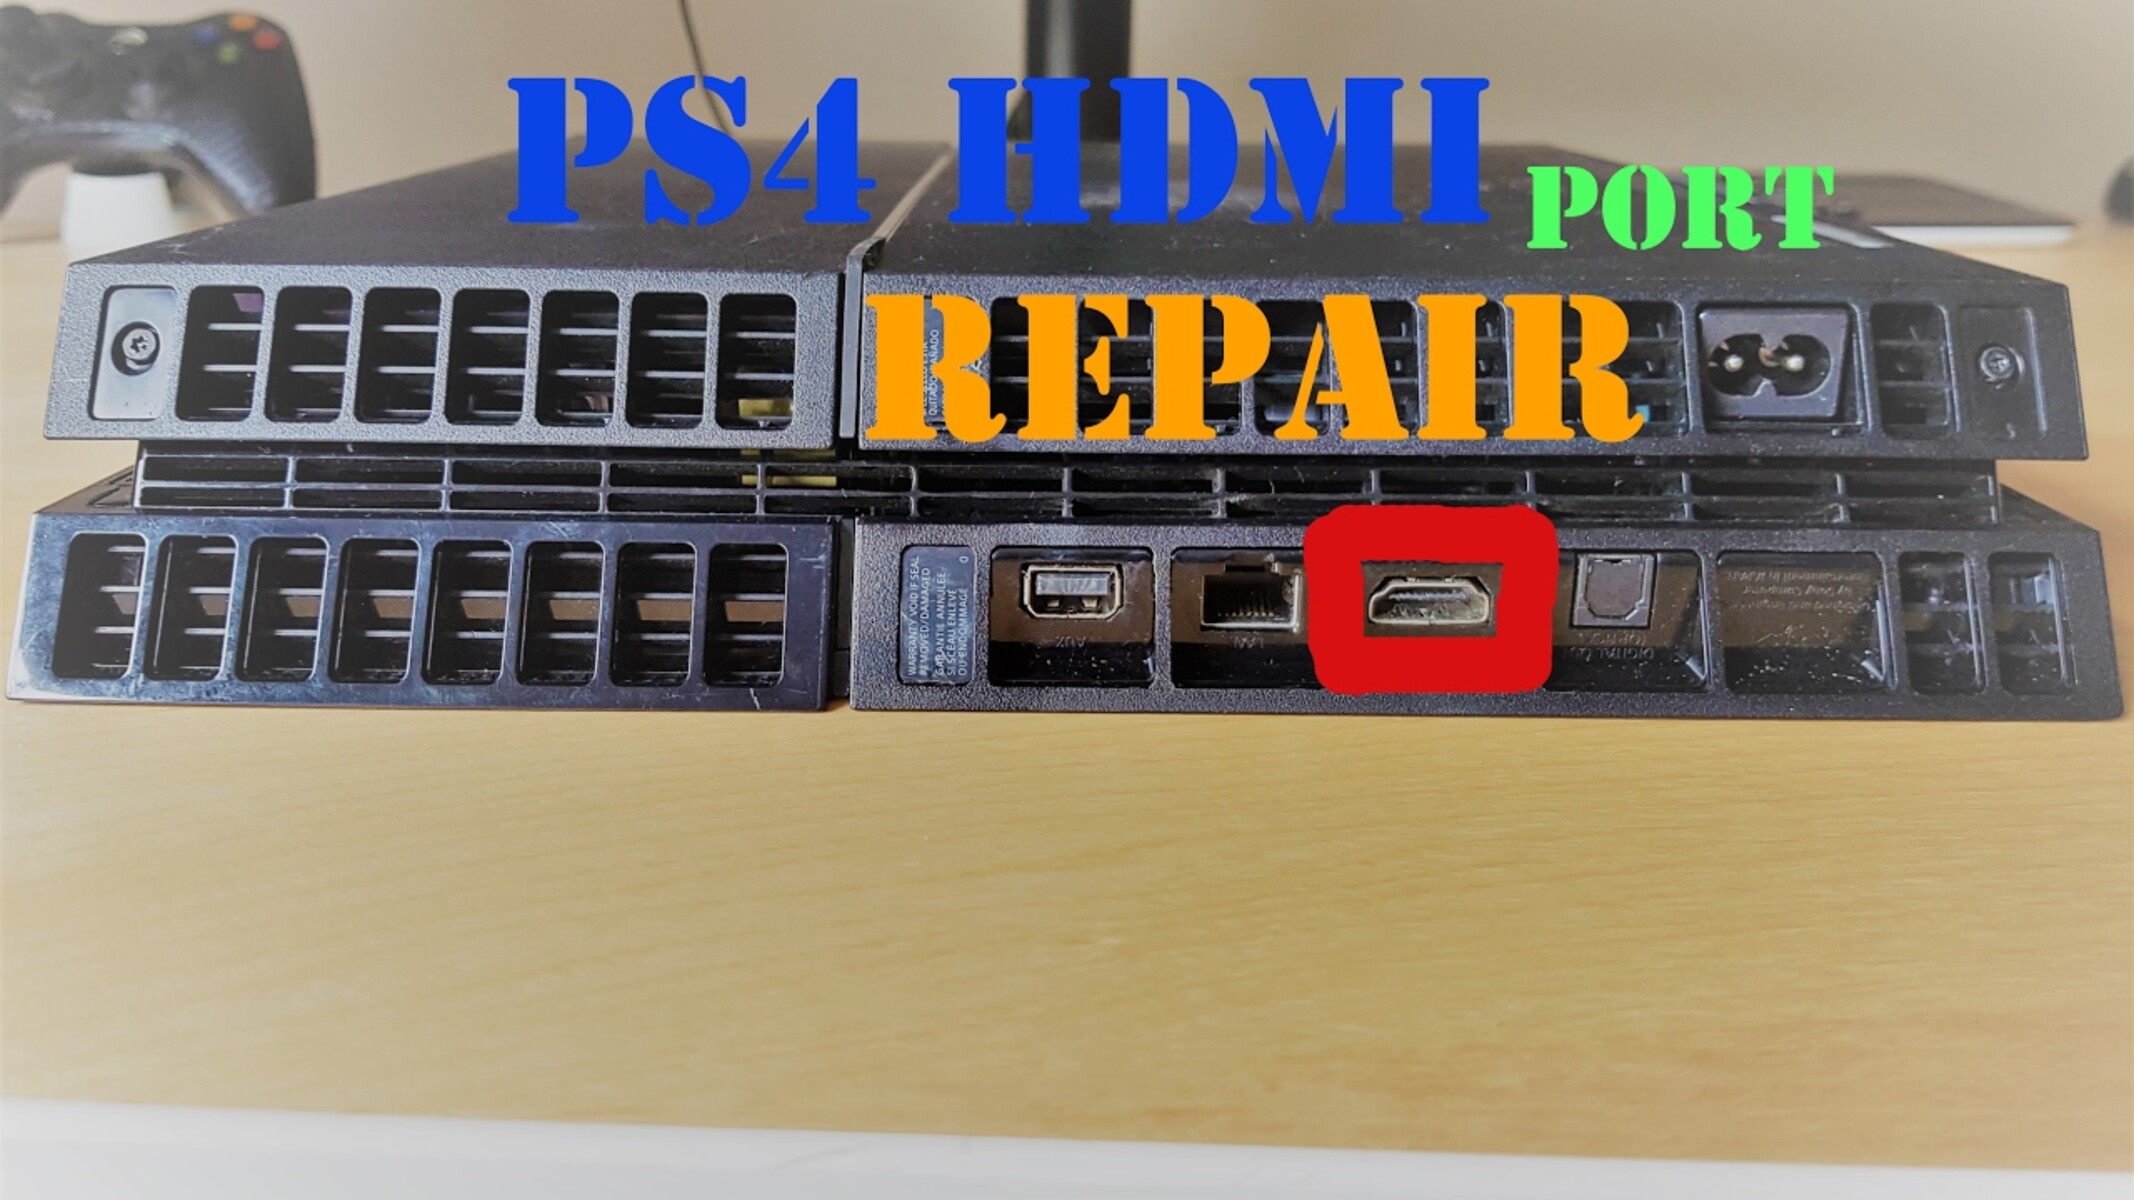
- Locate the HDMI port on your PS4. Inspect it for any visible signs of damage, such as bent or broken pins, loose connections, or debris. If necessary, use compressed air and cotton swabs with isopropyl alcohol to clean the port and remove any dust or debris.
- If the HDMI port is damaged beyond repair, you will need to replace it. Gently disconnect the cables connected to the port and remove any screws or clips holding it in place. Replace the damaged HDMI port with a new one that matches your PS4 model.
- If the HDMI port is not physically damaged but you are experiencing connectivity issues, you may need to reflow the port. Using a heat gun or hairdryer on a low to medium setting, apply heat directly to the HDMI port for a short duration. Be cautious not to overheat the surrounding components.
- If there are any solder connections that need repair or replacement, you will need to use a soldering iron and solder. Ensure that you have the necessary skills and experience in soldering before proceeding.
- Once the repair work is complete, reassemble your PS4 by reversing the steps taken to disassemble it. Make sure that all cables and components are properly connected and secured. Double-check that the screws are tightened but not overly tightened, as this can damage the casing.
- Plug your PS4 back into the power source and turn it on. Connect it to your display device using a new HDMI cable to test the repaired HDMI port.
- If the HDMI port is still not functioning properly, it may indicate a more severe hardware issue. In this case, it is recommended to seek professional assistance or contact the manufacturer for further support.
Remember, the process of repairing the HDMI port on your PS4 requires careful handling and attention to detail. If you are unsure or uncomfortable with any step, it is recommended to seek professional help to avoid further damage.
With the HDMI port repaired, you can now enjoy high-quality audio and video on your PS4 once again. However, don’t forget to test the repaired port thoroughly before assuming the repair is successful. Let’s move on to the next section to learn about testing the repaired HDMI port.
Testing the repaired HDMI port
Once you have successfully repaired the HDMI port on your PS4, it’s important to test it to ensure that it is functioning properly. Here is a step-by-step guide on how to test the repaired HDMI port:
- Connect your repaired PS4 to the power source and turn it on. Make sure that all the cables are securely connected.
- Plug one end of the HDMI cable into the repaired HDMI port on your PS4, and the other end into the HDMI input on your display device, such as a television or monitor.
- Power on your display device and switch it to the correct HDMI input. Most modern televisions and monitors have multiple HDMI inputs, so make sure you select the one you connected your PS4 to.
- If everything is connected correctly, you should see the PS4’s home screen or the game you have inserted into the console. Check if the audio and video are clear and free from any glitches or issues.
- Try playing a game or streaming video content to further test the HDMI port’s performance. Pay attention to any audio or video disruptions, such as black screens, flickering, or distorted sound.
- If you notice any problems, double-check the connections and ensure that the HDMI cable is securely attached to both your PS4 and the display device. It’s also a good idea to test the HDMI port with another HDMI cable and verify if the issue persists.
- If the HDMI port functions properly without any issues, congratulations! You have successfully repaired the HDMI port on your PS4.
- If you encounter persistent issues or experience the same problems as before the repair, it could indicate that there might be other underlying hardware problems. In such cases, it is recommended to seek professional help or contact the manufacturer for further assistance.
By thoroughly testing the repaired HDMI port, you can ensure that your PS4 is back to delivering a high-quality audio and video experience. Enjoy your gaming sessions, movies, and multimedia content without any interruptions!
In the next section, we’ll provide some useful tips to prevent future damage to the HDMI port on your PS4.
Tips to prevent future HDMI port damage
Preventing damage to the HDMI port on your PS4 is essential to ensure a seamless and uninterrupted gaming experience. Here are some useful tips to help you safeguard your HDMI port and prevent future damage:
- Handle cables with care: When connecting or disconnecting HDMI cables, avoid pulling on the cable itself. Instead, gently grasp the connector and insert or remove it from the port. Excessive force or pulling can damage the internal pins or cause the port to loosen over time.
- Avoid frequent plugging and unplugging: While it may be tempting to frequently connect and disconnect HDMI cables, it’s best to minimize these actions. Constantly inserting and removing the cable can wear out the connectors and increase the risk of damage to the HDMI port.
- Proper cable management: Keep your cables organized and free from tangles. This will reduce the strain on the HDMI port and prevent unnecessary stress on the connection. Consider using cable ties or cable management accessories to keep cables neat and tidy.
- Protect the HDMI port: When the PS4 is not in use, consider covering the HDMI port with a protective cap or cover. This will help prevent dust, debris, or accidental damage from affecting the port. You can find HDMI port covers specifically designed for gaming consoles online or at electronics stores.
- Avoid excessive heat: Heat can damage electronic components, including the HDMI port. Ensure that your PS4 has proper ventilation and is not overheating during long gaming sessions. Keep the console away from heat sources, direct sunlight, or enclosed spaces that can trap heat.
- Regular cleaning: Periodically clean the HDMI port area using compressed air and a soft brush to remove any dust, lint, or debris. Be gentle and avoid using excessive force to prevent accidental damage to the port or its pins.
- Use high-quality HDMI cables: Invest in good-quality HDMI cables that are specifically designed for high-definition video and audio transmission. These cables are built to provide a secure and reliable connection, reducing the chances of signal loss or damage to the HDMI port.
- Properly power down your PS4: When turning off your PS4, ensure that you follow the proper shutdown procedure. Turning off the console abruptly or cutting off the power supply while it’s still running can potentially lead to data corruption or damage to the HDMI port.
By following these tips, you can prolong the lifespan of your PS4’s HDMI port and minimize the risk of future damage. Remember, prevention is always better than having to deal with repairs or replacements.
Now that you know how to prevent future HDMI port damage, let’s explore some possible alternatives to HDMI for connecting your PS4 in case you need a temporary solution.
Possible alternatives to HDMI for connecting your PS4
While HDMI is the standard and preferred method of connecting your PS4 to a display device, there are a few alternatives that you can consider if you encounter issues with your HDMI port or need a temporary solution. Here are some possible alternatives to HDMI:
- VGA (Video Graphics Array): If your display device supports VGA input, you can use a VGA cable to connect your PS4. However, keep in mind that VGA only transmits video signals, so you’ll need a separate audio connection.
- DVI (Digital Visual Interface): Some older monitors and televisions may have DVI inputs. You can use a DVI-to-HDMI adapter or cable to connect your PS4 to these devices. As with VGA, audio will need to be handled separately.
- Component cables: PS4 Slim and PS4 Pro models support component cables. These cables divide the video signal into three separate color-coded cables (red, green, and blue), and also require separate audio connections. However, it’s important to note that using component cables may result in a lower maximum resolution than HDMI.
- Wireless Display: The PS4 supports wireless streaming to compatible display devices using the “Remote Play” feature. This allows you to play games on a separate device, such as a laptop or smartphone, and wirelessly mirror the gameplay on the screen. However, for a seamless gaming experience, ensure that both the PS4 and the streaming device have a strong and stable Wi-Fi connection.
- DisplayPort: Some newer monitors and televisions have DisplayPort inputs. If your display device supports it, you can use a DisplayPort-to-HDMI adapter or cable to connect your PS4. This will provide high-quality audio and video signals.
It’s important to remember that these alternatives may have different limitations or requirements compared to HDMI. They may not support the same resolutions or features, and additional cables or adapters may be needed for audio or other connections.
While these alternatives can provide a temporary solution, it’s still recommended to repair or replace the HDMI port on your PS4 for the best performance and compatibility.
Now that we’ve explored some possible alternatives to HDMI, let’s wrap up this guide on repairing the HDMI port on your PS4.
Conclusion
Repairing the HDMI port on your PS4 is an achievable task that can save you from the frustration of a faulty connection and ensure an uninterrupted gaming experience. By following the step-by-step guide provided in this article, you can successfully troubleshoot and repair common issues with the HDMI port on your PS4.
We began by understanding the importance of HDMI and why the HDMI port is crucial for connecting your PS4 to a display device. We then explored the common issues that can arise with the HDMI port, such as no signal, video or audio distortion, intermittent connection, and physical damage.
Equipped with the knowledge of the common issues, we moved on to discussing the tools and materials needed for the repair process. It is important to gather the necessary items, including screwdrivers, opening tools, HDMI port replacements, a heat gun or hairdryer, soldering iron and solder, and cleaning supplies.
The step-by-step guide provided detailed instructions on how to repair the HDMI port on your PS4, from disassembling the console to replacing the port or reflowing the existing one. We then covered the importance of testing the repaired HDMI port, ensuring that it functions properly and delivers high-quality audio and video.
To prevent future HDMI port damage, we provided useful tips on handling cables with care, proper cable management, protecting the HDMI port, avoiding excessive heat, regular cleaning, using high-quality HDMI cables, and powering down the PS4 correctly.
In case the HDMI port issues persist or you need a temporary solution, we discussed possible alternatives to HDMI, including VGA, DVI, component cables, wireless display, and DisplayPort.
With the knowledge gained from this guide, you are now equipped to repair the HDMI port on your PS4 and enjoy uninterrupted gaming. Remember to exercise caution and seek professional help if needed.
So, don’t let HDMI port issues hamper your gaming experience any longer. Dive into the repair process and get back to enjoying your favorite games in high definition!