Introduction
When you receive an application sent by email on your phone, it can be convenient and efficient to fill it out on the go. Whether you’re applying for a job, a scholarship, or any other opportunity, being able to complete the application right from your phone saves you time and allows you to respond quickly.
In this article, we will guide you through the process of filling out an application sent by email on your phone. We’ll provide step-by-step instructions on how to open the email, download and save the application form, fill in the required information, attach additional documents if needed, and submit the application. By following these steps, you’ll be able to complete the application smoothly and ensure that all the necessary information is included.
It’s important to note that the exact steps may vary slightly depending on the email app you’re using and the type of document attached to the email. However, the general process remains the same across different email platforms and mobile devices. By familiarizing yourself with the basic steps outlined in this article, you’ll be well-equipped to handle application forms sent to your email, no matter the specific circumstances.
Now, let’s dive into the step-by-step process of filling out an application sent by email on your phone. Whether you’re on your daily commute or enjoying a coffee break, you can easily complete the application and submit it without any hassle.
Step 1: Open the email
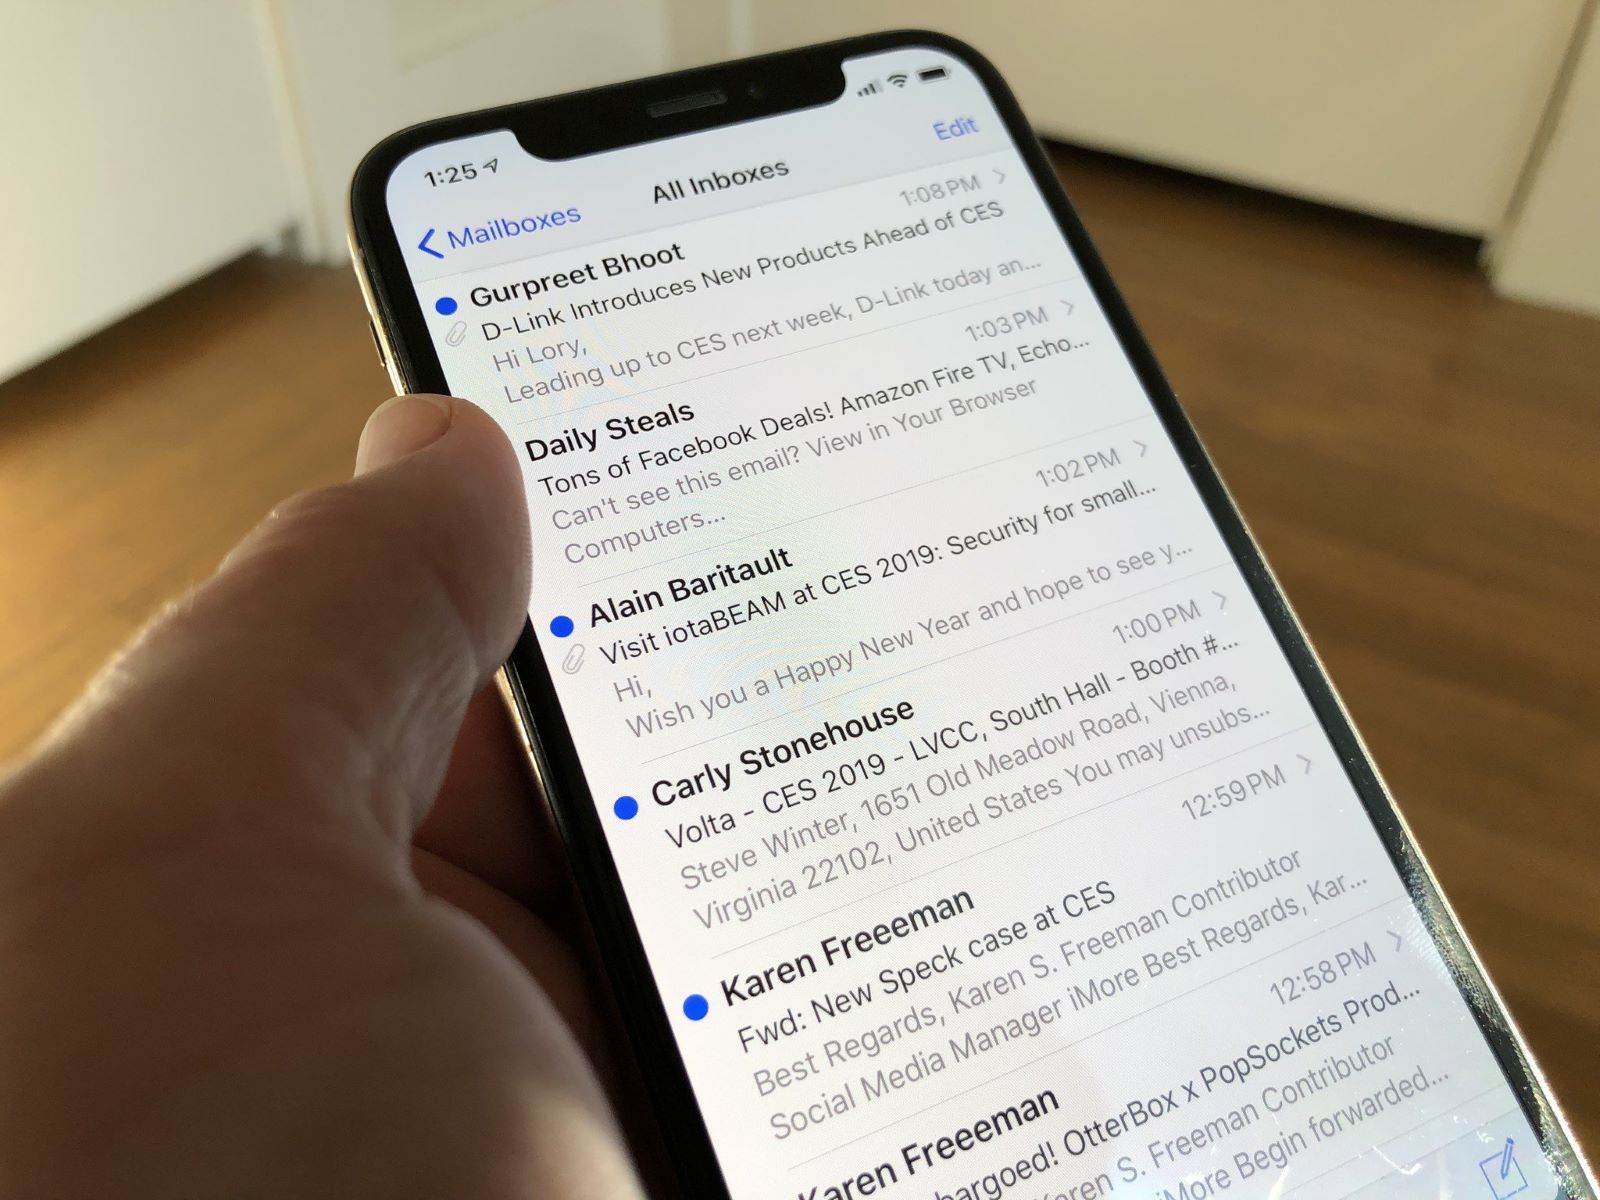
The first step in filling out an application sent by email on your phone is to open the email. This may seem like an obvious step, but it’s essential to ensure that you have access to the application form and any accompanying instructions or requirements.
Open your email app on your phone and navigate to the inbox. Look for the email containing the application. It might be from a specific sender or have a subject line that indicates it is an application or a form to be filled out. Once you locate the email, tap on it to open it.
Ensure that you have a stable internet connection before proceeding further. Some applications may have large file attachments, so you may need to wait a few seconds for the email to fully load, especially if you have a slow internet connection.
If you are unable to find the email with the application, check your spam or junk folder as sometimes legitimate emails can be mistakenly filtered. Additionally, you can use the search feature in your email app to search for relevant keywords related to the application, such as the sender’s name or the name of the opportunity you are applying for.
Once you’ve opened the email, take a moment to read through any instructions or requirements provided by the sender. This will help you understand what information is needed and any specific formatting or document guidelines that you should follow. Make a mental note of any deadlines mentioned in the email as well.
Now that you have successfully opened the email and familiarized yourself with any instructions, you’re ready to move on to the next step: downloading and saving the application form.
Step 2: Download and save the application form
Once you have opened the email containing the application, the next step is to download and save the application form to your phone. Most email apps allow you to download attachments directly to your device, making it easy for you to access and fill out the form at your convenience.
Look for the attachment within the email that represents the application form. It is usually a file with a common format, such as a PDF, Microsoft Word document, or a fillable form in a supported format. Tap on the attachment to begin the download process.
Depending on your email app and device, the attachment may open automatically or prompt you to choose how you want to handle the file. If prompted, select the option to download and save the file to your device. Choose a location on your phone where you can easily locate the downloaded form, such as your “Downloads” folder or a dedicated folder for applications.
Once the download is complete, navigate to the location where you saved the application form on your phone. Ensure that the file is successfully downloaded and accessible. If it’s a PDF or a document in a similar format, you can use a compatible app on your phone to open and view the form. If it’s a fillable form, you’ll be able to type directly into the fields using your phone’s keyboard.
If the email contains multiple attachments, such as supporting documents or reference letters, it’s advisable to save them to the same folder as the application form for easy access later. This way, you’ll have everything you need in one place when filling out the application.
By successfully downloading and saving the application form to your phone, you have taken an important step towards completing the application. The next step is to open the form and start filling in your personal information.
Step 3: Open the application form
After downloading and saving the application form to your phone, it’s time to open the form and prepare it for filling in your personal information. By opening the form, you’ll be able to see the layout, structure, and fields that you are required to complete.
Navigate to the location where you saved the application form on your phone. Locate the file and tap on it to open it. Depending on the file format, your phone may automatically open the form using a compatible app or give you the option to choose an app to open it.
If the form is in a PDF format, you can use a PDF reader app or the default PDF viewer on your phone to open it. If it’s a Word document, you can use a compatible app such as Microsoft Word or Google Docs. For fillable forms, your phone may prompt you to choose an app that supports form filling.
Once the application form is open, take a moment to familiarize yourself with the structure and layout. Scan through the document to get an understanding of the different sections and fields you need to fill in. Note any specific instructions or guidelines provided within the form.
If the form is fillable, you will see fields that you can tap on or select to start typing in your information. These fields may include sections for your name, contact details, educational background, work experience, and other relevant information for the application.
If the form is not fillable, you can still complete it by typing in the information directly below the prompts or sections provided. You can use your phone’s keyboard to type the required information in the appropriate spaces.
If you encounter any difficulties opening the form or are unable to view it properly, check if your phone has the necessary apps or software to handle the file format. You may need to install a compatible app or update your existing apps to ensure smooth access to the form.
By successfully opening the application form on your phone, you’re now prepared to fill in your personal information. The next step will guide you through the process of completing the required fields on the form.
Step 4: Fill in personal information
Now that you have opened the application form on your phone, it’s time to fill in your personal information. This step requires you to provide accurate and relevant details about yourself in the designated fields of the form.
Start by carefully reading each field and section to understand what information is being asked for. Common fields may include your full name, address, phone number, email address, date of birth, and any other personal details required for the application.
Tap on the first field or section that requires your input. Depending on the form, you may be able to type directly into the field using your phone’s keyboard, or you may need to select options from a drop-down menu or checkboxes.
When entering your personal information, make sure to double-check the accuracy of the details. Ensure that you spell your name correctly, provide an up-to-date phone number and email address, and accurately input your residential address.
If the form requires you to provide additional information such as your educational background, work experience, or references, take your time to fill in these sections accurately and comprehensively. Provide details of your qualifications, degrees, relevant courses, positions held, and any other pertinent information that showcases your skills and experiences.
As you progress through the form, make sure to save your progress periodically. Some apps automatically save your input, while others may require you to manually save the form. This way, you can avoid losing any information if there’s an interruption or accidental closure of the app.
If you are unsure about how to answer a particular question or if you need clarification on any of the fields, refer back to the email or any accompanying instructions provided by the sender. It’s important to understand and follow any specific guidelines or requirements given for each section.
Take your time filling in the personal information and ensure that you have completed all the required fields. Remember to review your answers as you go along, checking for any errors or missing details. Once you have finished filling in your personal information, it’s time to move on to the next step: completing the required fields on the form.
Step 5: Complete the required fields
After filling in your personal information, the next step is to complete the required fields on the application form. These fields are specific to the opportunity you are applying for and may vary depending on the nature of the application.
Take a moment to carefully review the form and identify any sections or fields marked as “required” or “mandatory”. These fields must be completed in order for your application to be considered complete. They often include questions or prompts related to your qualifications, skills, experiences, and reasons for applying.
When completing the required fields, be sure to provide accurate and detailed responses. Take the time to think about your answers and provide relevant information that showcases your suitability for the opportunity. Use specific examples, achievements, or experiences to support your responses whenever possible.
If you encounter any unfamiliar terms, acronyms, or concepts within the required fields, consult any instructions or guidelines provided with the application. Additionally, you can conduct research or seek clarification from the sender or the organization offering the opportunity.
If the form includes multiple sections or pages, make sure to navigate through each section and provide the necessary information. Pay attention to any instructions or prompts within each section to ensure that you are addressing all the requirements.
As you progress through the form, save your progress periodically to avoid losing any information. This is especially important if you are filling out a long or complex form that requires multiple sittings to complete.
If you need extra space or additional sections to provide more detailed responses, check if the form allows for attachments or if there is an option to include additional documents. If so, you can create a separate document and attach it to the application form, providing the necessary information in a clear and organized manner.
Remember to proofread your responses and double-check for any errors or missing information. Once you have completed all the required fields on the form, it’s time to proceed to the next step: reviewing and editing your answers.
Step 6: Review and edit your answers
After completing the required fields on the application form, it’s crucial to take the time to review and edit your answers. This step is essential to ensure that your application is error-free, coherent, and effectively presents your qualifications and experiences.
Begin by carefully reviewing each section and field on the form. Check for any typos, spelling mistakes, grammatical errors, or missing information. Pay attention to the formatting as well, ensuring that your answers are well-organized and easy to read.
Read through your responses to ensure that they are clear, concise, and directly address the prompts or questions. Ensure that you have provided sufficient information to support your qualifications and demonstrate your suitability for the opportunity.
If possible, take a break before reviewing your answers to gain a fresh perspective. This will help you approach the application with a critical eye and make any necessary improvements. Consider seeking feedback from a trusted friend or mentor to get an external opinion on your responses.
While reviewing your answers, make sure that you have followed any specific formatting guidelines provided by the application instructions. This includes font size, font type, line spacing, or any other formatting requirements. Adhering to these guidelines demonstrates attention to detail and professionalism.
If you come across any areas where you feel your answers can be further strengthened, take the opportunity to make revisions. Add more specific examples, provide additional details, or rephrase your responses to enhance their impact.
Ensure that your answers align with the requirements and objectives of the opportunity you are applying for. Tailor your responses to highlight your most relevant skills, experiences, and achievements that directly relate to the position or opportunity.
When editing your answers, it’s important to strike a balance between being thorough and concise. Avoid unnecessary repetition, jargon, or overly technical language. Instead, focus on clarity and conciseness while still conveying your qualifications effectively.
Once you have reviewed and edited your answers, save your changes in the application form. If possible, make a copy of the completed form for your records. This allows you to refer back to your application if necessary and helps you keep track of the details you have provided.
By meticulously reviewing and editing your answers, you can ensure that your application presents you in the best possible light. Now that you have perfected your responses, it’s time to move on to the next step: attaching any additional documents requested by the application.
Step 7: Attach additional documents
In addition to filling out the application form, you may be required to attach additional documents to support your application. These documents could include your resume, cover letter, transcripts, certificates, portfolio, or any other relevant materials.
First, review the instructions provided in the application email or form to determine which additional documents are requested. Pay attention to any specific file formats or naming conventions mentioned. This will help ensure that you provide the documents in the required format and avoid any potential issues.
Next, gather the requested documents that are readily available on your phone. These may be stored in your phone’s file manager, cloud storage services, or email attachments. If necessary, transfer the required documents to a dedicated folder on your phone for easy access during the application process.
To attach the additional documents, locate the option within the application form that allows for file attachments. Tap on the attachment icon or browse button, depending on the interface of the application form, to open the file explorer on your phone.
Navigate to the location where you have stored the required documents and select them one by one. Depending on the application form, you may be allowed to attach multiple files in different formats. Ensure that you attach the correct files, double-checking the file names and formats before proceeding.
If the application form does not have a specific place to attach the additional documents, check if there is an option to upload or submit supporting documents separately. In such cases, you may be required to upload the files to a designated file-sharing platform or send them via email to the provided contact.
Before finalizing the attachment process, make sure that the files you attach are properly named and labeled. Use clear and descriptive file names that make it easy for the recipient to identify the content of each attachment. If necessary, consider compressing multiple files into a single archive for convenience.
Once you have attached all the additional documents, review the list of attachments to ensure that all the required files are included. Double-check for any missing or incorrect files before moving to the next step.
Attaching the necessary additional documents showcases your preparedness and attention to detail. By submitting the required materials, you provide a comprehensive view of your qualifications and increase the chances of a successful application. Now that you have attached the documents, it’s time to move on to the next step: checking for any errors or missing information in your application.
Step 8: Check for any errors or missing information
Before submitting your application, it is crucial to thoroughly check for any errors or missing information. This step ensures that your application is complete, accurate, and presents you in the best possible light.
Begin by carefully reviewing each section and field of the application form. Pay close attention to details such as spelling, grammar, punctuation, and formatting. Look for any typos, inconsistencies, or unclear statements that may detract from the overall quality of your application.
Read through your personal information, responses to questions, and any supporting documents you have attached. Make sure that everything is coherent, well-organized, and effectively conveys your qualifications and experiences.
Check for any missing information or incomplete fields. Ensure that you have provided all the necessary details requested by the application form. Double-check against the instructions or requirements to make sure you have not overlooked any important sections.
If possible, take a break and return to your application with a fresh perspective. This will help you identify any errors or omissions that you may have missed during the initial review. You could also consider asking a friend or family member to proofread your application for an additional set of eyes.
Read each question, response, and supporting statement carefully, considering whether they effectively address the criteria or requirements outlined in the application. Make revisions or additions where necessary to enhance the clarity, relevance, and strength of your answers.
If you come across any ambiguous or confusing statements within your application, clarify or rephrase them to ensure that your message is clear and easily understood by the recipient. Seek to present yourself in the best possible light, highlighting your skills, experiences, and achievements effectively.
Finally, review all the attachments you have included with your application. Ensure that they are properly labeled, easily accessible, and directly support the information provided in your application form. Remove any unnecessary documents or duplicates to streamline your application.
By diligently checking for errors and missing information, you demonstrate your attention to detail and commitment to presenting a polished application. Taking the time to review and revise your application at this stage will greatly increase your chances of making a positive impression. Once you are satisfied that all is in order, it’s time to move on to the final step: submitting your application.
Step 9: Submit the application
After ensuring that your application is error-free and complete, it’s time to submit it and officially apply for the opportunity. This final step requires you to follow any specified submission instructions provided in the application email or form.
Before proceeding, review the application form and any accompanying instructions once more to confirm the submission process. Pay attention to any specific submission deadlines, preferred file formats, or email addresses where the application should be sent.
If the application requires you to submit it through email, compose a new email using the email address provided. Keep the subject line clear and concise, specifying that it is an application submission. Address the email to the appropriate recipient or department mentioned in the instructions.
Attach the completed application form, including any additional documents, files, or links that are requested. Ensure that all your attachments are correctly labeled, organized, and accessible for the recipient to review.
If the application requires you to submit through an online portal or platform, navigate to the designated website or application submission form. Create an account or log in and follow the instructions provided to upload your completed application and any additional requested materials.
Carefully review the submission before clicking on the “Submit” button or sending the email. Double-check that all the required documents and information are included, properly formatted, and error-free.
If there is an option to receive a confirmation or acknowledgment of your application, follow the specified process to ensure that your submission has been successfully received. This may involve clicking a confirmation link, receiving an automated response, or contacting the organization directly for verification.
After submitting your application, it’s important to remember that the waiting process begins. Be patient and await a response from the recipient or the organization you applied to. This may take some time, depending on their application review process and timeline.
In the meantime, it’s a good idea to keep a record of your application, including the submission date, any relevant contact information, and any unique identification numbers or reference codes provided. This will help you track your application’s progress and refer back to it if needed.
By submitting your application in a timely and accurate manner, you have taken the final step toward pursuing the opportunity at hand. Now it’s time to wait for the outcome and, in the meantime, explore other potential opportunities that align with your goals and aspirations.
Conclusion
Filling out an application sent by email on your phone can be a convenient and efficient way to pursue various opportunities. By following the step-by-step guide outlined in this article, you can successfully navigate the process and ensure that your application is completed accurately and professionally.
From opening the email and downloading the application form, to filling in your personal information, completing the required fields, and attaching additional documents, each step is essential in presenting a comprehensive and compelling application.
Remember to review and edit your answers, checking for any errors or missing information. Take the time to ensure that your application is complete, coherent, and effectively showcases your qualifications and experiences.
When you are satisfied with your application, submit it according to the specified instructions. Whether it’s through email or an online submission portal, make sure you follow the guidelines carefully, attach all the required documents, and obtain any necessary confirmations of receipt.
While waiting for a response, continue to explore other potential opportunities and further develop your skills and experiences. Take this time to consider how your application relates to your long-term goals and aspirations.
Remember, the application process is just one step in your journey. Stay positive, proactive, and persistent in pursuing your dreams. And always be prepared to seize new opportunities that come your way.
With the knowledge and confidence gained from this guide, you are well-equipped to fill out applications sent by email on your phone. Whether it’s applying for a job, scholarship, or any other opportunity, you can approach the process with ease and professionalism.
So, grab your phone and start exploring the opportunities that await you. With determination and a well-crafted application, you can take a significant step towards achieving your goals.