Introduction
Welcome to the world of online transactions and fast, secure money transfers with PayPal Credit! Sending money to friends, family, or businesses has never been easier. Whether you’re splitting the bill at a restaurant, reimbursing a friend for concert tickets, or making a purchase from an online retailer, PayPal Credit provides a convenient and flexible way to make payments.
With PayPal Credit, you can send money directly from your PayPal account without the need for a credit card or bank account. This feature allows you to access funds upfront while giving you the flexibility to pay off your balance over time, subject to credit approval. PayPal Credit also offers promotional financing options, giving you the freedom to make larger purchases and pay them off interest-free within a specified period.
In this guide, we’ll take you through the step-by-step process of sending money with PayPal Credit, including how to create a PayPal account, add PayPal Credit to your account, and navigate the various options for sending and receiving money. Additionally, we’ll explore how to withdraw funds to your bank account and remove PayPal Credit from your account when necessary.
So, if you’re ready to dive into the world of convenient online transactions, let’s get started on your journey to becoming a PayPal Credit pro!
Creating a PayPal Account
Before you can start sending money with PayPal Credit, the first step is to create a PayPal account. Here’s a simple guide to help you get started:
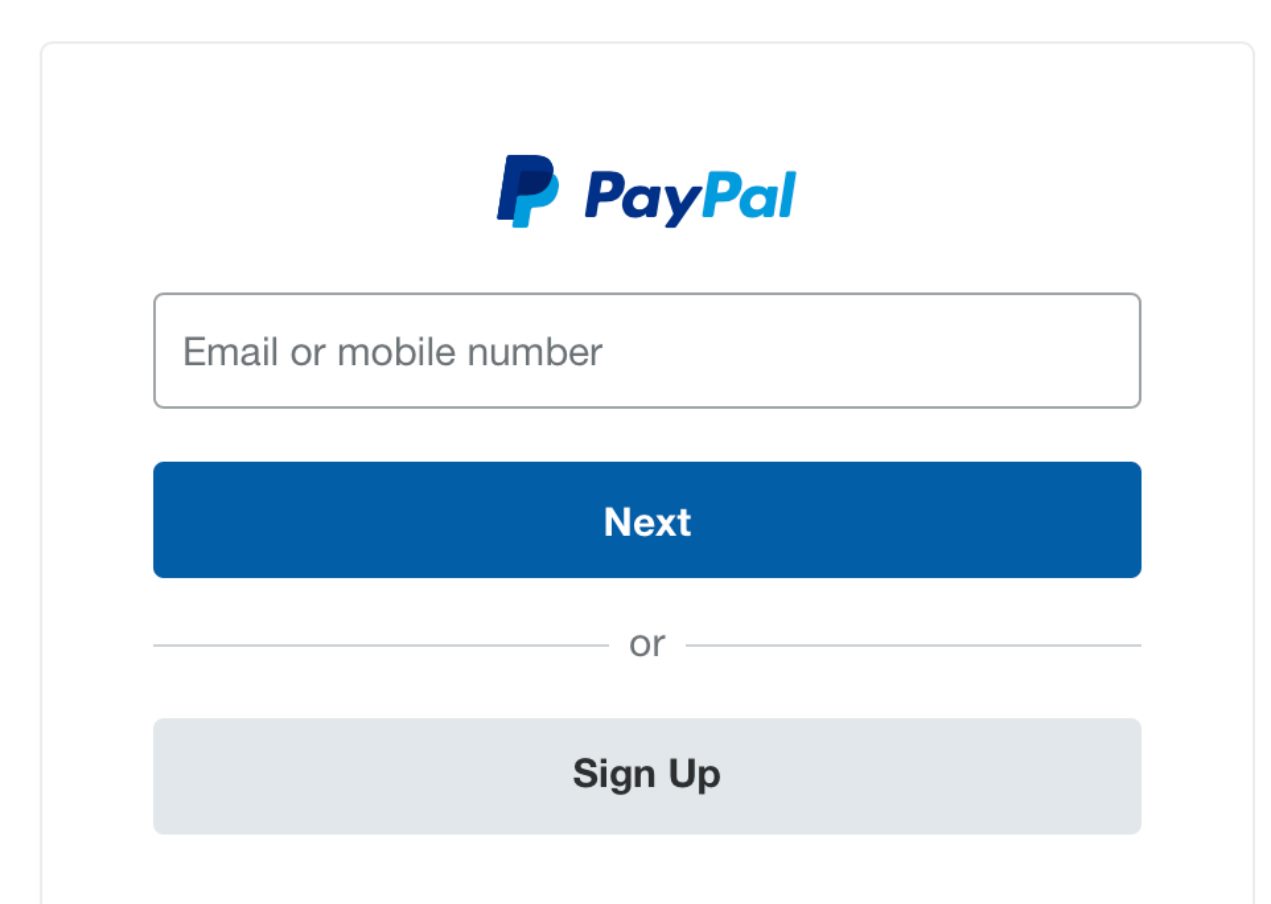
- Go to the PayPal website: Open your preferred web browser and visit www.paypal.com. Click on the “Sign Up” button located at the top right corner of the homepage.
- Select your account type: On the next page, you’ll be presented with two account options – “Personal” and “Business.” Choose the “Personal” account type if you’re using PayPal for personal transactions. If you’re creating an account for your business, select the “Business” account type.
- Provide your personal information: Fill in your email address and create a strong password for your account. Make sure to choose a password that is unique and not easily guessed. Click on the “Next” button to proceed.
- Enter your personal details: On the following page, enter your personal information, including your full name, address, and phone number. It’s important to provide accurate information to ensure a smooth verification process.
- Agree to the terms and conditions: Read through PayPal’s user agreement, privacy policy, and electronic communications delivery policy. Once you’ve reviewed the terms, check the box to indicate that you agree to them. Click on the “Agree and Create Account” button to proceed.
- Verify your email address: After completing the sign-up process, PayPal will send a confirmation email to the address you provided. Open the email and click on the verification link to confirm your email address. If you don’t see the email in your inbox, check your spam or junk folder.
- Set up additional security measures: To enhance the security of your PayPal account, it’s recommended to enable two-factor authentication. This adds an extra layer of protection by requiring a unique verification code in addition to your password when signing in.
Once you’ve completed these steps, your PayPal account will be created and ready for use. In the next section, we’ll explore how to add PayPal Credit to your account so you can start sending money conveniently and securely.
Adding PayPal Credit to Your Account
Now that you have a PayPal account, it’s time to add PayPal Credit and take advantage of its convenient payment features. Here’s how you can do it:
- Sign in to your PayPal account: Visit the PayPal website and log in using your email address and password.
- Access the “Wallet” tab: Once logged in, navigate to the “Wallet” tab located at the top of the page. This tab will display all the available payment methods linked to your PayPal account.
- Select “PayPal Credit”: In the list of payment methods, locate the option for “PayPal Credit” and click on it. This will take you to the dedicated PayPal Credit page.
- Apply for PayPal Credit: On the PayPal Credit page, you will find information about the benefits and terms of using PayPal Credit. If you haven’t already applied for PayPal Credit, click on the “Apply Now” button to start the application process.
- Complete the application: Fill out the required information in the PayPal Credit application form, including your personal details, income, and employment information. It’s important to provide accurate information, as PayPal will use it to determine your credit eligibility.
- Submit your application: After filling out the application form, review the information to ensure its accuracy. Once you are satisfied, click on the “Agree and Apply” button to submit your application for review.
- Wait for approval: PayPal will review your application and inform you of their decision. If approved, you’ll receive the applicable credit limit for your PayPal Credit account.
- Start using PayPal Credit: Once your PayPal Credit application is approved, you can start using it for online transactions, paying bills, and sending money. You’ll see the available credit balance displayed in your PayPal account.
Adding PayPal Credit to your account opens up a world of opportunities for easy, flexible, and secure payments. In the next section, we’ll cover the process of verifying your identity to further enhance the security of your PayPal Credit transactions.
Verifying Your Identity
Ensuring the security of your PayPal Credit account is essential for safe and reliable transactions. To enhance security measures, PayPal may require you to verify your identity. Here’s how you can complete the identity verification process:
- Log in to your PayPal account: Visit the PayPal website and sign in using your email address and password.
- Access your account settings: Once logged in, navigate to your account settings by clicking on the gear icon located in the top right corner of the page.
- Select “Account Settings”: From the dropdown menu, select “Account Settings” to access the various settings and options associated with your PayPal account.
- Navigate to “Identity Verification”: In the account settings page, click on the “Identity Verification” tab. Here, you’ll find options to verify your identity and complete the necessary steps.
- Provide necessary documentation: PayPal may request specific documents to verify your identity. This can include a valid government-issued identification (such as a passport or driver’s license), proof of address (such as a utility bill or bank statement), and any additional information required.
- Upload the required documents: Using the provided instructions, upload the requested documents securely through the PayPal website. Ensure that the documents are clear and legible to facilitate the verification process.
- Submit the documents for review: After uploading the necessary documents, submit them for review. PayPal will review the documents and notify you of the verification status within a given timeframe.
- Follow additional instructions: In some cases, PayPal may require additional steps for identity verification. This could include answering security questions or providing additional information to validate your identity.
- Wait for verification completion: Once you’ve provided the necessary documentation and completed any additional steps, wait for PayPal to complete the verification process. This typically takes a few business days, but the timeframe may vary.
- Receive verification confirmation: Once your identity has been verified, PayPal will send you a confirmation email with the verification status. You can now enjoy the increased security and reliability of your PayPal Credit account.
Verifying your identity adds an extra layer of protection to your PayPal Credit transactions, reducing the risk of unauthorized access and ensuring a secure environment for your financial activities. In the next section, we’ll explore how to link your bank account or debit card to your PayPal account for seamless transactions.
Linking Your Bank Account or Debit Card
Linking your bank account or debit card to your PayPal account allows you to easily transfer funds and make payments directly from your preferred financial institution. Here’s how you can link your bank account or debit card:
- Log in to your PayPal account: Visit the PayPal website and sign in using your email address and password.
- Access your account settings: Once logged in, navigate to your account settings by clicking on the gear icon located in the top right corner of the page.
- Select “Account Settings”: From the dropdown menu, select “Account Settings” to access the various settings and options associated with your PayPal account.
- Click on “Linked Accounts”: In the account settings page, find the “Linked Accounts” tab and click on it. Here, you’ll be able to manage the accounts linked to your PayPal account.
- Choose the type of account: On the “Linked Accounts” page, click on the corresponding option to link either a bank account or a debit card. Select the option that you wish to link to your PayPal account.
- Enter the required information: Follow the prompts and provide the necessary information to link your bank account or debit card. This may include your bank account number, routing number, or debit card details.
- Confirm the linking process: PayPal will initiate a verification process to ensure the accuracy of the provided information. This can be done through small test deposits sent to your bank account or by verifying the debit card details.
- Verify your bank account or debit card: Once PayPal has sent the test deposits or verified the debit card, you’ll need to verify the amounts or follow the instructions provided to complete the verification process.
- Complete the linkage: After successfully verifying your bank account or debit card, the account or card will be linked to your PayPal account. You can now use it for seamless transactions and fund transfers.
- Manage linked accounts: In the “Linked Accounts” section of your PayPal account settings, you have the option to add additional bank accounts or debit cards, as well as manage or remove existing linked accounts.
Linking your bank account or debit card to your PayPal account simplifies the process of transferring funds and making payments. It provides you with greater flexibility and convenience, giving you more control over your finances. In the next section, we’ll explore how to send money with PayPal Credit, whether it’s to friends, family, or businesses.
Sending Money with PayPal Credit
With PayPal Credit, you can securely send money to friends, family, or businesses, making transactions quick and convenient. Here’s a step-by-step guide on how to send money using PayPal Credit:
- Log in to your PayPal account: Visit the PayPal website and sign in using your email address and password.
- Navigate to the “Send and Request” tab: Once logged in, locate and click on the “Send and Request” tab located at the top of the page. This will take you to the page where you can initiate money transfers.
- Select “Send Money”: On the “Send and Request” page, click on the “Send Money” option. This will allow you to send funds to another PayPal user or make a payment to an email address or mobile number.
- Choose the recipient: Enter the email address or mobile number of the person or business you want to send money to. If the recipient is already in your PayPal contacts, their name will appear as you type.
- Enter the amount: Specify the amount you wish to send. You can choose to send the full available balance in your PayPal Credit account or enter a specific amount.
- Select the currency: If you’re sending money to another country, select the appropriate currency from the dropdown menu. PayPal will automatically convert the amount for you.
- Add a note (optional): If you want to include a message or note along with your payment, you can enter it in the “Add a note” section. This can be helpful for providing additional information or instructions to the recipient.
- Choose the payment method: Since you’re using PayPal Credit, ensure that the payment method selected is your PayPal Credit account. If it’s not already selected, choose it from the available options.
- Confirm the transaction: Review the details of the transaction, including the recipient, amount, currency, and payment method. Make any necessary changes or corrections before proceeding.
- Click “Send”: Once you’re satisfied with the transaction details, click on the “Send” button to initiate the transfer. PayPal will process the payment and send a confirmation email to both you and the recipient.
Congratulations! You’ve successfully sent money using PayPal Credit. The recipient will receive the funds in their PayPal account, and the transaction will be recorded in your PayPal transaction history.
Whether you’re sending money to a friend for a shared expense or making a payment to a business, PayPal Credit simplifies the process and provides a secure way to complete your transactions. In the next section, we’ll explore how to send money internationally with PayPal Credit.
Choosing the Recipient
When sending money with PayPal Credit, it’s important to select the correct recipient to ensure that your funds reach the intended party. Here are some key points to consider when choosing the recipient:
1. Verify recipient’s PayPal account: Ensure that the recipient has a valid PayPal account. If they don’t have an account, they will need to sign up for one to receive the funds you send. Double-check the email address or mobile number associated with their PayPal account to avoid any errors or delays in transferring the money.
2. Select from your PayPal contacts: If the recipient is already in your PayPal contacts list, it’s convenient to select them directly from the dropdown menu while entering the recipient’s information. This helps to avoid any typographical errors or confusion in identifying the correct recipient.
3. Use the correct email address or mobile number: If the recipient is not in your contacts, make sure to enter the correct email address or mobile number associated with their PayPal account. Triple-check the details to avoid sending money to the wrong person.
4. Confirm recipient’s identity: If you’re sending money to a business or someone you don’t personally know, take the time to confirm the recipient’s identity and legitimacy. Check for any additional details such as a business name, address, or contact information to ensure you’re sending money to the intended recipient.
5. Use discretion and trust: It’s important to exercise caution when sending money to someone you don’t know personally. If you have any doubts or concerns about the recipient, consider conducting further research or reaching out to PayPal’s customer support for guidance.
By carefully choosing the recipient, you can ensure that your funds are transferred accurately and securely. Take the necessary steps to verify the recipient’s identity and confirm their PayPal account details to avoid any potential issues.
In the next section, we’ll cover how to enter the amount you want to send using PayPal Credit for a seamless transaction process.
Entering the Amount
Once you have selected the recipient of your funds, the next step in sending money with PayPal Credit is entering the amount you wish to send. Here’s how to enter the amount accurately and efficiently:
1. Consider the currency: Determine the currency in which you want to send the funds. PayPal supports multiple currencies, so make sure to select the appropriate currency from the dropdown menu if you’re sending money internationally.
2. Specify the exact amount: Enter the specific amount you want to send to the recipient. You can enter the amount manually or use the preset options, depending on the transaction type and any pre-determined agreements you have with the recipient.
3. Verify the amount: Double-check the entered amount to ensure it is correct. Make sure there are no typos or errors that could result in sending an incorrect sum of money. It’s always better to be cautious and ensure accuracy.
4. Take into account any fees or charges: Consider any applicable fees or charges associated with the transaction. PayPal may deduct a certain percentage or a fixed amount for certain types of payments or transfers, so factor this into the total amount you send.
5. Communicate and coordinate with the recipient: If you’re sending money for a specific purpose, such as splitting a bill or reimbursing someone, it’s helpful to communicate and coordinate with the recipient. Confirm the amount with them in advance to ensure accuracy and transparency in your financial transactions.
By entering the amount accurately, you can ensure that the intended recipient receives the correct sum of money. Take into account any currency conversions, fees, and charges to ensure that the final amount sent is what you intended.
In the next section, we’ll go over the process of confirming the transaction and ensuring the funds are sent securely with PayPal Credit.
Confirming the Transaction
After entering the amount you wish to send with PayPal Credit, the next step is to confirm the transaction. Confirming the transaction ensures that the funds are sent securely and accurately. Here’s how to complete the confirmation process:
1. Review the transaction details: Take a moment to review the transaction details displayed on the confirmatio/n screen. This includes the recipient’s information, the amount you’re sending, and any applicable fees or charges.
2. Double-check recipient information: Verify that the recipient’s email address or mobile number is correct. Confirm that you’re sending the money to the intended recipient and not a similarly named contact in your list.
3. Verify the payment method: Make sure that your PayPal Credit account is selected as the payment method for this transaction. Check that the payment method details associated with your PayPal Credit account, such as the available credit, are accurate.
4. Check the currency: If you’re sending money in a currency different from the currency of your PayPal Credit account, review the currency conversion details. Ensure that the exchange rate is satisfactory to you and that you understand any fees associated with the currency conversion.
5. Confirm the transaction: Once you’ve reviewed all the transaction details and are satisfied, click on the “Confirm” or “Send” button to complete the transaction. This action will initiate the transfer of funds from your PayPal Credit account to the selected recipient’s account.
6. Receive confirmation and transaction details: Once the transaction is confirmed, PayPal will display a confirmation message on the screen. Additionally, PayPal will send you and the recipient an email notification confirming the details of the transaction.
By carefully reviewing and confirming the transaction details, you ensure that the funds are sent accurately and securely. Taking this step helps to prevent any errors or discrepancies in the transaction and provides peace of mind for both the sender and the recipient.
In the next section, we’ll explore how to review transaction details and access transaction history on PayPal for record-keeping purposes.
Reviewing Transaction Details
After confirming a transaction with PayPal Credit, it’s essential to review the transaction details for your records and to ensure accuracy. Here’s how to review transaction details on PayPal:
1. Access your PayPal account: Log in to your PayPal account using your email address and password.
2. Navigate to the “Activity” tab: Once logged in, click on the “Activity” tab located at the top of the page. This tab will display a list of your recent transactions.
3. Locate the transaction: In the “Activity” tab, locate the specific transaction you want to review. You can usually identify the transaction by the recipient’s name or email address, the date, or the transaction amount.
4. Click on the transaction: Click on the transaction to view the detailed information about the transaction. This will open a page displaying the specifics of the transaction, including the recipient, the date and time, the transaction type, and any associated fees or charges.
5. Review the transaction details: Take the time to review all the details of the transaction, including the amount sent, the payment method used (PayPal Credit), and any currency conversions if applicable. Ensure that all the information aligns with your expectations and the confirmation you received during the transaction process.
6. Print or save transaction details: If you need a physical or electronic record of the transaction, you can print or save the transaction details. Simply click on the “Print” or “Save as PDF” option, usually located in the upper-right corner of the transaction details page.
7. Verify the recipient’s acknowledgment: If you need to confirm that the recipient has received the funds, you can reach out to them directly or check their PayPal account for any notification or confirmation on their end.
Reviewing transaction details is important for record-keeping, reconciliation, and tracking purposes. It helps you stay organized and ensures that all transactions are accounted for accurately.
In the next section, we’ll explore how to send money internationally with PayPal Credit, expanding your payment options to different countries and currencies.
Sending Money Internationally with PayPal Credit
With PayPal Credit, you can easily send money internationally, expanding the reach of your transactions and allowing you to make payments in different currencies. Here’s how to send money internationally with PayPal Credit:
1. Log in to your PayPal account: Visit the PayPal website and sign in using your email address and password.
2. Navigate to the “Send and Request” tab: Once logged in, click on the “Send and Request” tab located at the top of the page. This will take you to the page where you can initiate money transfers.
3. Select “Send Money”: On the “Send and Request” page, click on the “Send Money” option.
4. Choose the recipient: Enter the email address or mobile number of the recipient. Ensure that the recipient has a valid PayPal account.
5. Enter the amount: Specify the amount you wish to send in the currency of the recipient’s country. PayPal will automatically convert the amount from your currency to the recipient’s currency based on the current exchange rates.
6. Review the currency conversion: PayPal will display the converted amount and provide you with an estimated conversion rate. Take note of any applicable fees or charges for currency conversion as they may influence the final amount that will be sent.
7. Add a note (optional): Include a message or note to the recipient if necessary, providing additional instructions or information about the payment.
8. Choose the payment method: Select your PayPal Credit account as the payment method for the international transaction.
9. Confirm the transaction: Review the transaction details, including the recipient, amount, currency conversion, and payment method. When you’re satisfied, click on the “Confirm” or “Send” button to initiate the transfer.
10. Receive confirmation: PayPal will send you and the recipient a confirmation email with the details of the transaction, including the converted amount and the estimated time for the funds to be available in the recipient’s account.
By leveraging PayPal Credit, you can send money internationally with ease. PayPal handles the currency conversion for you, ensuring a streamlined and straightforward process for sending funds across borders.
In the next section, we’ll explore how to check the status of your transactions on PayPal to stay informed about the progress of your payments.
Checking the Status of Your Transaction
Once you’ve sent money using PayPal Credit, it’s natural to want to stay informed about the status of your transaction. PayPal provides you with tools and features to track and monitor the progress of your payments. Here’s how to check the status of your transaction:
1. Log in to your PayPal account: Visit the PayPal website and sign in using your email address and password.
2. Navigate to the “Activity” tab: Once logged in, click on the “Activity” tab located at the top of the page. This tab displays a list of your recent transactions.
3. Find the transaction in the list: Look for the specific transaction you wish to check the status of. You can identify it by the recipient’s name, the transaction date, or the transaction amount.
4. Click on the transaction details: Click on the transaction in the list to access the detailed information about the transaction. This will open a page displaying the specifics of the transaction.
5. Review the transaction status: On the transaction details page, you will find the status of the transaction. The status might be “Paid,” “Completed,” “Pending,” or any other relevant designation. This status indicates the current stage of the payment process.
6. Check for any updates or actions required: Depending on the transaction status, there may be additional information or actions required. For example, if the status is “Pending,” there might be a pending confirmation or verification needed before the payment is processed.
7. Seek further assistance if needed: If the transaction status is not clear or if you have any concerns or questions, you can reach out to PayPal’s customer support for clarification and assistance. They are available to help resolve any issues related to your transaction.
By regularly checking the status of your transactions, you can stay informed about the progress of your payments. This helps provide peace of mind and allows you to address any potential issues promptly.
In the next section, we’ll explore how to receive money with PayPal Credit, allowing you to accept payments and transfers from friends, family, or even customers for your business.
Receiving Money with PayPal Credit
In addition to sending money, PayPal Credit also enables you to receive funds from others, making it a versatile tool for accepting payments or receiving money from friends and family. Here’s how you can receive money with PayPal Credit:
- Share your PayPal email address: Provide the sender with your PayPal email address, which is associated with your PayPal account. This email address acts as your unique identifier and allows others to send you money.
- Communicate payment details: Clearly communicate the amount and purpose of the payment to the sender. This helps ensure that they send the correct sum and include any necessary information, such as payment references or notes, along with the transaction.
- Receive the funds: Once the sender initiates the payment, PayPal will notify you via email that you have received money. The funds will be credited to your PayPal Credit account.
- Review the transaction details: Log in to your PayPal account and navigate to the “Activity” tab. Here, you can view the transaction details, including the sender’s name, the payment amount, and any associated fees or charges.
- Confirm receipt of funds: After reviewing the transaction details and confirming that the funds have been credited to your PayPal Credit account, you can acknowledge the receipt of funds to the sender to ensure transparency.
Receiving money with PayPal Credit offers you flexibility, whether you’re accepting payments from customers or receiving funds from friends and family. You can use the received funds to make purchases, pay bills, or even transfer the money to your linked bank account if needed.
It’s important to stay vigilant and report any suspicious or unauthorized transactions to PayPal immediately to ensure the security of your funds and protect against fraudulent activity.
In the next section, we’ll explore how to withdraw funds from your PayPal Credit account to your linked bank account, providing you with easy access to your money.
Withdrawing Money to Your Bank Account
With PayPal Credit, you have the flexibility to withdraw funds from your PayPal account to your linked bank account. Here’s how you can easily withdraw money to your bank account:
- Log in to your PayPal account: Visit the PayPal website and sign in using your email address and password.
- Access the “Wallet” tab: Once logged in, navigate to the “Wallet” tab located at the top of the page. This tab displays all the available payment methods and financial instruments linked to your PayPal account.
- Click on “Withdraw funds”: On the “Wallet” page, click on the “Withdraw funds” option. This will allow you to initiate a transfer of funds from your PayPal account to your linked bank account.
- Select your bank account: If you have multiple bank accounts linked to your PayPal account, select the desired account to which you want to transfer the funds.
- Enter the withdrawal amount: Specify the amount you wish to withdraw from your PayPal Credit account. Make sure to consider any applicable fees or charges that may be deducted during the withdrawal process.
- Confirm the withdrawal: Review the withdrawal details, including the amount and the selected bank account. Once you are sure everything is accurate, confirm the withdrawal.
- Wait for the funds to be transferred: PayPal will process the withdrawal request, and the funds will be transferred to your linked bank account. The time it takes for the funds to appear in your bank account may vary, but it typically takes a few business days.
- Check your bank account: Once the transfer is complete, check your bank account to ensure that the withdrawn funds have been successfully deposited.
Withdrawing money to your bank account allows you to have direct access to your funds and use them for various purposes outside of the PayPal system. Whether you want to pay bills, make purchases, or simply have the money readily available, this withdrawal feature gives you that flexibility.
It’s essential to keep in mind any applicable fees and the processing time for the withdrawal to plan your finances accordingly. Additionally, ensure that your linked bank account information is accurate and up to date to avoid any issues with the withdrawal process.
In the next section, we’ll explore how to remove PayPal Credit from your account if you no longer wish to use this payment option.
Removing PayPal Credit from Your Account
If you decide that you no longer want to have PayPal Credit linked to your account, you have the option to remove it easily. Here’s how you can remove PayPal Credit from your account:
- Log in to your PayPal account: Visit the PayPal website and sign in using your email address and password.
- Access the “Wallet” tab: Once logged in, navigate to the “Wallet” tab located at the top of the page. This tab displays all the available payment methods and financial instruments linked to your PayPal account.
- Find PayPal Credit: Scroll through the payment methods listed on the “Wallet” page and locate the section for PayPal Credit.
- Click on “Manage”: Within the PayPal Credit section, click on the “Manage” link. This will take you to the settings and options specific to your PayPal Credit account.
- Choose “Remove PayPal Credit”: On the PayPal Credit settings page, look for the option to “Remove PayPal Credit” or “Unlink PayPal Credit,” and click on it.
- Confirm the removal: PayPal will present you with a confirmation message to ensure that you want to proceed with removing PayPal Credit from your account. Review the message and click on “Remove” or “Unlink” to confirm the removal.
- Verify the removal: After confirmation, PayPal will remove PayPal Credit from your account. You will no longer have PayPal Credit as a linked payment method.
Removing PayPal Credit from your account eliminates it as a payment option, giving you a streamlined payment experience with your remaining payment methods. If you decide in the future that you want to use PayPal Credit again, you can always reapply and link it to your account.
It’s important to note that removing PayPal Credit from your account does not close your PayPal account or remove any other linked payment methods or financial instruments. Your account will remain active, and you can continue to use PayPal with your other payment options.
In this guide, we’ve covered everything from creating a PayPal account to adding PayPal Credit, sending money, receiving funds, and withdrawing to your bank account. By understanding and utilizing these features, you can make the most of PayPal Credit and enjoy the convenience and flexibility it offers in your online transactions.
If you have any further questions or need assistance, PayPal’s customer support team is available to help guide you and address any concerns you may have along the way.
Conclusion
Congratulations on becoming familiar with the process of using PayPal Credit to send and receive money! We’ve covered the essential steps for creating a PayPal account, adding PayPal Credit, verifying your identity, linking your bank account or debit card, and sending money domestically and internationally. We’ve also explored how to check transaction status, receive money, withdraw funds, and remove PayPal Credit from your account. By following these steps, you can leverage the convenience and security of PayPal Credit to enhance your online financial transactions.
Remember to review and confirm transaction details, choose recipients carefully, enter amounts accurately, and check the status of your transactions regularly. These practices will ensure smooth and error-free money transfers. Additionally, it’s important to maintain the security of your PayPal account by protecting your login credentials and reporting any suspicious activities to PayPal.
PayPal Credit offers a seamless experience for handling your financial transactions, whether it’s sending money to friends, paying for purchases, or receiving payments for your business. With its promotional financing options and the flexibility of paying over time, PayPal Credit provides a convenient and flexible solution for managing your finances.
If you ever need assistance or have questions, PayPal’s customer support is available to provide guidance and address any concerns you may have. The team’s expertise can help you navigate any challenges and make the most out of your PayPal Credit experience.
Thank you for joining us on this journey into the world of PayPal Credit. We hope this guide has been informative and helpful, empowering you to make secure and convenient financial transactions online.