Introduction
Welcome to this guide on accessing your PayPal account! PayPal is a popular online payment platform that allows users to securely send, receive, and manage their money transactions. Whether you’re using PayPal for personal or business purposes, having access to your account is essential.
In this article, we will walk you through the various steps involved in accessing your PayPal account, including creating an account, logging in, resetting your password, and verifying your account. We will also explore how to navigate your account dashboard, manage your account settings, add or withdraw funds, link or remove bank accounts and credit cards, and send or receive money through PayPal. Additionally, we will cover the process of viewing your transaction history to keep track of your financial activities.
With PayPal’s secure and user-friendly interface, accessing your account is quick and straightforward. Whether you’re using it to shop online, receive payments from clients, or send money to friends and family, having a clear understanding of how to navigate your PayPal account will streamline your financial transactions and give you peace of mind.
So, let’s dive in and discover how to access your PayPal account and make the most of its features!
Creating a PayPal Account
To access your PayPal account, you first need to create one. Follow these steps to get started:
- Visit the PayPal website (www.paypal.com) in your web browser.
- Click on the “Sign Up” button, usually located at the top right corner of the homepage.
- Select the type of account you want to create: Personal or Business. If you’re using PayPal for personal reasons, such as online shopping or sending money to friends, choose the Personal Account option. If you’re using PayPal for business purposes, select the Business Account option.
- Fill in the required information, including your name, email address, and a secure password. Make sure to choose a strong password that includes a combination of letters, numbers, and special characters to enhance the security of your account.
- Click on the “Next” button to proceed.
- Provide your contact information, including your address and phone number. This information is necessary for verification purposes and to ensure the security of your account.
- Review and accept the PayPal User Agreement and Privacy Statement by checking the box next to “I agree to the PayPal User Agreement and Privacy Statement.”
- Click on the “Agree and Create Account” button to complete the sign-up process.
Once you have created your PayPal account, you will receive a confirmation email with instructions on how to verify your account. It is essential to verify your account to access all the features and functionalities of PayPal.
Creating a PayPal account is free and only takes a few minutes. It provides you with a convenient and secure way to manage your online payments and transactions. Whether you’re a buyer, a seller, or simply someone looking for a safe payment method, PayPal offers a versatile platform to meet your needs.
Now that you have created your PayPal account, let’s move on to the next step: logging in!
Logging into your PayPal Account
Once you have created your PayPal account, accessing it is quick and simple. Follow these steps to log into your PayPal account:
- Open your preferred web browser and go to the PayPal website (www.paypal.com).
- Click on the “Log In” button, which is usually located at the top right corner of the homepage.
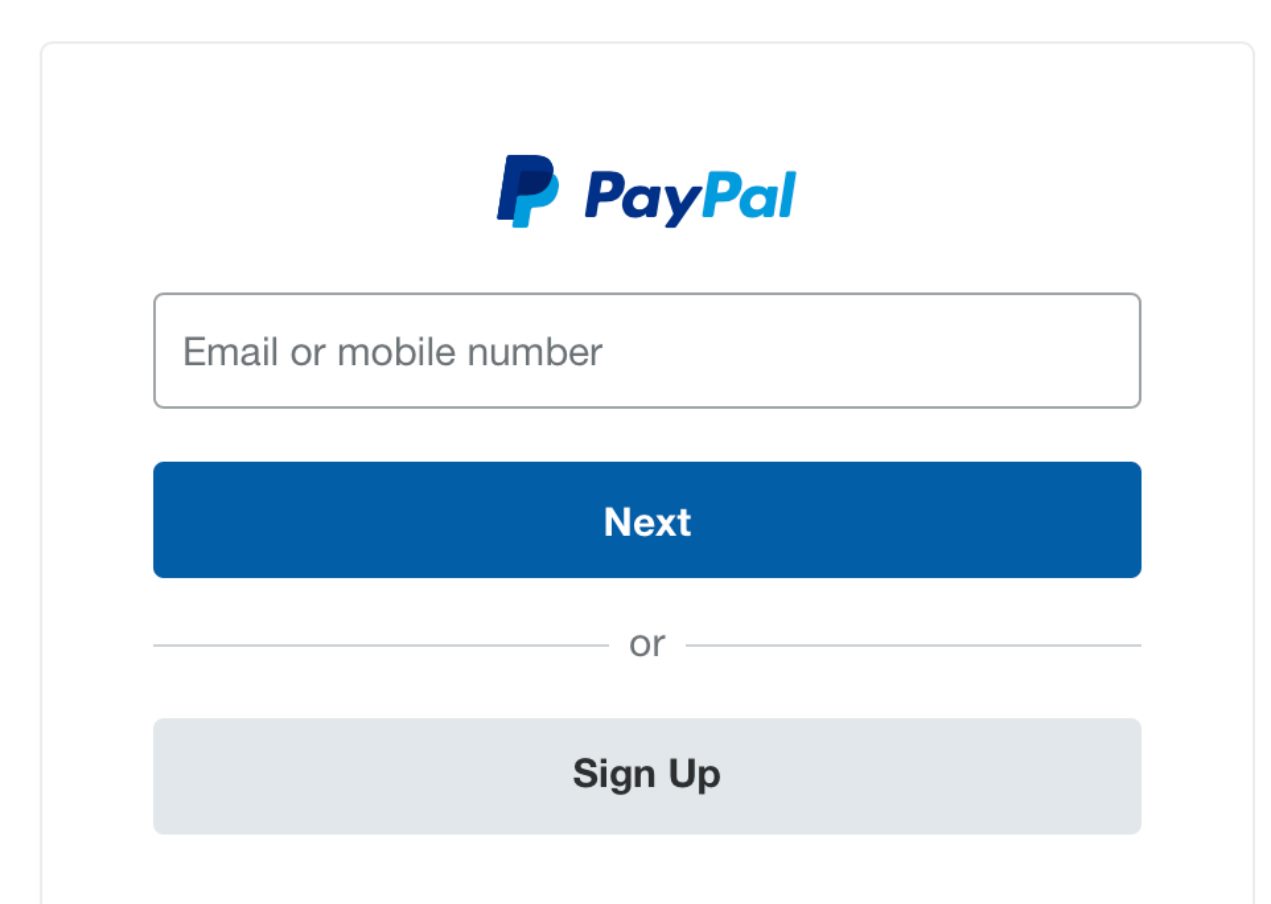
- On the login page, enter the email address associated with your PayPal account in the provided field.
- Next, enter your password. Make sure to enter it accurately, as passwords are case-sensitive.
- If you are accessing your PayPal account from a trusted and secure device, you can check the “Stay Logged In” box. This will save you from entering your login credentials each time you access your account, providing convenience without compromising security. However, only select this option if you are using a personal device.
- After entering your email address and password, click on the “Log In” button to access your PayPal account.
If you have entered your login credentials correctly, you will be directed to your PayPal account dashboard, where you can manage your transactions, view your balance, and access various account features.
If you have forgotten your password or are having trouble logging into your account, PayPal provides an option to reset your password. Simply click on the “Having trouble logging in?” link on the login page and follow the instructions to reset your password.
It is important to keep your PayPal login credentials confidential and secure. Avoid sharing your password with anyone and make sure to log out of your PayPal account after each session, especially when using public or shared devices.
Now that you know how to log into your PayPal account, let’s move on to the process of resetting your password, just in case you ever need to.
Resetting your PayPal Password
If you have forgotten your PayPal password or suspect that it has been compromised, resetting it is a straightforward process. Follow these steps to reset your PayPal password:
- Go to the PayPal website (www.paypal.com) in your web browser.
- Click on the “Log In” button located at the top right corner of the homepage.
- On the login page, click on the “Having trouble logging in?” link located below the login form.
- You will be prompted to enter the email address associated with your PayPal account. Input the email address and click on the “Next” button.
- PayPal will now send you an email with instructions to reset your password. Check your email inbox, including the spam or junk folder, for the password reset email.
- Open the email and click on the provided link to reset your password. The link will redirect you to a page where you can enter a new password.
- Choose a strong and unique password for your PayPal account. Ideally, it should contain a combination of uppercase and lowercase letters, numbers, and special characters.
- Confirm your new password by re-entering it in the required field.
- Click on the “Update” or “Reset Password” button to save your new password.
Once you have successfully reset your PayPal password, you can log in to your account using your new password.
It’s important to note that PayPal will never ask for your password via email or any other form of communication. If you receive an email or message asking for your PayPal password, do not respond and report it to PayPal immediately. Protecting your password is crucial for the security of your PayPal account.
Now that you have learned how to reset your PayPal password, let’s move on to the next step: verifying your PayPal account.
Verifying your PayPal Account
Verifying your PayPal account is an important step that enhances the security and functionality of your account. It helps establish your identity and enables you to access additional features and benefits. Follow these steps to verify your PayPal account:
- Log in to your PayPal account using your email address and password.
- On your account dashboard, look for the “Notification” or “Settings” icon, usually represented by a gear or a bell. Click on it to access your account settings.
- In the settings menu, navigate to the “Account” or “Verify” section. The exact location may vary, so look for options related to verifying your account.
- Select the verification method you prefer. PayPal offers several options for account verification, including linking and confirming a bank account, linking and confirming a credit card, or providing additional personal information. Choose the method that suits you best.
- Follow the on-screen instructions to complete the verification process. Depending on the verification method you choose, you may need to provide specific details, such as your bank account or credit card information, or answer additional security questions.
- Once you have completed the verification process, PayPal will review the information you provided and verify your account. This process typically takes a few business days, but you may receive instant verification in some cases.
- Once your account is verified, you will receive a confirmation email from PayPal. This email will indicate that your account has been successfully verified and that you can now enjoy the full benefits of your verified account.
Verifying your PayPal account not only adds an extra layer of security, but it also enables you to send and receive higher amounts of money, access certain PayPal features, and build trust with other PayPal users when conducting transactions.
It’s important to keep your verified account information up to date. If there are any changes to your bank account, credit card, or personal information, make sure to update it in your PayPal account settings.
Now that you have learned how to verify your PayPal account, let’s move on to exploring your account dashboard and its various features.
Navigating your PayPal Account Dashboard
Once you log in to your PayPal account, you will be greeted with your account dashboard. The dashboard serves as the central hub for managing your PayPal transactions, settings, and other account-related activities. Let’s explore how to navigate your PayPal account dashboard:
- Summary: The summary section provides an overview of your account balance, recent transactions, and any important notifications or alerts. It gives you a quick snapshot of your PayPal activity at a glance.
- Activity: The activity section displays your transaction history, including payments sent, received, and refunded. You can search for specific transactions, filter them by date, and view details such as transaction ID, date, and recipient.
- Send & Request: This section allows you to send money to friends, family, or businesses using their email address or mobile number. You can also request money from others, making it convenient for splitting bills, collecting payments, or requesting funds for goods and services.
- Wallet: The wallet section provides an overview of your linked bank accounts, credit cards, and PayPal balance. You can add or remove payment methods, view your available balance, and manage your preferred payment sources.
- Tools: The tools section contains various features and settings to customize your PayPal experience. Here, you can access options like resolving disputes, generating invoices, creating recurring billing agreements, and setting up PayPal buttons for your website.
- Profile & Settings: By clicking on your profile icon or name, you can access your account settings and update your personal information, including contact details, security settings, and notification preferences. You can also manage your PayPal Business Profile if you have a business account.
- Help & Support: If you need assistance or have questions about using PayPal, the help and support section is your go-to resource. You can find answers to frequently asked questions, access the PayPal community forum, or contact PayPal’s customer support for further assistance.
Navigating your PayPal account dashboard is easy and intuitive, thanks to its user-friendly interface. Take some time to explore the various sections and become familiar with the available features and settings. This will help you make the most of your PayPal account and streamline your financial transactions.
Now that you know how to navigate your PayPal account dashboard, let’s move on to managing your account settings and ensuring they meet your preferences and needs.
Managing your Account Settings
Your PayPal account settings allow you to customize various aspects of your account to suit your preferences and needs. Here are some key settings that you can manage:
- Personal Information: You can update your personal information, such as your name, address, phone number, and email address, in the “Profile & Settings” section. Keeping this information up to date ensures that your account remains accurate and helps facilitate smooth transactions.
- Security: Protecting your PayPal account is essential. In the account settings, you can set up two-factor authentication, which provides an extra layer of security by requiring a unique code along with your password for logging in. You can also manage your security questions and view any recent security activities.
- Notifications: PayPal allows you to customize the types of notifications you receive. In the settings, you can choose whether to receive email alerts for various account activities, such as receiving payments, account changes, or promotional offers. Adjusting these settings helps you stay informed while reducing email clutter.
- Payment Preferences: In the payment preferences section, you can configure how your payments are processed. You can choose your preferred payment method, set your default currency, and manage your automatic withdrawal and payment settings.
- Agreements and Permissions: PayPal offers various agreements and permissions that grant access to certain features and integrations. In this section, you can review and manage these agreements, such as recurring payments, reference transactions, and pre-approved payments, to ensure they align with your needs.
- Merchant Tools: If you have a PayPal Business Account, you can access additional merchant tools and settings. These include managing your website payments, setting up invoicing, creating subscription plans, and integrating PayPal into your e-commerce platform.
- Mobile: PayPal provides a mobile app for convenient account access on the go. In the account settings, you can manage your mobile settings, including enabling mobile payments, configuring notifications, and keeping your mobile devices secure.
Regularly reviewing and updating your account settings is essential to ensure that your PayPal account operates smoothly and aligns with your preferences. By customizing these settings to meet your specific needs, you can enhance security, streamline transactions, and receive the necessary notifications without overwhelming your inbox.
Take the time to explore the different account settings available to you and make adjustments as needed. Keeping your account settings up to date will help you enjoy a seamless PayPal experience.
Now that you have learned how to manage your account settings, let’s move on to the important topic of adding and withdrawing funds to and from your PayPal account.
Adding and Withdrawing Funds to your PayPal Account
One of the key benefits of having a PayPal account is the ability to add and withdraw funds securely and conveniently. Here is a guide on how to add and withdraw funds to and from your PayPal account:
- Adding Funds: To add funds to your PayPal account, follow these steps:
- Log in to your PayPal account and navigate to the “Wallet” section.
- Under the “PayPal balance” section, click on the “Add Money” button.
- Enter the amount you want to add and select the funding source. You can choose to add funds from your linked bank account or credit card.
- Follow the prompts to confirm the details of the transaction.
- Once the process is complete, the funds will be added to your PayPal account and will be available for use.
- Withdrawing Funds: To withdraw funds from your PayPal account, follow these steps:
- Log in to your PayPal account and navigate to the “Wallet” section.
- Under the “PayPal balance” section, click on the “Withdraw Money” button.
- Choose the withdrawal method of your preference. You can transfer funds to your linked bank account or request a check to be mailed to your registered address.
- Enter the amount you want to withdraw and follow the prompts to confirm the withdrawal request.
- PayPal will process the withdrawal, and the funds will be transferred to your chosen withdrawal method.
Adding funds to your PayPal account allows you to maintain a balance that can be used for online purchases, sending money to others, or funding future transactions conveniently. The funds added to your account can be used for purchases or transferred back to your bank account whenever needed.
When withdrawing funds from your PayPal account, keep in mind that it may take a few business days for the funds to appear in your bank account, depending on your bank’s processing time. If you choose to receive a check, it will be mailed to your registered address and may take some time to arrive.
By being familiar with the process of adding and withdrawing funds, you can effectively manage your PayPal account’s financial transactions and ensure a seamless experience.
Now that you know how to add and withdraw funds from your PayPal account, let’s explore how to link and remove bank accounts and credit cards for smooth payment transactions.
Linking and Removing Bank Accounts and Credit Cards
Linking your bank accounts and credit cards to your PayPal account is an important step to facilitate seamless payment transactions. By doing so, you can easily transfer funds, make purchases, and receive payments. Here’s how you can link and remove bank accounts and credit cards:
- Linking Bank Accounts: To link a bank account to your PayPal account, follow these steps:
- Log in to your PayPal account and navigate to the “Wallet” section.
- Under the “Bank accounts” or “Link a bank account” section, click on the “Link a bank account” button.
- Enter the required bank account information, including the account number, routing number, and account type.
- Follow the prompts to verify the bank account. PayPal will make two small deposits into your bank account, which you’ll need to verify by entering the deposit amounts in your PayPal account.
- Once the verification process is complete, your bank account will be linked to your PayPal account.
- Removing Bank Accounts: To remove a bank account from your PayPal account, follow these steps:
- Log in to your PayPal account and navigate to the “Wallet” section.
- Under the “Bank accounts” section, locate the bank account you want to remove and click on the “Remove” or “Delete” button.
- Follow the prompts to confirm the removal of the bank account.
- The bank account will be removed from your PayPal account.
- Linking Credit Cards: To link a credit card to your PayPal account, follow these steps:
- Log in to your PayPal account and navigate to the “Wallet” section.
- Under the “Credit and debit cards” or “Link a card” section, click on the “Link a card” button.
- Enter the required credit card information, including the card number, expiration date, and security code.
- Follow the prompts to verify the credit card. This may involve entering a verification code sent via SMS or reviewing your card statement for a code.
- Once the verification process is complete, your credit card will be linked to your PayPal account.
- Removing Credit Cards: To remove a credit card from your PayPal account, follow these steps:
- Log in to your PayPal account and navigate to the “Wallet” section.
- Under the “Credit and debit cards” section, locate the credit card you want to remove and click on the “Remove” or “Delete” button.
- Follow the prompts to confirm the removal of the credit card.
- The credit card will be removed from your PayPal account.
Linking your bank accounts and credit cards to your PayPal account allows for smooth and convenient financial transactions. It enables you to make online purchases, send payments to others, or receive money securely. By removing any outdated or unused bank accounts or credit cards, you can ensure the accuracy and efficiency of your PayPal account.
Now that you know how to link and remove bank accounts and credit cards in your PayPal account, let’s move on to the process of sending and receiving money through PayPal.
Sending and Receiving Money through PayPal
One of the primary functions of PayPal is to send and receive money securely, whether you’re making a payment to a merchant or sending funds to a friend or family member. Here’s how you can send and receive money through PayPal:
- Sending Money: To send money through PayPal, follow these steps:
- Log in to your PayPal account and navigate to the “Send & Request” section.
- Click on the “Send” tab.
- Enter the recipient’s email address or mobile number.
- Specify the amount you want to send and select the currency.
- Choose the funding source from your available balance, linked bank accounts, or linked credit cards.
- Add an optional note to the recipient, if desired.
- Review the transaction details and click on the “Send” button to complete the payment.
- The recipient will receive a notification about the payment, and the funds will be deposited into their PayPal account.
- Requesting Money: To request money through PayPal, follow these steps:
- Log in to your PayPal account and navigate to the “Send & Request” section.
- Click on the “Request” tab.
- Enter the email address or mobile number of the person from whom you are requesting money.
- Specify the amount you want to request and select the currency.
- Add an optional note to provide context for the request, if needed.
- Review the request details and click on the “Request Money” button.
- The recipient will receive a notification about the request, and they can choose to fulfill it by sending the requested amount to your PayPal account.
- Receiving Money: When someone sends money to your PayPal account, you will receive a notification. The funds will be deposited into your PayPal balance, where you can use them for future purchases or transfer them to your linked bank account.
PayPal provides a secure and convenient way to send and receive money globally. It allows you to make transactions without sharing your financial information with the recipient, thereby adding an extra layer of privacy and security.
Keep in mind that PayPal may charge fees for certain types of transactions or currency conversions, so it’s essential to review the fee structure on the PayPal website to ensure you understand the associated charges.
Now that you know how to send and receive money through PayPal, let’s explore how to view your transaction history to keep track of your financial activities.
Viewing your Transaction History
Keeping track of your financial activities is crucial to managing your PayPal account effectively. PayPal provides an easy way to view your transaction history, allowing you to monitor your payments, purchases, and transfers. Here’s how you can view your transaction history:
- Log in to your PayPal account and navigate to the “Activity” or “Transactions” section. You can usually find it on the main dashboard or in the top menu.
- You will be presented with a list of your recent transactions. By default, the most recent transactions will be displayed.
- To filter or search for specific transactions, you can use the search bar or the available filters, such as date range, transaction type, or recipient.
- You can click on a specific transaction to view additional details, including the date, time, transaction ID, sender/receiver information, and any associated fees or currency conversions.
- If needed, you can also access downloadable reports of your transaction history by clicking on the “Reports” or “Download” button.
- In addition to the transaction history, PayPal provides tools for exporting your transaction data for accounting or record-keeping purposes.
Reviewing your transaction history allows you to reconcile your PayPal activities, track your spending, and verify the accuracy of any payments or transfers. It is especially useful for individuals who use PayPal for business purposes and need to maintain thorough financial records.
It’s important to regularly review your transaction history to detect any unauthorized or suspicious activities. If you come across any questionable transactions, you can report them to PayPal’s customer support for further investigation.
By staying informed about your financial activities through PayPal’s transaction history, you can effectively manage your account, track your expenses, and maintain accurate records of your transactions.
Now that you know how to view your transaction history, you have gained a better understanding of how to manage your PayPal account effectively.