Introduction
Have you ever needed to download a form from a website but weren’t sure how to do it? Whether you’re filling out an application, completing a survey, or accessing important documents, downloading forms is a common task in today’s digital world. Knowing how to download a form can save you time and simplify your paperwork process. In this article, we’ll guide you through the step-by-step process of downloading a form from a website.
Downloading a form is a relatively straightforward process, but it can vary depending on the website and the file format of the form. This guide will provide you with general instructions that can be applied to most websites and forms. So, whether you’re a student, a professional, or simply someone who needs to fill out forms regularly, this article is for you.
Before we dive into the steps, it’s important to ensure that you have a reliable internet connection and a device that allows you to access the internet and download files. Additionally, make sure you have an up-to-date web browser installed on your device to ensure optimal compatibility with the website you’re using to download the form.
Now that you’re prepared, let’s get started on your journey to successfully download a form from a website. Follow the steps outlined below, and you’ll be on your way to efficiently accessing the forms you need in no time.
Step 1: Choose the Website
The first step in downloading a form is to choose the website from which you want to download it. There are various websites that offer forms for different purposes, such as government websites, educational institutions, and online service providers.
When selecting a website, consider the credibility and reliability of the source. Government websites, official organization websites, and reputable platforms are usually a safe bet. It’s important to choose a website that you trust to ensure the form you’re downloading is legitimate and up to date.
Additionally, consider the user-friendliness of the website. Look for websites that have clear navigation menus and a search function to help you locate the desired form easily. User reviews and ratings can also provide insights into the overall user experience offered by the website.
If you’re unsure about which website to choose, you can conduct a quick internet search using relevant keywords to find websites that offer the specific form you need. Take the time to explore a few different options to ensure you find a website that meets your requirements.
Remember, the website you choose should provide the form in a format that is compatible with your device and the software you plan to use to open and edit the form. Common form formats include PDF (Portable Document Format), DOC (Microsoft Word Document), or XLS (Microsoft Excel Spreadsheet).
Once you’ve selected a website that meets your needs, it’s time to move on to the next step: navigating to the downloads page.
Step 2: Navigate to the Downloads Page
After choosing the website where you plan to download the form, the next step is to navigate to the downloads page. This is typically the section of the website where you can find and access the forms or documents you want to download.
Navigating to the downloads page might vary depending on the website’s layout and design. Here are a few common methods to find the downloads page:
- Look for a “Downloads” or “Forms” tab: Many websites have a dedicated section where they organize all their downloadable forms. Usually, you can find this section in the main navigation menu at the top of the website or in a sidebar.
- Perform a search: If the website has a search function, you can enter relevant keywords such as “forms,” “downloads,” or the specific type of form you’re looking for. The results of your search should help you locate the downloads page.
- Check the footer or sitemap: Some websites include links to their downloads page in the footer section of the website. Alternatively, you can look for a sitemap, which provides an overview of all the pages on the website, including the downloads page.
Once you’ve located the downloads page, click on the link or button that will take you there. In some cases, you may need to log in to your account on the website before accessing the downloads page.
It’s worth noting that some websites offer forms for free, while others may require you to pay a fee or provide certain information before downloading the form. Read any instructions or terms of use provided on the website to ensure you comply with their requirements.
Now that you have successfully navigated to the downloads page, you’re ready to move on to the next step: searching for the specific form you need.
Step 3: Search for the Form
Now that you have reached the downloads page of the website, it’s time to search for the specific form you need. Depending on the website’s layout and organization, the form you’re looking for may be directly listed on the downloads page or you may need to use a search function to find it.
If the form is readily available on the downloads page, you can visually scan through the list of forms and look for the one that matches your requirements. Websites often categorize forms into different sections or provide filters to help you narrow down your search. Take advantage of these features to quickly locate the form you need.
In cases where the downloads page is extensive or the form is not directly listed, use the search function provided on the website. Look for a search bar or a search icon and enter relevant keywords related to the form you’re seeking. Make sure to use specific terms to refine your search results.
Once you’ve entered the keywords, click on the search button or press Enter to initiate the search. The website will then provide you with a list of search results that match your query. Browse through the results and click on the link or button that corresponds to the form you want to download.
It’s important to note that some websites may require you to provide additional information or answer certain questions before accessing the form. This is usually done to gather necessary details or to comply with legal requirements. Fill in any required information as accurately as possible to proceed with the download.
When searching for the form, pay attention to the form’s format. Ensure that the file format is compatible with the software you plan to use to open and edit the form. Common formats include PDF, DOC, and XLS. If the website allows you to select the format, choose the one that suits your needs.
Now that you’ve successfully found and selected the form you want, it’s time to move on to the next step: checking file format compatibility.
Step 4: Check File Format Compatibility
Before proceeding with the download, it’s crucial to check the file format compatibility of the form you’ve selected. Different forms may be available in various file formats, such as PDF, DOC, or XLS. Ensuring compatibility will ensure that you can open and work with the form using the software installed on your device.
To check the file format of the form, look for information provided on the website’s download page. Many websites include details about the file format next to the form’s description or download button. It may be listed as an icon or mentioned in the form’s title.
Take note of the file format indicated next to the form. If it’s not explicitly mentioned, try hovering your mouse cursor over the download button, as some websites display additional information in a tooltip or preview pane.
Once you have identified the file format, determine whether your device and software can support it. For example, if the form is in PDF format, you will need a PDF reader application installed on your device, such as Adobe Acrobat Reader or a compatible alternative. If the form is in DOC format, you will need a word processing software, like Microsoft Word or Google Docs.
If you don’t have the necessary software installed, you may need to download and install it before you can proceed with opening and editing the form. Most software applications have free versions or trial periods available for download directly from the developer’s website.
It’s worth mentioning that some websites may offer the option to choose the file format before downloading. If this is the case, select the format that is compatible with your device and preferred software.
By verifying the file format compatibility in advance, you can avoid any inconveniences or delays when it comes to accessing and using the downloaded form.
With the file format compatibility checked, you are now ready to move on to the next step: clicking on the download button to initiate the download process.
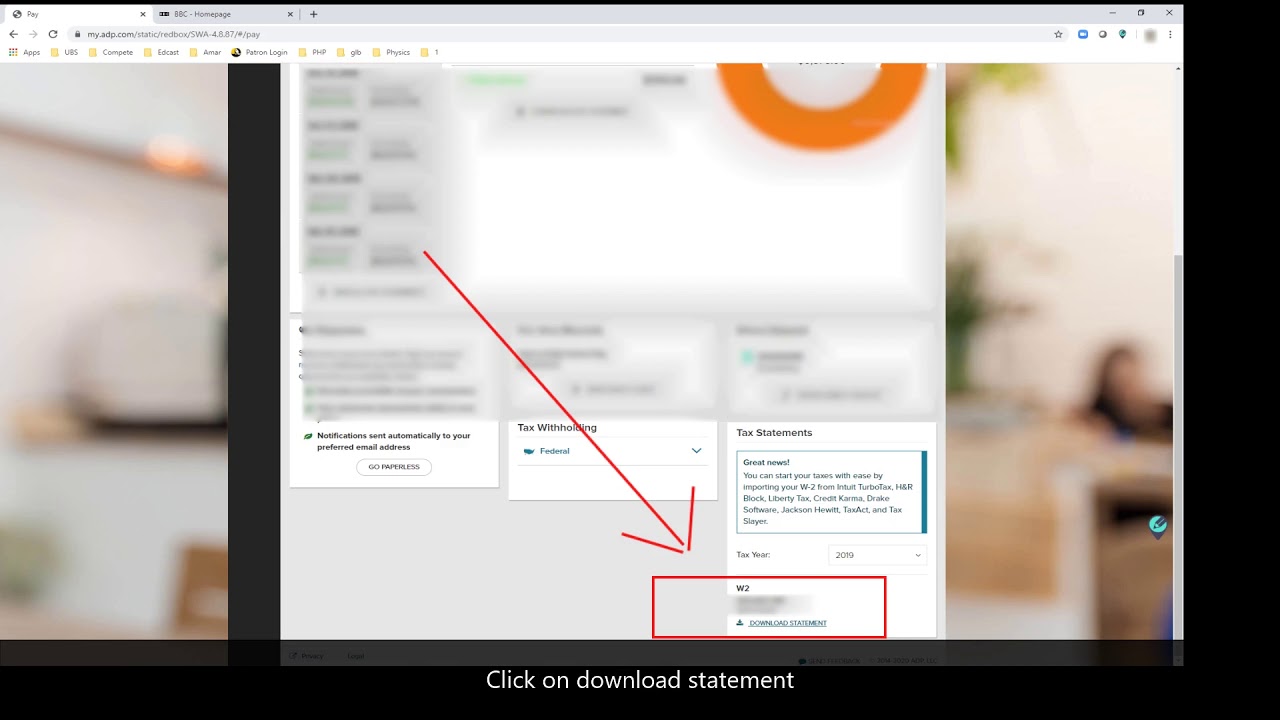
Step 5: Click on the Download Button
Once you have confirmed the file format compatibility of the form you want to download, the next step is to click on the download button to initiate the download process. The download button is typically located near the form’s description or in close proximity to the form itself on the website’s download page.
Look for a prominent download button or link that is labeled with terms such as “Download,” “Get,” or “Save.” It may be accompanied by an icon indicating the file format, such as a PDF icon or a download arrow symbol.
Position your mouse cursor over the download button and click on it to start the download process. In some cases, you may need to right-click on the download button and select “Save link as” or a similar option from the context menu.
Once you have clicked on the download button, the website will begin transferring the form’s file from their server to your device. The download process duration will depend on the file size and the speed of your internet connection. During the download, it’s important to remain connected to the internet and not interrupt the process.
Some websites may display a progress bar or provide an estimated time remaining for the download. This can give you an idea of how long the download will take to complete. Be patient and let the download finish before proceeding to the next step.
After the download is complete, the form’s file will be saved to your device’s default downloads folder or to the location you specified during the download process. You can usually find the downloaded file in the “Downloads” folder of your device’s file manager.
It’s a good practice to double-check the downloads folder to ensure that the form’s file is successfully saved. If you’re unable to locate the downloaded file, check your web browser’s settings to verify the default download location or consult the website’s instructions for further guidance.
With the form successfully downloaded to your device, you can now proceed to the next step: saving the form to a desired location on your device or opening it for editing, depending on your needs.
Step 6: Save the Form to Your Device
After successfully downloading the form, the next step is to save it to a location on your device that is easily accessible and organized. Saving the form will ensure that you can locate and access it whenever you need to fill it out or refer to it.
Typically, when you download a form from a website, it is automatically saved to your device’s default downloads folder. However, you have the option to choose a different location to save the form during the download process.
When the download is complete, locate the downloaded file in your device’s downloads folder or the location where you saved it. You may need to open your device’s file manager or file explorer to navigate to the appropriate folder.
Once you have located the form’s file, you can either keep it in the downloads folder or move it to a different folder or directory of your choice. Consider creating a dedicated folder specifically for forms or documents to keep them organized and easily accessible.
To move the form to a different location, simply click and drag the file to the desired folder. Alternatively, you can right-click on the file, select “Cut” or “Copy,” navigate to the destination folder, and then right-click again and choose “Paste” to move or duplicate the form.
It’s a good practice to give the form file a descriptive and recognizable name when saving it. This will make it easier for you to identify the form later, especially if you have multiple forms with similar names.
If you have a cloud storage service like Google Drive or Dropbox, you can also consider uploading the form to the cloud for additional backup and accessibility. These services allow you to access your forms from any device with an internet connection.
Once you have saved the form to your desired location, you can proceed to the next step: opening and editing the form if necessary. This step will allow you to input the required information or make any necessary changes to the form.
Step 7: Open and Edit the Form (if necessary)
After saving the downloaded form to your device, the next step is to open and, if necessary, edit the form. Opening the form will allow you to input the required information, make changes, or customize it according to your needs.
Locate the saved form file on your device, whether it’s in the downloads folder or the location where you chose to save it. Depending on the file format, you will need the appropriate software installed on your device to open and edit the form.
If the form is in PDF format, you will need a PDF reader such as Adobe Acrobat Reader or a compatible alternative. If it’s in DOC format, a word processing software like Microsoft Word or Google Docs will be required. Similarly, for XLS format, you will need a spreadsheet software like Microsoft Excel or Google Sheets.
Double-click on the form file to open it with the associated software. If the software is not installed on your device, you may need to download and install it from the developer’s website or an authorized software provider.
Once the form is open, review the instructions or guidelines, if provided, to understand how to properly fill out the form. Use the available tools and features of the software to interact with the form, such as text entry fields, checkboxes, or dropdown menus.
If the form requires you to input information, complete the necessary fields by typing in the requested details. Ensure that the information entered is accurate and legible. Some forms may require you to digitally sign or provide additional attachments. Follow the instructions provided by the form to complete these tasks.
In case you need to make edits or modifications to the form, such as adding or removing sections, updating information, or formatting the document, use the provided editing features of the software to make the necessary changes.
Remember to save any changes or edits made to the form to ensure that your work is preserved. Use the “Save” or “Save As” option in the software to save the updated form to the same location or a different location on your device.
If you encounter any issues or have difficulty editing the form, consult the software’s help documentation or the website from which you downloaded the form for additional instructions or support.
With the form opened and any necessary edits made, you are now ready to move on to the final step: printing and using the form.
Step 8: Print and Use the Form
Once you have successfully opened and edited the form, if necessary, the final step is to print and use the form. Printing the form will provide you with a physical copy that can be filled out or submitted as required.
Before proceeding with printing, ensure that you have a functional printer connected to your device and that it has enough ink or toner to produce a clear and legible printout. You may also want to adjust any print settings, such as page layout or print quality, to meet your specific requirements.
Click on the print icon or go to the “File” menu in the software you are using to open the form. Select the Print option, and a preview of the printout will typically appear, allowing you to review how the form will be printed.
When you are satisfied with the preview, click on the Print button to start the printing process. Depending on your printer and the settings you have chosen, the form will be printed on paper in a matter of seconds or minutes.
Once the form is printed, carefully examine it to ensure that all the text, graphics, and form fields are clearly visible and legible. Check that the printed form accurately reflects any edits or changes you made during the editing process.
If you are submitting the form to an organization or institution, follow their specific instructions for submission. Some forms may require you to mail it, while others may allow for electronic submission via email or an online portal.
Keep a copy of the printed form for your records, especially if it contains important information or if you may need to refer to it in the future.
Remember to handle the printed form with care to avoid smudging or damaging it. Use a pen with smudge-proof ink or a printer that provides water-resistant prints, if necessary.
With the form printed, you have completed the process of downloading, saving, editing, and printing the form. Congratulations! You are now ready to use the form for its intended purpose.