Introduction
Welcome to the world of Google Forms! If you’re looking for a quick and easy way to create surveys, quizzes, or collect data, Google Forms is just what you need. It’s a versatile tool offered by Google that allows you to gather information in a structured format.
One of the great features of Google Forms is the ability to download your forms in various formats, including PDF. This can be particularly useful if you want to share your form with others who may not have access to Google Forms or if you simply want to keep a copy for yourself. In this guide, we’ll walk you through the step-by-step process of downloading Google Forms as PDF.
Whether you’re a student, a teacher, a business professional, or just someone who needs to collect data, Google Forms provides a user-friendly platform to create and distribute surveys or other types of forms. From gathering feedback and opinions to conducting market research, the possibilities are endless with Google Forms.
By downloading your Google Forms as PDF, you can not only maintain a version that can be easily shared, but you can also have a permanent snapshot of your form’s content. This can be especially useful if you plan on making any changes to your form in the future or if you need to store a record of form responses.
So, without further ado, let’s dive into the process and learn how to download your Google Forms as PDF. It’s a straightforward procedure that will have you downloading your forms in no time!
Step 1: Accessing Google Forms
To begin the process of downloading Google Forms as PDF, you’ll first need to access Google Forms itself. Follow these simple steps to get started:
- Open your web browser and navigate to https://www.google.com/forms.
- If you’re already signed in to your Google account, you’ll be directed to the Google Forms homepage. If not, you’ll need to sign in by clicking the “Sign In” button located at the top-right corner of the screen.
- Once you’re signed in, you’ll be taken to the Google Forms homepage where you’ll have two options: “Blank” or “Template”. If you want to create a form from scratch, choose “Blank”. If you prefer to use a pre-designed template, click on “Template” and select the template that suits your needs.
- If you decide to create a form from scratch, you’ll be greeted with a blank form. Here, you can start building your form by adding questions, sections, and other elements. If you chose a template, you’ll be directed to a pre-designed form that you can customize to fit your requirements.
Once you have successfully accessed Google Forms and are ready to create or modify your form, you can proceed to the next step. Keep in mind that you can also access Google Forms through your Google Drive account by clicking “New” and selecting “Google Forms” from the drop-down menu. This provides an alternate method of accessing and managing your forms quickly and efficiently.
Now that you have learned how to access Google Forms, you’re one step closer to downloading your forms as PDFs. In the next step, we’ll guide you through creating a new form or selecting an existing form that you want to download. So, let’s move on to Step 2!
Step 2: Creating a New Form or Selecting an Existing Form
Now that you have accessed Google Forms, it’s time to either create a new form or select an existing form to download as a PDF. Follow these guidelines to proceed:
- If you want to create a new form, click on the “+ Blank” button located on the Google Forms homepage or within your Google Drive’s “New” menu. This will open a new form template where you can start customizing your form.
- If you already have an existing form that you want to download as a PDF, access your Google Drive and locate the folder or directory where your form is stored. Then, click on the form to open it.
- If you’re working on a new form, you’ll be presented with a series of options to customize your form. You can add different types of questions like multiple-choice, short answer, or checkboxes. You can also include titles, descriptions, images, and video content to enhance your form.
- If you’re modifying an existing form, you can click on the question fields, titles, or descriptions to make any necessary changes. You can also add or remove questions or sections of your form as needed.
Remember, the customization options in Google Forms are quite extensive, allowing you to tailor your form to specific needs. Take advantage of the available features to make your form more engaging, visually appealing, and relevant to the information you want to collect.
Once you have created a new form or selected an existing form for downloading, you’re ready to move on to the next step. In Step 3, we’ll guide you on how to preview your form and ensure everything is in order before downloading it as a PDF.
Step 3: Previewing the Form
Before downloading your Google Form as a PDF, it’s essential to preview it to ensure that everything looks as intended. Taking a few moments to review your form can help you identify any errors, formatting issues, or missing elements. Follow these steps to preview your form:
- Click on the eye-shaped Preview button located at the top-right corner of the form editor. This will open a preview window where you can see how your form will appear to respondents.
- In the preview window, navigate through your form by clicking the Next or Previous buttons. This allows you to view each question and section of your form to verify content and formatting.
- Pay attention to the layout, question phrasing, answer choices, and any other elements you have included in your form. Make sure they are clear, concise, and easy to understand.
- If you spot any mistakes or need to make adjustments, close the preview window and return to the form editor. Make the necessary modifications, then repeat the process of previewing the form until you are satisfied with the final result.
Previewing your form gives you the opportunity to put yourself in the shoes of your respondents and ensure a smooth and user-friendly experience. By double-checking the form’s appearance and functionality, you can address any potential issues and make necessary improvements before proceeding to the next step.
With your form previewed and refined, you’re now ready to move on to the next step. In Step 4, we’ll cover how to customize the form settings to further optimize your Google Form. Let’s continue!
Step 4: Customizing Form Settings
Customizing form settings is an important step in preparing your Google Form for PDF download. It allows you to fine-tune various aspects of your form to suit your specific requirements. Follow these steps to customize your form settings:
- While in the form editor, click on the gear-shaped Settings icon located at the top-right corner. This will open the form settings menu.
- In the settings menu, you’ll find several options to customize your form. Here are a few key settings you might want to consider:
- Title and description: Edit or provide a title and description for your form to give it context and provide instructions to respondents.
- Confirmation message: Customize the message that appears to respondents once they have submitted the form.
- Collect email addresses: Decide whether you want to collect the email addresses of respondents.
- Restrict to one response: Choose whether you want to limit respondents to only one form submission.
- Response destination: Select where you want the form responses to be stored, such as a Google Sheets spreadsheet or your Google Drive.
- After customizing the form settings, click on the Save button to save your changes.
Customizing your form settings allows you to tailor the form to your unique needs. By providing clear instructions, setting response limitations, and choosing response destinations, you can ensure a streamlined and organized data collection process.
Now that you have customized the settings for your Google Form, you’re almost ready to download it as a PDF. In the next step, we will guide you through the process of downloading your form. So, let’s move on to Step 5!
Step 5: Downloading Google Forms as PDF
After creating and customizing your Google Form, it’s time to download it as a PDF. This allows you to have a portable and shareable version of your form. Follow these steps to download your Google Form as a PDF:
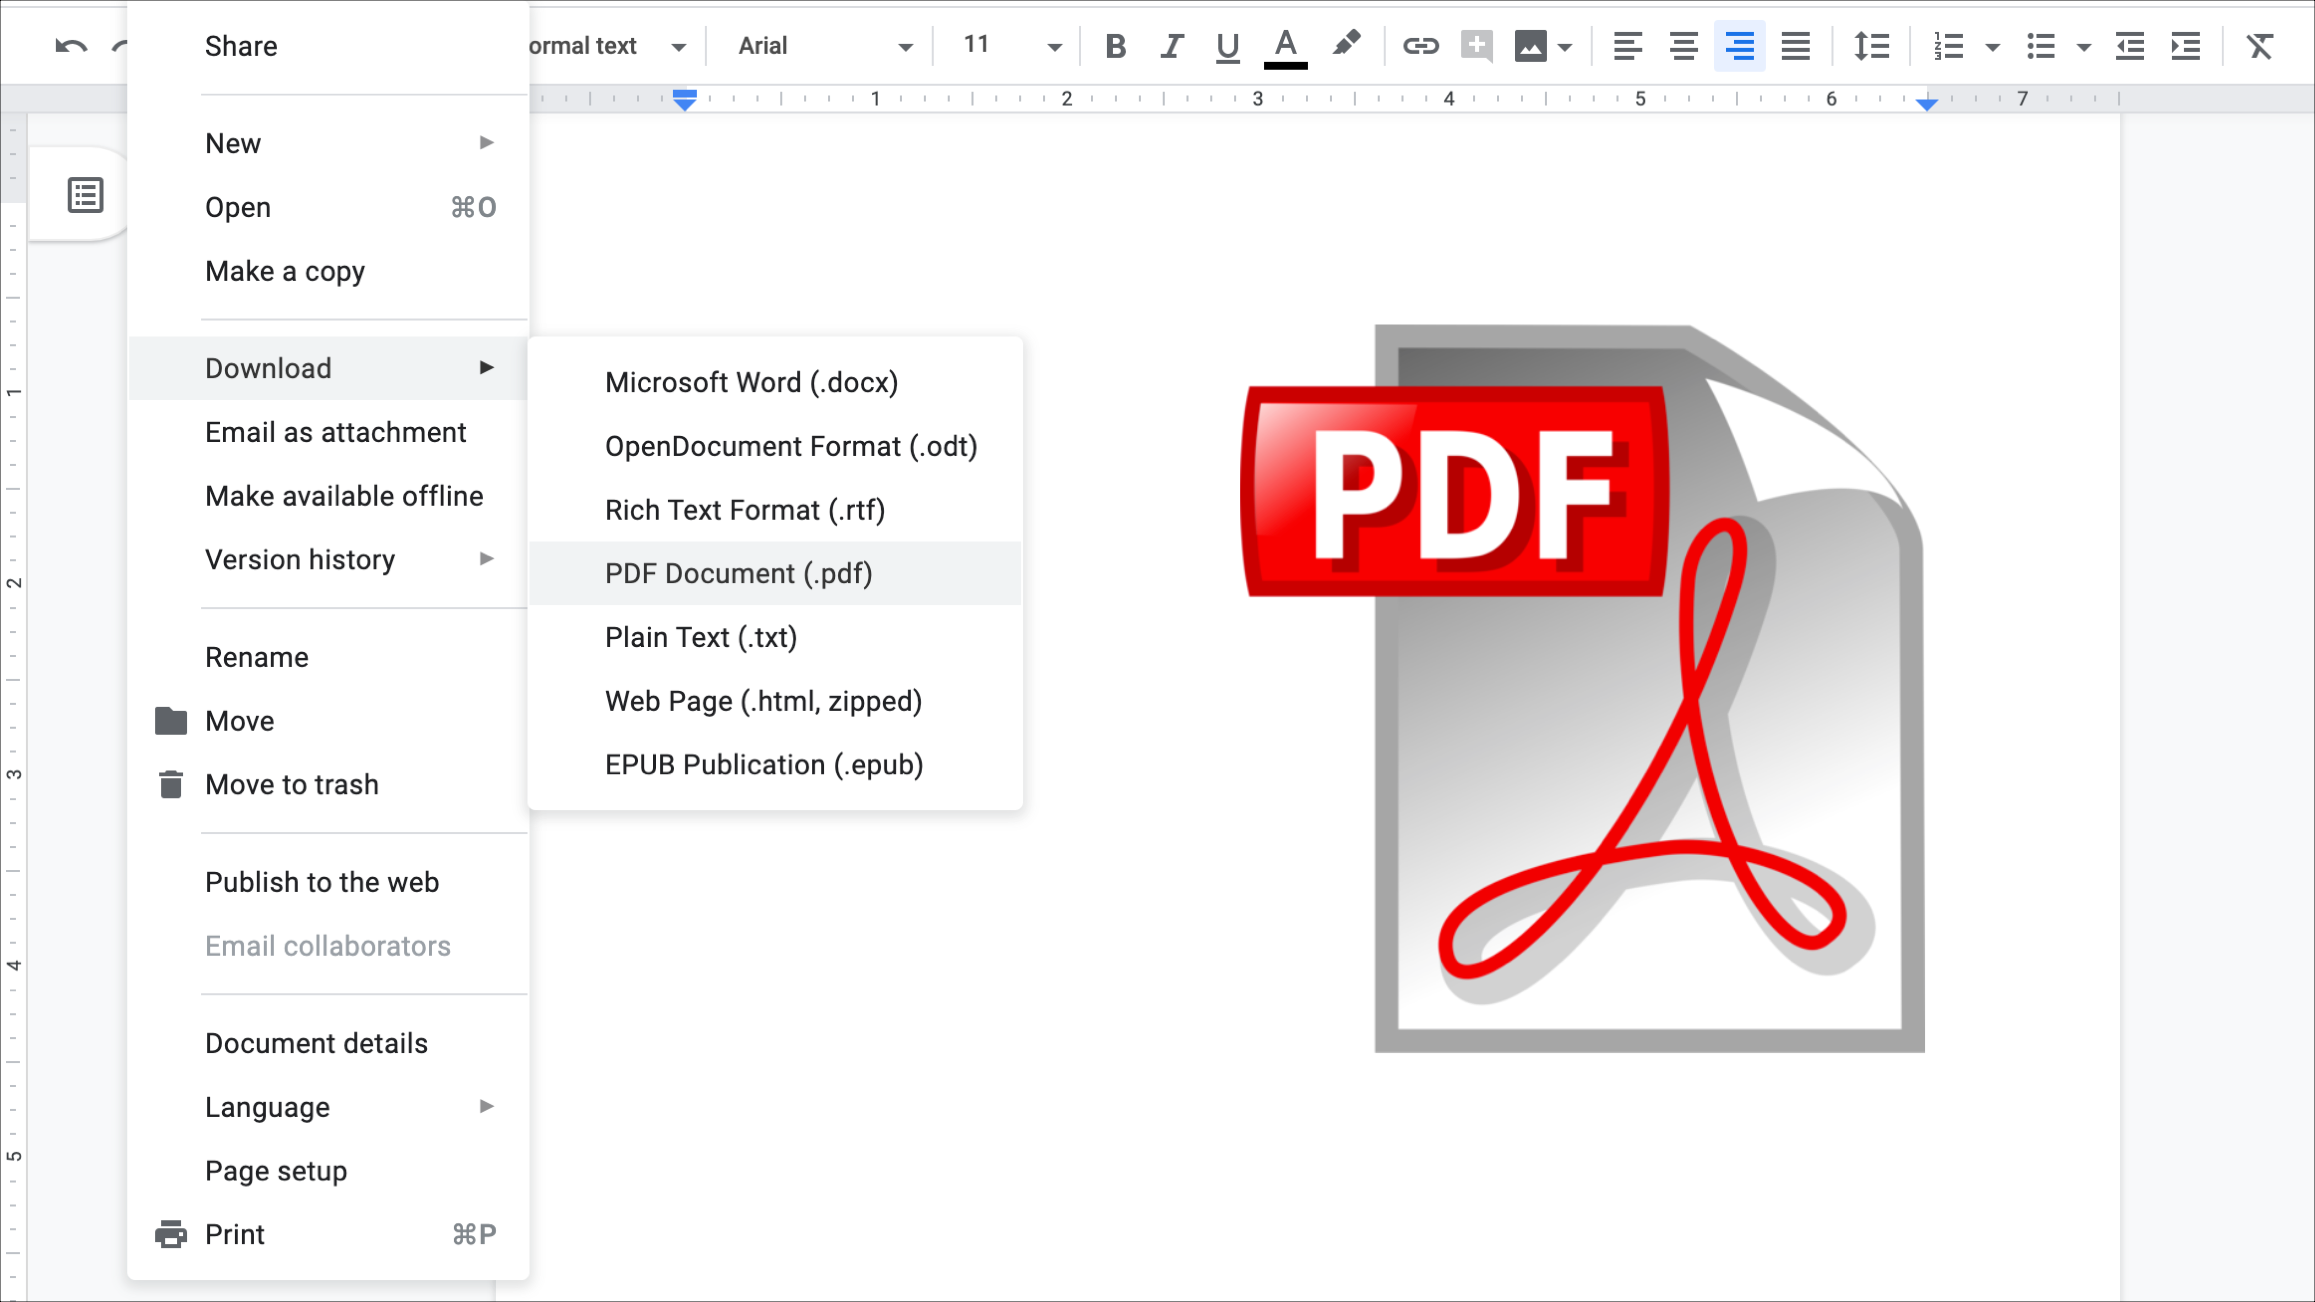
- With your form open in the editor, click on the More (three-dot) button located at the top-right corner of the screen. This will open a dropdown menu.
- In the dropdown menu, select the “Print” option. This will open a new browser tab or window with a print preview of your form.
- Once the print preview is open, you can customize the print settings to your preference. You can choose the printer option as “Save as PDF” or “Adobe PDF” depending on the browser you are using.
- After selecting the desired PDF printer option, click on the “Print” button. This will prompt you to choose a location on your computer to save the PDF file.
- Navigate to the desired location on your computer, name the PDF file, and click on the “Save” button to save the form as a PDF.
Upon completing these steps, the form will be saved in PDF format to the location you specified. You can now share the PDF file, either through email or other digital platforms, making it easily accessible to other users who may not have access to Google Forms.
By downloading your Google Form as a PDF, you have a snapshot of your form’s content and layout at a specific point in time. This can be useful for archiving purposes, creating backups, or sharing with stakeholders who may not have an internet connection.
Congratulations! You have successfully downloaded your Google Form as a PDF. Now you can utilize the PDF version for various purposes according to your needs.
Conclusion
Google Forms is an incredibly versatile tool that allows you to create, customize, and collect data through online forms. By following the steps outlined in this guide, you have learned how to download your Google Forms as PDF files, providing you with a portable and shareable version of your form.
Throughout the process, we covered the essential steps, including accessing Google Forms, creating new forms or selecting existing forms, previewing the form, customizing form settings, and finally, downloading the form as a PDF.
Whether you are a student, teacher, business professional, or anyone in need of an efficient data collection solution, Google Forms can streamline and simplify the process. PDF downloads of your forms offer convenience, allowing you to store and share forms offline or with individuals who may not have access to Google Forms.
Take advantage of Google Forms’ extensive customization options, such as question types, form settings, and layout features, to create professional and engaging forms. Remember to preview your form to ensure everything looks as intended before downloading it as a PDF.
By mastering the art of downloading Google Forms as PDF, you have unlocked a powerful capability that can enhance your data collection and sharing processes. So, go ahead and put your newfound knowledge to use, taking full advantage of Google Forms and its ability to generate PDF versions of your forms.
Now that you have completed this guide, you are ready to create, customize, and download your Google Forms as PDFs with confidence.

![18 Best Online PDF Readers and Editors in 2022 [100% Working]](https://robots.net/wp-content/uploads/2020/06/PDF-image-300x196.jpg)