Introduction
Resetting your computer to its factory settings can be a useful solution when you encounter issues with your Windows 7 operating system. Whether you’re experiencing frequent crashes, slow performance, or a malware infection that refuses to be removed, a factory reset can help restore your computer to its original state, erasing any software conflicts or corrupted files that may be causing the problems.
A factory reset, also known as a system restore or a clean install, reinstalls the Windows operating system and removes all personal data, applications, and settings from your computer. It essentially takes your computer back to the way it was when you first purchased it. However, be aware that this process will delete all your files and installed programs, so it’s essential to back up any important data before proceeding with the reset.
In this article, we will walk you through several methods to factory reset your Windows 7 computer. We will explore the built-in recovery partition, the Windows 7 installation disc, the Advanced Boot Options menu, the System Recovery Options menu, and even third-party software that can assist with the process. By following these methods, you can effectively wipe your computer clean and start fresh.
Before we dive into the different methods, it’s important to note that a factory reset should be considered a last resort. It should only be used when all other troubleshooting methods, such as updating drivers, scanning for malware, and performing system repairs, have failed to resolve your computer issues. Additionally, remember to backup any important files and create a list of installed applications to make the reinstallation process smoother.
So, if you’re ready to learn how to factory reset your Windows 7 computer, let’s explore the various methods in detail. Whether you’re a novice user or an experienced one, we have you covered with step-by-step instructions to help you through the process.
Why do you need to factory reset Windows 7?
There are several reasons why you may need to factory reset your Windows 7 computer. Let’s take a closer look at some common scenarios where a factory reset can be beneficial:
1. Resolving Persistent Issues: If you’re experiencing consistent crashes, errors, or other frustrating issues with your Windows 7 system that aren’t getting resolved through normal troubleshooting steps, a factory reset can help. By resetting your computer to its original state, you can eliminate any software conflicts or corrupted files that may be causing the problems. It’s like giving your computer a fresh start.
2. Speeding Up Performance: Over time, your computer can become bogged down with unnecessary files, applications, and background processes that can slow it down. A factory reset removes all these accumulated clutter and frees up system resources, resulting in improved performance and faster operation.
3. Removing Malware Infections: If your Windows 7 computer has been infected with persistent malware that can’t be completely removed by antivirus software, a factory reset can help. By reinstalling the operating system, you can eliminate any hidden malware and start with a clean slate.
4. Preparing for Resale or Donation: If you’re planning to sell or donate your Windows 7 computer, a factory reset is crucial to protect your personal data. By wiping the hard drive and restoring the system to its factory settings, you can ensure that all your personal files, accounts, and settings are securely erased.
5. Starting Fresh: Sometimes, you may simply want to start fresh with your Windows 7 computer. Perhaps you’ve installed and uninstalled numerous software programs, modified various settings, or made changes you no longer remember. A factory reset allows you to revert back to the original configuration, eliminating any unwanted changes and simplifying your system.
Regardless of your specific reason, it’s important to note that a factory reset should be approached with caution. Make sure to back up any important files and create a checklist of installed applications to ensure a smooth reinstallation process. Once you’re prepared, you can proceed with the factory reset method that best suits your situation.
Things to do before factory resetting
Before you take the plunge and factory reset your Windows 7 computer, there are a few important steps you should take to ensure a smooth and successful reset. These preparation tasks can help minimize the risk of data loss and make the reinstallation process easier. Let’s take a look at what you need to do:
1. Backup your important files: Before proceeding with a factory reset, it’s crucial to back up any important files and documents that you don’t want to lose. You can use an external hard drive, a USB flash drive, or cloud storage services to store your files securely. Remember to include documents, photos, videos, and any other data that you want to keep.
2. Create a list of installed programs: Make a thorough list of all the programs and applications you currently have installed on your computer. This will help you remember what you need to reinstall after the factory reset. You can either jot down the names manually or use third-party software to generate a list of installed programs.
3. Deauthorize software licenses: If you have any software that requires activation or uses licenses, make sure to deauthorize or deactivate them before performing the factory reset. This will ensure that you can reauthorize or reactivate the software without any issues after the reset.
4. Gather necessary installation media: If you plan to reinstall Windows 7 using the installation disc method, locate the original Windows 7 installation disc or USB drive. If you don’t have one, you may need to create a bootable USB or obtain a copy of the installation media from a trusted source.
5. Collect driver installation files: Gather the necessary drivers for your computer hardware, such as graphics cards, network adapters, and sound cards. You can either download and save the latest drivers from the manufacturers’ websites or use third-party tools to backup your existing drivers.
6. Make note of BIOS/UEFI settings: If you have made any custom BIOS or UEFI settings, take note of them or take screenshots so that you can easily reconfigure them after the factory reset. This includes settings related to boot order, secure boot, and virtualization.
7. Disconnect external devices: Before initiating the factory reset, unplug any external devices such as printers, scanners, USB drives, and external hard drives. This will prevent any potential conflicts or data loss during the reset process.
By completing these preparatory tasks, you can ensure a smoother and more efficient factory reset experience. Taking the time to backup your files, create a list of installed programs, and gather necessary installation media and drivers will make it easier to restore your computer after the reset. Once you’ve completed these steps, you’ll be ready to proceed with the factory reset method of your choice.
Method 1: Using the built-in recovery partition
Windows 7 comes with a built-in recovery partition that allows you to restore your computer to its factory settings without the need for an installation disc. This method is convenient if your computer came with Windows 7 pre-installed and you haven’t made any significant hardware changes. Here’s how you can use the built-in recovery partition to factory reset your Windows 7 computer:
1. Start your computer: Power on your Windows 7 computer and wait for it to boot up.
2. Access the recovery options: As the computer starts, look for a key (usually F11, F10, or F8) to enter the recovery environment. The specific key may vary depending on the manufacturer of your computer. Press the appropriate key repeatedly until the recovery options screen appears.
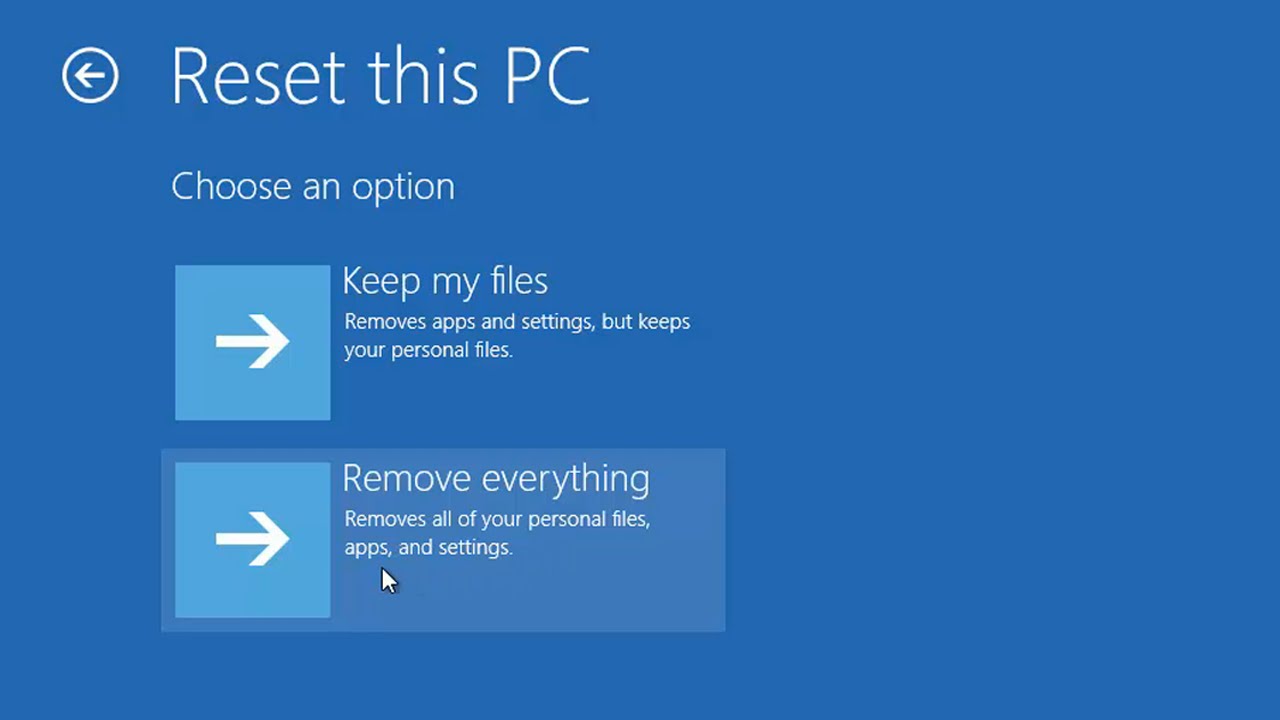
3. Choose the recovery option: From the recovery options screen, select the “Repair Your Computer” or “Restore Your Computer” option. This will launch the recovery environment.
4. Select the operating system: If prompted, select the appropriate operating system (in this case, Windows 7) that you want to reset to its factory settings.
5. Follow the on-screen instructions: The recovery environment will guide you through the process of resetting your computer to its factory settings. Read each prompt carefully and follow the on-screen instructions to proceed.
6. Wait for the reset to complete: The factory reset process may take some time to complete. It will erase all data on the computer’s hard drive and reinstall the original Windows 7 operating system.
7. Set up your computer: Once the factory reset is complete, you will need to go through the initial setup process, such as selecting your region and language, creating a user account, and configuring the Windows settings.
8. Reinstall your applications and restore files: After setting up your computer, you will need to reinstall any applications and restore your files from your backup. Use the list of installed programs you created earlier to guide you through the reinstallation process.
Using the built-in recovery partition is a straightforward method to factory reset your Windows 7 computer. It doesn’t require additional installation media and is often the fastest way to restore your computer to its original state. However, keep in mind that this method may not be available on all computers, especially those that were custom-built or had significant hardware changes. In such cases, you may need to explore other methods to perform a factory reset on your Windows 7 system.
Method 2: Using the Windows 7 installation disc
Another method to factory reset your Windows 7 computer is by using the Windows 7 installation disc. This method is suitable when you have the original installation disc or a bootable USB drive containing the Windows 7 operating system. Here’s how you can use the installation disc to perform a factory reset:
1. Insert the installation disc: Insert the Windows 7 installation disc or plug in the bootable USB drive into your computer.
2. Boot from the installation disc: Restart your computer and access the system’s BIOS or UEFI settings. Look for the boot options and set the computer to boot from the installation disc or USB drive. Save the changes and exit the BIOS/UEFI settings.
3. Start the installation: The computer will now boot from the Windows 7 installation disc. Follow the on-screen prompts to initiate the installation process. Select your language preferences and click “Next” to proceed.
4. Choose “Install now”: On the installation screen, you will be presented with different options. Choose the “Install now” option to proceed with the installation process.
5. Accept the license terms: Read and accept the license terms to continue with the installation. Click the checkbox next to “I accept the license terms” and click “Next”.
6. Select “Custom (advanced) installation”: On the following screen, you will be prompted to select the type of installation. Choose the “Custom (advanced)” option.
7. Delete partitions: You will now see a list of partitions on your computer’s hard drive. Select each partition one-by-one and click “Delete”. Be cautious and make sure you back up any important data on these partitions before proceeding.
8. Choose the unallocated space: After deleting all the partitions, you will be left with unallocated space on your hard drive. Select the unallocated space and click “Next” to start the installation process.
9. Follow the on-screen instructions: The Windows 7 installation will now proceed. Follow the on-screen instructions, such as selecting your region and language preferences, creating a user account, and configuring Windows settings.
10. Reinstall applications and restore files: Once the installation is complete, you will need to reinstall your applications and restore your files from backup. Use the list of installed programs you created earlier to guide you through the reinstallation process.
Using the Windows 7 installation disc gives you more control over the factory reset process and allows you to start from scratch by removing all partitions on your hard drive. It is important to note that this method will completely erase all data on your computer, so ensure you have backed up all important files beforehand. If you don’t have the Windows 7 installation disc, you can try using the built-in recovery partition or explore other methods to factory reset your Windows 7 system.
Method 3: Using the Advanced Boot Options menu
If you’re unable to access the built-in recovery partition or don’t have the Windows 7 installation disc, you can use the Advanced Boot Options menu to factory reset your computer. This method is useful when your Windows 7 system encounters serious issues or won’t boot properly. Here’s how you can use the Advanced Boot Options menu to initiate a factory reset:
1. Start your computer and repeatedly tap F8: Power on your computer and immediately start tapping the F8 key until the Advanced Boot Options menu appears. This works best if you begin tapping the key as soon as the initial startup screen or manufacturer logo appears.
2. Navigate to the “Repair Your Computer” option: Use the arrow keys on your keyboard to highlight the “Repair Your Computer” option in the Advanced Boot Options menu. Press Enter to select it.
3. Choose the operating system: If prompted, select the appropriate operating system (Windows 7) that you want to reset to its factory settings.
4. Select “Factory Image Restore” or “Destructive Recovery”: In the System Recovery Options menu, look for an option such as “Factory Image Restore,” “Recovery Manager,” or “Destructive Recovery.” This option may vary depending on your computer’s manufacturer. Select it and click “Next” to proceed.
5. Confirm the factory reset: Be aware that initiating a factory reset from the Advanced Boot Options menu will delete all your files, applications, and settings. Read the warning message carefully and ensure you have backed up any important data before proceeding. If you’re ready to proceed, click “Yes” or “OK” to confirm.
6. Wait for the factory reset process to complete: The factory reset process may take some time to complete. Your computer will be restored to its original state with the Windows 7 operating system. Follow any on-screen prompts or instructions to finalize the process.
7. Set up your computer: Once the factory reset is complete, you will need to go through the initial setup process, such as selecting your region and language, creating a user account, and configuring the Windows settings.
8. Reinstall applications and restore files: After setting up your computer, you will need to reinstall any applications and restore your files from your backup. Use the list of installed programs you created earlier to guide you through the reinstallation process.
The Advanced Boot Options menu provides a convenient way to access the factory reset option when your computer encounters serious issues or won’t boot properly. It allows you to restore your computer to its factory settings without the need for an installation disc or the built-in recovery partition. However, be cautious, as this method will permanently erase all your data, so make sure to back up any important files beforehand. If you’re unable to access the Advanced Boot Options menu or if it doesn’t have the factory reset option, consider exploring alternative methods to perform a factory reset on your Windows 7 system.
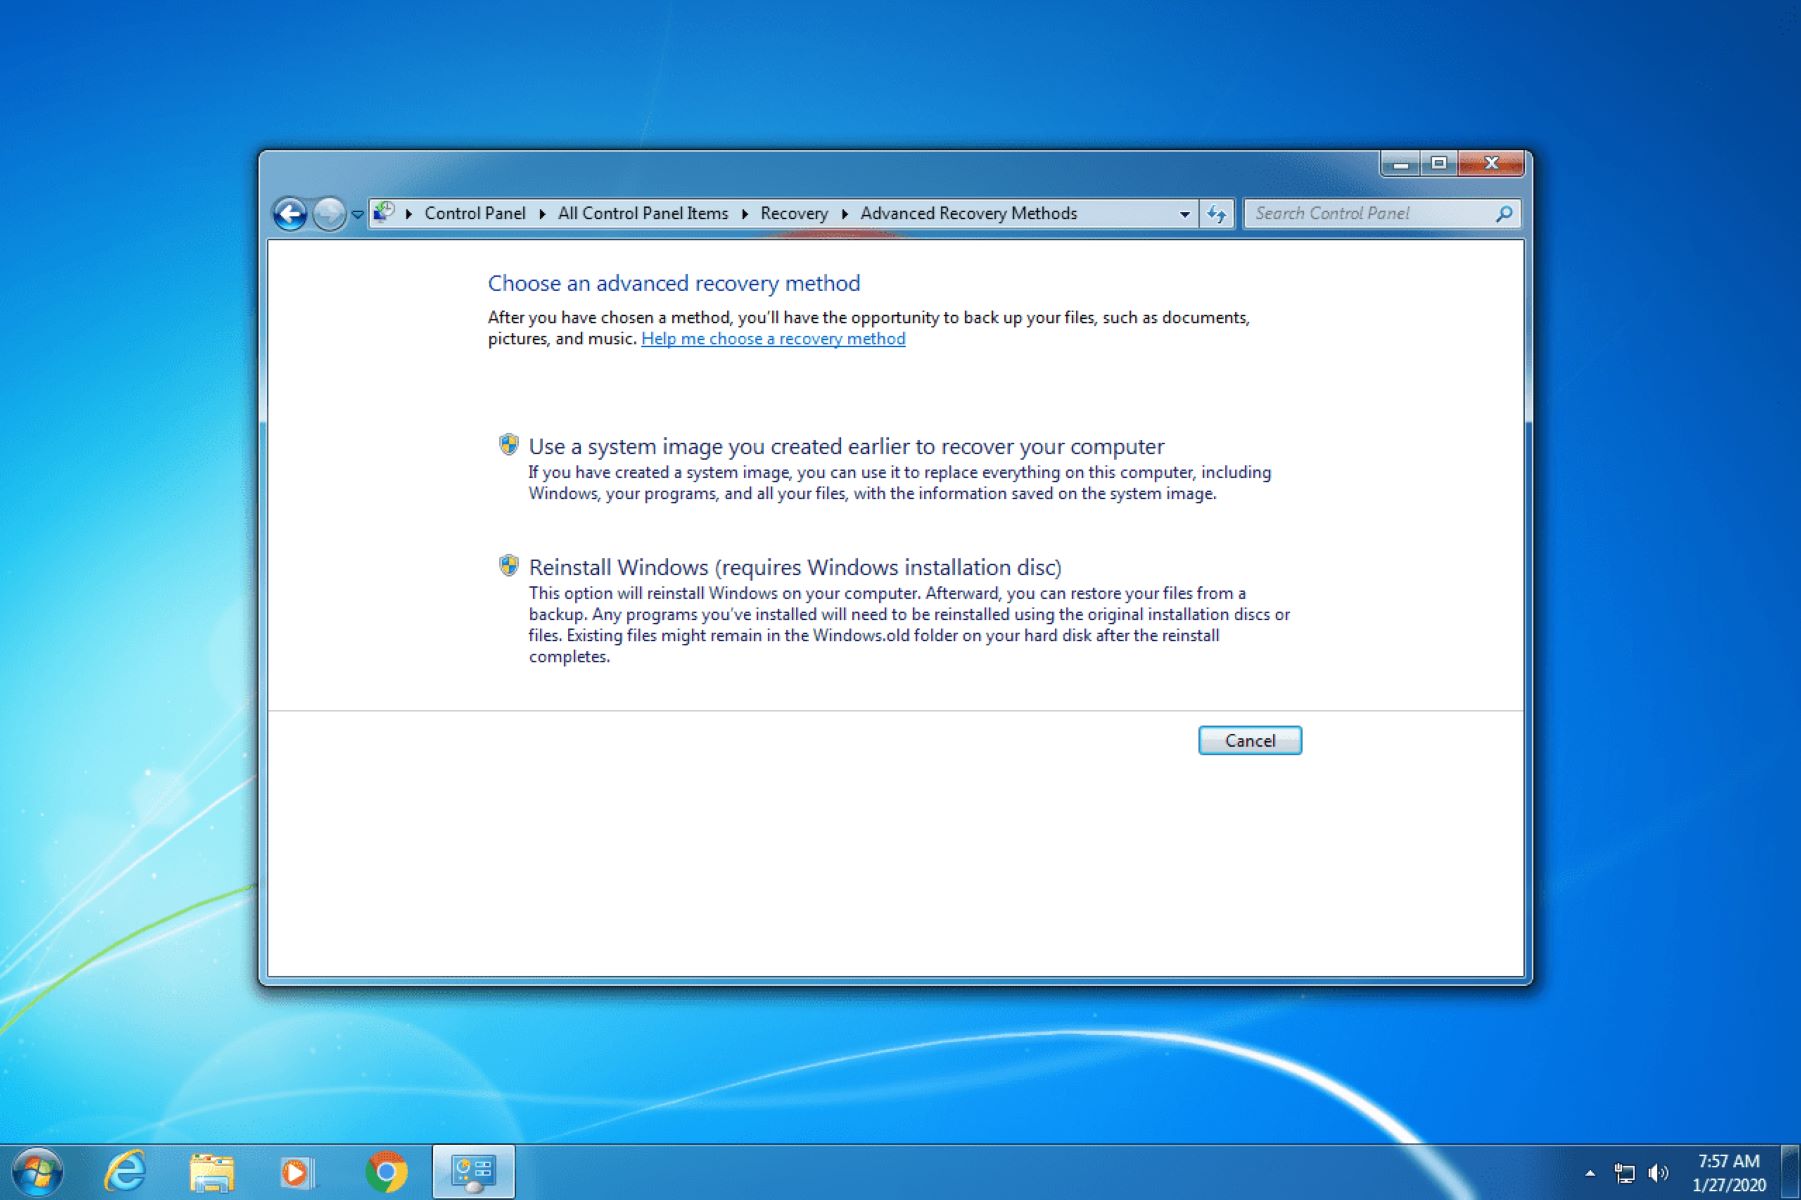
Method 4: Using the System Recovery Options menu
The System Recovery Options menu in Windows 7 provides various tools and utilities to help troubleshoot and repair your computer. It also includes the option to perform a factory reset, which can be beneficial if your Windows 7 system is experiencing serious issues or won’t boot properly. Here’s how you can use the System Recovery Options menu to initiate a factory reset:
1. Start your computer from the installation disc or a system repair disc: Insert the Windows 7 installation disc or a system repair disc into your computer’s optical drive or USB port. Restart your computer and set it to boot from the installation or repair disc.
2. Select your language preferences: On the initial Windows Setup screen, choose your desired language and other preferences, and click “Next” to continue.
3. Access the System Recovery Options menu: On the next screen, click on “Repair your computer” at the bottom left corner to access the System Recovery Options menu.
4. Choose your operating system: If prompted, select the operating system (Windows 7) you want to reset to its factory settings.
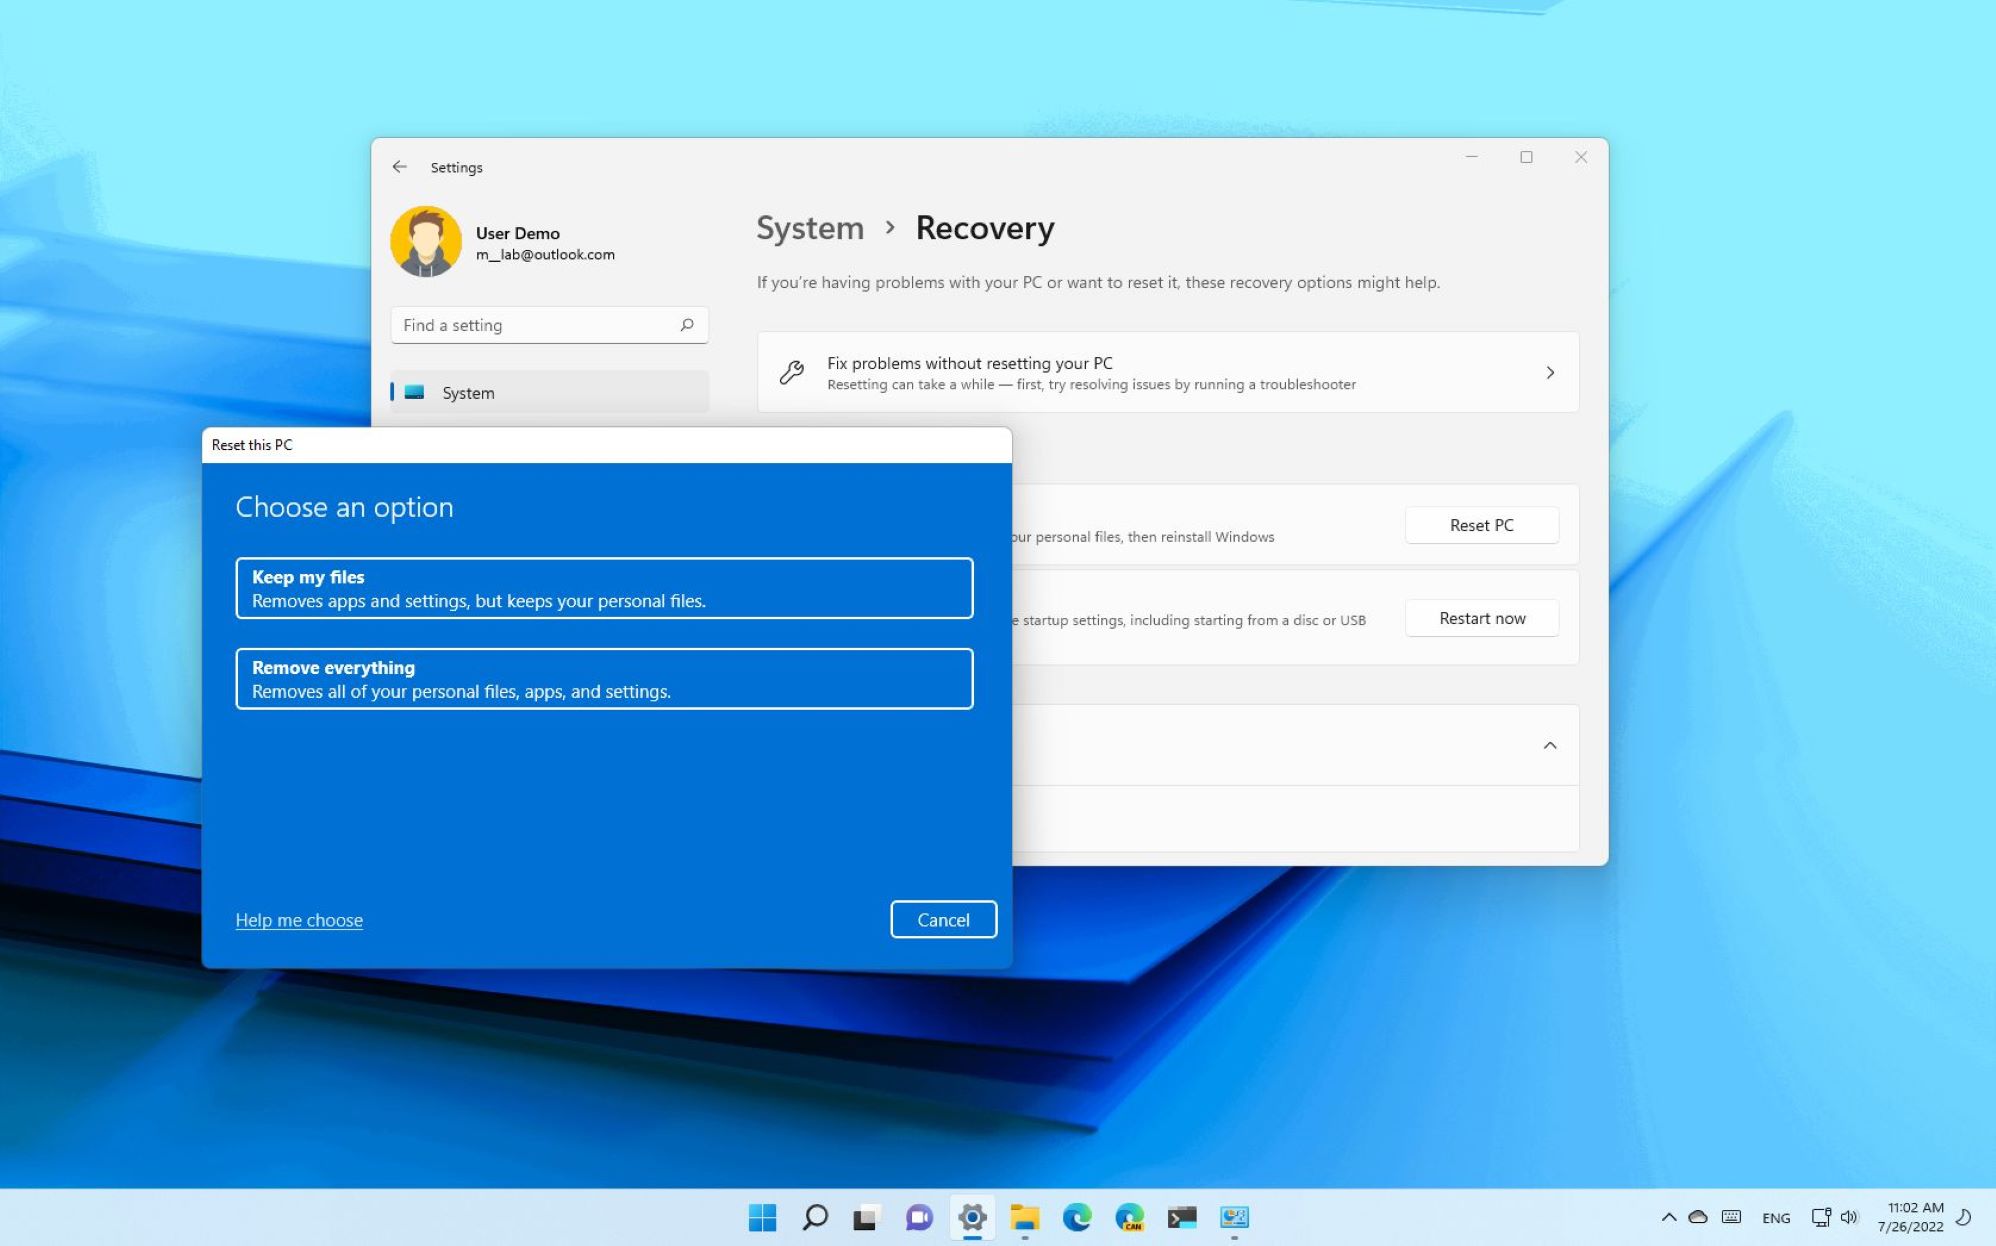
5. Select “System Restore” or “Startup Repair”: In the System Recovery Options menu, you may see options like “System Restore” or “Startup Repair.” These options can help resolve system issues without performing a factory reset. However, if you want to proceed with the factory reset, look for an option like “System Recovery” or “Complete PC Restore.” Select it and click “Next” to continue.
6. Confirm the factory reset: Before proceeding, you will receive a warning message indicating that the factory reset will delete all your files, applications, and settings. Make sure you have backed up any important data, as it cannot be recovered after the reset. Once you are ready to proceed, confirm the factory reset by clicking “Yes” or “OK.”
7. Wait for the factory reset process to complete: The factory reset process will begin and may take some time to complete. Your computer will be restored to its original state with the Windows 7 operating system. Follow any on-screen prompts or instructions to finalize the process.
8. Set up your computer: Once the factory reset is complete, you will need to go through the initial setup process, such as selecting your region and language, creating a user account, and configuring the Windows settings.
9. Reinstall applications and restore files: After setting up your computer, you will need to reinstall any applications and restore your files from your backup. Use the list of installed programs you created earlier to guide you through the reinstallation process.
The System Recovery Options menu provides a range of tools to help repair and restore your Windows 7 system, including the option to perform a factory reset. While it may not be as convenient as using the built-in recovery partition or the installation disc, it can be a useful alternative when those options are not available. Remember to backup your files and be aware that the factory reset will erase all data on your computer. If your system is severely damaged or unbootable, the System Recovery Options menu can be a valuable resource to bring your Windows 7 computer back to its original state.
Method 5: Using third-party software
If the built-in recovery options or the Windows 7 installation disc are not available or don’t meet your needs, you can consider using third-party software to perform a factory reset on your Windows 7 computer. There are several reputable software options available that offer advanced features and flexibility. Here’s how you can use third-party software to initiate a factory reset:
1. Research and choose a reliable third-party software: Conduct thorough research to find a reputable third-party software solution that specializes in Windows system recovery and factory resets. Look for positive reviews, user ratings, and a well-established track record.
2. Download and install the software: Visit the official website of the chosen software and download the installation package. Follow the on-screen instructions to install the software on your computer.
3. Launch the software: Once the installation is complete, launch the software. Familiarize yourself with the user interface and features, as they may vary depending on the software you have chosen.
4. Explore the factory reset option: Look for the option within the software that allows you to perform a factory reset or system restoration. This option is usually clearly labeled or found within a dedicated menu.
5. Confirm the factory reset: Before proceeding with the factory reset, ensure that you have backed up all important files and data, as the process will erase all data on your computer. Review any warning messages or prompts and confirm your choice to initiate the factory reset.
6. Follow the software instructions: Follow the step-by-step instructions provided by the third-party software to proceed with the factory reset. Pay close attention to any additional options or settings that may be available during the process.
7. Wait for the factory reset to complete: The factory reset process may take some time to complete, depending on the software you’re using and the specifications of your computer. Allow the software to complete the reset without interruption.
8. Set up your computer: After the factory reset is complete, you will need to go through the initial setup process, such as selecting your region and language, creating a user account, and configuring the Windows settings.
9. Reinstall applications and restore files: Following the setup process, reinstall your desired applications and restore your files from backup. Utilize the list of installed programs you created earlier to facilitate the reinstallation process.
Using third-party software for a factory reset can provide increased flexibility and additional features compared to the built-in recovery options. However, it’s crucial to choose a reputable software solution from a trusted source and follow the provided instructions carefully. Always backup your important files and ensure compatibility with your Windows 7 system before initiating the factory reset. Keep in mind that the specific steps may vary depending on the software you use, so refer to the documentation or support resources provided by the software developer for detailed instructions.
Conclusion
Factory resetting your Windows 7 computer can be a powerful solution to resolve persistent issues, improve performance, remove malware infections, or prepare for resale or donation. In this article, we have explored five different methods to perform a factory reset, each catering to different circumstances and available resources.
The built-in recovery partition is a convenient method if your computer came with Windows 7 pre-installed. It allows you to restore your computer to its factory settings without the need for an installation disc. On the other hand, using the Windows 7 installation disc provides more control and is suitable when you have the original installation media.
If your system encounters serious issues or won’t boot properly, the Advanced Boot Options menu and the System Recovery Options menu offer alternative pathways for a factory reset. These methods can be handy when the built-in recovery partition or installation disc are not available or not suitable for your situation.
For those who prefer more advanced features and flexibility, using third-party software is a viable option. Third-party software solutions can provide advanced tools for system recovery and factory resets, offering additional options beyond the built-in Windows 7 tools.
Before initiating a factory reset, it’s vital to backup your important files, create a list of installed programs, and be aware that the process will erase all your data. Take the necessary precautions to ensure a smooth reset and reinstall your applications and restore your files using the backup and list you created.
Remember, a factory reset should be approached cautiously and considered a last resort when other troubleshooting methods have failed. Such a reset wipes your computer and reinstalls the operating system, so it’s crucial to fully understand the implications and prepare accordingly.
By following the appropriate method for your situation, you can successfully perform a factory reset on your Windows 7 computer and restore it to its original state. Enjoy the benefits of a clean and fresh start, and if needed, consider seeking professional assistance or guidance if you encounter any challenges during the process.