Introduction
Welcome to our guide on how to enable PHP Curl Extension. If you’re a web developer or have worked with PHP, you might have come across the term “Curl” in your coding journey. The PHP Curl Extension is a powerful library that allows you to make HTTP requests, interact with APIs, and retrieve data from remote servers.
With the PHP Curl Extension, you can perform various tasks such as sending and receiving HTTP requests, handling cookies, managing sessions, and even uploading files to a server. It provides you with a comprehensive set of functions that simplify the process of fetching data from external sources.
However, it’s important to note that the PHP Curl Extension is not enabled by default in PHP installations. This means that if you want to utilize its capabilities, you’ll need to enable it manually. In this guide, we will walk you through the steps to enable PHP Curl Extension on different operating systems, including Windows, Linux, and macOS.
Before we dive into the specifics of enabling the extension, let’s first understand why the PHP Curl Extension is so important and how it can benefit you in your web development projects.
What is PHP Curl Extension?
The PHP Curl Extension is a library that provides an interface to interact with servers using various protocols like HTTP, FTP, SMTP, and more. It allows you to make requests to remote servers, retrieve data, and perform other operations without leaving the comfort of your PHP script.
Curious about where the name “Curl” comes from? Well, Curl stands for “Client for URLs,” which reflects its primary purpose of acting as a client for making requests to URLs or web addresses. It offers a wide range of functionalities, making it a versatile tool for web developers.
With the PHP Curl Extension, you can perform common tasks such as sending GET and POST requests to APIs, retrieving JSON or XML responses, and handling authentication through cookies or custom headers. Additionally, you can upload files to a remote server or even download files using Curl’s built-in capabilities.
The extension provides a user-friendly and straightforward API that allows you to configure various options, including timeouts, SSL verification, proxy settings, and more. It also supports features like handling redirects, preserving session data, and enabling gzip compression for efficient data transfer.
Overall, the PHP Curl Extension offers a robust and feature-rich toolset for web developers to communicate with remote servers seamlessly. It’s widely used in applications that interact with APIs, fetch remote data, or perform server-to-server communication. Understanding the basics and utilizing the power of the PHP Curl Extension can significantly enhance your web development capabilities.
Why is PHP Curl Extension Important?
The PHP Curl Extension plays a crucial role in modern web development due to its wide range of capabilities and benefits. Here are some key reasons why the PHP Curl Extension is important:
- Interacting with APIs: APIs (Application Programming Interfaces) are integral to modern web development, allowing different applications and systems to communicate and exchange data. The PHP Curl Extension makes it easy to interact with APIs by enabling you to send HTTP requests, handle authentication, and retrieve JSON or XML responses. This opens up a world of possibilities for integrating external services, fetching data, and building dynamic and interactive web applications.
- Fetching Remote Data: Often, web developers need to retrieve data from remote servers or websites. Whether it’s scraping information from a website, fetching stock prices, or accessing external databases, the PHP Curl Extension provides a convenient way to make HTTP requests, handle responses, and parse the required data. It saves developers from manual and tedious processes, making it efficient and straightforward to extract the desired information.
- Server-to-Server Communication: In certain cases, applications need to communicate directly with other servers or services to exchange data. The PHP Curl Extension makes it seamless to establish connections with remote servers, send data, and retrieve responses. This is particularly useful for tasks like synchronizing data between different systems, fetching updates from external sources, or integrating with third-party services that require server-to-server communication.
- File Transfers: The PHP Curl Extension is not limited to just fetching data. It also provides functionalities for uploading and downloading files to and from remote servers. Whether it’s uploading user files to cloud storage, fetching images from external sources, or transferring large files, Curl simplifies the file transfer process by handling the underlying protocols and providing a convenient API to manage such operations.
- Advanced Features and Flexibility: The PHP Curl Extension offers a plethora of advanced features and options to customize your requests and handle complex scenarios. From handling redirects and managing cookies to setting custom headers and configuring SSL certificates, Curl provides the flexibility and control to fine-tune your interactions with remote servers. Its extensive documentation and community support make it a reliable tool for handling diverse use cases and solving specific challenges.
Overall, the PHP Curl Extension is essential for modern web development. It empowers developers to easily interact with remote servers, communicate with APIs, retrieve data, and perform various server-side tasks efficiently and effectively.
Checking if Curl Extension is Already Enabled
Before proceeding to enable the PHP Curl Extension, it’s essential to determine whether it is already enabled on your server. Here are a few methods to check the status of the Curl extension:
- phpinfo() Function: One way to check if Curl is enabled is by using the phpinfo() function. Simply create a new PHP file, insert the following code, and run it on your server:
<?php
  phpinfo();
  ?>
This will display a comprehensive PHP information page in your browser. Use the browser’s search functionality (usually accessed by pressing Ctrl+F) and search for “curl” or “curl extension” to find the relevant information. If you can locate Curl information, it means the extension is already enabled. Otherwise, it will not be listed, indicating that it is not enabled.
- Command Line: Another method is to use the command line interface. Open a terminal or command prompt and run the following command:
php -m | grep curlIf the Curl extension is enabled, the command will display “curl” in the output. Otherwise, there will be no output or an error message.
- Using a Test Script: Alternatively, you can create a simple PHP script to specifically check for the Curl extension. Create a new PHP file containing the following code and run it on your server:
<?php
  if (function_exists('curl_version')) {
    echo "Curl is enabled on this server.";
  } else {
    echo "Curl is not enabled on this server.";
  }
  ?>
If the script outputs “Curl is enabled on this server,” it means that the extension is enabled. Otherwise, the message “Curl is not enabled on this server” indicates that the extension is not enabled.
By following any of these methods, you can easily determine whether the PHP Curl Extension is already enabled on your server. If it is enabled, you can proceed with your development tasks. However, if it is not enabled, you can continue reading this guide to learn how to enable the PHP Curl Extension on different operating systems.
Enabling PHP Curl Extension on Windows
If you’re using PHP on a Windows server or local development environment, follow these steps to enable the Curl extension:
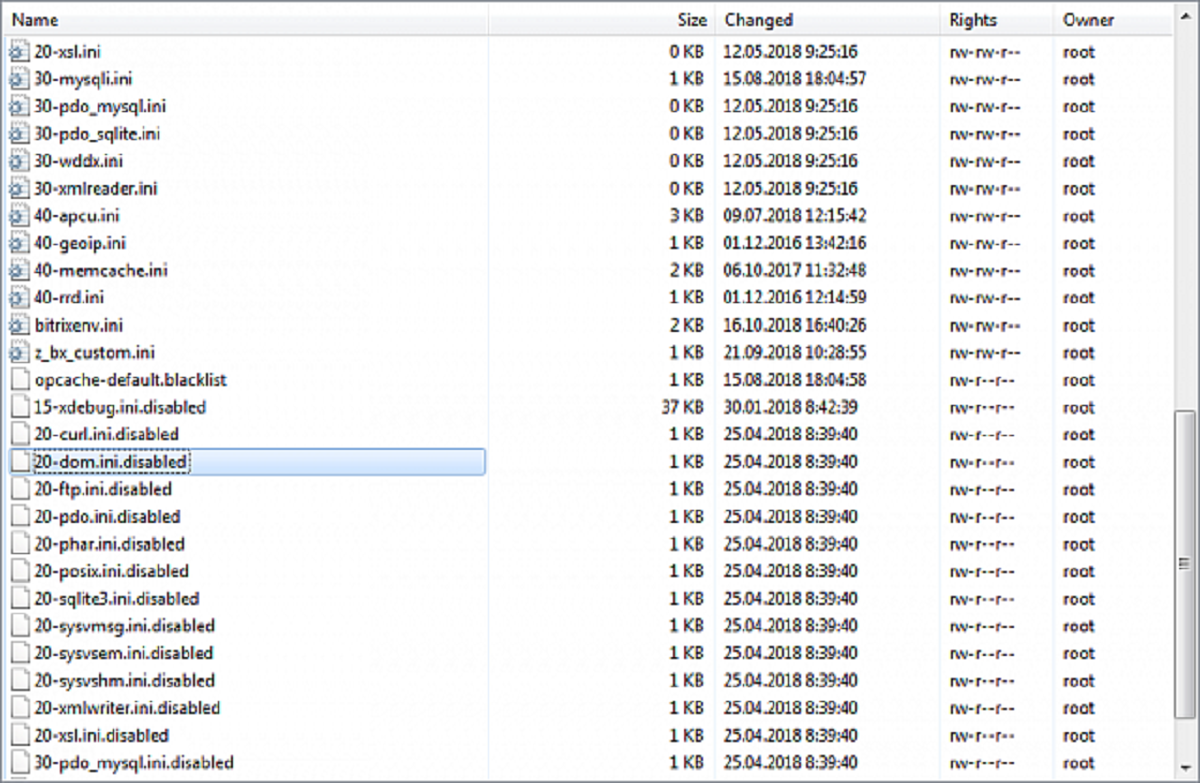
- Locate the php.ini File: The first step is to find the php.ini file that corresponds to your PHP installation. Typically, it is located in the “php” directory within your PHP installation folder. For example, if your PHP installation is in C:\php, the php.ini file will be located at C:\php\php.ini.
- Open php.ini in a Text Editor: Once you have located the php.ini file, open it in a text editor of your choice.
- Search for the Curl Extension: In the php.ini file, use the search functionality (usually achieved by pressing Ctrl+F) and search for “extension=curl”.
- Remove the Comment Character: Once you find the line “extension=curl”, check if it is commented out with a semicolon (;) at the beginning. If it is, remove the semicolon to uncomment the line.
- Save the php.ini File: After uncommenting the line, save the changes to the php.ini file.
- Restart the Web Server: To apply the changes, you need to restart the web server. This can typically be done by stopping and starting the server service, or by restarting the server software.
- Verify the Curl Extension: Once the web server is restarted, you can verify if the Curl extension is enabled by using the methods mentioned in the previous section “Checking if Curl Extension is Already Enabled.”
If you can confirm that the Curl extension is now enabled, you’re all set to utilize its functionalities in your PHP projects. However, if you encounter any issues or the extension is still not enabled, refer to the next section for troubleshooting common problems that may arise during the enabling process.
Enabling PHP Curl Extension on Linux
If you’re using PHP on a Linux server or environment, follow these steps to enable the Curl extension:
- Open Terminal: Access the terminal or SSH into your Linux server.
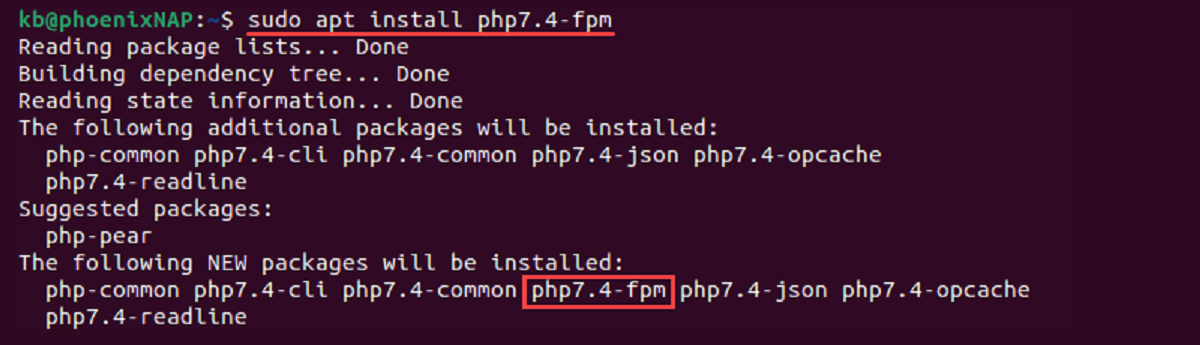
- Install the Required Packages: Install the necessary packages for Curl and PHP extensions. The package names may vary depending on your Linux distribution. For example, on Ubuntu, you can use the following command:
sudo apt-get install php-curlOn CentOS, you can use the following command:
sudo yum install php-curlUse the appropriate package manager for your Linux distribution.
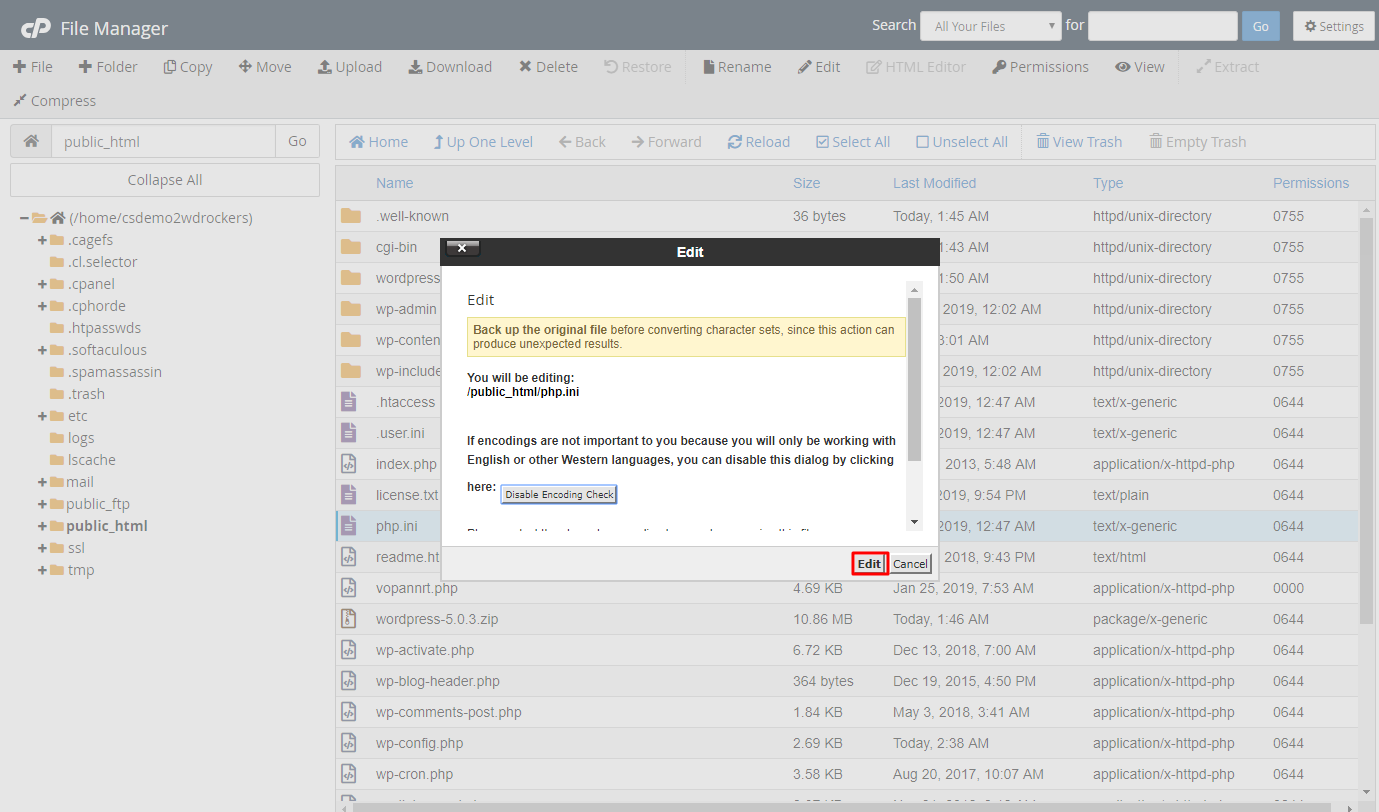
- Edit php.ini File: Open the php.ini file using a text editor. The location of the file can vary depending on your setup. Typically, you can find it in the /etc/php/ directory. For example, on Ubuntu, you can use the following command:
sudo nano /etc/php/7.x/apache2/php.iniReplace “7.x” with your PHP version.
- Enable Curl Extension: In the php.ini file, look for the line “extension=curl” and remove the comment character (;) if present at the beginning of the line. Save the changes to the file.
- Restart the Web Server: To apply the changes, you need to restart the web server. Use the appropriate command for your web server. For example, on Apache, you can use the following command:
sudo service apache2 restartIf you’re using Nginx, use the following command:
sudo service nginx restart - Verify the Curl Extension: Once the web server is restarted, you can verify if the Curl extension is enabled using the methods mentioned in the previous section “Checking if Curl Extension is Already Enabled.”
If the verification confirms that the Curl extension is now enabled, congratulations! You can start utilizing its capabilities in your PHP projects. In case you encounter any issues during the enabling process, the next section will provide troubleshooting tips for common problems.
Enabling PHP Curl Extension on macOS
If you’re using PHP on a macOS system, follow these steps to enable the Curl extension:
- Open Terminal: Launch the Terminal application on your macOS system.
- Edit php.ini File: Open the php.ini file using a text editor. The location of the file can vary depending on your setup. Typically, you can find it at /etc/php.ini or /etc/php/version/php.ini. For example, you can use the following command to open the file with the nano text editor:
sudo nano /etc/php.iniIf the file is not found, you can create a new one by copying the php.ini.default template file.
- Find Curl Extension Configuration: In the php.ini file, search for the line “extension=curl”. If you find it, make sure it is not commented out with a semicolon (;) at the beginning of the line. If it is commented out, remove the semicolon to uncomment the line.
- Save the php.ini File: After updating the file, save the changes and exit the text editor.
- Restart the Web Server: To apply the changes, you need to restart the web server. You can restart Apache on macOS by using the following command:
sudo apachectl restart - Verify the Curl Extension: Once the web server is restarted, you can verify if the Curl extension is enabled by using the methods mentioned in the previous section “Checking if Curl Extension is Already Enabled.”
If the verification confirms that the Curl extension is now enabled, you’re ready to leverage its capabilities in your PHP projects on macOS. If you encounter any difficulties or the extension is still not enabled, refer to the next section for troubleshooting common problems and finding solutions.
Troubleshooting Common Issues
Enabling the PHP Curl Extension can sometimes come with its fair share of challenges. If you encounter any issues during the process, here are a few common problems and their possible solutions:
- Extension Not Found: If you can’t locate the extension line in the php.ini file, it’s likely that Curl is not installed on your system. Ensure that you have the necessary packages installed, as mentioned in the relevant sections for your operating system.
- Incorrect php.ini File: If the changes made to the php.ini file don’t seem to take effect, make sure you’re modifying the correct php.ini file. Double-check the file location and consult the documentation or seek assistance from your hosting provider if necessary.
- Web Server Restart: Sometimes, failing to restart the web server after modifying the php.ini file can prevent the changes from being applied. Ensure that you restart the server to activate the updated configuration.
- File Permissions: Incorrect file permissions on the php.ini file or the related directories can cause issues with enabling the Curl Extension. Make sure that the file and directories have the proper read and write permissions for the web server to access them.
- Conflicting Extensions: It’s possible that other extensions or modules are conflicting with the Curl Extension. Check if there are any conflicting modules enabled in the php.ini file and consider disabling them temporarily to isolate the issue.
- Restarting the Wrong Web Server: If you’re using multiple web servers on your system, make sure you restart the correct one after making changes to the php.ini file. Restarting the wrong server can lead to frustration and confusion.
- Outdated PHP Version: Ensure that you’re using a compatible and up-to-date version of PHP. Older versions may not support the Curl Extension or may require additional steps for enabling it.
If you encounter any other specific issues while enabling the PHP Curl Extension, consult the PHP documentation, online forums, or seek assistance from experienced developers to find solutions tailored to your circumstances.
Conclusion
The PHP Curl Extension is a powerful tool for web developers that allows for seamless communication with remote servers, handling APIs, fetching data, and more. Enabling the Curl Extension is an essential step to leverage its capabilities and enhance your PHP projects.
In this guide, we’ve covered the importance of the PHP Curl Extension, how to check if it’s already enabled, and the steps to enable it on different operating systems, including Windows, Linux, and macOS. We’ve also discussed troubleshooting common issues that may arise during the enabling process.
By enabling the PHP Curl Extension, you open up a world of possibilities for interacting with external services, fetching remote data, performing server-to-server communication, and handling file transfers. Its advanced features and flexibility empower you to tackle various challenges in web development.
Remember to always verify if the Curl extension is enabled after making the necessary changes. This can be done with methods like using the phpinfo() function, the command line, or by running a test script.
We hope this guide has provided you with the knowledge and guidance needed to enable the PHP Curl Extension effectively. Now, go ahead and take advantage of the extension’s capabilities to enhance your PHP applications and streamline your web development workflow.