Understanding Google Workspace and Gmail
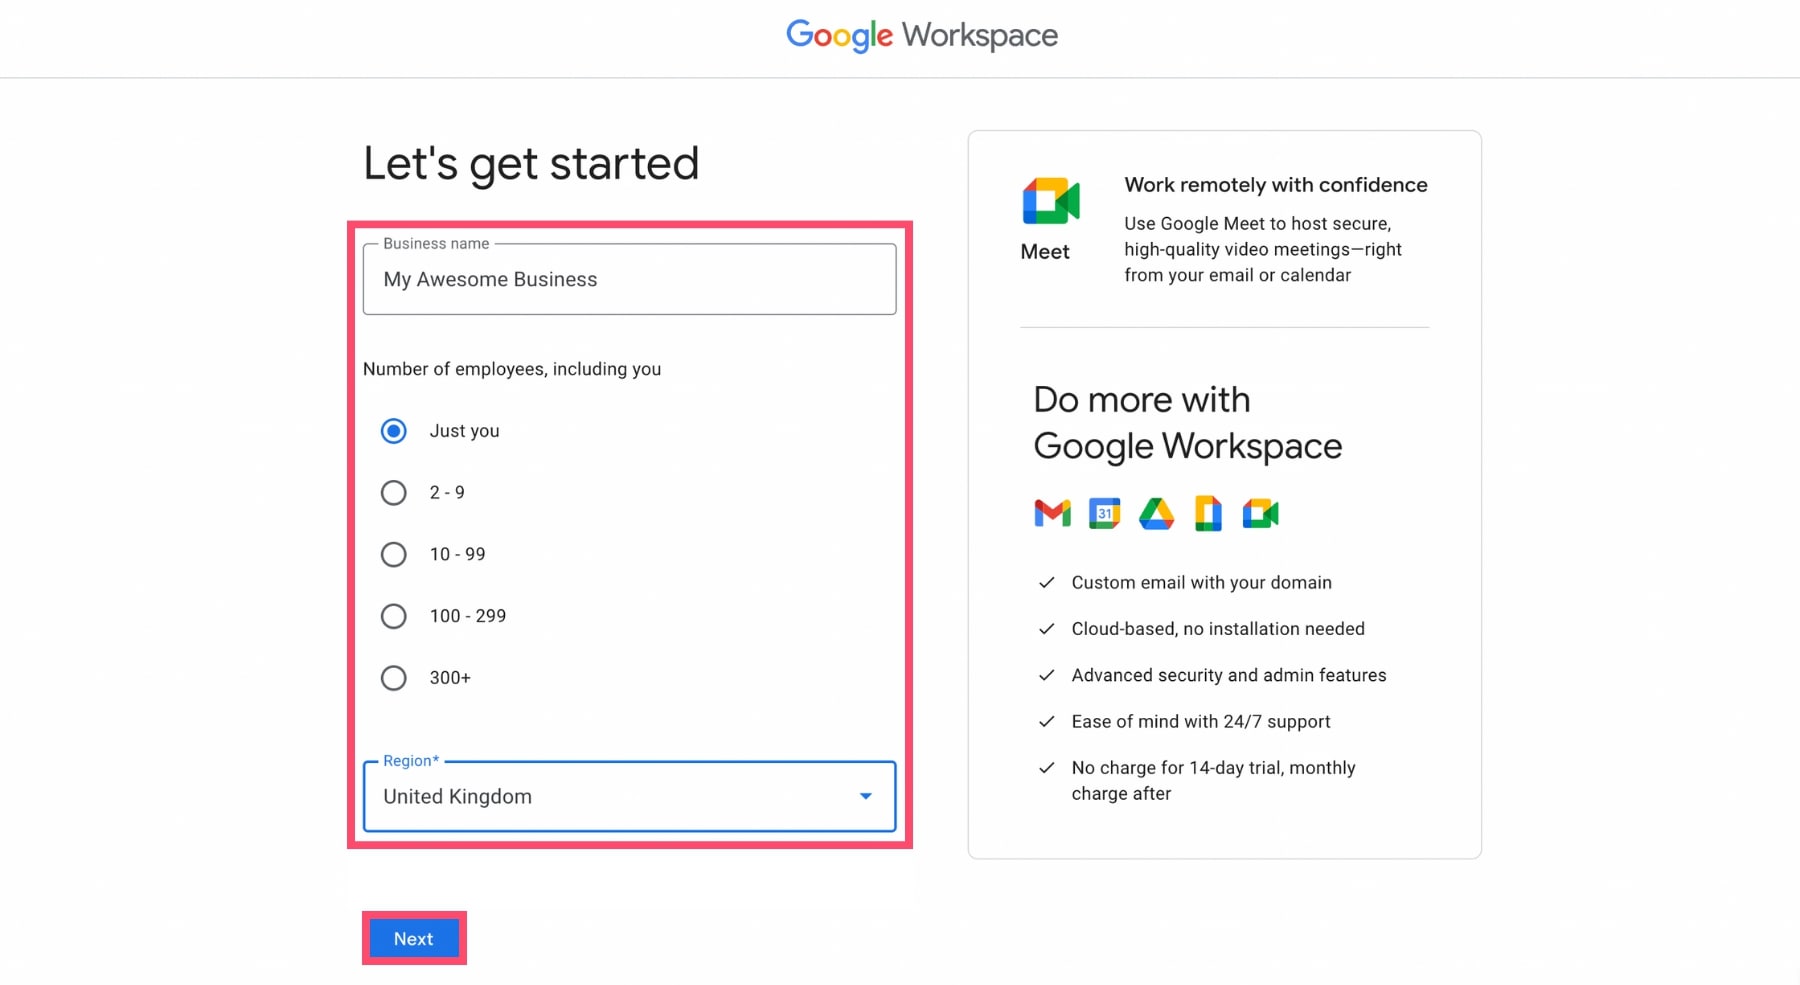
Google Workspace is a powerful suite of productivity and collaboration tools designed for businesses. It includes a variety of applications such as Gmail, Drive, Calendar, Docs, and more. Among these applications, Gmail stands out as one of the most widely used and essential tools for communication.
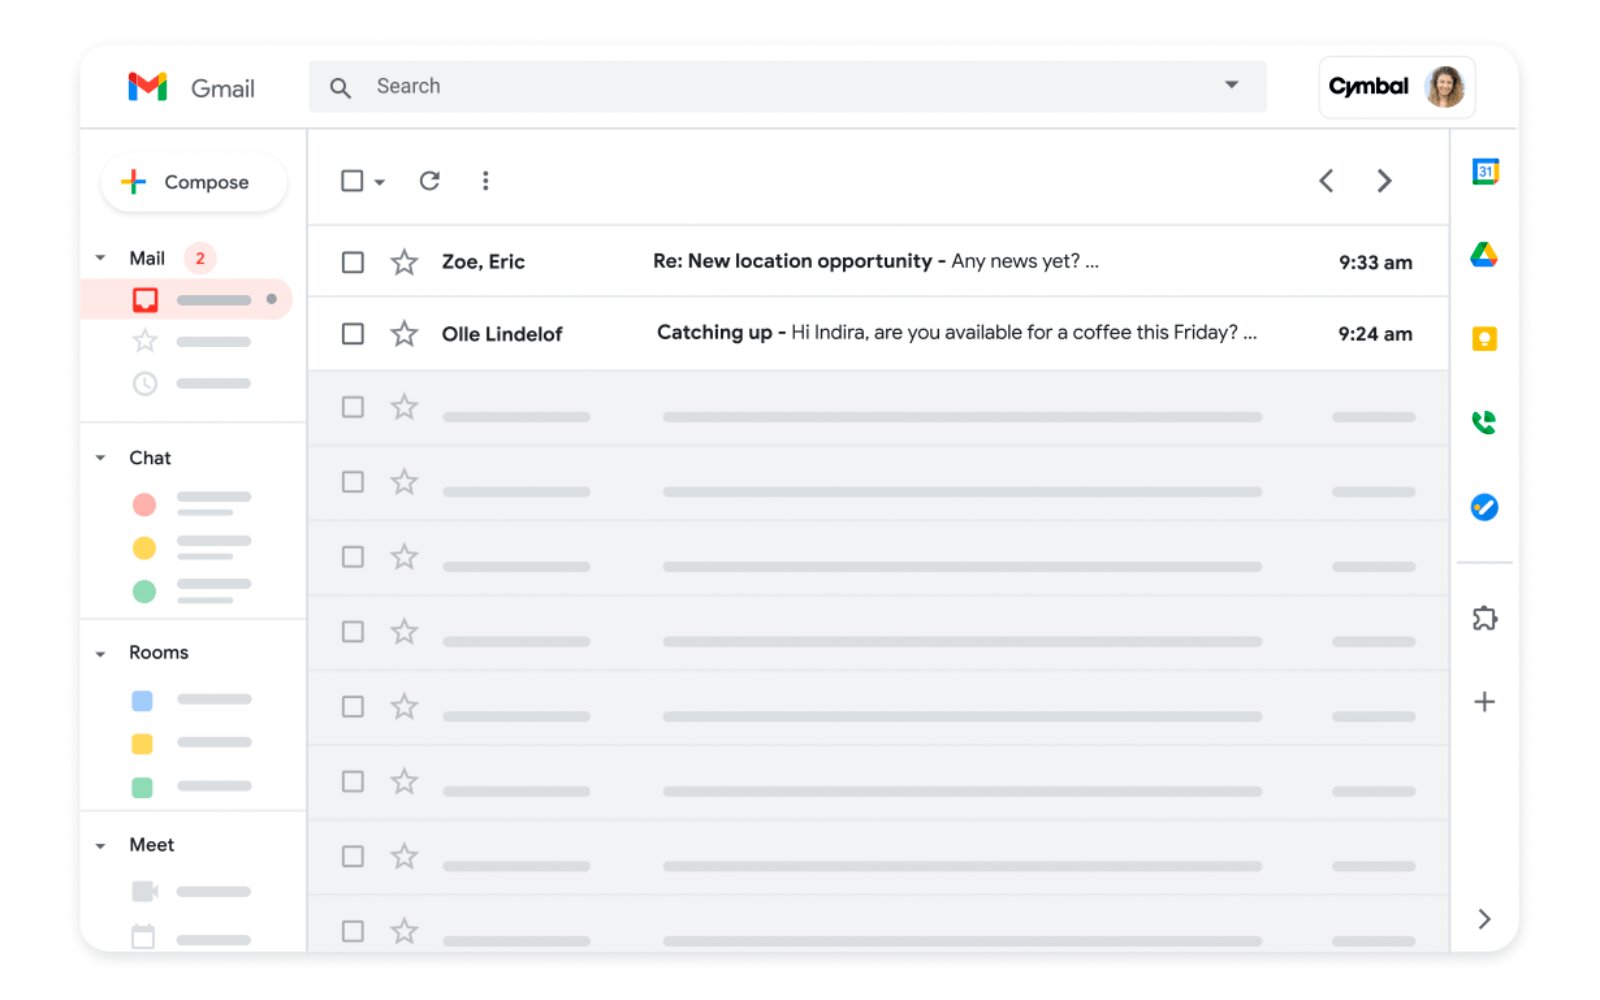
Gmail is a web-based email service that offers secure and reliable email hosting for businesses. It allows users to send, receive, and organize emails efficiently. With Google Workspace, you can enable Gmail for your organization, providing your employees with a professional and feature-rich email solution.
By enabling Gmail in Google Workspace, you gain access to a wide range of benefits. First and foremost, Gmail offers a user-friendly and intuitive interface, making it easy for your employees to navigate and manage their emails. It also provides powerful spam filtering and advanced security features to protect your organization’s sensitive information.
Moreover, Gmail integrates seamlessly with other Google Workspace applications, allowing for streamlined collaboration and productivity. Users can easily share files from Google Drive, schedule meetings with Google Calendar, and collaborate on documents with Google Docs, all within the Gmail interface.
Another key advantage of using Gmail in Google Workspace is the generous storage space it offers. Each user gets 30GB of storage, which ensures that they can store and access a large number of emails and attachments without worrying about running out of space.
In addition, Gmail comes with powerful search and organization features, allowing users to quickly find and sort their emails. Labels and filters help organize incoming messages, making it easier to prioritize and manage workflow. The ability to archive and access customized folders further enhances productivity and efficiency.
Overall, enabling Gmail in Google Workspace is a wise choice for any organization looking to enhance communication, collaboration, and productivity. With its user-friendly interface, robust security measures, seamless integration with other Google applications, and ample storage space, Gmail offers a comprehensive and reliable email solution for businesses of all sizes.
Step 1: Accessing the Admin console
To enable Gmail in Google Workspace, the first step is accessing the Admin console, which is the central hub for managing your organization’s Google Workspace settings. Here’s how you can do it:
- Go to the Google Admin homepage (admin.google.com) and sign in with your admin account credentials. This account should have administrative privileges.
- Once you’ve successfully logged in, you’ll be taken to the Admin console dashboard. Here, you’ll find a range of options and settings for managing your organization’s Google Workspace.
- Take a moment to familiarize yourself with the layout and navigation of the Admin console. The left-hand side of the dashboard provides a list of different sections, including “Users,” “Apps,” “Devices,” and more. These sections allow you to manage specific aspects of your organization’s Google Workspace.
- To proceed with enabling Gmail, click on the “Apps” section on the left-hand menu. This will open a submenu with various application options.
- From the submenu, click on “G Suite.” This will direct you to the G Suite page where you can manage the different G Suite applications, including Gmail.
- On the G Suite page, you’ll find a list of applications, each with its own settings. Locate Gmail in the list and click on it to access the Gmail settings.
- You are now in the Gmail settings page, where you can enable and customize Gmail for your organization. This is where you will configure various settings to meet your requirements.
Note: It’s important to ensure that you have the necessary administrative privileges to make changes in the Admin console. If you’re unable to access the Admin console or make any changes, you may need to consult with your organization’s IT department or the person responsible for Google Workspace administration within your organization.
By successfully accessing the Admin console, you’ve completed the first step towards enabling Gmail in Google Workspace. Now, you can move on to the next step of navigating to the Gmail settings and configuring Gmail for your organization.
Step 2: Navigating to the Gmail settings
After accessing the Admin console, the next step in enabling Gmail in Google Workspace is navigating to the Gmail settings. This is where you can configure and customize Gmail for your organization. Follow these steps to reach the Gmail settings:
- Once you’re on the Gmail settings page of the Admin console, you’ll see a variety of tabs and options. The first tab is the “General” tab, which contains essential settings for Gmail.
- Under the “General” tab, you can modify settings such as the organization’s email signature, email routing, and inbound and outbound relay settings. Take some time to review and adjust these settings according to your organization’s requirements.
- Move on to the next tab, “Filters,” where you can set up email filters to automatically categorize and manage incoming messages. This can help streamline your inbox and improve productivity.
- The next tab, “Forwarding and POP/IMAP,” allows you to enable or disable POP and IMAP access. You can choose whether to allow users to access their Gmail accounts through third-party email clients or only via the Gmail web interface.
- Proceed to the “Web Clips” tab, where you can choose whether to display personalized ads and web clips in users’ inboxes. This can be customized based on your organization’s privacy preferences.
- Next, explore the “Offline” tab, which allows users to access their Gmail accounts even without an internet connection. You can enable or disable offline access for your organization, depending on your requirements.
- The “Advanced settings” tab provides even more customization options for Gmail. Here, you can configure settings related to email delivery, compliance, and routing. It’s recommended to consult with your IT team or Google Workspace administrator for assistance in managing these advanced settings.
- Make sure to review and adjust the settings in each tab based on your organization’s email requirements and policies. Take note of any additional customization options or settings that may be specific to your organization.
By properly navigating to the Gmail settings, you’re one step closer to enabling Gmail for your organization in Google Workspace. The next step involves enabling Gmail and customizing it according to your organization’s specific needs.
Step 3: Enabling Gmail for your organization
Now that you’ve successfully navigated to the Gmail settings in the Admin console, it’s time to enable Gmail for your organization and make it accessible to your users. Follow these steps to enable Gmail:
- In the Gmail settings page of the Admin console, under the “General” tab, you’ll find the option to “Enable Gmail.” Simply click on the toggle switch to enable Gmail for your organization.
- Once Gmail is enabled, you’ll notice additional settings and options become available for customization. These settings allow you to fine-tune the behavior of Gmail according to your organization’s requirements and preferences.
- Review the available options and make adjustments based on your organization’s email policies. You can customize settings such as the maximum attachment size, email signature requirements, message recall period, and much more.
- Consider exploring the “Advanced settings” tab within Gmail to access more specialized configurations. Here, you can enable features like “Hosted S/MIME for Gmail” to enhance email security or set up “Content Compliance” rules to strengthen compliance measures.
- Once you’re satisfied with the customizations, click on the “Save” or “Apply” button to save the changes and enable Gmail for your organization.
- Inform your users of the newly enabled Gmail service. They can now access their Gmail accounts by signing in with their Google Workspace credentials.
Note: Enabling Gmail for your organization may take a few moments for the changes to take effect. Users may need to refresh their browsers or restart their mail clients to access the newly enabled Gmail service.
By successfully enabling Gmail for your organization in the Admin console, you’ve provided your users with a powerful and reliable email solution. The next steps involve customizing Gmail’s features and settings to further enhance its usability and functionality for your organization.
Step 4: Customizing Gmail for your organization
After enabling Gmail for your organization in Google Workspace, the next step is to customize Gmail to align with your organization’s branding and preferences. Customizing Gmail allows you to tailor the user experience and enhance productivity. Follow these steps to customize Gmail:
- Within the Gmail settings page of the Admin console, navigate to the “General” tab to access basic customization options.
- Upload your organization’s logo in the “Organization logo” section to replace the default Gmail logo with your company’s branding. This creates a more professional and personalized appearance for your users.
- Consider customizing the organization-wide email signature, ensuring that it complies with your organization’s guidelines and policies. The email signature can include contact information, job titles, and promotional messages.
- Review the “Outbound gateway” settings to configure additional email security measures, such as setting up approved senders or restricting certain types of messages.
- Explore the “Themes” section to choose a color scheme or background image that reflects your organization’s branding. This can make the Gmail interface more visually appealing and reinforce your corporate identity.
- If needed, enable “External recipient warnings” to provide a warning message to users when sending emails to external recipients. This helps prevent accidental disclosure of sensitive information.
- Consider customizing the “Spam” and “Search” settings to fine-tune the behavior of Gmail’s spam filters and improve search efficiency within Gmail.
- Ensure that the “Send mail as” settings allow users to send emails from their Gmail accounts using their organization’s email domain. This helps maintain a professional image and avoids confusion among recipients.
- Take advantage of the “Vacation responder” settings to set up automated responses when employees are away from work. This feature can help manage customer expectations and maintain communication during absences.
Customizing Gmail for your organization allows you to create a more tailored and branded experience for your users. By aligning Gmail with your organization’s identity and preferences, you can enhance user engagement and productivity in email communication.
Remember to periodically review and update the customization settings as your organization’s needs evolve. By staying proactive in customizing and adapting Gmail, you ensure that it continues to meet your requirements and supports your business goals effectively.
Step 5: Enabling Gmail features
Once you have enabled and customized Gmail for your organization in Google Workspace, the next step is to explore and enable additional Gmail features that can enhance the email experience for your users. These features can improve productivity, collaboration, and communication. Follow these steps to enable Gmail features:
- Within the Gmail settings page of the Admin console, navigate to the “General” tab if you’re not already on that page.
- Scroll down to find the “Gmail features” section, where you’ll see a list of features that can be enabled or disabled for your organization.
- Review the different features available and consider enabling those that align with your organization’s needs. Here are some notable features to consider:
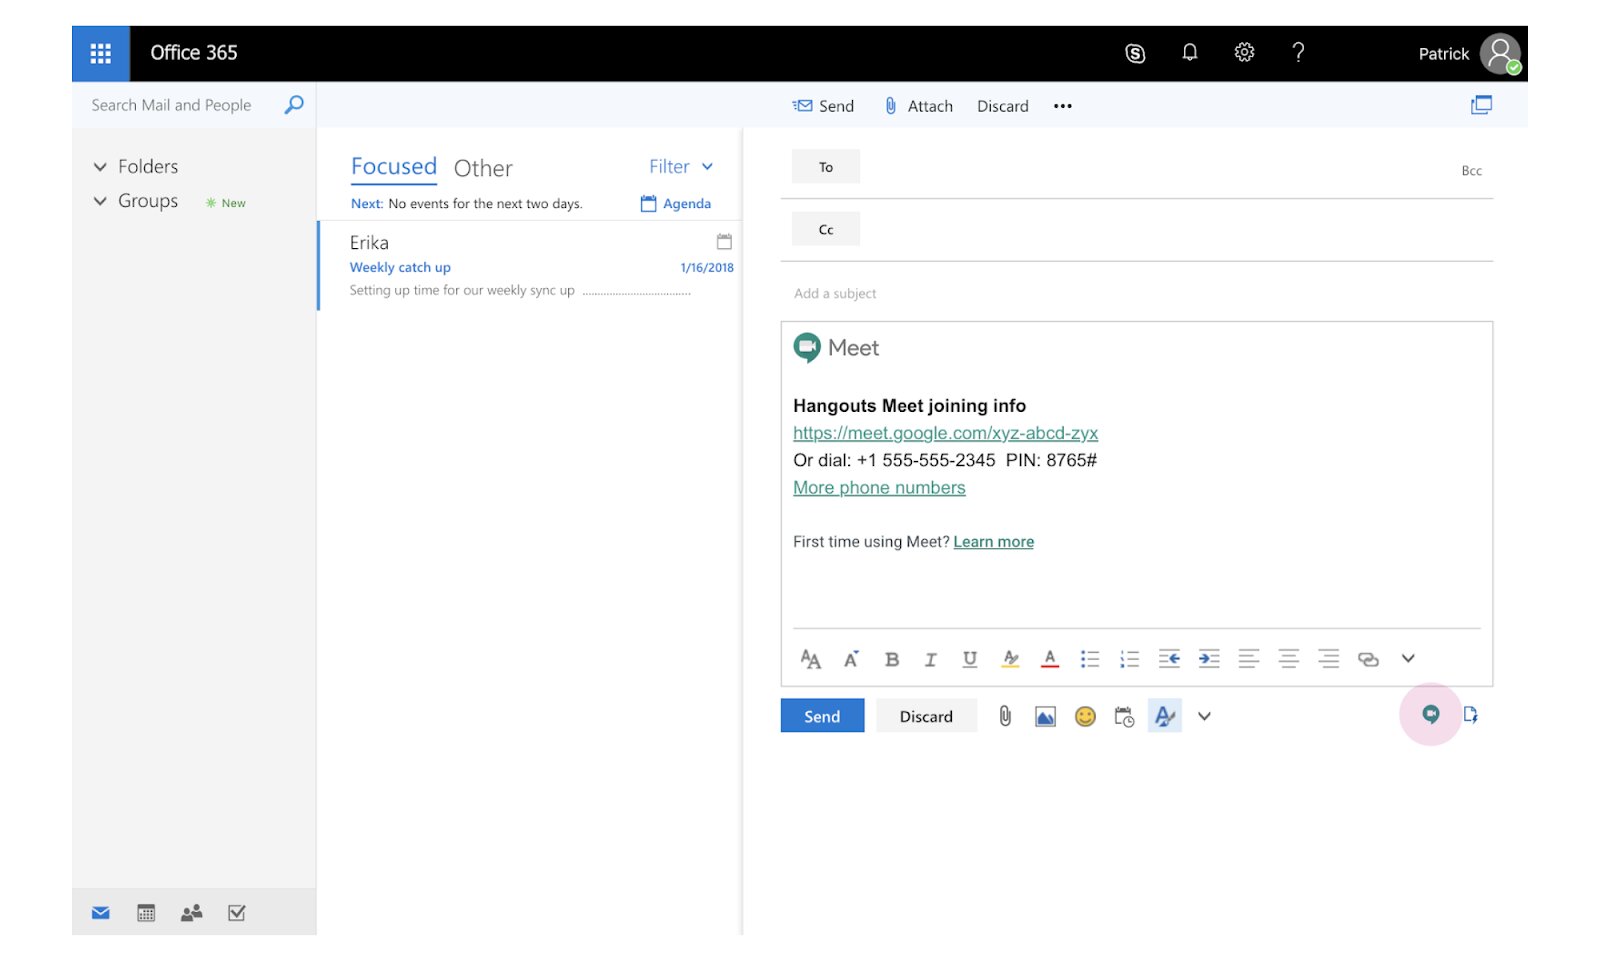
- Chat and Meet: Enable this feature to integrate Google Chat and Google Meet directly within the Gmail interface. This allows for seamless communication and collaboration with colleagues.
- Calendar: Enabling this feature allows users to access and manage their Google Calendar within Gmail. It provides easy scheduling and meeting management capabilities.
- Tasks: Enable this feature to add a to-do list tool directly in Gmail. Users can create and manage tasks without leaving their inbox, improving organization and productivity.
- Smart Compose and Smart Reply: These features offer AI-powered suggestions for composing email messages quickly. Enable them to save time and improve efficiency in email communication.
- Priority Inbox: This feature automatically categorizes emails into different sections based on their importance, helping users prioritize and focus on the most crucial messages.
- As you enable each feature, you may be presented with additional options and settings to configure. Take the time to explore and customize these options based on your organization’s preferences.
- Enable any other features that you believe will benefit your organization and users, depending on your specific needs and workflows.
- Once you’ve made your selections, click the “Save” or “Apply” button to save the changes and enable the selected Gmail features.
Enabling these additional features enhances the functionality of Gmail and provides users with a more versatile and powerful email solution. It’s recommended to periodically review and reassess the enabled features, considering any new updates or changes available within the Gmail settings.
By enabling these Gmail features, you empower your organization with advanced tools and capabilities that can optimize email communication and collaboration, ultimately enhancing productivity and efficiency.
Step 6: Adding user accounts to Gmail
Now that you have enabled and customized Gmail for your organization in Google Workspace, the next step is to add user accounts to Gmail. This allows your employees to access and use Gmail for their email communication. Follow these steps to add user accounts to Gmail:
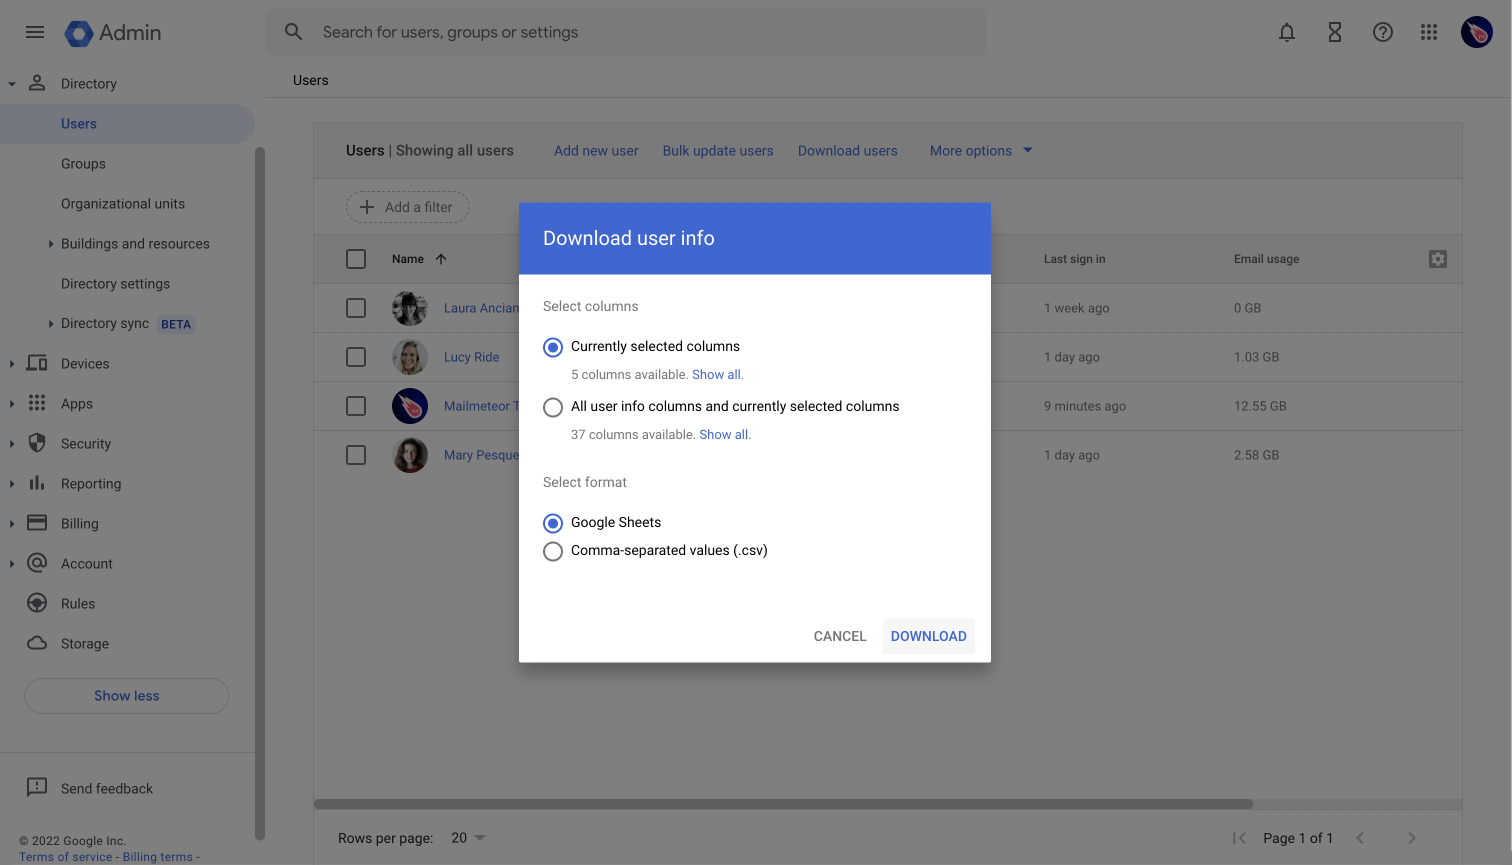
- From the Admin console, navigate to the “Users” section, which can typically be found in the left-hand menu.
- Click on the “Add” button or the “+” sign to add a new user account.
- Provide the necessary information for the new user, such as their name, username, and password. You can choose whether to generate a password for them or allow them to set it themselves.
- Specify the email address for the user, which will typically be in the format of username@yourdomain.com.
- Assign the appropriate user privileges and permissions. This includes selecting the appropriate organizational unit, setting access levels, and assigning any additional roles or services.
- Review and confirm the details of the new user account, ensuring that everything is accurate.
- Click the “Add user” button to create the new user account and add it to Gmail.
- Repeat the process for each user account that needs to be added to Gmail.
Note: If you have a large number of user accounts to add, you may consider using the bulk upload method or integrating with a user management system to streamline the process.
By adding user accounts to Gmail, you provide each employee with their own email address and access to the Gmail service. They can start sending and receiving emails using their newly created Gmail account.
Once users have been added to Gmail, you can further manage their settings and preferences within the Admin console. This includes managing email aliases, setting mailbox size limits, configuring forwarding rules, and more.
Remember to regularly review and manage user accounts in Gmail, adding or removing users as needed based on employee onboarding or offboarding. This ensures that access to Gmail is appropriately controlled and reflects the current state of your organization.
Step 7: Managing Gmail settings for individual users
Once you have added user accounts to Gmail in Google Workspace, the next step is to manage the Gmail settings for individual users. This allows you to customize and fine-tune Gmail’s behavior and features based on each user’s needs. Follow these steps to manage Gmail settings for individual users:
- From the Admin console, navigate to the “Users” section, where you can find a list of all the user accounts in your organization.
- Select the user account for which you want to manage the Gmail settings.
- Click on the “More” button (usually represented by three vertical dots), and then select “Manage Gmail settings.”
- In the individual user’s Gmail settings, you can customize various options and preferences. This includes managing email signatures, configuring labels, setting up vacation responders, and more. Review the available settings and customize them based on the user’s specific requirements.
- Ensure that the user’s Gmail settings align with your organization’s email policies and guidelines. You can set up email retention periods, specify email addresses for mail delegation, manage forwarding options, and control access to Gmail features.
- Consider adjusting the user’s spam and security settings to enhance email protection and prevent the delivery of unwanted or harmful messages.
- Review additional options such as language preferences, automatic email forwarding, and the ability to enable/disable chat features within Gmail.
- Make any necessary changes or adjustments to the user’s Gmail settings, ensuring that the configuration meets their specific needs and organizational requirements.
- Click the “Save” or “Apply” button to apply the changes and update the user’s Gmail settings.
- Repeat the process for each user account, managing their Gmail settings individually.
Managing Gmail settings for individual users allows you to provide a more personalized email experience and optimize productivity. It ensures that each user has their preferred Gmail configuration, tailored to their specific requirements and workflows.
Regularly review and update the Gmail settings for individual users as their needs or organizational requirements change. This will help maintain the effectiveness and relevance of their Gmail configuration.
Step 8: Troubleshooting common issues
While enabling and managing Gmail in Google Workspace is usually a smooth process, you may encounter some common issues along the way. Knowing how to troubleshoot these issues can help ensure a seamless and uninterrupted email experience. Follow these steps to troubleshoot common Gmail issues:
- Problem: Email delivery delays or failures.
- Solution: Check if there are any network or server issues. Verify that the recipient’s email address is correct. Ensure that the sending domain is not blocked or listed as a spam source. Review the Gmail delivery logs in the Admin console for further insights.
- Problem: Attachments not opening or downloading properly.
- Solution: Ensure that the file format is supported. Check the file size limit set in Gmail settings. Verify that the recipient has the necessary software or application to open the attachment. Encourage users to clear their browser cache and try accessing the email again.
- Problem: Emails landing in the spam folder or being marked as spam.
- Solution: Review the email content for any suspicious or spam-like elements. Make sure that the sending domain has a proper DNS setup with valid SPF, DKIM, and DMARC records. Check the user’s individual Gmail settings and verify the spam filter sensitivity level.
- Problem: Slow email loading or performance issues.
- Solution: Check the user’s internet connection and speed. Clear the browser cache and cookies. Disable any browser extensions or plugins that may be causing conflicts. Confirm that the user’s device meets the minimum system requirements for running Gmail.
- Problem: Login or account access issues.
- Solution: Ensure that the user is entering the correct username and password. Reset the user’s password if necessary. Check for any temporary service disruptions or server maintenance. Validate that the user’s Google Workspace subscription is active and paid.
- Problem: Missing emails or email data loss.
- Solution: Verify if the emails were accidentally deleted. Check Gmail’s Trash or Spam folder. Confirm that the email messages have not been moved or filtered using Gmail’s labels or filters. Contact the Google Workspace support team for assistance in recovering lost emails.
Note: If the above troubleshooting steps do not resolve the issues, it is recommended to contact the Google Workspace support team or consult with your organization’s IT department for further assistance.
By understanding and addressing these common Gmail issues, you can ensure a smooth and uninterrupted email experience for your organization in Google Workspace.
Conclusion
Enabling and customizing Gmail in Google Workspace is a crucial step in providing a reliable and feature-rich email solution for your organization. By following the step-by-step process outlined in this guide, you can successfully enable Gmail, navigate the Gmail settings, customize Gmail for your organization, and manage user accounts and settings.
Gmail offers a wide range of features and customization options, allowing you to tailor the email experience to your organization’s needs. From branding and logo customization to enabling advanced features like Chat and Meet, Gmail provides a powerful platform for effective communication and collaboration.
In addition to enabling and customizing Gmail, this guide also highlights the importance of troubleshooting common issues. By being aware of potential problems and their solutions, you can ensure a smooth and uninterrupted email experience for your users.
Remember to regularly review and update your organization’s Gmail settings, as well as manage individual user settings as needed. This ensures that Gmail continues to meet your organization’s evolving requirements and enhances productivity and efficiency.
By successfully enabling and customizing Gmail in Google Workspace, you empower your organization with a reliable, secure, and feature-rich email solution. Take advantage of the flexibility and customization options that Gmail offers to create a tailored email experience that meets your organization’s unique needs.
Whether you’re a small startup or a large enterprise, Gmail in Google Workspace provides the tools and capabilities necessary for effective email communication and collaboration. Embrace and leverage the power of Gmail to streamline your organization’s communication processes and enhance productivity across the board.