Introduction
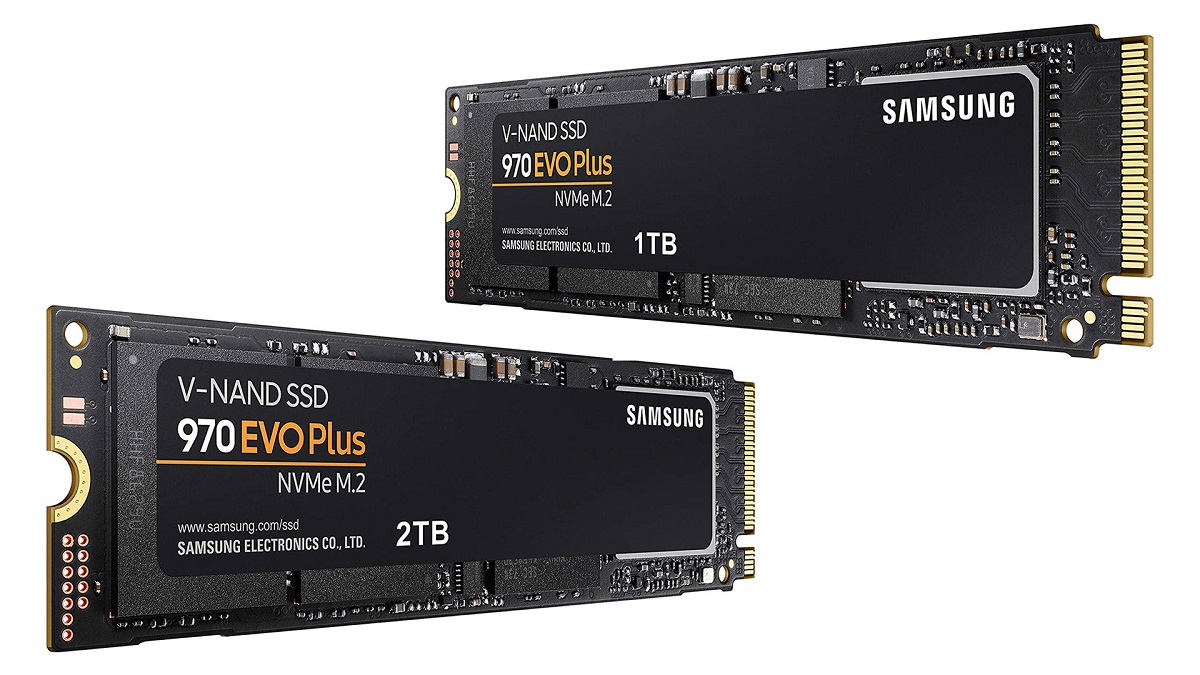
Welcome to this comprehensive guide on how to perform a fresh install of Windows 10 on an SSD. If you’re looking to optimize the performance of your computer and breathe new life into it, installing Windows 10 on a solid-state drive (SSD) is a great way to achieve that goal. By upgrading to an SSD, you can enjoy faster boot times, quicker application launches, and a more responsive computing experience overall.
In this guide, we will take you through the step-by-step process of preparing for the fresh install, creating a bootable USB drive, adjusting BIOS settings, formatting the SSD, installing Windows 10, configuring the necessary settings, installing device drivers and updates, and finally, restoring any backed up data.
Before proceeding with the installation, it’s essential to back up any important files and data that you don’t want to lose. While the installation process itself shouldn’t erase any files, it’s always better to be safe than sorry. We’ll show you how to backup your data effectively and securely.
Additionally, we will guide you on how to download the Windows 10 installation media, which is necessary for a fresh install. You’ll need a USB drive with sufficient storage capacity and a reliable internet connection to complete this step. We’ll explain the process in detail, so you can easily create a bootable USB drive.
Adjusting the BIOS settings is another crucial step in the process. This step varies depending on your computer’s manufacturer and model, but we will provide generic instructions that should work for most systems. Understanding and correctly configuring the BIOS settings will ensure a smooth installation process.
Installing Windows 10 involves formatting the SSD and choosing the appropriate installation options. We’ll guide you through the necessary steps to ensure a seamless installation. Once Windows 10 is installed, we’ll help you configure the initial settings, including privacy preferences and user accounts.
After the installation is complete, it’s crucial to install the necessary device drivers and updates to ensure optimal performance and compatibility. We’ll provide instructions on how to do this efficiently and effectively.
Finally, we’ll show you how to restore any data you backed up earlier. Whether you have important documents, photos, or other files, we’ll guide you through the process of safely restoring them to your Windows 10 installation.
By following this step-by-step guide, you’ll be able to perform a fresh install of Windows 10 on your SSD and enjoy an improved computing experience. So let’s get started on this exciting journey of optimizing your computer’s performance!
Preparing for the Fresh Install
Before embarking on the process of installing Windows 10 on your SSD, it’s crucial to take a few preparatory steps to ensure a smooth and successful installation. These steps will help you avoid any potential data loss and ensure that you have all the necessary resources at hand.
First and foremost, it’s essential to back up any important data and files that you don’t want to lose during the installation process. While the installation itself shouldn’t erase any files, accidents and unforeseen circumstances can happen. By creating a backup, you’ll have peace of mind knowing that your important files are safe and secure.
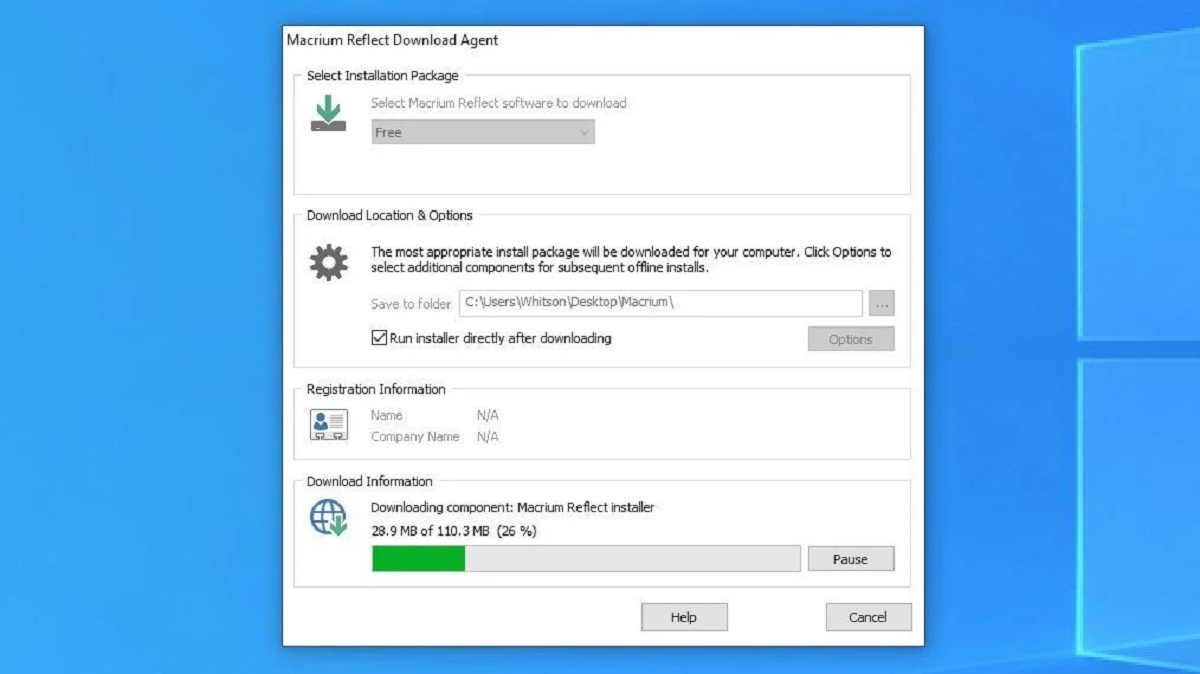
There are several methods you can use to back up your data. One option is to manually copy the files to an external hard drive, USB drive, or cloud storage service. Another option is to use dedicated backup software that can automate the process for you. Whichever method you choose, make sure to double-check that all your important files are safely backed up before proceeding.
Next, you’ll need to download the Windows 10 installation media. This is necessary to perform a fresh install on your SSD. The installation media contains all the necessary files and resources to install Windows 10 on your computer. You can download the installation media from the official Microsoft website using their Media Creation Tool.
Once you’ve downloaded the Windows 10 installation media, you’ll need to create a bootable USB drive. This USB drive will be used to install Windows 10 on your SSD. To create a bootable USB drive, you’ll need a USB drive with sufficient storage capacity (at least 8GB) and a reliable internet connection. Follow the instructions provided by Microsoft to create the bootable USB drive using the Media Creation Tool.
Before proceeding with the installation, it’s crucial to ensure that your computer’s BIOS settings are properly configured. The BIOS (Basic Input/Output System) is responsible for initializing and configuring the hardware components of your computer. Accessing the BIOS settings may vary depending on the manufacturer and model of your computer, but common methods include pressing a specific key (such as F2 or Delete) during the booting process.
Once you’ve accessed the BIOS settings, ensure that the boot order is set to prioritize the USB drive. This will allow your computer to boot from the USB drive and initiate the Windows 10 installation process. Save the changes and exit the BIOS settings.
By taking these preparatory steps, including backing up your data, downloading the Windows 10 installation media, creating a bootable USB drive, and adjusting the BIOS settings, you’ll be ready to proceed with the installation process. These steps ensure that you have a safety net of data backups and the necessary resources to install Windows 10 on your SSD without any hiccups.
Backing up Important Data
Before proceeding with the fresh install of Windows 10 on your SSD, it’s crucial to back up any important data that you don’t want to lose. While the installation process itself shouldn’t erase any files, there is always a slight risk of data loss or corruption. By backing up your data, you’ll have peace of mind knowing that your files are safe and can be easily restored after the installation.
There are several methods you can use to back up your data, depending on your preferences and the amount of data you need to back up. One common method is manually copying your files to an external storage device, such as an external hard drive, USB drive, or network-attached storage (NAS) device. Simply connect the storage device to your computer, select the files and folders you want to back up, and copy them over.
Another option is to use cloud storage services to back up your data. Services like Dropbox, Google Drive, and OneDrive offer free or paid plans with different storage capacities. By uploading your files to the cloud, you ensure that they are securely stored and accessible from anywhere with an internet connection.
If you have a large amount of data or want a more automated backup solution, you can use dedicated backup software. These software programs allow you to schedule regular backups and perform incremental backups, where only the changes to your files are saved, saving you time and storage space.
When choosing a backup method, consider the size of your data, the sensitivity of the files, and your preferred level of automation. It’s also a good practice to create multiple backups and store them in different locations for added redundancy.
Before starting the backup process, organize your files and determine which ones are essential and need to be backed up. This will help streamline the process and avoid unnecessary duplication of files.
Once you have selected your backup method and organized your files, start the backup process by following the instructions provided by your chosen method. If you’re manually copying files, simply drag and drop them to the external storage device or cloud storage folder. If you’re using backup software, set up the backup parameters, such as the source files, destination, and backup schedule, and let the software handle the rest.
Remember to verify that the backup is completed successfully and double-check that all your important files are included. It’s also a good idea to test the restoration process by recovering a few files from the backup to ensure everything is functioning correctly.
By backing up your important data before the fresh install of Windows 10, you can proceed with confidence, knowing that your files are safe and sound. In the event of any unexpected issues during the installation process or after, you’ll have peace of mind knowing that your data is secure and can be easily restored.
Downloading Windows 10 Installation Media
In order to perform a fresh install of Windows 10 on your SSD, you will need to download the Windows 10 installation media. The installation media contains all the necessary files and resources to install Windows 10 on your computer.
The first step is to visit the official Microsoft website and navigate to the “Download Windows 10” page. Here, you will find the option to download the Media Creation Tool, which is a utility provided by Microsoft to assist with downloading the Windows 10 installation media.
Once you have downloaded the Media Creation Tool, run the executable file to launch the tool. The tool will prompt you to accept the license terms and agreements before proceeding. After accepting the terms, you will be presented with two installation options: upgrading your current PC or creating installation media for another PC. Select the option to create installation media.
Next, you will need to choose the language, edition, and architecture for the Windows 10 installation media. The tool will offer recommendations based on your current system configuration, but you can modify these options if desired. Make sure to select the correct edition and architecture to match your system requirements.
After confirming your selections, you will be prompted to choose the media format for the installation. You have two options: a USB flash drive or an ISO file. If you choose the USB flash drive option, make sure you have a USB drive with sufficient storage capacity (at least 8GB) connected to your computer. If you choose the ISO file option, the tool will create an ISO file that you can later use to burn onto a DVD or create a bootable USB drive. Select the desired option and proceed.
The Media Creation Tool will then start downloading the Windows 10 installation files. The download time will vary depending on your internet connection speed. Make sure not to interrupt the download or turn off your computer during this process to avoid any potential issues.
Once the download is complete, the tool will automatically verify the downloaded files to ensure their integrity. This step is essential to ensure that the installation media is not corrupted. If any errors are detected, the tool will attempt to repair or redownload the necessary files.
After the verification process is complete, the Media Creation Tool will inform you that the Windows 10 installation media is ready. You can then use this media to perform a fresh install of Windows 10 on your SSD.
Remember to keep the Windows 10 installation media in a safe place for future use. Having a copy of the installation media will come in handy if you need to reinstall Windows 10 or perform repairs in the future.
By carefully following the steps provided and using the official Microsoft Media Creation Tool, you can easily download the Windows 10 installation media and proceed with the fresh install on your SSD.
Creating a Bootable USB Drive
After downloading the Windows 10 installation media using the Media Creation Tool, the next step is to create a bootable USB drive. This USB drive will be used to install Windows 10 on your SSD. Follow the step-by-step instructions below to create a bootable USB drive:
- Connect a USB drive with sufficient storage capacity (at least 8GB) to your computer. It’s important to note that all data on the USB drive will be erased during this process, so make sure to backup any important files beforehand.
- Launch the Windows 10 Media Creation Tool that you downloaded earlier. Accept the license terms and agreements to proceed.
- On the “What do you want to do?” screen, select the option to “Create installation media (USB flash drive, DVD, or ISO file) for another PC” and click “Next”.
- Choose the preferred language, edition, and architecture for the Windows 10 installation. These options should match the selections you made during the download process. Click “Next” to continue.
- Select the “USB flash drive” option as the media to use. Make sure the correct USB drive is selected if you have multiple connected to your computer. Click “Next” to proceed.
- The Media Creation Tool will now start creating the bootable USB drive. It will copy the necessary files from the downloaded installation media to the USB drive. This process may take several minutes.
- Once the process is complete, you will see a message stating that the bootable USB drive is ready. You can now safely remove the USB drive from your computer.
Now that you have successfully created a bootable USB drive, you are ready to proceed with the installation of Windows 10 on your SSD. Make sure to keep the bootable USB drive in a safe place for future use, such as reinstalling Windows 10 or performing repairs.
Remember, when booting your computer from the USB drive, ensure that the USB drive is set as the primary boot device in the BIOS settings. This will allow your computer to initiate the Windows 10 installation process from the USB drive.
By following these steps and using the Windows 10 Media Creation Tool, you can easily create a bootable USB drive and move on to the next stage of installing Windows 10 on your SSD.
Adjusting BIOS Settings
Before proceeding with the installation of Windows 10 on your SSD, it’s important to ensure that your computer’s BIOS settings are properly configured. The BIOS (Basic Input/Output System) is responsible for initializing and configuring the hardware components of your computer. By adjusting the BIOS settings, you can ensure that your computer boots from the correct device and that the installation process goes smoothly.
To access the BIOS settings, you’ll need to restart your computer and press the designated key to enter the BIOS. The specific key varies depending on the manufacturer and model of your computer but commonly used keys include F2, Delete, or Esc. Refer to your computer’s user manual or the manufacturer’s website if you’re unsure which key to use.
Once you’re in the BIOS settings, navigate to the “Boot” or “Boot Order” section. Here, you’ll see a list of devices that your computer can boot from, prioritized in a specific order. Make sure that the USB drive containing the Windows 10 installation media is set as the first boot device. This will enable your computer to boot from the USB drive and initiate the Windows 10 installation process.
To change the boot order, use the appropriate key (usually F5 or F6) to move the USB drive to the top of the list. You may need to disable the “Secure Boot” option or change its settings to allow booting from external devices. Again, the options may vary depending on your computer’s manufacturer and BIOS version.
Once you have adjusted the boot order and any relevant settings, save the changes and exit the BIOS settings. To do this, look for the “Save and Exit” option, usually located in the last tab of the BIOS settings. Confirm the changes and restart your computer for the new settings to take effect.
After your computer restarts, it should boot from the USB drive and initiate the installation of Windows 10. Follow the on-screen prompts to proceed with the installation process.
It’s important to note that the BIOS settings may have other configurations and options that can affect the performance and functionality of your computer. However, altering these settings without proper knowledge can result in unintended consequences or even damage to your system. If you’re unsure about any particular setting, it’s best to consult the user manual or seek assistance from a knowledgeable individual.
By adjusting the BIOS settings to prioritize the USB drive containing the Windows 10 installation media, you can ensure that your computer boots from the correct device and smoothly initiates the installation process. Taking the time to correctly configure the BIOS settings will help facilitate a successful installation of Windows 10 on your SSD.
Installing Windows 10
Now that you have prepared your computer by backing up your data, downloading the Windows 10 installation media, creating a bootable USB drive, and adjusting the BIOS settings, you are ready to proceed with the installation of Windows 10 on your SSD.
Make sure that the bootable USB drive containing the Windows 10 installation media is connected to your computer. Restart your computer and ensure that it boots from the USB drive. This will initiate the Windows 10 installation process.
The installation process will begin by loading the necessary files from the USB drive. This may take a few moments, so be patient. You will then be prompted to select the language, time, and currency format, as well as the keyboard or input method. Choose the appropriate options and click “Next” to proceed.
On the next screen, click the “Install Now” button to begin the installation of Windows 10. You may be prompted to enter the product key for Windows 10, which can be found on the packaging or in the email if you have purchased a valid license. If you don’t have a product key, you can choose the option to “I don’t have a product key” and continue with the installation. Windows 10 will be activated later once the installation is completed.
In the next step, you’ll be presented with the license terms and agreements. Read through the terms and if you agree, check the box and click “Next” to proceed. You will then be asked to select the type of installation you want to perform. Choose the option for a “Custom” installation.
On the following screen, you will see a list of available drives and partitions on your computer. Select the SSD where you want to install Windows 10 and click “Next” to continue. If the SSD is not recognized, make sure it is properly connected to your computer and try selecting the “Load Driver” option to install any necessary device drivers.
Windows 10 will now begin the installation process. Sit back and relax as the setup copies files, installs features and updates, and completes the installation. Your computer may restart multiple times during this process, so don’t be alarmed.
Once the installation is finished, you will be prompted to set up your computer. This includes choosing a username and password, privacy settings, and configuring your preferences. Follow the on-screen instructions to complete the setup process.
Congratulations! You have successfully installed Windows 10 on your SSD. Your computer should now be running the latest version of Windows, optimized for speed and performance. Take some time to explore the new features and functionalities of Windows 10, and don’t forget to install the necessary device drivers and updates to ensure optimal performance.
In the next sections, we will guide you through formatting the SSD, configuring Windows 10 settings, installing device drivers and updates, and restoring any backed up data.
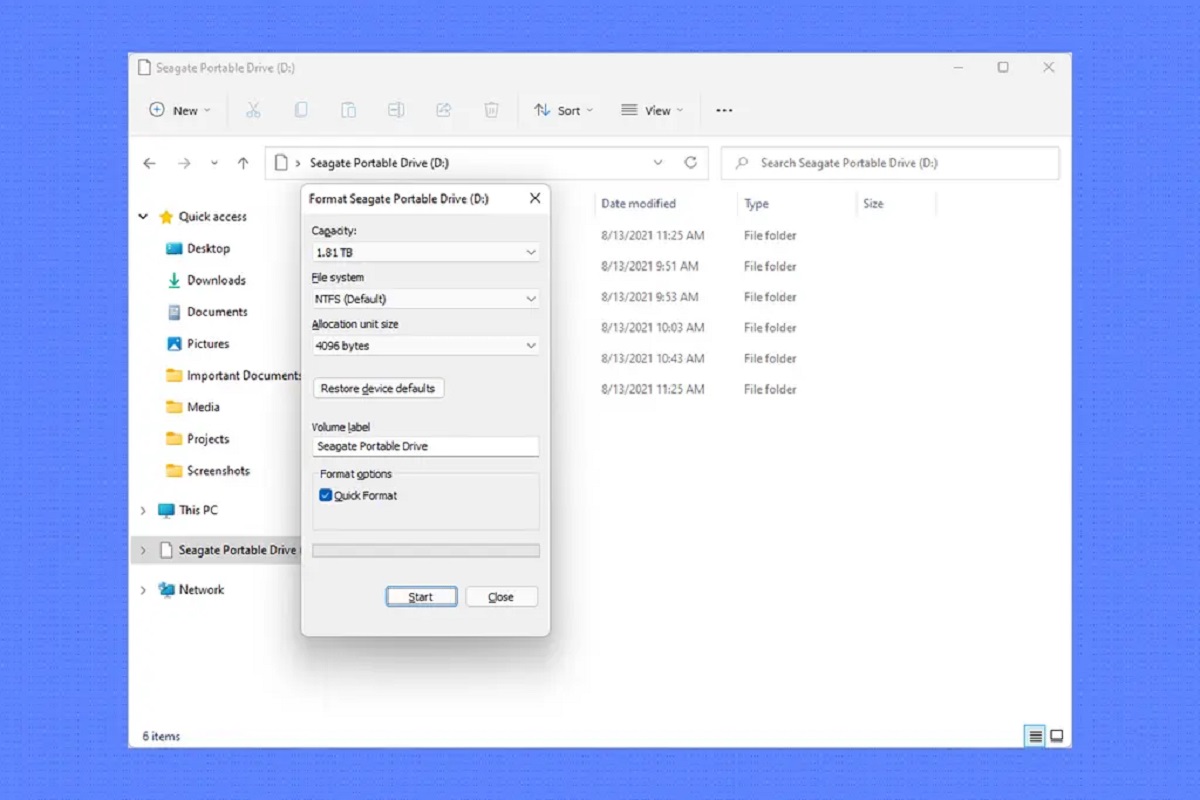
Formatting the SSD
Now that you have successfully installed Windows 10 on your SSD, the next step is to format the SSD. Formatting the SSD is essential to prepare it for use as the primary storage device for your operating system and data.
It’s important to note that formatting the SSD will erase all existing data on the drive, so ensure that you have backed up any important files or data before proceeding.
To format the SSD, follow the steps below:
- Open the “Settings” by clicking on the Start menu and selecting the gear icon.
- In the Settings menu, click on the “System” category.
- From the left-hand side menu in the System settings, choose “Storage”.
- Scroll down and locate the SSD under the “Local Storage” section.
- Click on the SSD drive to select it.
- Under the SSD drive, click on the “Format” option.
- A warning message will appear, explaining that formatting the drive will erase all data. Confirm that you have backed up any necessary files and click on “Format” to proceed.
- Wait for the formatting process to complete. This may take a few minutes depending on the size of the SSD.
- Once the formatting is finished, the SSD is now ready for use.
By formatting the SSD, you have prepared it for storing your data and operating system. Windows 10 will now recognize the SSD as a usable storage device and you can start utilizing it for your applications and files.
It’s important to note that if you have other storage drives, such as additional hard drives or external storage devices, they will need to be formatted separately if you plan to use them as well.
With the SSD successfully formatted, you can now proceed to configure Windows 10 settings, install the necessary device drivers and updates, and finally, restore any backed up data.
Choosing Installation Options
During the installation of Windows 10 on your newly formatted SSD, you will be presented with several installation options that allow you to customize and tailor the installation to your preferences. It’s important to understand these options and choose the ones that best suit your needs.
Here are the installation options you will encounter:
- Language, time, and currency format: Select your preferred language, time zone, and currency format. Choose the options that align with your location and preferences.
- Keyboard or input method: Choose the keyboard layout that matches your physical keyboard. This selection will determine how your keystrokes are interpreted by the operating system.
- Product key: If you have a valid Windows 10 product key, enter it when prompted. This will activate your copy of Windows 10. If you don’t have a product key or want to activate Windows 10 later, you can skip this step.
- License terms: Read and accept the license terms to proceed with the installation. It’s important to review the terms to understand the rights and restrictions associated with using Windows 10.
- Type of installation: Choose the type of installation you want to perform. The options usually include “Upgrade” and “Custom”. Select the “Custom” option since you are performing a fresh install on your SSD.
- Partition selection: In the partition selection screen, you can see the available partitions on your SSD. Select the unallocated space or the partition you created for the installation and click “Next”. If there are multiple partitions, you may choose to delete them and create a new partition for the installation.
- Copying files, installing features, and updates: Windows 10 will begin the installation process by copying files, installing features, and applying updates. This may take some time depending on the speed of your computer and the size of the installation.
- Account setup: Set up your user account by entering your name and optionally creating a password. You can also choose to set up a PIN or skip this step for now.
- Privacy settings: Configure your privacy settings according to your preferences. Windows 10 offers various options for sharing data with Microsoft and other apps. Review the settings carefully and select the options that align with your privacy preferences.
By carefully choosing the installation options, you can customize Windows 10 to fit your specific needs and preferences. Take the time to review each option and select the settings that align with your language, region, keyboard, and privacy preferences.
Once you have completed the installation setup, Windows 10 will finalize the installation process and you’ll be greeted with the desktop screen. From here, you can begin exploring the features and functionalities of Windows 10 on your newly installed SSD.
Next, we will guide you through the process of configuring Windows 10 settings to ensure optimal performance and personalization.
Configuring Windows 10 Settings
After successfully installing Windows 10 on your SSD, it’s important to configure the settings to ensure optimal performance, security, and personalization. Configuring these settings allows you to tailor your Windows 10 experience to your needs and preferences. Let’s explore some key settings that you should consider adjusting:
1. Windows Update: Keeping your Windows 10 installation up-to-date is crucial for security and performance. Go to the Settings app and navigate to the “Update & Security” section. From here, you can configure update settings, check for updates, and install any available updates to keep your system secure and running smoothly.
2. Privacy Settings: Windows 10 offers a range of privacy settings that control the collection and usage of your data. Access the Privacy settings in the Settings app to customize your privacy preferences for features such as location, camera access, microphone access, and app permissions. Review each category and adjust the settings as desired to maintain your privacy.
3. User Accounts: To manage user accounts, go to the Settings app and open the “Accounts” section. From here, you can add new user accounts, change account settings, and switch between different accounts. You can also manage account features such as sign-in options, email and calendar settings, and synchronization settings to ensure a personalized and seamless experience.
4. Personalization: Personalize your Windows 10 experience by customizing themes, colors, backgrounds, and screensavers. Access the Personalization settings in the Settings app to make these adjustments. You can also configure the taskbar, start menu, and notification settings to suit your preferences and workflow.
5. Windows Security: Windows 10 includes built-in security features to protect your computer from threats. Open the Windows Security app to access features such as Windows Defender Antivirus, Firewall & Network protection, App & Browser control, and more. Configure these settings to ensure that your system remains protected against malware and other security risks.
6. Power Options: Adjusting your power settings can help optimize battery life for laptops or maximize performance for desktops. Open the Control Panel and navigate to the Power Options section. Here, you can create custom power plans or tweak existing plans to suit your specific needs, such as adjusting screen timeout, sleep settings, and power buttons action.
7. Default Apps: Set your preferred default apps for various file types and protocols. Access the Default Apps settings in the Settings app to specify your preferred web browser, email client, media player, and more. This allows you to seamlessly open files and links using your preferred applications.
8. Cortana: If you want to use Cortana, Windows 10’s virtual assistant, you can configure its settings to personalize your experience. Open the Cortana settings in the Settings app to adjust preferences related to voice activation, reminders, news feed, and other features.
By configuring these settings, you can tailor your Windows 10 experience to your preferences and optimize your system’s performance and security. Take the time to review each setting category in the Settings app and make adjustments based on your needs and preferences.
Configuring Windows 10 settings allows you to enhance your productivity, protect your privacy, and make the most of your newly installed operating system on your SSD.
In the next section, we will guide you through the process of installing device drivers and updates to ensure optimal functionality and compatibility.
Installing Device Drivers and Updates
After installing Windows 10 on your SSD and configuring the initial settings, it’s crucial to install the necessary device drivers and updates to ensure optimal functionality and compatibility with your hardware components. Device drivers act as intermediaries between the operating system and your hardware, allowing them to communicate effectively.
Here’s how you can install device drivers and updates:
- Windows Update: Start by running Windows Update to check for and install any available updates. Open the Settings app, navigate to the “Update & Security” section, and click on “Check for updates”. Windows will automatically search for updates and prompt you to download and install them. It’s important to keep your system up to date to benefit from the latest enhancements and security patches.
- Manufacturer’s Website: Visit the support website of your computer’s manufacturer to download and install the latest drivers specifically designed for your hardware. Locate the “Support” or “Drivers” section on the manufacturer’s website and search for the appropriate drivers based on your computer’s model and operating system (Windows 10). Make sure to download the drivers from a reliable source.
- Driver Installation: Once you have downloaded the necessary drivers, run the installation files and follow the on-screen instructions. These instructions may vary depending on the specific driver and manufacturer. Typically, you will need to double-click the installation file and follow the prompts to complete the installation. Restart your computer if prompted to ensure that the driver changes take effect.
- Windows Device Manager: If any drivers are missing or not functioning correctly, you can use the Windows Device Manager to update or install drivers. Press the Windows key + X and select “Device Manager” from the menu that appears. In the Device Manager window, expand the categories and locate any devices with a yellow exclamation mark or that are listed as “Unknown Device”. Right-click on the device, select “Update driver”, and choose the option to search for drivers automatically. Windows will search for and install the best available driver for the device.
- Third-Party Driver Updaters: Alternatively, you can use third-party driver updater software that automatically scans and updates your drivers. These tools can simplify the process by identifying outdated or missing drivers and providing one-click updates. However, exercise caution and choose reputable software to avoid potentially harmful or incompatible drivers.
Remember to restart your computer after installing any drivers or updates to ensure that the changes take effect. Regularly check for driver updates, especially after major Windows updates or when encountering issues with specific hardware components, to keep your system running smoothly.
By installing the necessary device drivers and updates, you can ensure optimal functionality and compatibility between your hardware and the Windows 10 operating system. Your computer will be equipped with the latest drivers to provide the best performance and stability.
In the next section, we will guide you through the process of restoring backed up data to your Windows 10 installation on the SSD.
Restoring Backed Up Data
Now that you have successfully installed Windows 10 on your SSD and completed the necessary configurations, it’s time to restore your backed-up data. Restoring your data ensures that you have access to your important files, documents, and settings that you previously backed up.
Here’s how you can restore your backed-up data:
- Connect your backup device: If you backed up your data to an external hard drive or USB drive, connect the device to your computer. If you used cloud storage, sign in to the respective service from your computer.
- Locate your backed-up data: Open the file explorer or file manager on your computer and navigate to the location where you stored your backup files. If you used backup software, follow the instructions provided by the software to access your backed-up data.
- Copy and paste: To restore individual files or folders, simply select them and copy them to the desired location on your SSD. You can choose to restore files to their original locations or create a new folder to organize the restored data.
- Import settings and configurations: If you have saved settings or configurations from applications or programs, follow the instructions provided by each application to import those settings. Many applications offer import/export features that allow you to easily restore your previous settings.
- Test and verify: After restoring your backed-up data, it’s advisable to test and verify the restored files to ensure their integrity and accessibility. Open a few files or documents from different folders to confirm that everything has been successfully restored. If you encounter any issues, refer to your backup documentation or seek further assistance if needed.
Remember to maintain organizational structure and ensure that important files and folders are restored to their original locations. If any files or data were stored in non-standard locations or custom directories, make sure to restore them accordingly.
It’s also a good idea to review your settings and configurations for each application or program that you restored. Check that the necessary permissions, preferences, and customizations are applied correctly.
By following these steps, you can restore your backed-up data and ensure that you have access to your important files, documents, and settings on your newly installed Windows 10 system on the SSD.
With your data successfully restored, you can now enjoy the improved performance and functionality of Windows 10 on your SSD, with all your important files and settings intact.
While the process of restoring backed-up data may seem time-consuming, it is essential to secure your valuable files and ensure a seamless transition to your new Windows 10 installation.
Conclusion
Congratulations on successfully completing the fresh install of Windows 10 on your SSD! By following the steps outlined in this guide, you have optimized the performance of your computer and ensured a smooth transition to the latest version of Windows.
We began by emphasizing the importance of backing up your data to protect against potential loss or corruption during the installation process. By taking this precaution, you can rest assured knowing that your important files are safe and can be easily restored.
Next, we walked through the process of downloading the Windows 10 installation media and creating a bootable USB drive. These steps are crucial for initiating the installation process and ensuring a seamless transition to Windows 10 on your SSD.
We then discussed the importance of adjusting the BIOS settings to prioritize booting from the USB drive. This ensures that your system correctly initiates the Windows 10 installation and avoids any compatibility or booting issues.
After successfully installing Windows 10, we guided you through formatting the SSD to prepare it as the primary storage device for your operating system and data. Formatting allows Windows 10 to recognize the SSD and ensures that it functions optimally.
With the installation complete, we explored various crucial settings, including language preferences, privacy options, user account management, personalization choices, and more. By customizing these settings, you can truly personalize your Windows 10 experience.
To ensure optimal functionality and compatibility, we discussed the importance of installing the necessary device drivers and updating your system. Regularly updating drivers and keeping your system up-to-date will ensure that your computer remains stable, secure, and operating at its best.
Lastly, we covered the process of restoring your data from the backup you created before the installation. By following the steps provided, you can easily restore your files, documents, and settings, enabling you to pick up where you left off on your new Windows 10 installation.
With the fresh install of Windows 10 on your SSD, you can now enjoy the improved performance, responsiveness, and functionality that this modern operating system offers. Take the time to explore the features and options available to you, and don’t hesitate to seek further assistance or consult additional resources as needed.
Thank you for following this comprehensive guide. We hope it has been helpful in your journey to install Windows 10 on your SSD and optimize your computing experience. Enjoy your newly upgraded system!


