Introduction
When working with a database in PHP, it is often necessary to display data retrieved from the database on a web page. Displaying data is a crucial aspect of any web application, as it allows users to view and interact with the information stored in the database. Whether you’re building a blog, an e-commerce site, or a data-driven dashboard, knowing how to display database data is an essential skill for any PHP developer.
In this article, we will explore various techniques for displaying data from a database using PHP. We will discuss how to connect to the database and retrieve the desired data. Additionally, we will cover different ways to present the data on the web page, including displaying it in a table, a list, or a dropdown menu. We will also explore advanced techniques such as displaying data in charts or graphs.
Displaying data from a database is not just about fetching the information and dumping it on the page. It is important to format the data properly to ensure a clear and user-friendly presentation. We will discuss how to format the data to improve readability, such as formatting dates, numbers, and text.
Furthermore, we will cover techniques like pagination and filtering to handle large datasets and enable users to find the specific information they are looking for. This helps to enhance the user experience and make it easier to navigate through the displayed data.
By the end of this article, you will have a solid understanding of how to connect to a database, retrieve data, and effectively display it on a web page using PHP. So let’s dive in and learn how to showcase your database data in an engaging and organized manner!
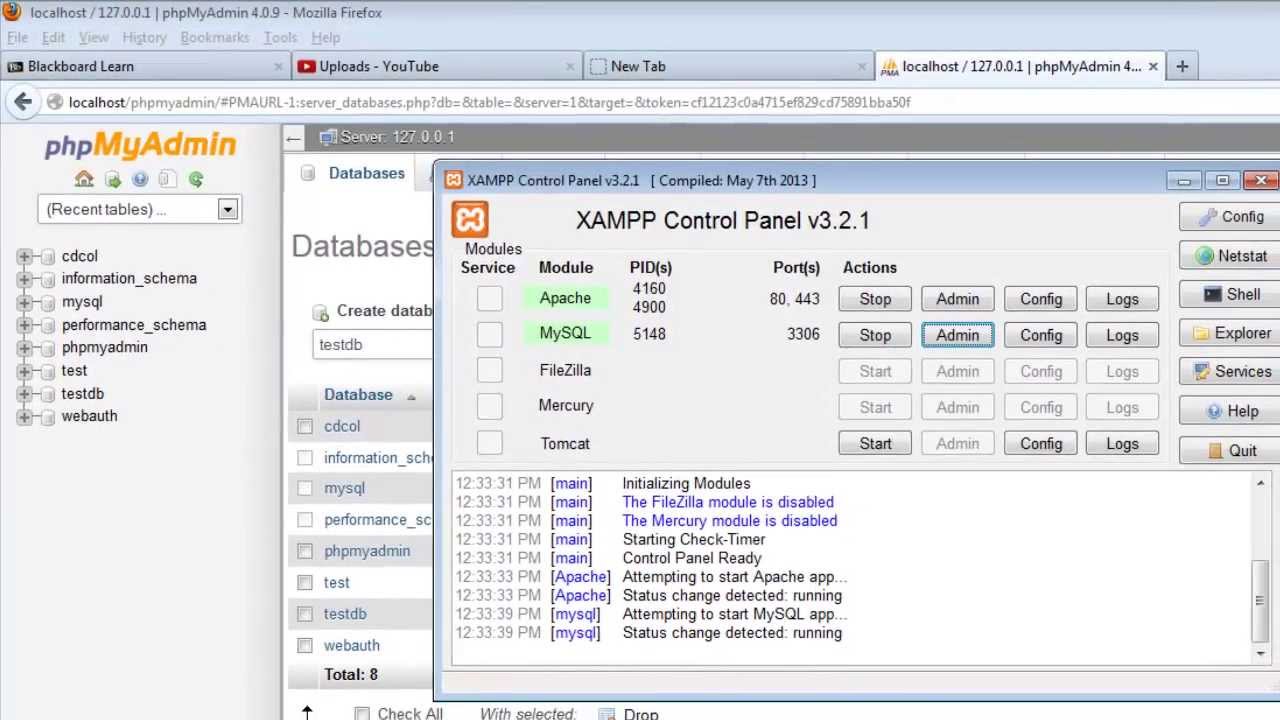
Connecting to the Database
Before we can display data from a database, we need to establish a connection between our PHP script and the database itself. This connection allows us to interact with the database and retrieve the desired information. Here are the steps to connect to a database using PHP:
- Choose the Database System: PHP supports various database management systems such as MySQL, PostgreSQL, SQLite, and more. Choose the one that suits your project requirements and ensure it is installed and running on your server.
- Set Up the Connection Parameters: The connection parameters include the host, username, password, and database name. These details are necessary for establishing a secure and successful connection.
- Use the Appropriate PHP Functions: PHP provides built-in functions like
mysqli_connect()orpdo::connect()to connect to different database systems. Depending on the selected database, choose the appropriate function and pass in the connection parameters. - Check the Connection: After establishing the connection, it is essential to verify its success. You can use conditional statements to handle connection errors and display appropriate messages to the user.
Here’s an example of connecting to a MySQL database using the mysqli_connect() function:
php
Remember to replace your_username, your_password, and your_database with the appropriate values for your database. Once the connection is established successfully, you will see the “Connected successfully” message.
It is important to close the database connection when you are done working with it. You can use the mysqli_close() function to close the connection. Closing the connection helps free up system resources and ensures the security of your database.
Now that we have successfully connected to the database, let’s move on to retrieving data from it and displaying it in various formats.
Retrieving Data from the Database
Once you have established a connection to the database, the next step is to retrieve the desired data. To retrieve data from a database using PHP, you can use SQL (Structured Query Language) queries. SQL allows you to specify what data you want to fetch from the database based on certain conditions.
Here are the steps to retrieve data from the database:
- Construct the SQL Query: Define the SQL query string that specifies the data you want to retrieve. This includes selecting the table(s), columns, and any conditions or filters.
- Execute the Query: Using the appropriate PHP database functions, execute the SQL query against the database. This will fetch the data based on the specified conditions.
- Retrieve the Data: Once the query is executed successfully, retrieve the fetched data and store it in a variable for further processing and display.
- Handle Errors: Check for any errors that occurred during the query execution. You can use conditional statements or try-catch blocks to handle and display error messages gracefully.
Here’s an example of retrieving data from a MySQL database using PHP:
php
In this example, the SQL query retrieves all the data from the “customers” table. The mysqli_query() function is used to execute the query, and mysqli_fetch_all() retrieves all the rows from the result set as an associative array called $data.
It is important to free up memory by using mysqli_free_result() to release the memory associated with the result set. Additionally, using mysqli_close() closes the database connection, freeing up system resources.
With the data retrieved from the database, we can now move on to displaying it in various formats, such as tables, lists, or dropdown menus. We will explore these display options in the next sections.
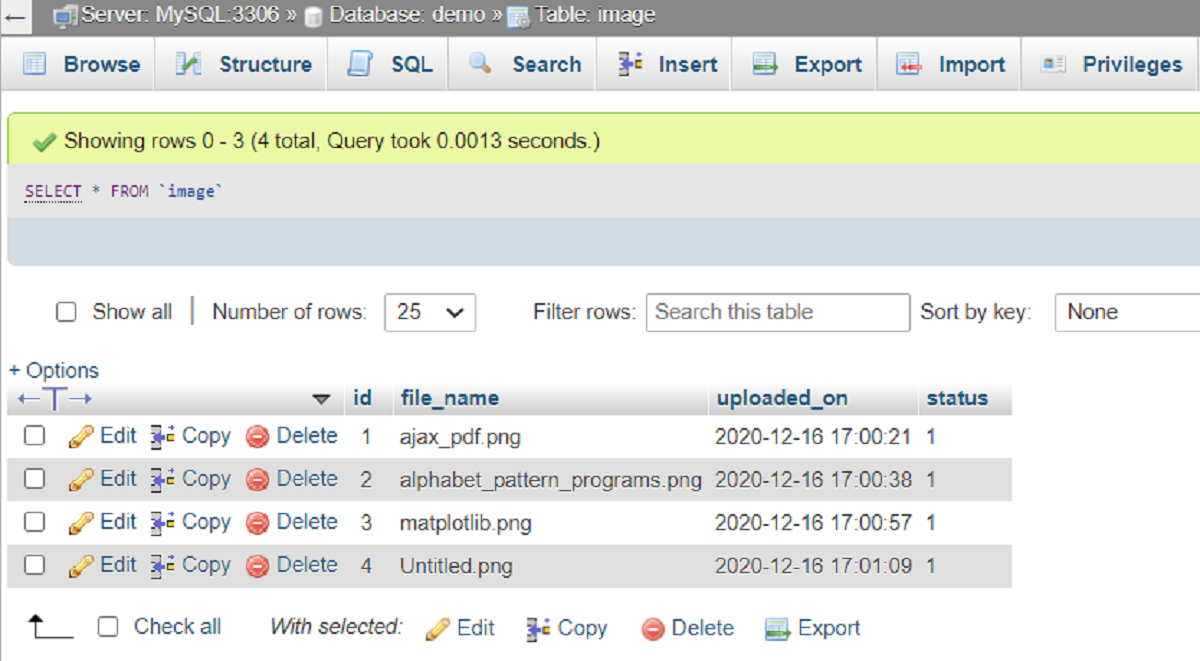
Displaying Data in a Table
Displaying data in a table format is a common and effective way to present database information on a web page. Tables provide a structured and organized display, making it easy for users to read and compare the data. In PHP, you can dynamically generate HTML tables using the retrieved data from the database.
Here are the steps to display data in a table:
- Create the HTML Table Structure: Start by creating an HTML table structure with appropriate table headers to define the columns. You can use the
<table>,<thead>,<tbody>, and<th>tags for this purpose. - Loop through the Data: Iterate over the retrieved data and generate table rows using the
<tr>tag. For each row, loop through the columns and populate the table cells (<td>) with the corresponding data. - Output the HTML Table: Echo or print the generated HTML table code to the web page. This will display the table along with the data on the browser.
Here’s an example of displaying data in a table format using the retrieved data from a MySQL database:
php
“;
echo “
echo “
echo “
“;
echo “
“;
echo “
“;
echo “
“;
echo “
“;
echo “
// Loop through the data and generate table rows
foreach ($data as $row) {
echo “
echo “
“;
echo “
“;
echo “
“;
echo “
“;
}
echo “
“;
echo “
“;
?>
In this example, we start by creating the table structure using HTML tags like <table>, <thead>, and <tbody>. We then loop through the data array and generate table rows (<tr>) and cells (<td>) for each row.
Finally, we output the generated HTML table code to the web page using echo. As a result, the table will be displayed on the browser with the retrieved data.
With the data displayed in a table format, users can easily scan and analyze the information. However, depending on the type of data and the desired user experience, alternative display options such as lists or dropdown menus may be more appropriate. We will explore these options in the following sections.
Displaying Data in a List
Displaying data in a list format is another effective way to present database information on a web page. Lists provide a simple and concise representation of the data, especially when dealing with a large dataset. In PHP, you can dynamically generate HTML lists using the retrieved data from the database.
Here are the steps to display data in a list:
- Select the Appropriate List Type: Choose the appropriate HTML list type based on the nature of your data. Common list types include ordered lists (
<ol>) and unordered lists (<ul>). - Loop through the Data: Iterate over the retrieved data and generate list items (
<li>) for each item. Populate the list items with the corresponding data from the database. - Output the HTML List: Echo or print the generated HTML list code to the web page. This will display the list along with the data on the browser.
Here’s an example of displaying data in a list format using the retrieved data from a MySQL database:
php
“;
// Loop through the data and generate list items
foreach ($data as $row) {
echo “
“;
}
echo “
“;
?>
In this example, we start by selecting the appropriate list type, which is an unordered list (<ul>). We then loop through the retrieved data array and generate list items (<li>) for each item. Here, we are displaying the “name” column from the database.
Finally, we output the generated HTML list code to the web page using echo. As a result, the list will be displayed on the browser with the retrieved data.
Displaying data in a list format provides a simplified view, making it easier for users to scan and navigate through the information. However, in some cases, a more interactive display option like a dropdown menu may be preferable. We will explore this option in the next section.
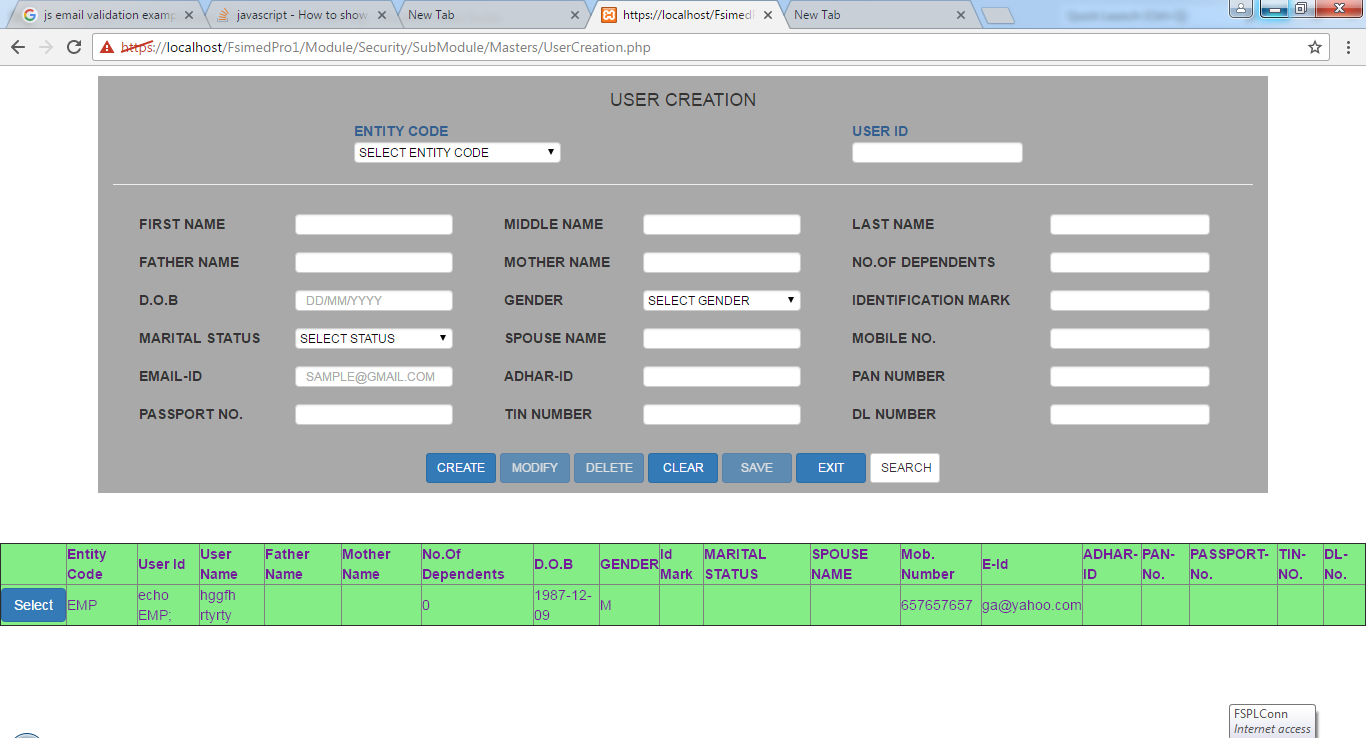
Displaying Data in a Dropdown
When you have a large dataset or want to provide a more compact and interactive display, displaying data in a dropdown menu is a useful option. Dropdown menus allow users to select a specific item from a list of options, making it easier to navigate through the data. In PHP, you can dynamically generate HTML dropdown menus using the retrieved data from the database.
Here are the steps to display data in a dropdown:
- Create the HTML Select Element: Start by creating an HTML select element (
<select>). This will serve as the container for the dropdown menu. - Loop through the Data: Iterate over the retrieved data and generate option elements (
<option>) for each item. Populate the option elements with the corresponding data from the database. - Output the HTML Select Element: Echo or print the generated HTML select code to the web page. This will display the dropdown menu along with the data on the browser.
Here’s an example of displaying data in a dropdown menu using the retrieved data from a MySQL database:
php
“;
// Loop through the data and generate option elements
foreach ($data as $row) {
echo ““;
}
echo ““;
?>
In this example, we start by creating the HTML select element using the <select> tag. We then loop through the retrieved data array and generate option elements using the <option> tag. Each option is assigned a value (here, we use the “id” column) and displays the corresponding data (the “name” column).
Finally, we output the generated HTML select code to the web page using echo. As a result, the dropdown menu will be displayed on the browser with the retrieved data as selectable options.
Displaying data in a dropdown menu provides a compact and interactive way for users to select specific items from a large dataset. However, depending on the nature of your data and the desired user experience, other display options like tables or lists may be more appropriate. Choose the option that best suits your project requirements.
Displaying Data in Charts or Graphs
Visualizing data in charts or graphs is an effective way to present complex information in a visually appealing and easily understandable manner. Charts and graphs provide insights into trends, patterns, and relationships within the data. In PHP, you can utilize various libraries and tools to generate charts or graphs using the retrieved data from the database.
Here are the steps to display data in charts or graphs:
- Select a Charting Library or Tool: There are several popular charting libraries available for PHP, such as Google Charts, Chart.js, and FusionCharts. Choose the one that best suits your project requirements.
- Prepare the Dataset: Analyze the data from the database and organize it into a format that the charting library can understand. Depending on the library, this may involve converting the data into JSON or using specific data structures.
- Configure the Chart Options: Customize the appearance and behavior of the chart by specifying various options, such as chart type, colors, labels, axes, legends, and tooltips. Refer to the documentation of the chosen charting library for available customization options.
- Render the Chart: Use the charting library’s functions or methods to render the chart on the web page. This typically involves creating an HTML container element and triggering the drawing of the chart using the provided API.
Here’s an example of displaying data in a line chart using the Chart.js library with data retrieved from a MySQL database:
php
$labels,
‘datasets’ => [
[
‘label’ => ‘Sales’,
‘data’ => $data,
‘backgroundColor’ => ‘rgba(75, 192, 192, 0.2)’,
‘borderColor’ => ‘rgba(75, 192, 192, 1)’,
‘borderWidth’ => 1
]
]
];
// Configure the chart options
$options = [
‘responsive’ => true,
‘scales’ => [
‘y’ => [
‘beginAtZero’ => true
]
]
];
// Render the chart
?>
In this example, we first prepare the dataset by extracting the necessary data from the retrieved database data. We create an array of labels representing the chart’s x-axis (years) and an array of data representing the chart’s y-axis (sales).
Next, we configure the chart options, such as making it responsive and setting the minimum y-axis value to zero. These options can be adjusted based on your specific requirements.
Finally, we render the chart using HTML canvas and the Chart.js library. The dataset and options are passed as parameters to the Chart constructor, and the chart is then displayed on the web page.
Remember to include the necessary library files and scripts based on the charting library you choose. Consult the documentation of the specific library for detailed instructions and additional customization options.
With charts or graphs, you can visually represent your data in an engaging way, enabling users to interpret and understand the information more easily.
Formatting the Data
Formatting data is an important aspect of displaying database information in a clear and readable manner. By applying appropriate formatting techniques, you can enhance the visual appeal of the data and make it more user-friendly. In PHP, there are various formatting options available to format different types of data, such as numbers, dates, and text.
Here are some common formatting techniques that you can apply to the retrieved data:
- Number Formatting: Use functions like
number_format()or formatting options provided by the specific charting or visualization library to format numeric values with decimal places, thousands separators, or currency symbols. - Date and Time Formatting: Use functions like
date()or libraries like Carbon to format date and time values into different formats, such as dd/mm/yyyy or hh:mm:ss. - Text Formatting: Apply HTML tags like
<b>,<i>, or<strong>to highlight or emphasize specific text. You can also apply CSS styles to format text, such as changing the font size, color, or alignment. - Data Unit Conversion: Convert data units to more readable formats. For example, you can convert file sizes from bytes to kilobytes, megabytes, or gigabytes, using appropriate conversion formulas.
Here’s an example of formatting data from a MySQL database using PHP:
php
” . $row[‘name’] . ““;
// Convert data units
$fileSize = convertFileSize($row[‘size’]);
// …
// Custom function to convert file size
function convertFileSize($size)
{
$units = array(‘B’, ‘KB’, ‘MB’, ‘GB’, ‘TB’);
$index = 0;
while ($size >= 1024 && $index < count($units) - 1) { $size /= 1024; $index++; } return round($size, 2) . " " . $units[$index]; } // ... ?>
In this example, we use the number_format() function to format the numeric sales value with two decimal places. The date() function is used to format the created_at date column into the desired format. We apply the <b> HTML tag to the product name to make it bold. Additionally, we define a custom function convertFileSize() to convert the file size from bytes to a more readable format.
By formatting the data appropriately, you can improve its readability and make it more visually appealing, enhancing the overall user experience when interacting with the displayed information.
Pagination and Filtering
When dealing with large datasets, it is often necessary to implement pagination and filtering mechanisms to enhance usability and performance. Pagination allows users to navigate through the data in smaller, manageable chunks, while filtering enables them to search for specific information based on certain criteria. In PHP, you can implement pagination and filtering functionality to display and manipulate the database data effectively.
Here’s how you can incorporate pagination and filtering:
- Define the Pagination Parameters: Determine the number of records to display per page and the current page number. These parameters will be used to control the amount of data shown and calculate the offset for database queries.
- Create Pagination Links: Generate navigation links (e.g., “Previous” and “Next”) and page numbers to enable users to move between pages. Utilize PHP functions such as
ceil()andfloor()to calculate the total number of pages based on the total number of records and items per page. - Apply Filtering Mechanisms: Implement search functionality to allow users to filter data based on specific criteria such as keywords, categories, or dates. Modify your database query to include the filtering conditions based on the user’s input.
- Update Database Queries: Incorporate the pagination parameters and filter conditions into your database queries. Utilize LIMIT and OFFSET clauses to fetch the appropriate records based on the current page and filtering criteria. Maintain an ORDER BY clause to ensure consistent sorting.
Here’s an example of pagination and filtering implementation using PHP and MySQL:
php
“;
if ($currentpage > 1) {
echo “Previous“;
}
for ($i = 1; $i <= $totalPages; $i++) {
$active = ($i == $currentpage) ? "active" : "";
echo "$i“;
}
if ($currentpage < $totalPages) {
echo "Next“;
}
echo “