Introduction
Welcome to this guide on how to create a database in PHP using Xampp. Creating and managing a database is essential for many web applications and websites. PHP, being a popular server-side scripting language, provides excellent support for interacting with databases.
In this tutorial, we will cover the step-by-step process of setting up Xampp, creating a database, connecting to the database, creating tables, inserting data into tables, retrieving data from tables, updating data in tables, deleting data from tables, and finally closing the database connection.
By the end of this tutorial, you will have a solid understanding of how to create a database using Xampp and perform basic database operations using PHP.
Why Xampp?
Xampp (cross-platform, Apache, MariaDB/MySQL, PHP, Perl) is a widely used software package that provides a complete environment for web development including a local server, database server, and programming language support. It is a convenient and user-friendly option for beginners to set up a local development environment quickly. However, keep in mind that Xampp is suitable for local development only and not recommended for production use.
To get started, you will need to download and install Xampp on your computer. Visit the official Xampp website and download the appropriate version for your operating system. Once the installation is complete, you can proceed with the database creation process.
Now let’s move on to the next section, where we will go through the process of setting up Xampp on your computer.
Setting Up Xampp
Before we can create a database in PHP using Xampp, we need to set up Xampp on our computer. Follow the steps below to install and configure Xampp:
- Download Xampp: Visit the official Xampp website and download the version of Xampp that is compatible with your operating system.
- Install Xampp: Once the download is complete, run the installer and follow the on-screen instructions to install Xampp on your computer. Choose an appropriate directory for installation.
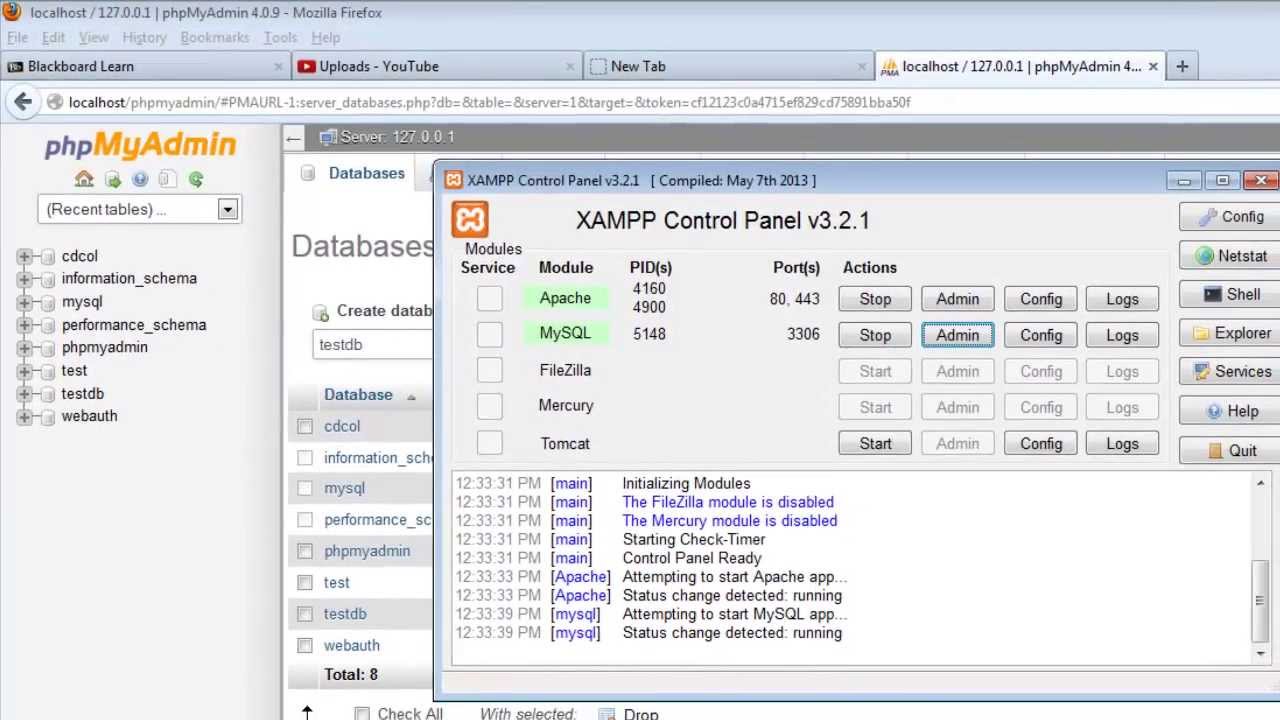
- Start Xampp: After the installation is complete, launch Xampp by running the Xampp control panel.
- Start Apache and MySQL: In the Xampp control panel, you will see options for starting Apache and MySQL servers. Click the “Start” button for both Apache and MySQL. Once they are started, you will see the status indicator turn green.
- Test Xampp: To ensure that Xampp is set up correctly, open a web browser and navigate to http://localhost/. If everything is working fine, you will see the Xampp dashboard.
With Xampp successfully installed and running on your computer, you are now ready to create a database using PHP.
Next, we will cover the process of creating a database in PHP by connecting to the MySQL server using Xampp. Follow along to learn how to establish a connection and perform database operations in PHP.
Creating a Database
Now that you have Xampp installed and running, it’s time to create a database. To create a database using PHP, we need to connect to the MySQL server.
Follow the steps below to create a database:
- Open your preferred code editor: To begin, open your preferred code editor or integrated development environment (IDE).
- Create a new PHP file: In your code editor, create a new PHP file with a .php extension. This file will contain the code to create the database.
- Connect to the MySQL server: To connect to the MySQL server, we need to use the mysqli_connect() function. The function takes in four parameters: the server name (usually “localhost”), username, password, and the database name.
- Create the database: Once the connection is established, we can create a database using the mysqli_query() function. Pass the SQL query “CREATE DATABASE dbname;” to create the database. Replace “dbname” with your preferred database name.
- Check if the database was created: To confirm that the database was created successfully, we can check the return value of the mysqli_query() function. If it returns true, the database creation was successful.
- Close the database connection: After creating the database, it’s a good practice to close the database connection using the mysqli_close() function.
Here’s an example of PHP code that creates a database:
<?php
$servername = "localhost";
$username = "root";
$password = "";
$dbname = "mydatabase";

// Create a connection
$conn = mysqli_connect($servername, $username, $password);

// Check if the connection was successful
if (!$conn) {
  die("Connection failed: " . mysqli_connect_error());
}

// Create the database
$sql = "CREATE DATABASE mydatabase";
if (mysqli_query($conn, $sql)) {
  echo "Database created successfully";
} else {
  echo "Error creating database: " . mysqli_error($conn);
}

// Close the connection
mysqli_close($conn);
?>
By running the above PHP code, you will create a database named “mydatabase” on your MySQL server.
Now that you understand how to create a database using PHP and Xampp, we can proceed to the next section where we will learn how to connect to the database.
Connecting to the Database
Once you have created a database, the next step is to establish a connection to the database using PHP. The connection allows us to interact with the database and perform various operations such as inserting, retrieving, updating, and deleting data.
To connect to the database, follow the steps below:
- Open your code editor: Open the PHP file where you want to establish the database connection.
- Set up the connection parameters: Define the necessary variables to store the connection details, such as the server name, username, password, and database name.
- Establish the connection: Use the mysqli_connect() function to establish a connection to the MySQL server. Pass in the connection parameters as arguments to the function.
- Check the connection: Verify if the connection was successful by using the mysqli_connect_error() function. If the connection fails, an error message will be displayed.
- Perform database operations: After establishing the connection, you can start executing SQL queries to interact with the database.
- Close the connection: Once you are done with the database operations, it is essential to close the database connection using the mysqli_close() function to free up server resources.
Here’s an example of PHP code that establishes a database connection:
<?php
$servername = "localhost";
$username = "root";
$password = "";
$dbname = "mydatabase";

// Establish a connection
$conn = mysqli_connect($servername, $username, $password, $dbname);

// Check the connection
if (!$conn) {
  die("Connection failed: " . mysqli_connect_error());
}

// Perform database operations here

// Close the connection
mysqli_close($conn);
?>
In the above code, replace the values of $servername, $username, $password, and $dbname with your actual database connection credentials. The mysqli_connect() function establishes the connection, and mysqli_close() function closes the connection.
Now that you know how to connect to the database using PHP and Xampp, we can move on to the next section where we will learn how to create tables in the database.
Creating Tables
With the database connection established, we can now move on to creating tables to store our data. Tables organize data into rows and columns, providing a structured way to store and retrieve information.
To create a table in the database using PHP, follow these steps:
- Open your code editor: Open the PHP file where you have established the database connection.
- Define the SQL query: Define an SQL query to create the table. The query should include the table name and the names and data types of each column in the table.
- Execute the query: Use the mysqli_query() function to execute the SQL query. Pass in the connection variable and the SQL query as arguments.
- Check if the table was created: To ensure that the table was created successfully, you can check the return value of the mysqli_query() function. If it returns true, the table creation was successful.
Here’s an example of PHP code that creates a table:
<?php
// SQL query to create the table
$sql = "CREATE TABLE users (
  id INT(6) UNSIGNED AUTO_INCREMENT PRIMARY KEY,
  name VARCHAR(50) NOT NULL,
  email VARCHAR(100) NOT NULL
)";

// Execute the query
if (mysqli_query($conn, $sql)) {
  echo "Table 'users' created successfully";
} else {
  echo "Error creating table: " . mysqli_error($conn);
}
?>
In this example, we’re creating a table named ‘users’ with three columns: ‘id’, ‘name’, and ’email’. The ‘id’ column is defined as an auto-incrementing primary key, while the ‘name’ and ’email’ columns are defined as strings with a specific length. Modify the SQL query and column definitions to suit your specific table structure.
After executing the PHP code, if the table is created successfully, you will see the success message. Otherwise, an error message will be displayed along with the error details.
Now that you know how to create tables in the database using PHP and Xampp, we can proceed to the next section where we will learn how to insert data into these tables.
Inserting Data into Tables
Once you have created tables in your database, the next step is to insert data into these tables. This allows you to populate the tables with the necessary information for your application or website.
To insert data into tables using PHP and Xampp, follow these steps:
- Open your code editor: Open the PHP file where you have established the database connection.
- Construct the SQL query: Create an SQL query to insert data into the table. The query should include the table name and the values to be inserted into each column.
- Execute the query: Use the mysqli_query() function to execute the SQL query. Pass in the connection variable and the SQL query as arguments.
- Check if the data was inserted: To ensure that the data was successfully inserted, you can check the return value of the mysqli_query() function. If it returns true, the data insertion was successful.
Here’s an example of PHP code that inserts data into a table:
<?php
// SQL query to insert data into the table
$sql = "INSERT INTO users (name, email) VALUES ('John Doe', 'johndoe@example.com')";

// Execute the query
if (mysqli_query($conn, $sql)) {
  echo "Data inserted successfully";
} else {
  echo "Error inserting data: " . mysqli_error($conn);
}
?>
In this example, we’re using the ‘users’ table created earlier. We specify the column names (‘name’ and ’email’) and the values to be inserted (‘John Doe’ and ‘johndoe@example.com’). Modify the SQL query and input values according to the specific data you want to insert.
After executing the PHP code, if the data is inserted successfully, you will see the success message. Otherwise, an error message will be displayed along with the error details.
Now that you know how to insert data into tables using PHP and Xampp, we can proceed to the next section where we will explore how to retrieve data from tables.
Retrieving Data from Tables
Once you have inserted data into your database tables, you may need to retrieve that data to display or use it in your application. Retrieving data from tables in PHP is a common task when working with databases.
To retrieve data from tables using PHP and Xampp, follow these steps:
- Open your code editor: Open the PHP file where you have established the database connection.
- Construct the SQL query: Create an SQL query to select the data from the table. The query should include the table name and the columns you want to retrieve.
- Execute the query: Use the mysqli_query() function to execute the SQL query. Pass in the connection variable and the SQL query as arguments.
- Process the result: Use the mysqli_fetch_assoc() function to fetch each row of data as an associative array. This allows you to access the values of each column using their respective column names.
- Display or use the retrieved data: Once you have fetched the data, you can display it or perform any necessary operations on it.
Here’s an example of PHP code that retrieves data from a table:
<?php
// SQL query to retrieve data from the table
$sql = "SELECT * FROM users";

// Execute the query
$result = mysqli_query($conn, $sql);

// Process the result
if (mysqli_num_rows($result) > 0) {
  while ($row = mysqli_fetch_assoc($result)) {
    echo "Name: " . $row["name"] . " - Email: " . $row["email"] . "<br>";
  }
} else {
  echo "No data found";
}
?>
In this example, we’re retrieving data from the ‘users’ table. The SQL query selects all columns from the table using the asterisk (*) wildcard. The mysqli_fetch_assoc() function fetches one row of data at a time, which we can access using the respective column names (“name” and “email” in this case).
After executing the PHP code, if there is data available in the table, it will be displayed with the respective column values. Otherwise, the message “No data found” will be displayed.
Now that you know how to retrieve data from tables using PHP and Xampp, we can proceed to the next section where we will learn how to update data in tables.
Updating Data in Tables
Sometimes, you may need to modify or update existing data in your database tables. PHP and Xampp provide easy and efficient ways to update data in tables using SQL queries.
To update data in tables using PHP and Xampp, follow these steps:
- Open your code editor: Open the PHP file where you have established the database connection.
- Construct the SQL query: Create an SQL query to update the desired data in the table. The query should include the table name, column names, and the new values to be set.
- Execute the query: Use the mysqli_query() function to execute the SQL query. Pass in the connection variable and the SQL query as arguments.
- Check if the data was updated: To ensure that the data was successfully updated, you can check the return value of the mysqli_query() function. If it returns true, the data update was successful.
Here’s an example of PHP code that updates data in a table:
<?php
// SQL query to update data in the table
$sql = "UPDATE users SET email='newemail@example.com' WHERE id=1";

// Execute the query
if (mysqli_query($conn, $sql)) {
  echo "Data updated successfully";
} else {
  echo "Error updating data: " . mysqli_error($conn);
}
?>
In this example, we’re updating the ’email’ column in the ‘users’ table where the ‘id’ is equal to 1. The SQL query uses the UPDATE statement followed by the SET keyword to specify the new value for the ’email’ column.
After executing the PHP code, if the data is updated successfully, you will see the success message. Otherwise, an error message will be displayed along with the error details.
Now that you know how to update data in tables using PHP and Xampp, we can proceed to the next section where we will learn how to delete data from tables.
Deleting Data from Tables
Deleting data from tables is a common task when working with databases. PHP and Xampp provide an easy way to delete specific records from database tables using SQL queries.
To delete data from tables using PHP and Xampp, follow these steps:
- Open your code editor: Open the PHP file where you have established the database connection.
- Construct the SQL query: Create an SQL query to delete the desired data from the table. The query should include the table name and a condition to specify which records to delete.
- Execute the query: Use the mysqli_query() function to execute the SQL query. Pass in the connection variable and the SQL query as arguments.
- Check if the data was deleted: To ensure that the data was successfully deleted, you can check the return value of the mysqli_query() function. If it returns true, the data deletion was successful.
Here’s an example of PHP code that deletes data from a table:
<?php
// SQL query to delete data from the table
$sql = "DELETE FROM users WHERE id=1";

// Execute the query
if (mysqli_query($conn, $sql)) {
  echo "Data deleted successfully";
} else {
  echo "Error deleting data: " . mysqli_error($conn);
}
?>
In this example, we’re deleting a record from the ‘users’ table where the ‘id’ is equal to 1. The SQL query uses the DELETE statement followed by the FROM keyword to specify the table from which to delete, and the WHERE clause to specify the condition for the deletion.
After executing the PHP code, if the data is deleted successfully, you will see the success message. Otherwise, an error message will be displayed along with the error details.
Now that you know how to delete data from tables using PHP and Xampp, we can proceed to the final section where we will learn how to close the database connection.
Closing the Database Connection
After you have performed the necessary operations on the database, it is important to close the database connection. Closing the connection ensures that the resources are freed up and prevents any potential issues.
To close the database connection in PHP and Xampp, follow these steps:
- Open your code editor: Open the PHP file where you have established the database connection.
- Use the mysqli_close() function: Call the mysqli_close() function and pass in the connection variable as an argument.
Here’s an example of PHP code that closes the database connection:
<?php
// Close the database connection
mysqli_close($conn);
?>
In the above code, $conn represents the database connection variable. Calling mysqli_close() with this variable as an argument will close the connection.
Closing the database connection is good practice as it helps prevent unnecessary resource usage. However, keep in mind that PHP automatically closes the database connection when the script finishes execution, so in most cases, explicitly closing the connection may not be necessary. It is still a recommended practice.
Now that you know how to close the database connection using PHP and Xampp, you have completed the essential steps for working with databases. Congratulations!
Feel free to explore more advanced database operations and features to further enhance your PHP and Xampp skills.
Conclusion
Congratulations! You have reached the end of this guide on how to create a database in PHP using Xampp. We have covered the essential steps from setting up Xampp to performing various database operations.
By now, you should have a good understanding of how to:
- Set up Xampp on your computer and create a local development environment.
- Create a database using PHP and Xampp.
- Establish a connection to the database.
- Create tables to organize your data.
- Insert and retrieve data from the tables.
- Update and delete data in the tables.
- Close the database connection after performing the necessary operations.
Working with databases is a fundamental skill for web developers, and PHP along with Xampp provides a versatile and efficient solution to interact with databases.
Remember to always practice good database management techniques and ensure the security of your data. Properly sanitizing and validating user inputs are critical to prevent any security vulnerabilities.
Continue to explore and expand your knowledge of PHP and database management. Experiment with complex database queries, join tables, and work with larger datasets. The more you practice and experiment, the more proficient you will become in handling databases.
Thank you for following along with this guide. We hope it has been helpful in your journey to create and manage databases in PHP using Xampp.