Introduction
Running PHP on Xampp allows you to create dynamic web pages and build powerful web applications. Xampp is a popular open-source web server solution that includes Apache, MySQL, PHP, and other necessary components to run PHP scripts on your local machine. It provides a user-friendly interface and simplifies the process of setting up a local development environment.
Whether you are a beginner learning PHP or a seasoned developer working on a project, Xampp provides a convenient way to develop and test your PHP code locally before deploying it to a live server. This article will guide you through the process of installing and configuring Xampp to run PHP on your computer.
In this tutorial, you will learn how to install Xampp on your machine, start the Apache and MySQL servers, configure the PHP settings, and test your PHP installation. We will also cover how to create a basic PHP file and access it from a web browser.
Before we dive into the installation process, it’s important to note that Xampp is available for different operating systems, including Windows, macOS, and Linux. Make sure to download the correct version for your operating system from the official Xampp website.
Now, let’s get started with installing Xampp and running PHP on your local machine.
Prerequisites
Before you begin installing Xampp and running PHP on your machine, there are a few prerequisites you should have in place. Here’s what you need:
- Operating System: Xampp is compatible with Windows, macOS, and Linux. Make sure you have a supported operating system installed on your machine.
- Hardware Requirements: Xampp doesn’t impose any special hardware requirements. However, it’s recommended to have a computer with at least 2GB of RAM and a sufficient amount of free disk space to accommodate Xampp and your projects.
- Internet Connection: While an internet connection is not mandatory for running Xampp and PHP locally, it may be required for downloading Xampp and installing updates.
Additionally, some basic knowledge of HTML, CSS, and PHP will be helpful as you work with Xampp. Understanding the fundamentals of these web technologies will enable you to create dynamic web pages and develop robust PHP applications.
It’s also beneficial to have a code editor installed on your machine. A code editor will facilitate writing and editing your PHP code. Popular choices include Sublime Text, Visual Studio Code, and Atom. Choose the code editor that you’re most comfortable with or explore different options to find the one that suits your needs best.
Once you have met the prerequisites mentioned above, you are ready to proceed with the installation and setup of Xampp. The next section will guide you through the process of installing Xampp on your machine and configuring it to run PHP.
Step 1: Installing Xampp
The first step to running PHP on Xampp is to install the Xampp software on your machine. Follow these steps to install Xampp:
- Download Xampp: Visit the official Xampp website (https://www.apachefriends.org/) and download the version of Xampp that is compatible with your operating system. Choose the version that includes PHP.
- Run the Installer: Once the download is complete, locate the installer file and run it. The installer will guide you through the installation process.
- Select Components: During the installation, you will be presented with a list of components to install. Make sure the Apache and MySQL checkboxes are checked since these are required to run PHP. You can also select any additional components you might need for your development environment.
- Select Installation Folder: Choose the destination folder where you want to install Xampp. The default folder is usually fine, but you can choose another location if desired.
- Start the Installation: Once you have selected the components and installation folder, click the “Install” button to start the installation process. The installer will copy all the necessary files to your machine.
- Complete the Installation: After the installation is complete, you may be prompted to install additional software or make certain configuration choices. Follow the on-screen instructions to complete the installation process.
Once the installation is finished, you now have Xampp installed on your machine. In the next step, we will start the Apache and MySQL servers to prepare for running PHP.
Step 2: Starting Apache and MySQL Servers
Now that you have successfully installed Xampp, it’s time to start the Apache and MySQL servers. Follow the steps below to get started:
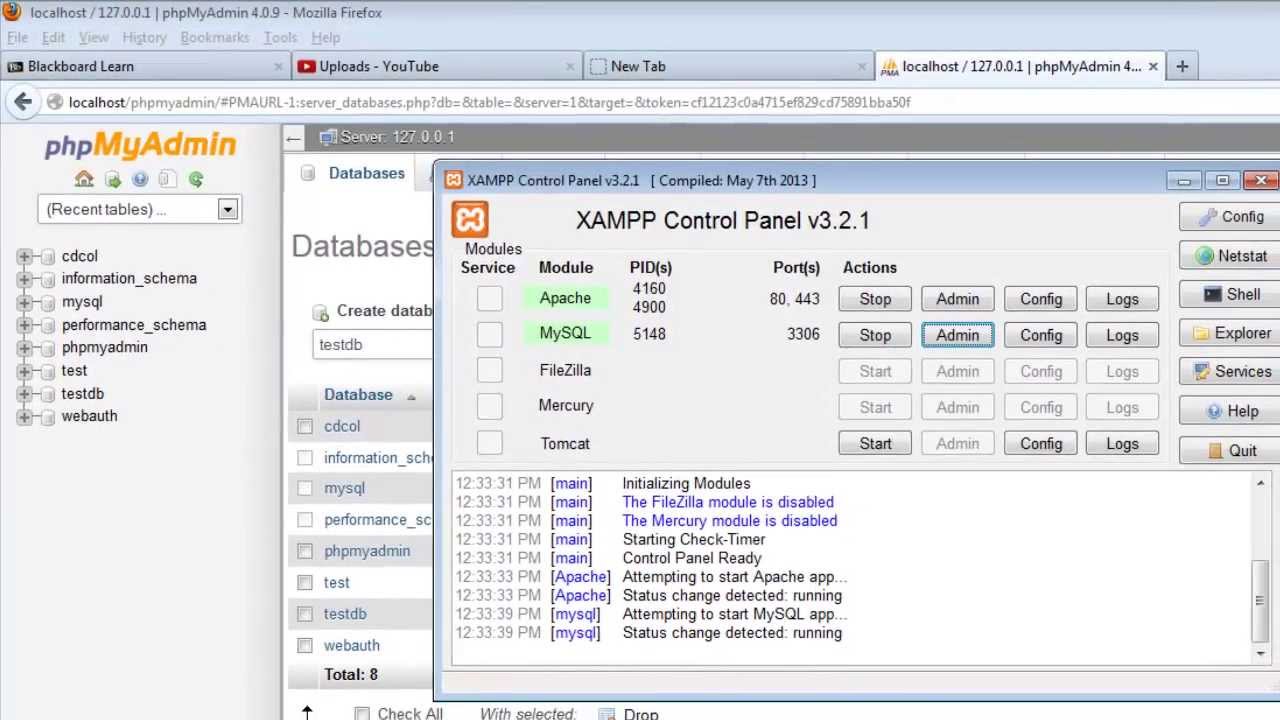
- Launch Xampp Control Panel: Locate the Xampp installation folder on your machine and open it. Inside the folder, you will find a file named “xampp-control.exe” (Windows) or “xampp” (macOS/Linux). Run this file to launch the Xampp Control Panel.
- Start Apache Server: In the Xampp Control Panel, you will see a list of modules including Apache and MySQL. To start the Apache server, simply click on the “Start” button next to Apache. The status should change from “Stopped” to “Running” indicating that the Apache server is now active.
- Start MySQL Server: Similarly, click on the “Start” button next to MySQL in the Xampp Control Panel to start the MySQL server. Once again, you will see the status change from “Stopped” to “Running” indicating that the MySQL server is now active.
Congratulations! You have successfully started the Apache and MySQL servers using Xampp. These two servers are essential for running PHP and managing databases in your local development environment.
To ensure that the servers are running correctly, you can check the status indicator in the Xampp Control Panel. Both Apache and MySQL should show as “Running”. Additionally, you can test the server by opening a web browser and entering “http://localhost” in the address bar. If everything is set up correctly, you should see the Xampp welcome page, indicating that the Apache server is working properly.
In the next step, we will configure the PHP settings to ensure that PHP is properly integrated with Xampp.
Step 3: Configuring PHP Settings
Configuring the PHP settings in Xampp is an important step to ensure that PHP is properly integrated and functions correctly. Follow the steps below to configure the PHP settings in Xampp:
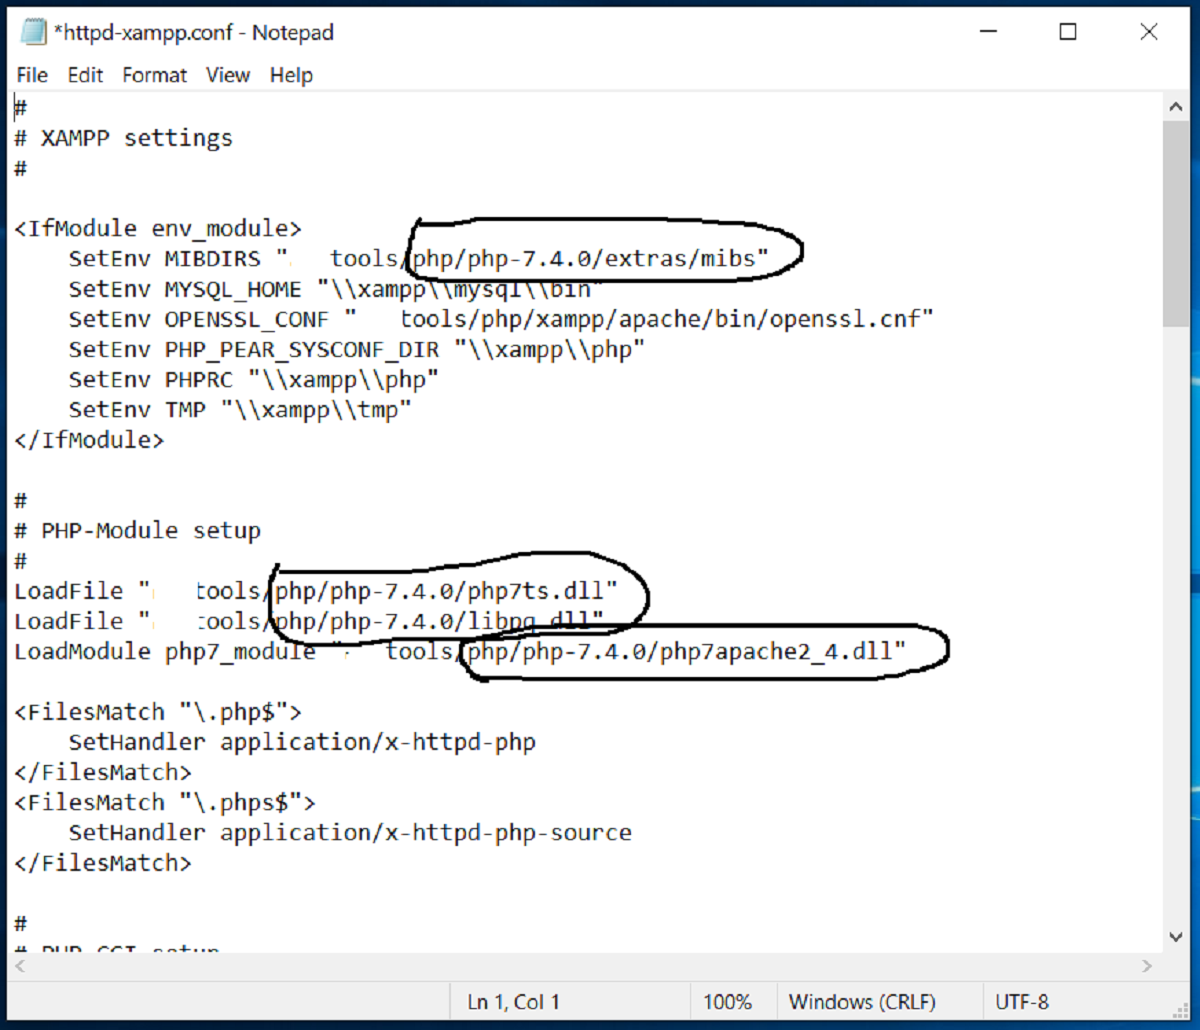
- Locate PHP Configuration File: Open the Xampp installation folder on your machine and navigate to the “php” directory. Inside this directory, you will find a file named “php.ini”. This file contains all the configuration settings for PHP.
-
Edit php.ini File: Open the “php.ini” file with a text editor of your choice. Look for the following settings and make the necessary changes:
- display_errors: Set this setting to “On” to enable error display in the browser. This is useful during development but remember to turn it off in production.
- error_reporting: Set the error reporting level. It’s recommended to set it to “E_ALL” to display all types of errors and warnings.
- date.timezone: Specify your local timezone. For example, you can set it to “America/New_York” or “Asia/Kolkata”. This ensures that PHP correctly handles date and time-related functions.
Feel free to explore other settings in the “php.ini” file and modify them according to your preferences and project requirements.
- Save php.ini File: Once you have made the necessary changes, save the “php.ini” file and exit the text editor.
After configuring the PHP settings, it’s important to restart the Apache server for the changes to take effect. To restart Apache, go to the Xampp Control Panel and click on the “Stop” button next to Apache, wait a few seconds, and then click on the “Start” button again to start Apache.
With the PHP settings properly configured, you are now ready to test your PHP installation and run PHP scripts on Xampp. In the next step, we will create a simple PHP file to verify that everything is working correctly.
Step 4: Testing PHP Installation
After configuring the PHP settings, it’s important to test your PHP installation to ensure that everything is functioning correctly. Follow the steps below to test your PHP installation on Xampp:
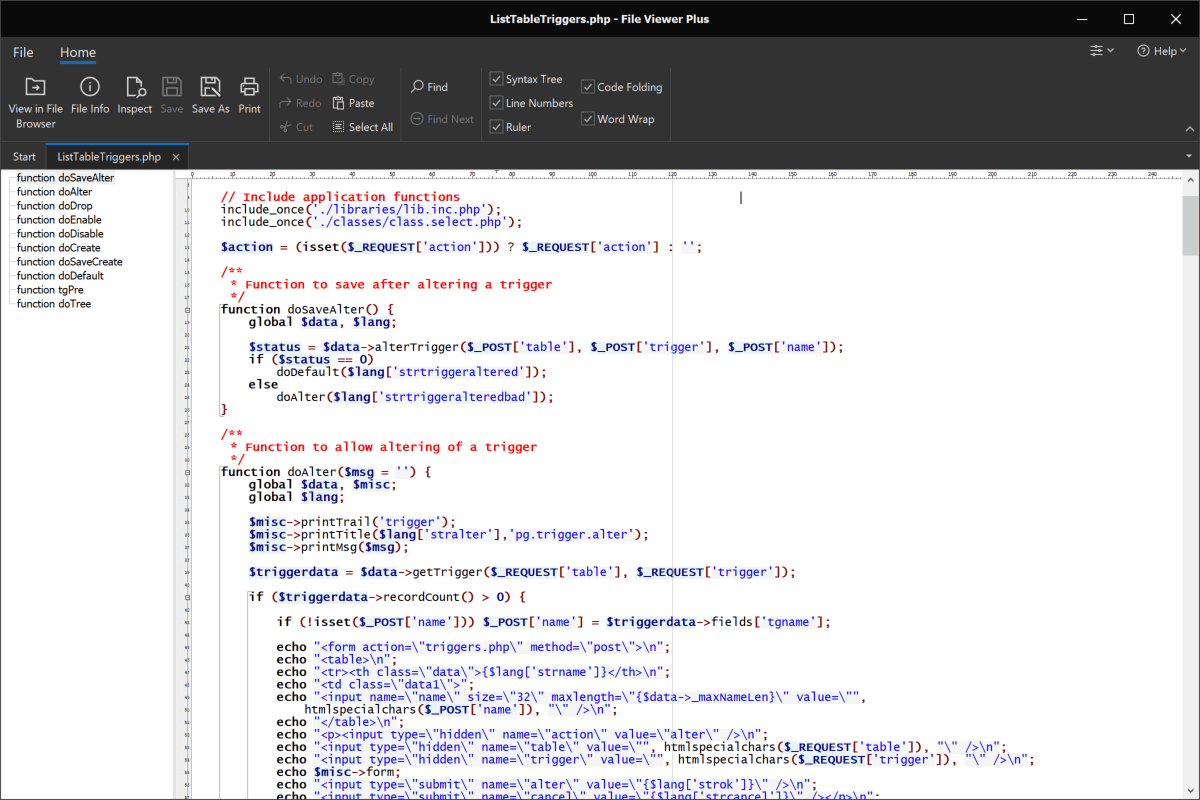
- Create a PHP File: Open a text editor and create a new file. Save the file with a “.php” extension, for example, “test.php”.
-
Add PHP Code: Inside the “test.php” file, add the following PHP code:
<?php
      phpinfo();
    ?>
This code will display detailed information about your PHP installation when executed.
- Save the PHP File: Save the “test.php” file in the “htdocs” folder of your Xampp installation. By default, this folder is located in the Xampp installation directory. For example, “C:\xampp\htdocs” on Windows or “/Applications/XAMPP/htdocs” on macOS.
- Access the PHP File: Open a web browser and enter the following URL in the address bar: “http://localhost/test.php”. If everything is set up correctly, you should see a page displaying information about your PHP installation, including the PHP version, server settings, and loaded modules.
If the PHP info page is displayed successfully, congratulations! It means your PHP installation on Xampp is working correctly. You can now start building and running PHP applications on your local machine.
In addition to testing PHP using the phpinfo() function, you can also create and run PHP scripts to perform various tasks, such as interacting with databases, processing form data, and generating dynamic content. Xampp provides a powerful local development environment to explore and experiment with PHP code.
Now that you have confirmed that PHP is running properly, let’s move on to the next step and learn how to create a basic PHP file in Xampp.
Step 5: Creating a PHP File
Creating a PHP file in Xampp is straightforward and allows you to build dynamic web pages and powerful web applications. Follow the steps below to create a basic PHP file in Xampp:
- Open a Text Editor: Launch your preferred text editor or code editor. You can use any text editor that supports plain text, such as Notepad (Windows), TextEdit (macOS), or Sublime Text.
- Create a New File: Create a new file by selecting “File” -> “New” from the menu bar of your text editor.
-
Add PHP Code: Inside the new file, add your PHP code. You can start with simple code snippets to display text or variables. For example:
<?php
      $message = "Hello, world!";
      echo $message;
    ?>
This code will assign the string “Hello, world!” to a variable called “$message” and then echo the value of the variable to the output.
- Save the PHP File: Save the file with a “.php” extension. Choose a descriptive filename that reflects the purpose of your PHP code. For example, “hello.php”.
- Move the PHP File: Move the saved PHP file to the “htdocs” folder of your Xampp installation. This is the folder where you can access and run PHP files through the web server.
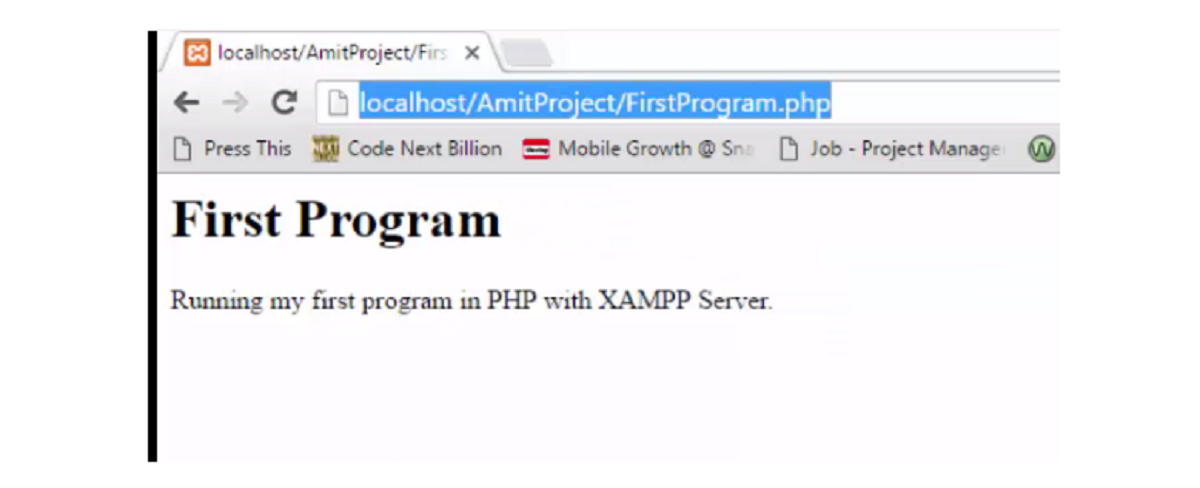
Once you have created and saved your PHP file in the appropriate location, you can access it through your web browser. Open a web browser and enter the URL “http://localhost/your_file_name.php”, replacing “your_file_name.php” with the actual filename you chose for your PHP file. If everything is set up correctly, you should see the output of your PHP code displayed in the web browser.
Congratulations! You have successfully created a PHP file in Xampp and executed PHP code to generate dynamic content. You can now continue to further develop your PHP skills and build more complex applications using Xampp’s local development environment.
In the final step, we will learn how to access PHP files from a web browser and interact with them in Xampp.
Step 6: Accessing PHP Files from a Web Browser
Once you have created and saved your PHP files in the appropriate location, you can easily access them from a web browser and interact with them in Xampp. Follow the steps below to access PHP files from a web browser:
- Open a Web Browser: Launch your preferred web browser, such as Google Chrome, Mozilla Firefox, or Safari.
- Enter the URL: In the address bar of the web browser, enter “http://localhost/your_file_name.php”, replacing “your_file_name.php” with the actual filename of your PHP file. For example, if your file is named “hello.php”, the URL would be “http://localhost/hello.php”.
- Press Enter: Press the Enter key or click the “Go” button to load the PHP file in the web browser.
- Interact with the PHP File: Depending on the PHP code within the file, you will see the output or the result of the PHP script displayed in the web browser. This could be dynamic content, database query results, or form submissions, among other possibilities.
By accessing PHP files from a web browser, you can test the functionality of your PHP code, debug any issues, and see the results of your PHP scripts in real-time. This is crucial for developing and fine-tuning your PHP applications before deploying them to a live server.
It’s important to note that when accessing PHP files through Xampp, the URL structure typically follows the format “http://localhost/your_file_name.php”. The “localhost” refers to your local machine, and the “your_file_name.php” corresponds to the filename of your PHP file. You can access any PHP file stored in the “htdocs” folder within your Xampp installation directory using this URL structure.
With this knowledge, you can now access and interact with PHP files from a web browser in Xampp. This final step concludes the process of running PHP on Xampp. You can now leverage the power of PHP to build dynamic web applications and enhance your web development skills.
Conclusion
Running PHP on Xampp provides you with a versatile and user-friendly platform for developing and testing PHP applications on your local machine. In this tutorial, we walked through the steps necessary to install and configure Xampp, starting from the installation process and moving on to starting the Apache and MySQL servers. We also covered how to configure the PHP settings, test the PHP installation, create PHP files, and access them from a web browser.
By following these steps, you now have a fully functional PHP development environment with Xampp. You can write PHP code, interact with databases, handle form submissions, and build dynamic web content right on your computer. Xampp simplifies the setup process by bundling Apache, MySQL, and PHP together, allowing you to focus on your PHP projects without the hassle of configuring separate server software.
Remember that Xampp is designed for local development purposes only and should not be used in a production environment. When your PHP project is ready for deployment, you should consider hosting it on a web server designed for production use.
As you continue your journey with PHP development, take advantage of the vast resources available online, such as PHP documentation, tutorials, and community forums. It’s also important to stay updated with the latest versions of Xampp and PHP to leverage new features and security improvements.
Congratulations on setting up PHP on Xampp and acquiring the skills to build dynamic and interactive web applications! Enjoy exploring the realm of PHP and unleashing your creativity in web development.