Introduction
Eclipse is a powerful and widely-used integrated development environment (IDE) that offers support for various programming languages, including PHP. By using Eclipse for PHP development, you can leverage its extensive features and tools to streamline your coding process and enhance productivity.
In this article, we will walk you through the steps to run a PHP project in Eclipse. We will cover the installation process, configuring the PHP interpreter, creating and importing PHP projects, and running and debugging your code.
Whether you are a beginner venturing into PHP development or an experienced developer looking to optimize your workflow, Eclipse provides a user-friendly interface and a plethora of customizable options to suit your needs.
By using Eclipse’s PHP Development Tools (PDT) plugin, you can take advantage of advanced features like code completion, syntax highlighting, and debugging capabilities. The collaboration between Eclipse and PHP provides an efficient environment for building robust and scalable PHP applications.
Running your PHP projects within Eclipse offers numerous benefits. You can easily organize and manage your code, integrate with version control systems, and take advantage of the debugging tools to identify and fix errors quickly. With Eclipse’s seamless integration of PHP development features, you can focus more on writing clean and efficient code without worrying about the underlying infrastructure.
Throughout this article, we will guide you step-by-step to set up and run PHP projects in Eclipse, providing practical tips and additional resources to help you along the way.
Note that before proceeding with the steps outlined in this article, you should have Eclipse installed on your system. If you haven’t installed it yet, don’t worry – we will cover the installation process in the next section.
So, let’s dive into the exciting world of running PHP projects in Eclipse and explore the powerful features and capabilities this IDE has to offer.
Installing Eclipse
Before diving into PHP development with Eclipse, you need to have Eclipse installed on your computer. Follow these steps to install Eclipse:
1. Visit the official Eclipse website (https://www.eclipse.org/) and navigate to the Downloads page.
2. Choose the appropriate version of Eclipse for your operating system. Eclipse offers versions for Windows, macOS, and Linux.
3. Once you have selected the correct version, click on the download link to start the download process.
4. After the download is complete, locate the downloaded file and run the installer.
5. Follow the installation wizard prompts to complete the installation process. You may be asked to choose an installation directory and specify additional settings during the installation.
6. Once the installation is complete, you can launch Eclipse by double-clicking on the Eclipse icon or accessing it from the Start menu (Windows) or Applications folder (macOS/Linux).
Congratulations! You now have Eclipse installed on your computer and are ready to start developing PHP projects.
It is worth noting that Eclipse is highly extensible and supports a vast array of plugins. These plugins can be added to enhance the functionality of your Eclipse IDE. One essential plugin for PHP development in Eclipse is the PHP Development Tools (PDT) plugin, which provides features specifically tailored for PHP coding.
In the next section, we will guide you through the process of installing the PHP Development Tools (PDT) plugin in Eclipse.
Keep in mind that Eclipse periodically releases updates and newer versions. It’s a good practice to stay updated with the latest stable version to benefit from bug fixes, performance improvements, and new features.
Now that you have Eclipse installed let’s continue with the next section on installing the PHP Development Tools (PDT) plugin.
Installing PHP Development Tools (PDT) plugin
To enhance Eclipse for PHP development, we need to install the PHP Development Tools (PDT) plugin. The PDT plugin offers essential PHP-specific features like syntax highlighting, code completion, and debugging capabilities. Follow the steps below to install the PDT plugin:
1. Launch Eclipse IDE if it is not already open.
2. Go to the “Help” menu and select “Eclipse Marketplace” from the dropdown.
3. In the “Eclipse Marketplace” dialog, search for “PHP Development Tools” using the search bar.
4. Locate the “PHP Development Tools (PDT)” entry from the search results and click on the “Go to Marketplace” button.
5. On the PDT page, click on the “Install” button to begin the installation process.
6. Review the list of featured and optional components and select the ones you need for your PHP development environment.
7. Accept the terms of the license agreements and click on the “Finish” button to start the installation.
8. Eclipse will begin downloading and installing the PDT plugin and any selected optional components. This process may take a few minutes.
9. Once the installation is complete, Eclipse will prompt you to restart the IDE to activate the newly installed plugin. Click on “Yes” to restart Eclipse.
After the restart, Eclipse will be equipped with the PHP Development Tools (PDT) plugin, providing you with powerful PHP development capabilities. You can now start creating and working with PHP projects.
It is important to ensure that you have the appropriate version of the PDT plugin that matches the version of Eclipse you are using. Mismatched versions may lead to compatibility issues and feature discrepancies.
Now that the PDT plugin is installed, let’s move on to the next section where we will explore how to create a new PHP project in Eclipse.
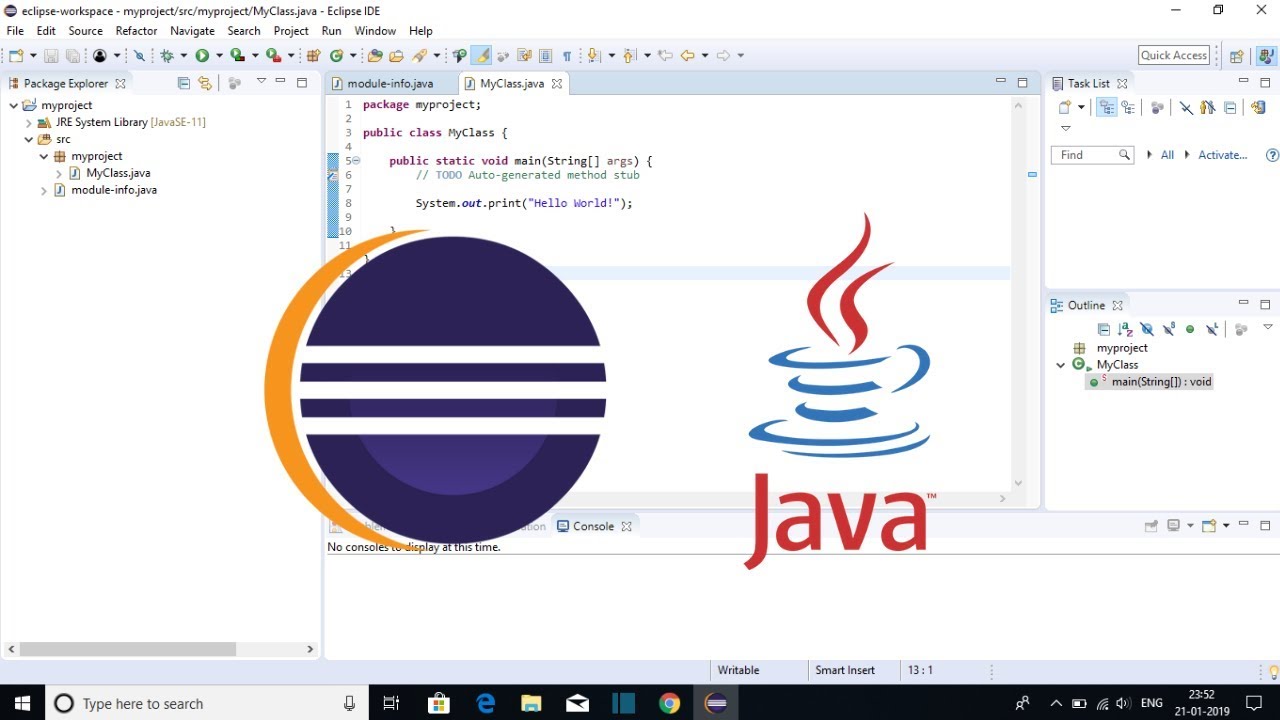
Creating a new PHP project
Now that Eclipse and the PHP Development Tools (PDT) plugin are installed, let’s dive into creating a new PHP project. Follow these steps to create a new PHP project in Eclipse:
1. Launch Eclipse and make sure the PHP perspective is active. If not, go to the “Window” menu, select “Perspective”, and choose “Open Perspective” followed by “PHP”. This will ensure that you are in the PHP development environment.
2. Go to the “File” menu and select “New” followed by “PHP Project”. Alternatively, you can right-click anywhere in the “Project Explorer” view and choose “New” and then “PHP Project”.
3. In the “New PHP Project” dialog, enter a suitable name for your project in the “Project name” field.
4. Choose an appropriate location for your project by specifying the directory path in the “Location” field. You can either use the default location or select a custom one.
5. Select the PHP version you wish to use for your project from the “PHP version” dropdown menu. If the desired PHP version is not listed, you may need to configure the PHP interpreter, which we will cover in the next section.
6. Click on the “Next” button to proceed to the next step.
7. Optionally, you can choose to create a sample PHP file and a web server configuration file by checking the respective checkboxes. This can be helpful for quickly getting started with a basic project setup.
8. Click on the “Finish” button to create the new PHP project.
Once the project is created, Eclipse will generate the necessary project structure, including folders for source code, libraries, and resources. You will see the newly created project listed in the “Project Explorer” view, ready for you to start working on your PHP code.
Remember to organize your code into logical directories within the project to maintain a clean and well-structured project hierarchy. This will make it easier to navigate and manage your files as your project grows.
Now that you have created a new PHP project, we can move on to configuring the PHP interpreter in Eclipse.
Configuring PHP interpreter
Configuring the PHP interpreter is an important step in setting up your PHP project in Eclipse. The PHP interpreter is responsible for executing your PHP code and providing essential runtime information. Follow these steps to configure the PHP interpreter:
1. Go to the “Window” menu and select “Preferences”. Alternatively, you can use the shortcut “Ctrl + Alt + S” (Windows/Linux) or “Cmd + ,”(macOS) to open the preferences window.
2. In the preferences window, expand the “PHP” section by clicking on the arrow next to it.
3. Select “PHP Interpreter” from the expanded menu.
4. In the PHP Interpreters tab, you will see a list of configured PHP interpreters. If no interpreters are listed, click on the “Add…” button to add a new PHP interpreter.
5. In the “PHP Executable” field, enter the path to the PHP executable on your system. If the PHP executable is not automatically detected, you can click on the “Browse…” button to locate it manually.
6. Once you have specified the PHP executable, Eclipse will automatically detect and populate the “PHP Configuration” section with details like PHP version, API level, and PHP ini location.
7. If necessary, you can also configure additional settings such as PHP debug, additional PHP .ini files, and PHP library paths.
8. Click on the “OK” button to save the PHP interpreter configuration.
Now, Eclipse is configured with the PHP interpreter, allowing it to execute PHP code and provide real-time feedback, such as syntax validation and code completion, specific to the PHP version you have configured.
Note that you can configure multiple PHP interpreters in Eclipse, allowing you to switch between different PHP versions or configurations depending on your project’s requirements. This flexibility is useful when working on projects that target different PHP versions or when collaborating on projects with team members using different PHP setups.
With the PHP interpreter configured, you are now ready to start writing and running PHP code in your project. In the next section, we will discuss how to import an existing PHP project into Eclipse.
Importing an existing PHP project
If you already have a PHP project that was developed outside of Eclipse, you can easily import it into the Eclipse IDE. Follow these steps to import an existing PHP project into Eclipse:
1. Open Eclipse and make sure the PHP perspective is active.
2. Go to the “File” menu and select “Import”. Alternatively, you can right-click anywhere in the “Project Explorer” view and choose “Import”.
3. In the “Import” dialog, expand the “General” folder, select “Existing Projects into Workspace”, and click on the “Next” button.
4. Choose the option “Select root directory” and click on the “Browse” button to locate the directory where your existing PHP project is stored. Alternatively, you can choose the option “Select archive” if your project is packaged as a zip or tar file.
5. Once you have selected the root directory or archive file, Eclipse will detect the available projects in that directory or archive and list them in the “Projects” section.
6. Select the project(s) you want to import into Eclipse. You can choose multiple projects by holding down the Ctrl (or Cmd on macOS) key while selecting.
7. Click on the “Finish” button to begin the import process.
Eclipse will import the selected project(s) into the Eclipse workspace, preserving the folder structure and source code files. You can find the imported project(s) listed in the “Project Explorer” view, ready for you to work on.
It is important to note that when importing an existing PHP project, Eclipse will try to determine the PHP version used in the project based on the project configuration and files. If the PHP version is not automatically detected, you may need to manually configure the PHP interpreter, as discussed in the previous section.
Additionally, make sure to check for any project-specific dependencies or external libraries that the project may require. You may need to configure the build path or install any required dependencies to ensure the project runs smoothly within Eclipse.
Now that you’ve successfully imported your existing PHP project into Eclipse, you can start working on it using the powerful features and tools provided by the IDE. In the next section, we will cover the process of running a PHP project in Eclipse.
Running a PHP project in Eclipse
Once you have set up and configured your PHP project in Eclipse, running it is a straightforward process. Follow these steps to run a PHP project in Eclipse:
1. Ensure that the PHP perspective is active in Eclipse. If not, go to the “Window” menu, select “Perspective”, and choose “Open Perspective” followed by “PHP”.
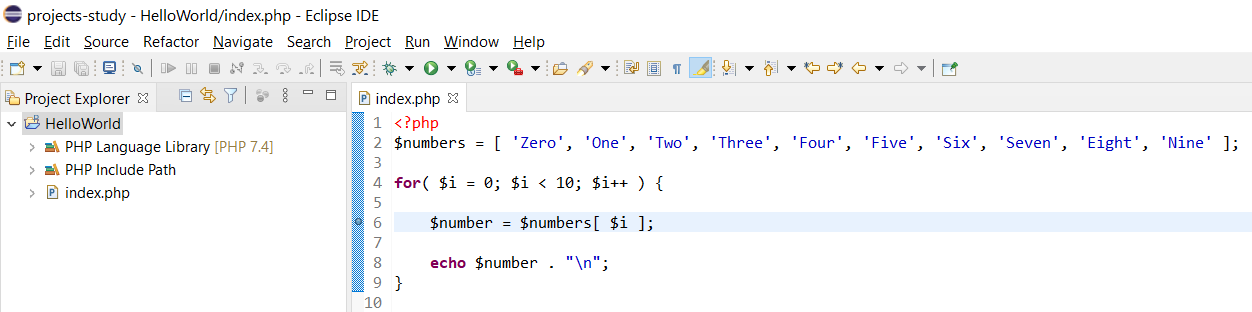
2. In the “Project Explorer” view, navigate to the PHP file that you want to run.
3. Right-click on the PHP file and select “Run As” from the context menu. Then, choose “PHP Script” from the sub-menu.
4. Eclipse will execute the PHP script, and the output will be displayed in the “Console” view. Any error messages or runtime information will also be displayed here.
5. If your PHP script requires any input or command-line arguments, you can provide them in the “Run Configurations” dialog. To access this dialog, go to the “Run” menu and select “Run Configurations”, or you can right-click on the PHP file, choose “Run As”, and then “Run Configurations”.
6. In the “Run Configurations” dialog, you can specify program arguments, PHP script arguments, and other configuration settings specific to your project.
7. Once you have configured the necessary options, click on the “Run” button to execute the PHP script with the provided settings.
By running your PHP project within Eclipse, you can test your code, check for any errors or unexpected behavior, and view the results directly in the console. This helps to quickly identify and resolve any issues during the development process.
Additionally, Eclipse provides various options for customizing the run configurations, such as setting environment variables, defining PHP server configurations for web projects, and specifying different execution options like debug mode.
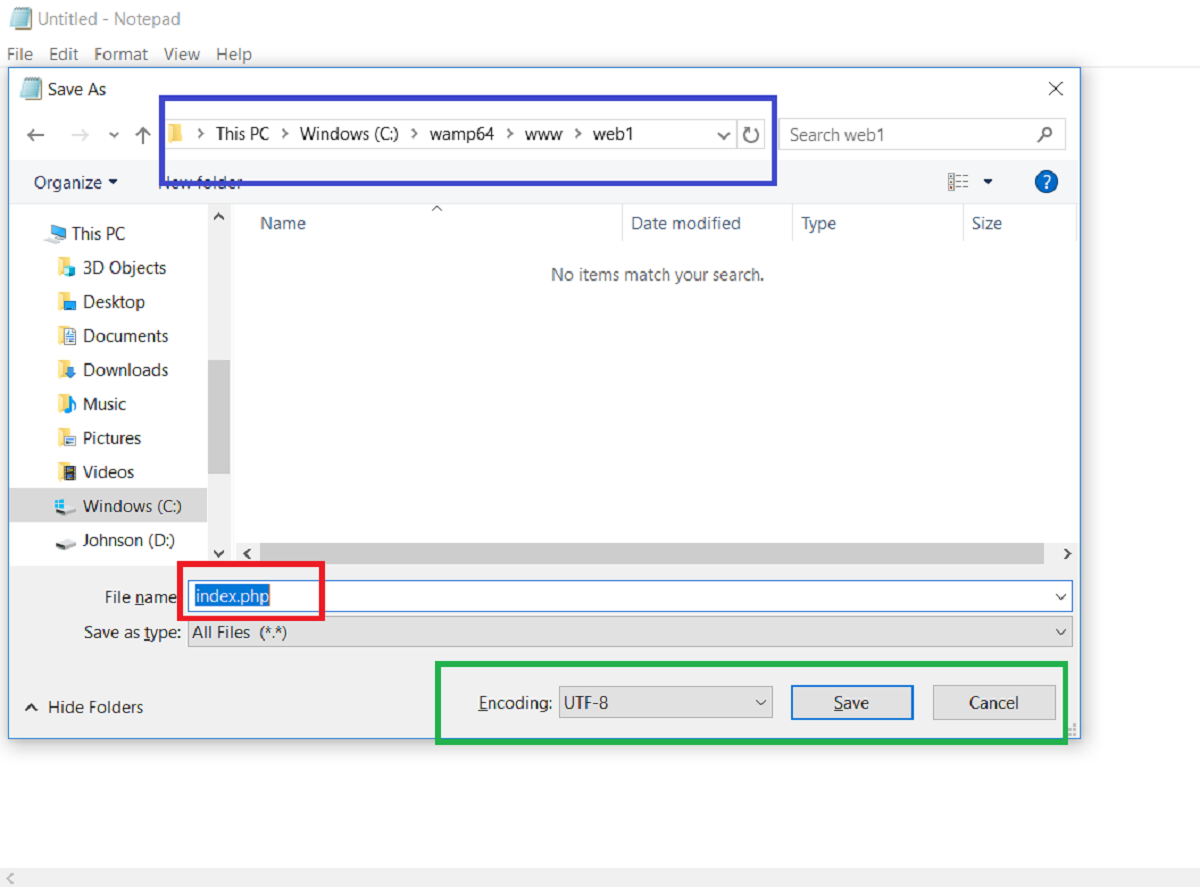
Remember to save your PHP files before running them to ensure that the latest changes are included in the execution.
In the next section, we will explore how to debug a PHP project in Eclipse, allowing you to step through your code for troubleshooting and finding errors.
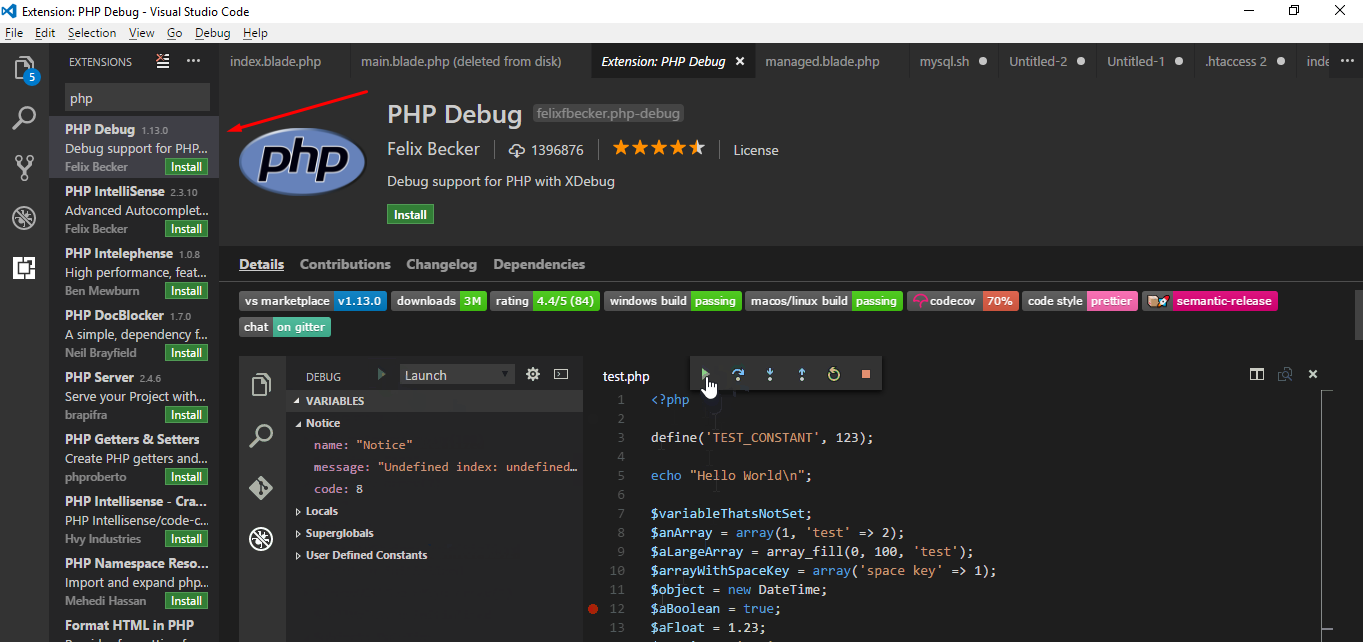
Debugging a PHP project
Debugging is an essential process in software development that allows developers to identify and fix errors in their code. Eclipse provides powerful debugging capabilities for PHP projects, making it easier to track down issues. Follow these steps to debug a PHP project in Eclipse:
1. Open the PHP file that you want to debug in Eclipse.
2. Set breakpoints in your code by clicking on the line number of the desired line. A breakpoint is a marker that tells Eclipse to pause the execution of the code at that specific line.
3. Right-click on the PHP file and select “Debug As” from the context menu, then choose “PHP Script”.
4. Eclipse will switch to the Debug perspective and start executing your PHP code.
5. Execution will pause at the first breakpoint encountered. You can now examine the values of variables, step through your code line by line, and analyze the flow of the program.
6. Use the debugging toolbar at the top of the Eclipse window to control the debugging process. The toolbar provides buttons for stepping over lines of code, stepping into functions or methods, stepping out of functions or methods, and stopping the debug session.
7. While debugging, you can inspect variable values by hovering over them, or by adding them to the “Expressions” view. The “Variables” view also provides detailed information about variable values and their scope.
8. As you proceed through your code, Eclipse will automatically highlight the current line being executed, helping you visualize the flow of the program.
9. If you encounter any errors or exceptions during debugging, Eclipse will display relevant information in the “Debug” view, allowing you to investigate the issue further.
Debugging your PHP project in Eclipse helps you identify the root causes of errors, examine the execution path, and gain a deeper understanding of how your code behaves. It allows you to fix bugs more efficiently and ensure the expected outcomes.
Eclipse’s debugging capabilities extend beyond just breakpoints and stepping through code. It also provides features like conditional breakpoints, which pause the execution only if a certain condition is met, and watch expressions, which allow you to track specific variables or expressions during debugging.
By utilizing the powerful debugging features in Eclipse, you can streamline the debugging process, save time, and deliver more reliable PHP applications.
In the next section, we will summarize the key points discussed in this article and offer some concluding remarks.
Conclusion
In this article, we explored the process of running and debugging PHP projects in Eclipse. We began by discussing the installation of Eclipse and the PHP Development Tools (PDT) plugin, which provides PHP-specific features and tools within the IDE.
We then covered how to create a new PHP project and import an existing one into Eclipse. By following these steps, you can organize your code and leverage Eclipse’s powerful features for efficient and effective PHP development.
Additionally, we looked at the importance of configuring the PHP interpreter in Eclipse to ensure the correct execution of PHP code. The PHP interpreter allows Eclipse to provide real-time feedback and intelligence specific to your chosen PHP version.
We also discussed the process of running PHP projects in Eclipse, allowing you to execute your code and view the output in the console. We highlighted the importance of setting breakpoints and utilizing the debugging features provided by Eclipse for efficient troubleshooting and error detection.
Debugging your PHP project with Eclipse offers a valuable insight into your code’s behavior, helping you identify and fix issues more effectively. The debugging toolbar, variable inspection, and other debugging features provided by Eclipse enhance your ability to write robust and reliable PHP applications.
By leveraging the power of Eclipse for PHP development, you can streamline your coding process, increase productivity, and improve the quality of your PHP projects. The ability to run and debug PHP code within one integrated environment offers a seamless experience and saves you valuable time during the development and debugging phases.
Whether you are a beginner or an experienced PHP developer, Eclipse’s rich feature set and extensive plugin ecosystem make it a versatile and efficient IDE for PHP development.
Now that you have a solid understanding of running and debugging PHP projects in Eclipse, you can dive into your PHP coding journey with confidence. Make the most of the tools and features available in Eclipse to create well-structured and error-free PHP applications.
Happy coding!