Introduction
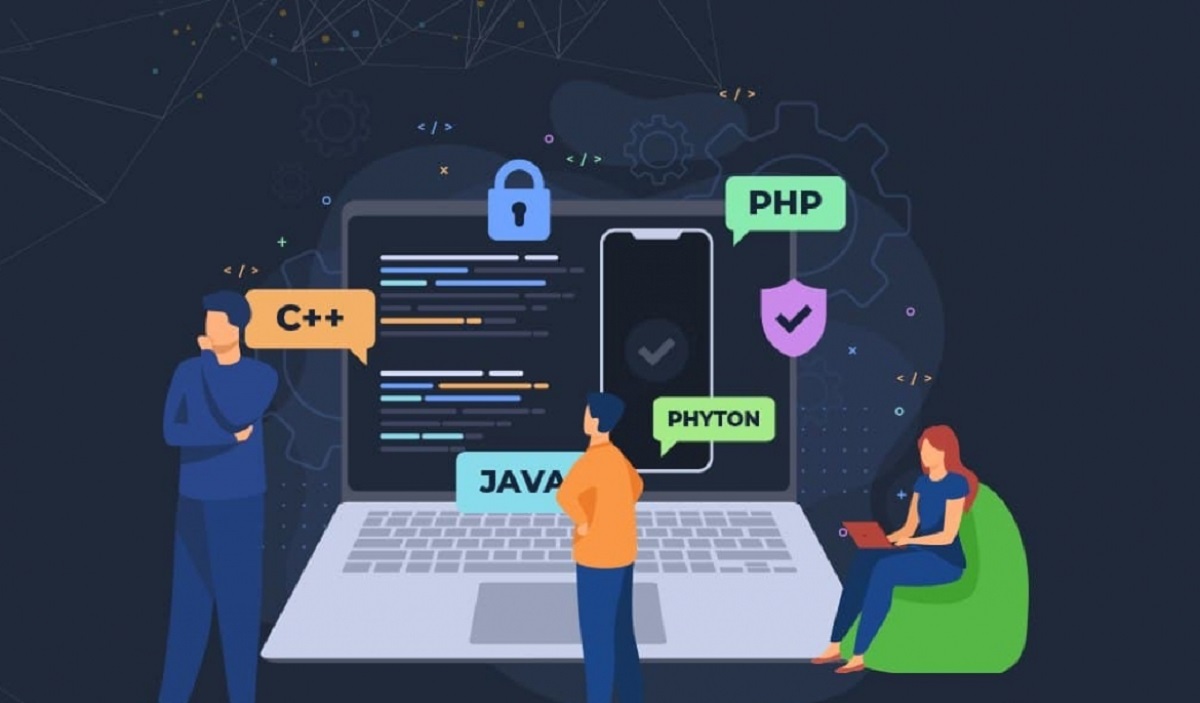
Welcome to the world of web development, where you have the power to create dynamic and interactive applications that can be accessed by users all around the globe. In this article, we will delve into the exciting realm of web application development using PHP, one of the most popular programming languages for building robust and scalable web solutions.
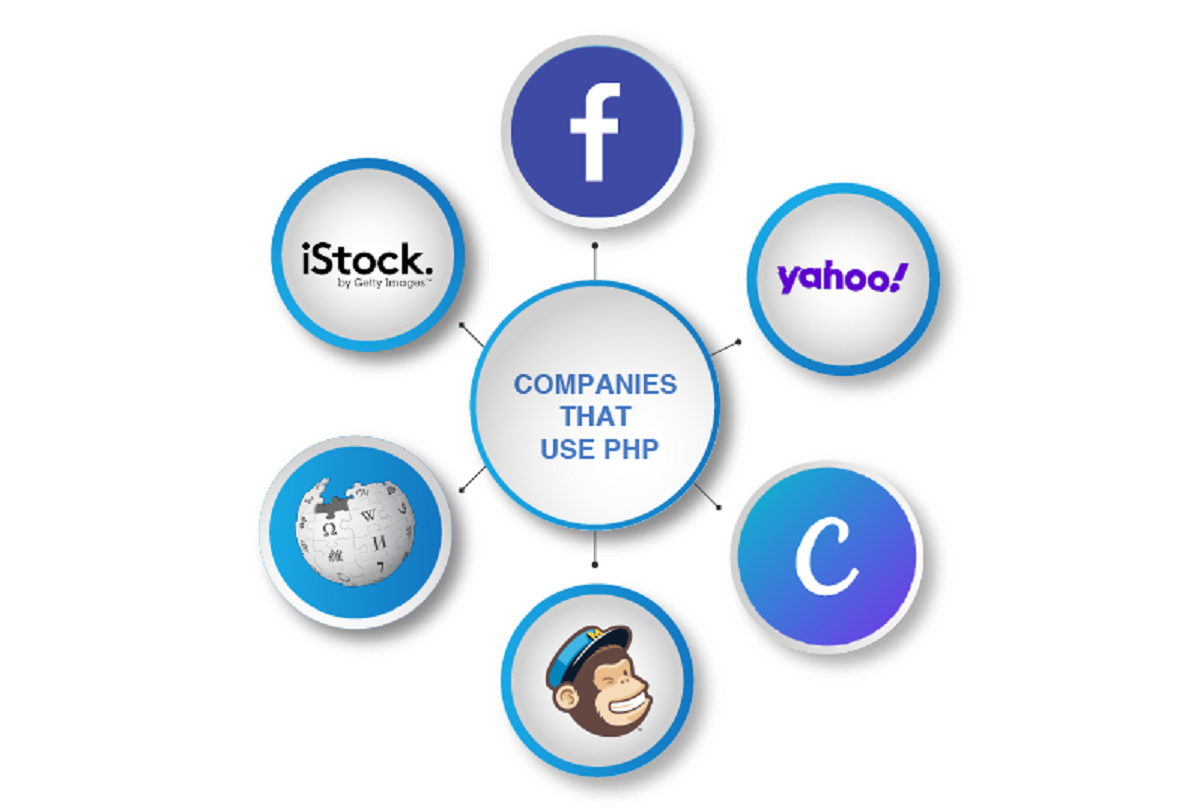
PHP, which stands for Hypertext Preprocessor, offers a wide range of functionalities and is widely utilized for creating dynamic web pages and web applications. With PHP, you can easily incorporate database connectivity, handle user authentication, process and validate user input, and perform various other tasks that are essential for developing a fully functional web application.
Throughout this article, we will walk you through the process of developing a web application using PHP, providing valuable insights and practical tips along the way. Whether you are a beginner looking to embark on your web development journey or an experienced programmer seeking to expand your skill set, this guide will equip you with the knowledge and tools necessary to create powerful web applications.
Before we dive into the technical aspects, it’s important to have a solid understanding of the fundamental concepts of web application development. We will cover topics such as setting up the development environment, choosing a PHP framework, designing the database schema, creating the user interface, implementing user authentication, handling user input and form validation, processing and storing data, and implementing CRUD (Create, Read, Update, Delete) operations.
In addition, we’ll explore crucial aspects of web application development, such as implementing security measures to safeguard user data, testing and debugging your application to ensure its functionality and performance, and finally, deploying the application to a live server so that it can be accessed by users worldwide.
So, if you’re ready to embark on this exciting journey of web application development using PHP, let’s get started and discover the endless possibilities that await!
Setting Up the Environment
Before you can start developing a web application in PHP, it’s essential to set up your development environment. This ensures that you have all the necessary tools and software required to code, test, and deploy your application. Here are the steps to set up your environment:
- Install a Web Server: To run PHP applications locally, you need to install a web server software like Apache, Nginx, or XAMPP. These servers will handle the HTTP requests and serve your PHP files.
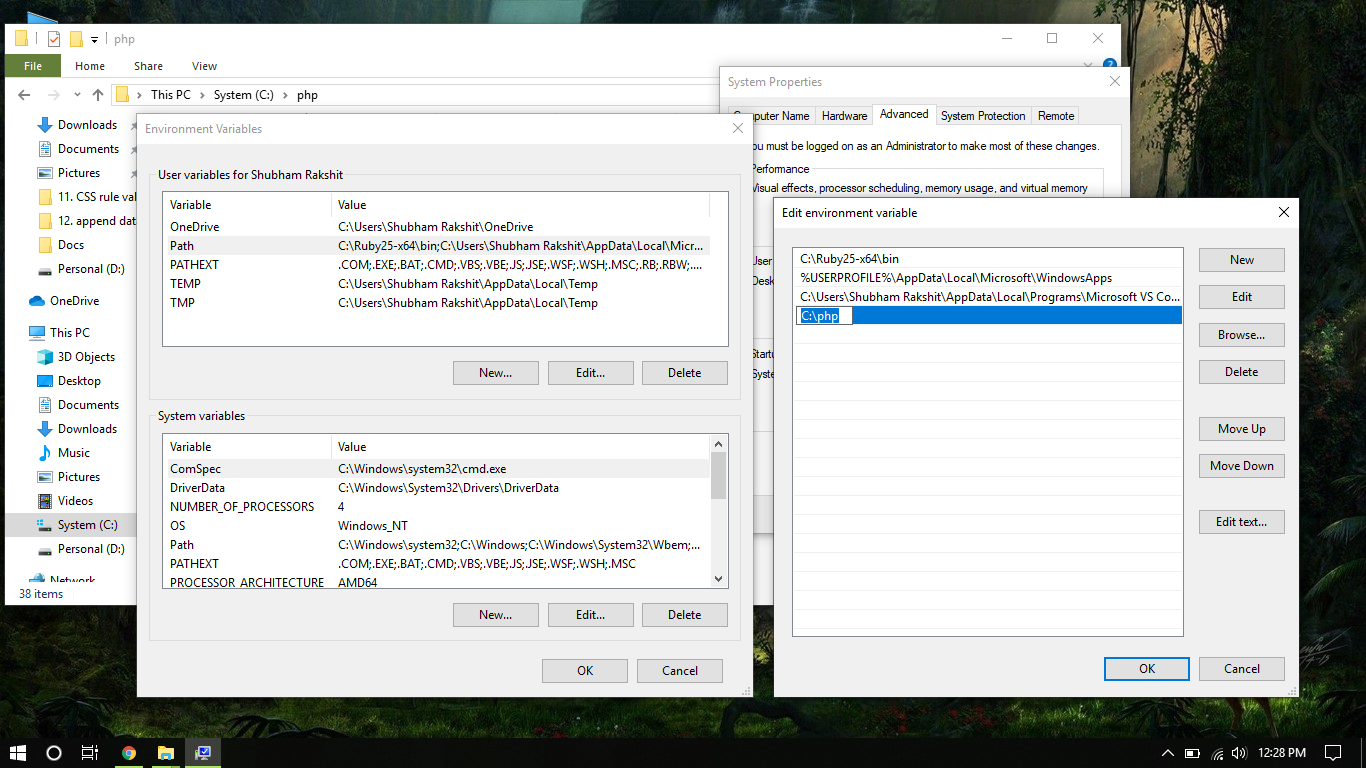
- Install PHP: Download and install the latest version of PHP from the official PHP website. Make sure to configure the PHP environment variables so that you can run PHP scripts from any directory on your computer.
- Install a Database Management System: Most web applications require a database to store and retrieve data. Install a database management system like MySQL, PostgreSQL, or SQLite to set up your database environment.
- Choose an Integrated Development Environment (IDE): While you can write PHP code in any text editor, using an IDE specifically designed for PHP development can greatly enhance your productivity. Popular options include PhpStorm, Visual Studio Code with PHP extensions, and Eclipse PDT.
- Configure Document Root: Set up the document root of your web server to point to the directory where your PHP files will be stored. This allows you to access your application through a browser.
Once you’ve completed these steps, you’re ready to begin writing PHP code and building your web application. It’s important to ensure that your development environment is properly configured, as it directly impacts your ability to code, test, and debug your application.
Additionally, consider setting up version control for your project using GIT, which allows you to track changes, collaborate with other developers, and revert to previous versions if needed. This ensures better organization and management of your codebase throughout the development process.
By setting up your development environment correctly, you lay a strong foundation for creating a successful web application in PHP. Now, let’s move on to the next step: choosing a PHP framework that suits your needs and simplifies the development process.
Choosing a PHP Framework
When developing a web application in PHP, using a PHP framework can significantly streamline the development process, improve code organization, and enhance overall productivity. PHP frameworks provide a structured approach to building web applications and offer a range of pre-built functionalities, such as routing, form handling, database abstraction, and user authentication. Here are some factors to consider when choosing a PHP framework:
- Project Requirements: Evaluate your project requirements and determine the specific features and functionalities that your web application needs. Consider aspects such as scalability, performance, security, and compatibility with other tools or libraries.
- Learning Curve: Assess your familiarity with PHP frameworks and consider the learning curve associated with each option. If you’re a beginner, choosing a framework with good documentation and a supportive community can make the learning process smoother.
- Community and Support: Look for frameworks with a large and active community. A flourishing community signifies ongoing development, frequent updates, and a wealth of resources and tutorials available for assistance. It also ensures that you can find answers to your questions and troubleshoot common issues with ease.
- Performance: Evaluate the performance benchmarks and user reviews of different frameworks. Opt for a framework that is known for its performance optimization and efficiency, as this can have a significant impact on the speed and responsiveness of your web application.
- Architecture and Code Organization: Consider the architectural pattern and code structure offered by different frameworks. Assess whether the framework follows a model-view-controller (MVC) or another architectural pattern that aligns with your development preferences.
- Community Feedback and Reviews: Research and read reviews from developers who have used the frameworks you are considering. Their experiences and insights can help you gain a deeper understanding of the pros and cons of each option.
Some popular PHP frameworks you may consider are Laravel, Symfony, CodeIgniter, and Yii. These frameworks have gained immense popularity due to their extensive feature sets, robustness, and active communities. However, it’s important to note that the best framework for your project may vary depending on your specific requirements and development expertise.
After careful evaluation, select the PHP framework that best aligns with your project needs and start utilizing its features to accelerate your development process. With the right framework in place, you can focus on building the core functionalities of your web application without having to reinvent the wheel.
Now that we have chosen a PHP framework, the next step is to design the database schema for our web application. Let’s proceed to the next section and explore this crucial aspect of web development.
Designing the Database
Designing the database is a critical step in developing a web application. The database serves as the foundation for storing and retrieving data, and its structure directly impacts the functionality and efficiency of your application. Here are some key considerations to keep in mind when designing the database for your web application:
- Analyze Requirements: Understand the requirements of your application and identify the data entities that need to be stored. Consider the relationships between these entities and define the necessary fields and attributes for each.
- Choose the Database Management System: Select a database management system (DBMS) that aligns with your application’s requirements. Common options include MySQL, PostgreSQL, and SQLite. Each DBMS has its own features and performance characteristics, so choose the one that best suits your needs.
- Schema Design: Depending on the complexity of your application, choose an appropriate database schema design. The relational database model, commonly used for web applications, employs tables to store data and defines relationships between tables using foreign key constraints.
- Data Integrity and Validation: Implement data integrity rules to ensure the accuracy and consistency of data. Use constraints such as primary keys, foreign keys, unique keys, and check constraints to maintain data integrity. Additionally, consider implementing input validation to prevent invalid data from entering the database.
- Normalize your Data: Apply normalization techniques to eliminate data redundancy and ensure data consistency. Normalization involves separating data into different tables, reducing data duplication, and establishing relationships between tables.
- Indexing: Identify the columns that will be frequently queried and create indexes on those columns. Indexing improves query performance by facilitating faster data retrieval.
- Consider Scalability: Anticipate future growth and design your database to accommodate increasing volumes of data. This can include techniques such as partitioning, sharding, or replication.
It’s recommended to use SQL (Structured Query Language) for database design and management. SQL provides a standardized language for interacting with databases, allowing you to create tables, define relationships, insert, update, and retrieve data, and perform complex queries.
After designing the database schema, it’s essential to create the necessary tables, define relationships, and ensure data integrity by implementing appropriate constraints. This can be done using various tools or by writing SQL scripts manually.
Remember to test the database design extensively to ensure it meets the requirements of your web application. Make any necessary adjustments or optimizations based on performance and usability considerations.
Now that we have a well-designed database, the next step is to create the user interface of our web application. In the next section, we’ll explore the process of designing and implementing an intuitive and user-friendly interface to enhance the user experience.
Creating the User Interface
The user interface (UI) of a web application plays a crucial role in ensuring an intuitive and engaging user experience. It is responsible for presenting the application’s features and functionality to users in a visually appealing and user-friendly manner. When creating the user interface for your web application, consider the following steps:
- Wireframing: Start by creating wireframes to plan the layout and structure of your web application. Wireframes are basic, low-fidelity sketches that outline the placement of various elements on each page. Tools like Balsamiq, Sketch, or Adobe XD can be used to create wireframes.
- Design Language: Decide on a design language or theme that aligns with your application’s purpose and target audience. Consider factors such as color schemes, typography, and visual elements to create a consistent and visually appealing user interface.
- Responsive Design: Ensure that your web application’s user interface is responsive and accessible across different devices and screen sizes. Implement responsive design techniques using CSS media queries to adapt the layout and content based on the user’s device.
- Navigation: Design a clear and intuitive navigation system that allows users to easily navigate through different pages or sections of your web application. Implement menus, breadcrumbs, and navigation bars to enhance usability and provide a seamless browsing experience.
- User Feedback: Incorporate interactive elements, such as buttons, forms, and tooltips, to provide feedback to users and guide them through the application. Use animations or visual cues to indicate loading states, success messages, or error notifications.
- Visual Hierarchy: Create a visual hierarchy by emphasizing important elements and organizing content in a logical manner. Use whitespace, contrast, and font sizes to direct users’ attention towards critical information or actions.
- Accessibility: Ensure that your web application is accessible to all users, including those with disabilities. Follow accessibility guidelines and best practices, such as providing alternative text for images, using semantic HTML, and implementing keyboard navigation.
- Usability Testing: Conduct usability testing to gather feedback from real users and identify any usability issues or areas for improvement. Incorporate their feedback to make necessary adjustments and enhance the overall user experience.
Once you have a solid design in place, implement the user interface using HTML, CSS, and JavaScript. Utilize frameworks like Bootstrap, Foundation, or Materialize CSS to expedite development and ensure a consistent and responsive UI across different browsers and devices.
Remember to continually iterate and refine your user interface based on user feedback and evolving requirements. Regularly evaluate usability, performance, and accessibility to deliver an exceptional user experience.
Now that we have created an intuitive and visually appealing user interface, the next step is to implement user authentication to secure our web application. In the next section, we’ll explore how to authenticate users and manage their access to different parts of the application.
Implementing User Authentication
User authentication is an essential aspect of web application development, as it ensures that only authorized users can access specific parts of the application and perform certain actions. Implementing user authentication involves verifying the identity of users and managing their access privileges. Here’s a step-by-step guide to implementing user authentication in your web application:
- User Registration: Provide users with a registration form where they can create an account by providing their email address, username, and password. Hash the passwords before storing them in the database to enhance security.
- Login System: Create a login system that allows users to authenticate themselves with their credentials. Validate the entered username and password against the stored data, and if they match, grant the user access to the protected areas of your application.
- Session Management: Use session management techniques to maintain the user’s logged-in state. When a user logs in, create a session containing their user ID or other relevant information, and use this session to verify their identity on subsequent requests.
- Access Control: Implement an access control mechanism that determines what parts of the application users can access based on their role or privileges. Assign roles to users, such as admin, editor, or regular user, and define the permissions associated with each role.
- Password Reset: Include a feature that allows users to reset their passwords in case they forget them. Implement a password reset process that involves sending a password reset link to the user’s registered email address.
- Security Measures: Implement security measures such as password hashing, encryption, and protection against brute force attacks. Utilize secure session management techniques, enforce strong password policies, and apply necessary security patches and updates.
It’s important to note that user authentication is a sensitive area that requires careful attention to security. Protect user passwords by using strong encryption algorithms and salting techniques to prevent unauthorized access to user accounts.
Consider using established authentication libraries and frameworks, such as Laravel’s built-in authentication system or third-party libraries like PHP’s PasswordHash or Bcrypt, to simplify the authentication process and ensure best practices are followed.
Remember to thoroughly test your authentication system to ensure it works as expected and provides a secure and seamless login experience for your users. Regularly review and update your authentication mechanisms to adhere to the latest security standards and protect your application and user data from potential threats.
Now that we have implemented user authentication, the next step is to handle user input and validate forms to ensure the data submitted by users is accurate and secure. Let’s proceed to the next section and explore this important aspect of web application development.
Handling User Input and Form Validation
Handling user input and implementing proper form validation is crucial for ensuring the accuracy and security of data within a web application. By validating user input, you can prevent potential errors, protect against malicious attacks, and provide a seamless user experience. Here are the steps involved in handling user input and form validation:
- Client-Side Validation: Implement client-side validation using JavaScript to provide instant feedback to users and prevent unnecessary form submissions. Validate the input fields for required fields, correct data formats (e.g., email addresses, phone numbers), and any other relevant validation rules.
- Server-Side Validation: Despite implementing client-side validation, it is crucial to perform server-side validation as well. Server-side validation acts as a final line of defense and ensures that all user data is validated on the server before processing or storing it in a database.
- Sanitization: Sanitize user input to remove any potentially harmful or malicious content that could compromise the security of your web application. Utilize functions or libraries that strip out or encode any malicious script tags or SQL injection attempts.
- Error Feedback: Display clear and concise error messages to users when form validation fails. These messages should provide specific details about the validation errors encountered and guide users on how to correct them.
- Data Filtering: Filter user input to ensure that it conforms to the expected data types or patterns. This can include removing leading or trailing spaces, formatting numbers or dates, or converting input to the appropriate data type.
- Data Encryption: Implement encryption techniques to protect sensitive user data, such as passwords, credit card numbers, or other personally identifiable information. Hash passwords using secure algorithms like bcrypt or Argon2 to prevent unauthorized access to user credentials.
- Regular Updates: Regularly update your form validation and input handling mechanisms to stay up-to-date with the latest security best practices. Keep an eye on security vulnerabilities and patches for any libraries or frameworks you are using.
By implementing comprehensive form validation and input handling practices, you can ensure that all user data is accurate, sanitized, and secure. This not only prevents potential data integrity issues but also improves the overall user experience and protects your web application from vulnerabilities and attacks.
It’s important to thoroughly test your validation and input handling mechanisms to ensure they are functioning as expected. Test various scenarios, including valid and invalid inputs, edge cases, and potential security exploits, to identify and resolve any issues.
Now that we have covered user input and form validation, the next step is to learn about processing and storing data within our web application. In the next section, we will explore techniques for effectively handling data from forms and storing it securely in our chosen database system.
Processing and Storing Data
Processing and storing data is a fundamental aspect of web application development. It involves handling user input, manipulating data, and securely storing it in a database for future retrieval. Properly processing and storing data ensures data integrity, security, and efficient retrieval. Here’s a step-by-step approach to effectively process and store data in your web application:
- Data Validation: Validate and sanitize user input to ensure the data is accurate, consistent, and free from any potential security vulnerabilities. Apply the form validation techniques mentioned earlier to ensure the data meets the required standards and formats.
- Database Connectivity: Establish a connection to your chosen database management system, such as MySQL or PostgreSQL, using database-specific extensions or libraries for the programming language you are using (e.g., mysqli or PDO in PHP).
- Data Persistence: Utilize the appropriate database operations, such as INSERT, UPDATE, or DELETE statements, to save or modify data in the database. Ensure that all data is correctly structured and formatted according to the database schema.
- Data Retrieval: Implement database queries (e.g., SELECT statements) to retrieve and display the data when needed by your application. Customize your queries to retrieve specific data based on the application’s requirements.
- Data Relationships: Implement relationships between database tables using foreign keys to establish associations between related data. This allows for the efficient querying and retrieval of data.
- Transaction Management: Use transactions when handling critical operations that involve multiple database queries. Transactions ensure that either all database operations succeed, or none of them take effect, maintaining data consistency.
- Error Handling: Implement robust error handling mechanisms to gracefully handle any database-related errors that may occur during data processing or storage. Provide meaningful error messages and log the errors for troubleshooting purposes.
- Data Encryption and Security: Encrypt sensitive data, such as passwords or personal information, before storing it in the database. Employ secure encryption algorithms and adhere to best practices for data security.
When processing and storing data, it is essential to consider factors such as data integrity, efficiency, scalability, and security. Optimize your database queries and consider indexing strategies to improve performance when handling large volumes of data. Regularly back up your database to protect against data loss.
Additionally, implement a data retention policy to manage the lifespan of stored data. Periodically review and remove any unnecessary or outdated data to optimize database performance and storage usage.
By following best practices for processing and storing data, you can ensure that your web application maintains reliable and secure data throughout its lifecycle.
With data processing and storage in place, we can now move on to implementing CRUD (Create, Read, Update, Delete) operations to allow users to interact with the data within our web application. In the next section, we’ll explore how to incorporate these essential operations into our application’s functionality.
Implementing CRUD Operations
Implementing CRUD (Create, Read, Update, Delete) operations is crucial for enabling basic data manipulation in a web application. These operations allow users to interact with the data, create new records, view existing data, update existing records, and delete unwanted data. Here are the steps to implement CRUD operations in your web application:
- Create: Provide a user interface, such as a form, to capture user input and create new records in the database. Validate and sanitize the input, and then use the appropriate database query (e.g., INSERT statement) to store the data in the database.
- Read: Create views or pages to display the existing data to the users. Retrieve the data from the database using SELECT queries and present it in a user-friendly manner. Implement search and filtering functionalities to allow users to find specific records.
- Update: Enable users to modify existing data records. Retrieve the desired record(s) using SELECT queries, populate the data in an editable form, and validate the updated input. On submission, use appropriate database queries (e.g., UPDATE statement) to save the changes.
- Delete: Provide functionality to delete unnecessary or unwanted data records. Retrieve the record(s) to be deleted using SELECT queries, and then use DELETE queries to remove them from the database. Implement confirmation dialogs or prompts to prevent accidental deletions.
- Data Relationships: If your data involves multiple entities with relationships, ensure that changes made to one entity correctly reflect in related entities. Utilize database constraints like foreign keys and cascading options to maintain data integrity when performing CRUD operations.
- Error Handling: Implement robust error handling and validation to prevent data inconsistencies or unexpected errors during CRUD operations. Provide informative error messages and handle potential exceptions gracefully to guide users through the process.
- Access Control: Implement access control mechanisms to restrict CRUD operations based on user roles and permissions. Ensure that only authorized users can perform specific operations and that appropriate security measures are in place.
It is important to handle CRUD operations securely and efficiently. Utilize parameterized queries or prepared statements to prevent SQL injection attacks and ensure data integrity. Regularly backup your database to protect against data loss and have proper disaster recovery measures in place.
Consider implementing auditing and logging mechanisms to track changes made to the data, providing an audit trail for accountability and troubleshooting purposes.
By implementing comprehensive CRUD operations, you empower users to interact with the data in your web application, ensuring a rich and dynamic user experience. Regularly test and optimize these operations to guarantee smooth data manipulation functionality.
With CRUD operations incorporated, we can now focus on implementing security measures to protect our web application from potential threats. In the next section, we’ll explore essential security measures to safeguard our application and enhance its resilience.
Implementing Security Measures
Implementing robust security measures is crucial for safeguarding your web application and protecting sensitive user data from potential threats and attacks. By incorporating security measures throughout your application, you can ensure its resilience and maintain user trust. Here are some essential security measures to implement:
- Secure Authentication: Implement strong authentication mechanisms, such as multi-factor authentication or OAuth, to protect user accounts from unauthorized access. Enforce robust password policies, including complexity requirements and password expiration.
- Secure Session Management: Protect user sessions by implementing secure session handling techniques. Use secure cookies, regenerate session IDs on authentication, and enforce session timeouts to prevent session hijacking or session fixation attacks.
- Input Validation and Sanitization: Validate and sanitize all user input to prevent common vulnerabilities, such as cross-site scripting (XSS), SQL injection, or command injection attacks. Use parameterized queries or prepared statements to protect against SQL injection.
- Protection against Cross-Site Scripting (XSS): Implement output encoding or escaping techniques to prevent XSS attacks. Properly sanitize user-generated content to prevent malicious scripts from being executed in users’ browsers.
- Data Encryption: Encrypt sensitive data, both in transit and at rest. Use secure encryption algorithms, such as HTTPS (TLS/SSL) for data transmission and encryption methods like bcrypt or Argon2 for storing passwords.
- Security Auditing and Logging: Implement logging mechanisms to monitor and track suspicious activities within your application. Log critical events, errors, and access attempts to identify potential security breaches or anomalies.
- Access Control: Implement role-based access control (RBAC) to restrict access to sensitive areas or functionalities of your application based on user roles and permissions. Ensure that users are authorized to perform only the actions they are permitted to.
- Regular Updates and Patching: Keep all your application dependencies, frameworks, and server software up to date with the latest security patches. Regularly check for vulnerability reports and apply necessary updates promptly.
- Third-Party Libraries and Dependencies: Be cautious when using third-party libraries and dependencies. Ensure they are from reputable sources, verify their security track record, and regularly update them to benefit from security patches and bug fixes.
- Security Testing: Regularly conduct security testing, such as penetration testing or vulnerability assessments, to identify and address any potential vulnerabilities or weaknesses within your application.
It is vital to have a security mindset throughout the development process and involve security practices at each stage. Educate yourself and your team about common security threats and best practices for secure coding.
Stay updated with emerging security trends and implement industry-standard security frameworks, such as OWASP (Open Web Application Security Project) guidelines, to ensure your application is built with security in mind.
Remember, security is an ongoing effort. Regularly assess and enhance the security measures in your application to stay ahead of potential threats and protect your users’ data.
With the implementation of robust security measures, we can now focus on testing and debugging our web application. In the next section, we will explore techniques for ensuring the functionality, performance, and reliability of our application.
Testing and Debugging
Testing and debugging are crucial steps in the web application development process. Thoroughly testing your application ensures that it functions as expected, performs well, and provides a seamless user experience. Debugging helps identify and resolve issues, ensuring a high-quality and reliable application. Here are the key aspects of testing and debugging to consider:
- Unit Testing: Write unit tests to verify the functionality of individual components, functions, or classes within your application. Unit tests help catch bugs early and ensure that each part of your application performs as intended.
- Integration Testing: Conduct integration tests to verify the interactions between different components or modules of your application. Integration tests help uncover compatibility issues and ensure the smooth operation of the overall system.
- User Acceptance Testing (UAT): Involve users or stakeholders to perform a series of tests that simulate real-world usage scenarios. UAT helps identify user experience issues, gather feedback, and ensure that your application meets user expectations.
- Performance Testing: Measure your application’s performance under different conditions, such as high traffic or heavy load. Identify potential bottlenecks or areas for optimization and ensure that your application can handle the expected user load efficiently.
- Security Testing: Conduct security testing to identify vulnerabilities or weaknesses in your application’s code or configuration. Use penetration testing tools, vulnerability scanners, and manual testing techniques to uncover potential security risks and make the necessary fixes.
- Error and Exception Handling: Implement robust error handling mechanisms to catch and handle any unexpected errors or exceptions that may occur during runtime. Properly log errors and exceptions for effective debugging and maintain a smooth user experience.
- Browser Compatibility: Test your application across different browsers and versions to ensure cross-browser compatibility. Verify that all features and functionalities work as expected and provide a consistent experience for users regardless of their chosen browser.
- Data Integrity Testing: Validate that data is accurately stored, retrieved, and processed within your application. Check if data is correctly persisted, updated, and maintained without any loss or corruption.
- Regression Testing: Perform regression testing to ensure that new changes or updates do not introduce unintended side effects or break existing functionality. Re-run previous tests after making modifications to verify that everything still works as expected.
Use debugging tools and techniques to identify and resolve any issues that arise during testing. Utilize logging, debugging consoles, and error tracking tools to track down and fix bugs efficiently.
As you test and debug your application, document any identified issues, track your resolutions, and maintain a robust bug tracking system. This enables efficient collaboration with your team and improves transparency throughout the debugging process.
Remember to test your application in realistic environments as closely as possible to the production environment to ensure accurate results. Simulate real-world conditions and user scenarios to identify and address any potential issues before deploying your application.
With thorough testing and effective debugging, you can address any issues, ensure the reliability and functionality of your application, and deliver a high-quality user experience.
Now that our web application has been thoroughly tested and debugged, it’s time to deploy it to a live server. In the next section, we will explore the process of deploying our application and making it accessible to users.
Deploying the Application
Deploying your web application involves making it accessible to users on a live server. It’s an essential step towards releasing your application to the world. Deploying your application properly ensures that it is available, secure, and performs well. Here’s a guide to help you deploy your web application:
- Production Environment Setup: Set up a production environment that closely mirrors the live server environment. Configure your server with the necessary software, frameworks, and libraries required to run your application successfully.
- Code Optimization: Optimize your codebase for production deployment. Remove development-specific code, ensure proper caching, and minimize any resource-hogging operations that could impact application performance.
- Database Migration: Ensure your database is correctly migrated to the production server. Apply any necessary schema changes, generate indexes, and ensure data consistency across environments.
- Web Server Configuration: Set up your web server, such as Apache or Nginx, to serve your application. Configure virtual hosts, SSL certificates, and other security measures to protect data transmitted between the server and users.
- Automated Builds and Deployment: Implement automated build and deployment processes to simplify future updates or changes. Utilize continuous integration/continuous deployment (CI/CD) tools to automate the process of building, testing, and deploying your application.
- Load Balancing and Scaling: If your application experiences high traffic or needs to handle scalability, consider load balancing techniques and horizontal scaling to distribute the workload across multiple servers. This helps maintain a responsive application and accommodates increasing user demand.
- Monitoring and Error Tracking: Set up monitoring tools to track the performance, uptime, and error rate of your application. Utilize log aggregators and error tracking services to identify and debug any errors or anomalies that may occur in the production environment.
- Data Backup and Disaster Recovery: Implement regular data backups and ensure you have proper disaster recovery plans in place. Regularly backup your database and files, and have a strategy in case of server failures or data loss.
- Beta Testing: Before releasing your application to a wider audience, consider conducting beta testing with a limited number of users. This allows you to gather feedback, identify any potential issues, and make necessary improvements before the full launch.
- Documentation and User Support: Provide clear documentation for users on how to use your application. Include a frequently asked questions (FAQ) section and a support contact to assist users with any questions or issues they may encounter.
Throughout the deployment process, consider implementing security measures such as firewalls, access controls, and regular vulnerability scanning to protect your application from potential threats. Regularly update your software dependencies and server configurations to address any security vulnerabilities.
Once your application is successfully deployed, continuously monitor its performance, gather user feedback, and make necessary improvements through regular updates and feature enhancements.
Congratulations! Your web application is now live and accessible to users. Keep monitoring, updating, and refining your application to provide a seamless and secure experience for your users.