Introduction
Welcome to this comprehensive guide on how to create a PHP website using Dreamweaver. Dreamweaver is a powerful web development tool that provides an intuitive interface and a wide range of features to make the process of building websites, including dynamic ones using PHP, easier and more efficient.
PHP is a server-side scripting language that is widely used for developing dynamic web pages and applications. By combining the power of PHP with the functionality of Dreamweaver, you can create websites that are not only visually appealing but also highly functional and interactive.
Throughout this guide, we will cover all the necessary steps to set up Dreamweaver, create a new PHP website, configure a local server, write PHP code, connect to a database, and publish your website. Whether you are a beginner or an experienced web developer, this guide will provide you with the knowledge and tools to get started with PHP development in Dreamweaver.
Before we dive into the technical details, it’s important to have some prerequisites in place to ensure a smooth learning experience. Let’s take a look at what you’ll need to get started.
Prerequisites
Before you begin creating a PHP website in Dreamweaver, there are a few prerequisites you should fulfill:
- A computer with an operating system that supports Dreamweaver.
- Dreamweaver software installed on your computer. You can either purchase it or subscribe to Adobe’s Creative Cloud subscription.
- A basic understanding of HTML, CSS, and PHP. While it’s not necessary to be an expert in these languages, having a basic knowledge will greatly benefit you.
- A local server environment set up on your computer. This can be achieved by installing software such as XAMPP, which includes Apache, PHP, MySQL, and other necessary components.
Having these prerequisites in place will ensure that you can follow along with this guide seamlessly. If you haven’t installed Dreamweaver or set up a local server environment, now would be a good time to do so. Take your time to familiarize yourself with the Dreamweaver interface, as it will be the primary tool for designing and coding your PHP website.
Additionally, it’s recommended to have a text editor for editing code, such as Sublime Text or Visual Studio Code, as it can be handy for fine-tuning your PHP code.
With these prerequisites fulfilled, you’re all set to embark on your journey to create a PHP website in Dreamweaver. Let’s move on to installing Dreamweaver and setting up a new PHP website.
Installing Dreamweaver
Installing Dreamweaver is the first step in creating your PHP website. Follow these steps to get Dreamweaver up and running:
- Ensure that your computer meets the system requirements for Dreamweaver. You can find the detailed system requirements on Adobe’s official website.
- Visit the Adobe Creative Cloud website and sign up for a subscription if you haven’t already. Choose the plan that includes Dreamweaver.
- Download the Creative Cloud desktop application and install it on your computer.
- Launch the Creative Cloud application and sign in with your Adobe ID.
- In the Apps tab, locate Dreamweaver and click on the “Install” button.
- Wait for the installation process to complete.
- Once the installation is finished, launch Dreamweaver from your computer’s applications or start menu.
- Sign in with your Adobe ID within Dreamweaver.
- You are now ready to start creating your PHP website in Dreamweaver!
It’s recommended to keep your Dreamweaver software up to date by regularly installing updates provided by Adobe. This ensures that you have the latest features and bug fixes.
If you encounter any issues during the installation process, refer to Adobe’s documentation or seek assistance from their support resources. Remember, a successful installation of Dreamweaver is crucial to proceed with creating your PHP website smoothly.
Now that you have Dreamweaver installed, let’s move on to the next step: creating a new PHP website.
Creating a New PHP Website
Once you have Dreamweaver installed, it’s time to create a new PHP website. Follow these steps to get started:
- Launch Dreamweaver if it’s not already open.
- In the welcome screen, click on “Create New”.
- In the “New Document” dialog box, select “Blank Page” under the “Page Type” section.
- In the “Create New” tab, choose “PHP” as the “Language” for your document. This will enable Dreamweaver to provide code hints and other features specific to PHP.
- In the “Site” section, click on the folder icon next to the “Site Root” field to choose a location where you want to store your website files.
- Give your website a name and specify the local site folder. Click “Save” to proceed.
- In the “Advanced Settings” section, select the appropriate character encoding option for your website.
- Click on “Create” to create your new PHP website in Dreamweaver.
Once you’ve completed these steps, Dreamweaver will create a new PHP website and open a blank page where you can start designing and coding your website. Your PHP website project structure will be organized within the chosen site root folder.
It’s important to note that the process may vary slightly depending on the version of Dreamweaver you are using. However, the basic principles and steps for creating a new PHP website remain the same.
Now that you have your new PHP website set up in Dreamweaver, it’s time to move on to the next step: setting up the local server environment.
Setting Up the Local Server
Before you can start testing and running your PHP website locally, you need to set up a local server environment. This will allow you to emulate a web server on your computer and execute PHP code. Follow these steps to set up the local server:
- Download and install XAMPP, a popular software bundle that includes Apache, PHP, MySQL, and other necessary components for running a local server environment.
- Launch XAMPP and start the Apache and MySQL services.
- Open your web browser and visit http://localhost. If everything is set up correctly, you should see the XAMPP dashboard.
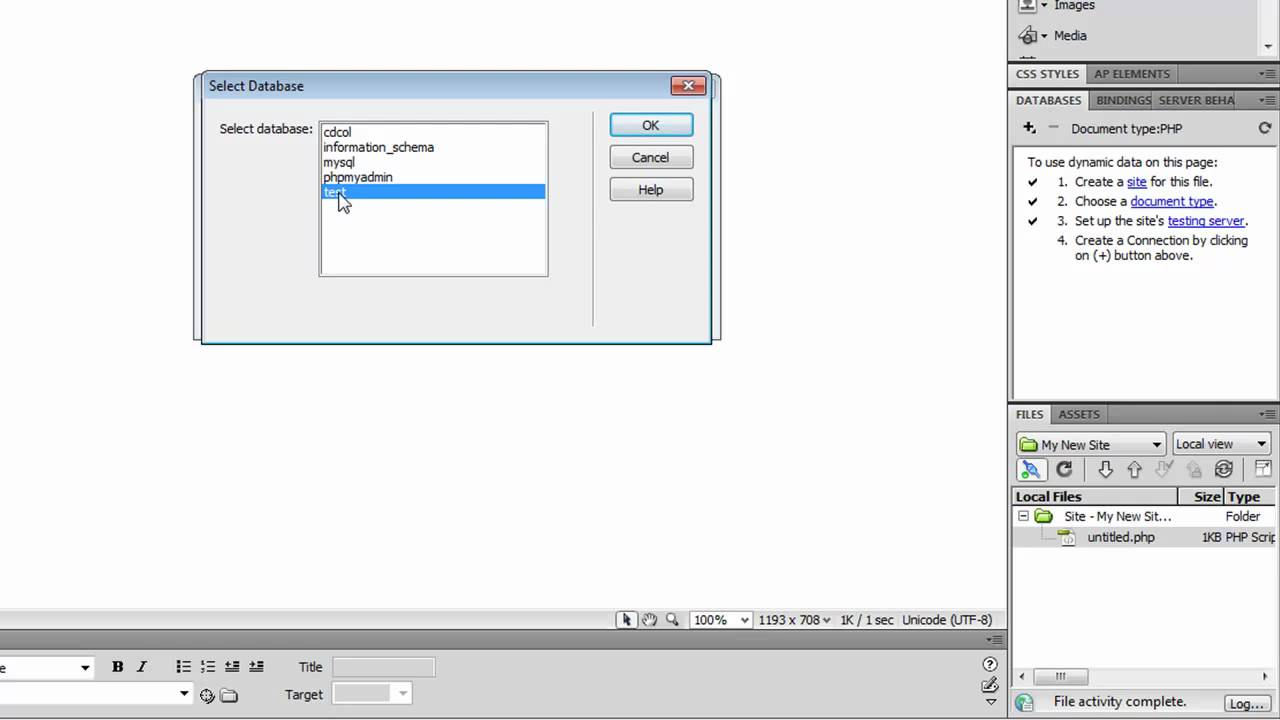
- Create a new database for your PHP website. You can do this by clicking the “phpMyAdmin” link in the XAMPP dashboard and following the instructions to create a new database.
- Make a note of the database name, username, and password you set up. You will need this information later to connect your PHP website to the database.
Once the local server environment is set up and running, you can now test your PHP website locally by accessing it through the web browser using the URL “http://localhost/your-website-folder”.
It’s important to note that XAMPP is just one option for setting up a local server environment. There are other alternatives available, depending on your operating system and preferences. However, XAMPP is widely used and provides a user-friendly interface for managing the local server.
With the local server environment set up, you’re now ready to start creating dynamic web pages using PHP. In the next section, we’ll cover the basics of creating a basic PHP page in Dreamweaver.
Creating a Basic PHP Page
Now that you have your PHP website set up in Dreamweaver and the local server environment ready, it’s time to start creating your first PHP page. Follow these steps to create a basic PHP page:
- In Dreamweaver, open the PHP website project you created earlier.
- Create a new PHP file by clicking on “File” > “New” > “Blank Page” or using the keyboard shortcut Ctrl/Cmd + N.
- Save the file with a .php extension, such as “index.php”.
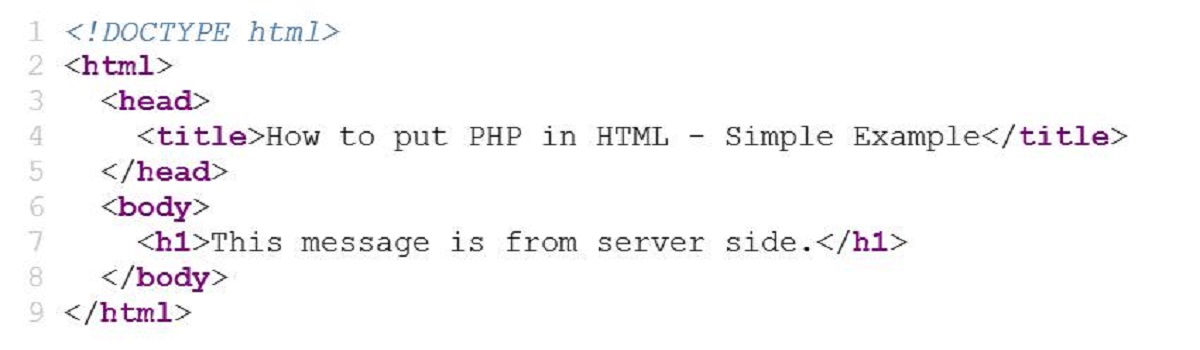
- In the new PHP file, add the necessary HTML markup and structure for your webpage.
- To include PHP code within your HTML, use the opening and closing PHP tags: <?php and ?>. Any code within these tags will be executed on the server before the HTML is sent to the client’s browser.
- Start by adding a simple PHP script, such as:
php
- Save the file and navigate to the file in your browser by accessing “http://localhost/your-website-folder/index.php”.
- If everything is set up correctly, you should see the message “Hello, world!” displayed on the webpage.
Congratulations! You have successfully created a basic PHP page in Dreamweaver and tested it on your local server. This is just the starting point, and you can now explore the power of PHP by incorporating dynamic content and interactivity into your web pages.
Remember, Dreamweaver provides an intuitive interface for designing and coding PHP webpages, allowing you to easily switch between the visual design view and the code view. Make sure to save your changes and test your PHP pages after making any modifications to ensure they function as expected.
In the next section, we will delve into inserting PHP code and learn how to make your PHP pages more interactive and dynamic.
Inserting PHP Code
Now that you have created a basic PHP page, it’s time to dive deeper and learn how to insert PHP code into your webpages to make them more dynamic. Follow these steps to insert PHP code into your Dreamweaver project:
- In Dreamweaver, open the PHP file you want to add PHP code to.
- Decide where you want to insert the PHP code within the HTML structure of your webpage.
- Use the opening and closing PHP tags, <?php and ?>, to designate the start and end of the PHP code section.
- Write your PHP code within the PHP tags. You can use variables, loops, conditional statements, and other PHP language constructs to build dynamic functionality.
- For example, to display the current date in your webpage, you can add the following PHP code:
php
Today is
- Save your PHP file and view it in the browser to see the dynamic output of your PHP code.
- As you become more comfortable with PHP and Dreamweaver, you can start incorporating database interactions, form submissions, and other advanced features into your PHP webpages.
Dreamweaver provides code highlighting, suggestion prompts, and code validation for PHP, helping you write clean and error-free code. It also offers a split view where you can see the visual appearance of your webpage alongside the underlying PHP code, making it easier to manage and modify your PHP projects.
Remember to continue testing your PHP webpages after making any changes to ensure that all the PHP code is functioning correctly and producing the desired output.
In the next section, we will explore how to connect your PHP website to a database, allowing you to store and retrieve data dynamically.
Connecting to a Database
Connecting your PHP website to a database allows you to store and retrieve data dynamically, making your website more interactive and functional. Follow these steps to connect your PHP website to a database in Dreamweaver:
- Make sure you have already set up a database in your local server environment, such as MySQL, using a tool like phpMyAdmin.
- In Dreamweaver, open the PHP file where you want to connect to the database.
- At the top of your PHP file, add the necessary database connection code using the mysqli extension or another suitable library:
php
- Modify the values of `$servername`, `$username`, `$password`, and `$database` to match your local server settings and database credentials.
- Once the database connection is established, you can execute SQL queries to interact with the database.
- For example, you can fetch records from a database table and display them on your webpage:
php
0) {
while ($row = mysqli_fetch_assoc($result)) {
echo “Name: ” . $row[“name”] . “
“;
}
} else {
echo “No records found.”;
}
mysqli_close($conn);
?>
- Save your PHP file and test it in the browser to see the database records displayed on the webpage.
- Remember to sanitize user inputs and handle errors gracefully when working with databases to ensure the security and integrity of your website.
By connecting your PHP website to a database, you can create dynamic web applications, such as blogs, e-commerce sites, and content management systems.
In the next section, we will explore how to create dynamic pages that change their content based on user inputs and database interactions.
Creating Dynamic Pages
Creating dynamic pages is a key aspect of PHP development, as it allows your website to adapt and display different content based on user inputs, database interactions, and other dynamic factors. Here’s how you can create dynamic pages in Dreamweaver:
- In Dreamweaver, open the PHP file where you want to add dynamic functionality.
- Identify the areas of the page that will change dynamically based on user inputs or database records.
- Use PHP code to fetch data from the database and populate the dynamic sections of the page.
- For example, if you have a product catalog, you can dynamically display product information based on the selected category:
php
0) {
while ($row = mysqli_fetch_assoc($result)) {
echo “
” . $row[“name”] . “
“;
echo “
” . $row[“description”] . “
“;
}
} else {
echo “No products found.”;
}
?>
- Save your PHP file and test it in the browser by passing the necessary parameters through the URL or capturing user inputs through forms.
- Dreamweaver’s code highlighting and suggestion prompts can assist you in writing dynamic PHP code efficiently.
- Consider implementing form validation and security measures to protect your website from malicious user inputs.
Creating dynamic pages provides a personalized and interactive experience for your website visitors. You can incorporate various features such as search functionality, user registration, feedback forms, and more to enhance user engagement.
Remember to always test your dynamic pages thoroughly to ensure that the PHP code behaves as expected and delivers the desired results. Debugging and refining your PHP code is an iterative process that will improve the functionality and user experience of your website.
In the next section, we will explore testing and debugging techniques to identify and resolve any issues in your PHP website.
Testing and Debugging
Testing and debugging are crucial steps in the development process to ensure the reliability and functionality of your PHP website. Here are some techniques and best practices for testing and debugging in Dreamweaver:
- Regularly test your PHP website on different web browsers and devices to ensure compatibility and responsiveness.
- Manually step through your PHP code to debug logic errors or unexpected behavior. Use code breakpoints in Dreamweaver to pause execution at specific points and inspect variables and values.
- Validate your HTML and PHP code to ensure it adheres to web standards. Use online validators or Dreamweaver’s built-in code validation feature.
- Enable error reporting by adding the following lines at the beginning of your PHP files:
php
- Utilize the PHP error logs to capture and analyze any runtime errors or warnings.
- Test user inputs, especially those interacting with databases, to prevent SQL injection and other security vulnerabilities.
- Validate and sanitize user inputs to ensure the integrity and security of your website.
- Consider implementing logging mechanisms to keep track of any errors or unexpected behaviors on your production server.
- Make use of Dreamweaver’s built-in debugging tools and features, such as Live View and Design View, to visualize and inspect your PHP website during development.
Remember to test your PHP website throughout the development process, as well as after making any significant changes or updates. By uncovering and resolving errors early, you can deliver a more polished and reliable website to your users.
In the next section, we will explore the process of publishing your PHP website, making it accessible to the public on the internet.
Publishing the Website
Once you have developed and tested your PHP website locally, it’s time to publish it and make it accessible to the public on the internet. Follow these steps to publish your PHP website:
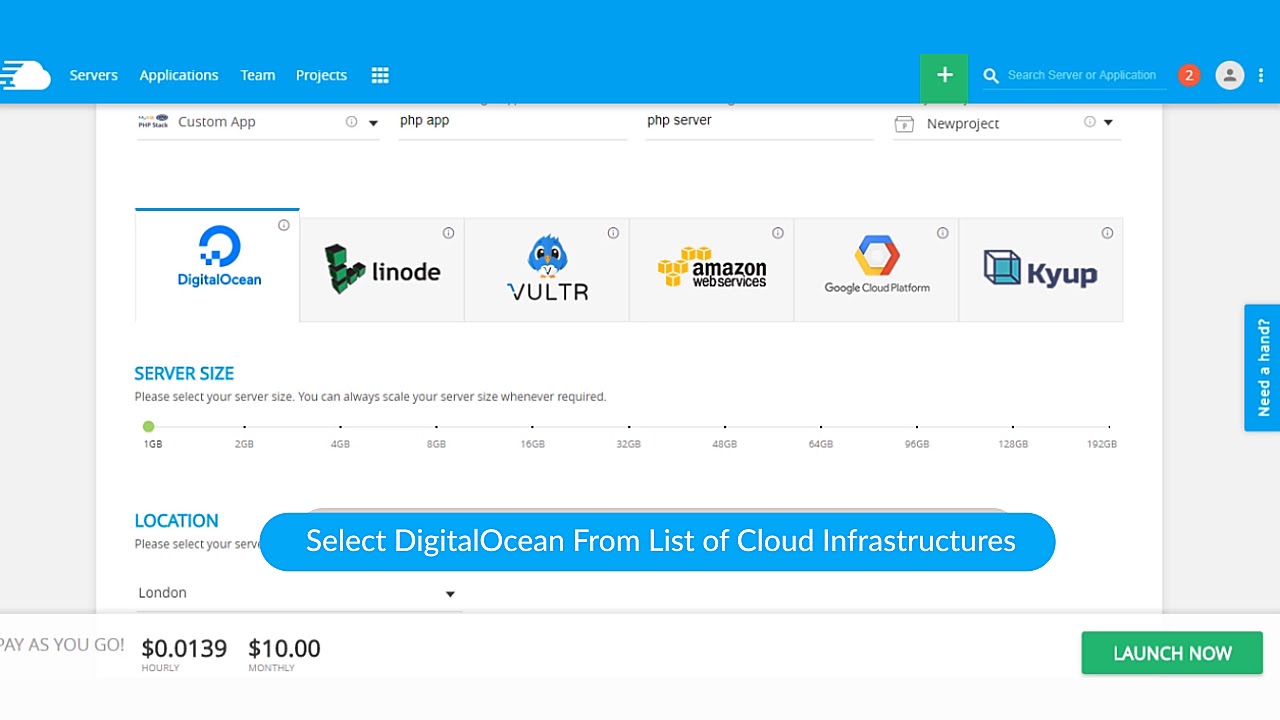
- Choose a web hosting provider that supports PHP and offers the necessary resources for your website’s requirements.
- Register a domain name for your website, or use an existing domain name if you have one.
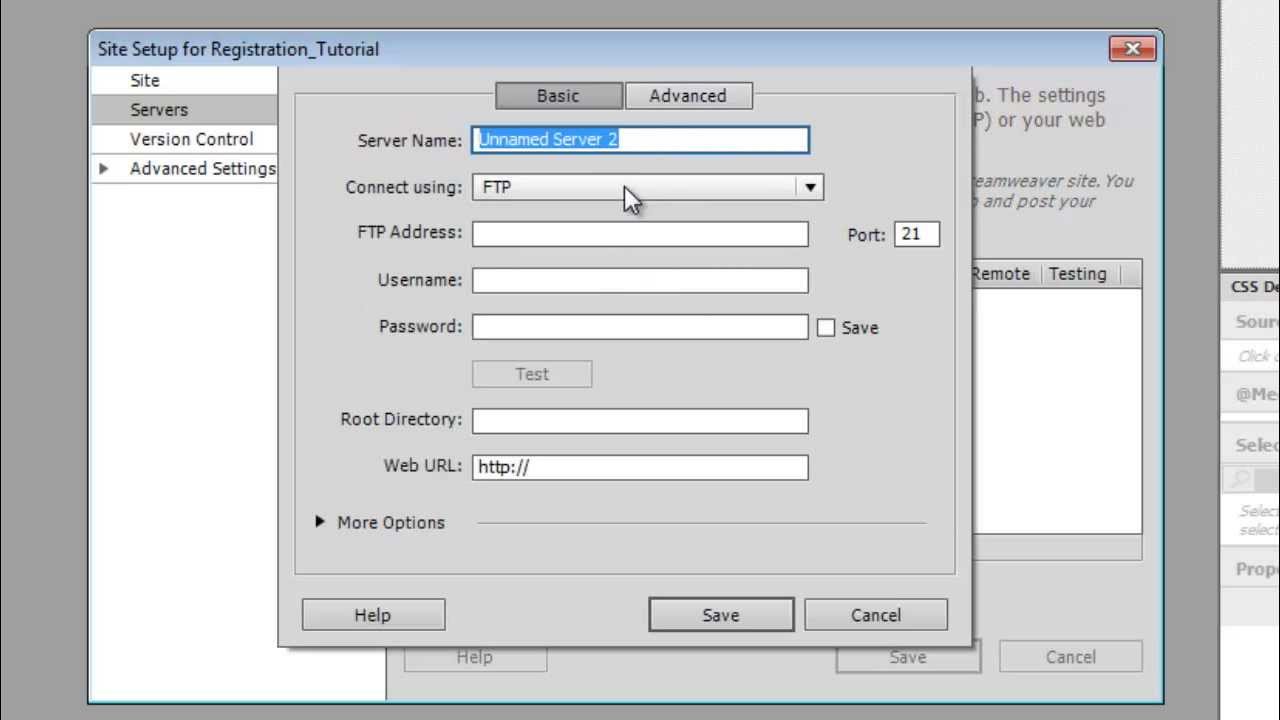
- Upload your PHP files and any associated assets, such as images or CSS files, to the web server using FTP (File Transfer Protocol) or a web-based file manager provided by your hosting provider.
- Set up a database on the web server that mirrors the database you used in your local environment. Import your database tables and data to the server.
- Update your PHP files with the new database connection information, such as the server name, the database username, password, and database name.
- Test your PHP website on the live server to ensure all functionality is working correctly. Pay attention to any differences in server configurations that may affect your website’s behavior.
- Secure your PHP website by implementing security measures such as using secure connections (HTTPS), validating user inputs, and protecting sensitive data.
- Regularly update and maintain your PHP website by applying security patches, bug fixes, and new features.
Publishing your PHP website may require various technical configurations specific to your hosting provider. Make sure to refer to their documentation and seek assistance from their support team if needed.
After publishing your website, it’s important to monitor its performance, security, and user feedback. Continuously improve and update your PHP website based on the needs and feedback of your audience.
Congratulations! Your PHP website is now accessible to the world and ready to serve its purpose. Keep refining and enhancing your website to provide an exceptional user experience.
In the next section, we will wrap up this guide on creating a PHP website in Dreamweaver.
Conclusion
Congratulations on successfully completing this comprehensive guide on creating a PHP website in Dreamweaver! You have learned the necessary steps to set up Dreamweaver, create a new PHP website, connect to a local server, write PHP code, and publish your website on the internet.
By harnessing the power of Dreamweaver, you can design visually appealing webpages while seamlessly integrating PHP code to add dynamic functionality. You have also explored the process of connecting your PHP website to a database, allowing for the storage and retrieval of data. Additionally, we covered testing and debugging techniques to ensure the reliability and functionality of your PHP website.
Remember to continuously update and maintain your PHP website, ensuring its security and performance. Regularly test your website on different browsers and devices, implement security measures, and keep up with best practices in PHP development.
Whether you are building a personal blog, an e-commerce site, or a complex web application, the skills you have acquired will serve as a solid foundation for your PHP development journey. Keep learning, exploring new techniques, and staying up to date with the latest trends to enhance your PHP web projects.
Thank you for joining us on this PHP and Dreamweaver adventure. Happy coding!