Introduction
Welcome to this comprehensive guide on how to create a database in PHP using MySQL. Databases are an integral part of web development, allowing you to efficiently store and manage data for your applications. PHP, a powerful and widely-used server-side scripting language, provides excellent support for interacting with MySQL databases.
Whether you are a beginner seeking to learn the fundamentals of database creation or an experienced developer looking to refresh your knowledge, this tutorial will provide you with step-by-step instructions on creating a database using PHP and MySQL.
This guide assumes that you have a basic understanding of PHP and MySQL. If you are new to these technologies, don’t worry – we will walk you through the process in a beginner-friendly manner. By the end of this tutorial, you will be equipped with the knowledge and skills to create, connect, and manipulate databases using PHP and MySQL.
Throughout this tutorial, we will be using PHP’s MySQLi extension, which stands for MySQL Improved. MySQLi is an object-oriented approach to interacting with MySQL databases and provides a wide range of features and functionalities.
By following the steps outlined in this tutorial, you will learn how to:
- Create a MySQL database.
- Connect to the MySQL database using PHP.
- Create a table within the database.
- Insert, retrieve, update, and delete data from the table.
Are you ready to dive into the exciting world of PHP and MySQL database creation? Let’s get started!
Prerequisites
Before we begin creating a database in PHP using MySQL, there are a few prerequisites that you should have in place:
- A basic understanding of HTML, CSS, and PHP: Familiarity with these web development languages will help you follow along with the tutorial and grasp the concepts more easily.
- A web server with PHP support: You will need a server where you can run PHP code. This can be a local development environment like XAMPP or a web hosting provider that supports PHP.
- MySQL server installed: You should have MySQL server installed on your development environment. If you are using XAMPP, MySQL is included by default.
- A text editor: You will need a text editor to write your PHP code. There are many options available, such as Visual Studio Code, Sublime Text, or Atom.
- Basic knowledge of SQL: Although not mandatory, having a basic understanding of SQL (Structured Query Language) will be beneficial. SQL is the language used to interact with databases, and we will be using it throughout this tutorial.
If you fulfill these prerequisites, you are ready to proceed with creating a database in PHP using MySQL. If not, take the time to familiarize yourself with the necessary technologies before continuing.
Remember, database creation is an essential skill for any web developer, and understanding how to interact with databases using PHP will greatly enhance your ability to build dynamic and data-driven web applications. So, let’s move on to the next steps and start creating our PHP MySQL database.
Step 1: Setting Up the Database
The first step in creating a database in PHP using MySQL is setting up the database itself. This involves creating the database on your MySQL server. Follow these steps:
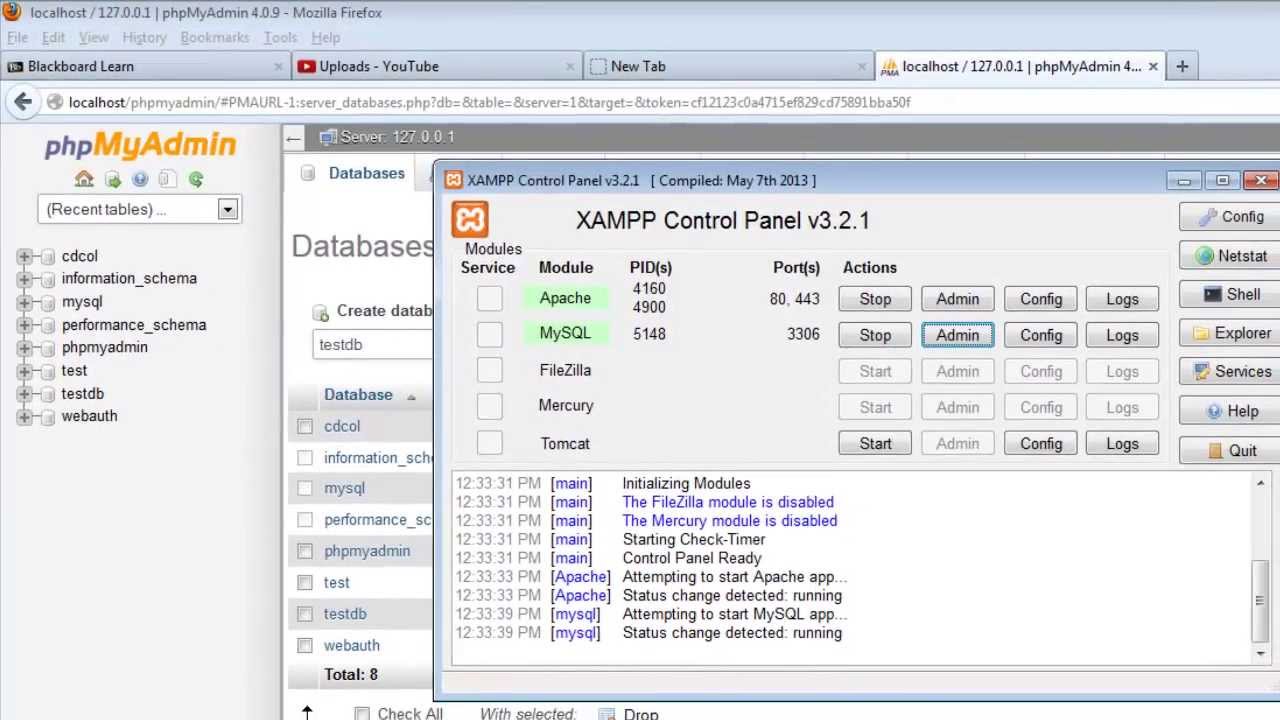
- Open your preferred MySQL administration tool, such as phpMyAdmin or MySQL Workbench.
- Create a new database by navigating to the “Database” tab or section in your tool. Provide a name for your database. Make sure to choose a descriptive yet concise name that reflects the purpose of your database.
- Choose a character set and collation for your database. These settings define how data is stored and sorted in the database. The most commonly used character set is “utf8mb4” for supporting a wide range of characters, and the corresponding collation is usually “utf8mb4_unicode_ci”.
- Click the “Create” or “Execute” button to create the database. Once you see a success message, your database is ready to be used.
It’s important to note that when setting up your database, you may need to provide login credentials to access your MySQL server. These credentials typically include a username and password granted the necessary privileges to create and manage databases. If you’re working with a locally installed MySQL server, the default username is often “root” and the password is empty.
Once the database is set up, take note of the database name, as you will need it in the next steps when establishing a connection with PHP. Now that your database is ready, let’s move on to the next step, which is connecting to the database.
Step 2: Connecting to the Database
After setting up the database, the next step is establishing a connection between PHP and the MySQL database. This connection allows PHP to communicate with the database and perform various operations on it. Follow these steps to connect to the database:
- Open your PHP file where you want to establish the database connection.
- Use the
mysqli_connect()function to connect to the database. This function takes four parameters: the host name, username, password, and database name. Here’s an example: - Replace
your_username,your_password, andyour_databasewith your actual MySQL username, password, and database name. - The
mysqli_connect()function attempts to establish a connection to the MySQL server using the provided credentials. If the connection is successful, the$connectionvariable will hold the connection object. If the connection fails, an error message will be displayed using themysqli_connect_error()function.
php
$host = “localhost”;
$username = “your_username”;
$password = “your_password”;
$database = “your_database”;
$connection = mysqli_connect($host, $username, $password, $database);
if (!$connection) {
die(“Connection failed: ” . mysqli_connect_error());
}
Once the connection is established, you can start using the database in PHP. Always remember to close the database connection when you no longer need it. You can close the connection using the mysqli_close() function:
php
mysqli_close($connection);
Establishing a connection to the database is an essential step in working with PHP and MySQL. It allows you to perform various database operations, such as creating tables, inserting, updating, and retrieving data. Now that the connection is set up, let’s move on to creating a table within the database.
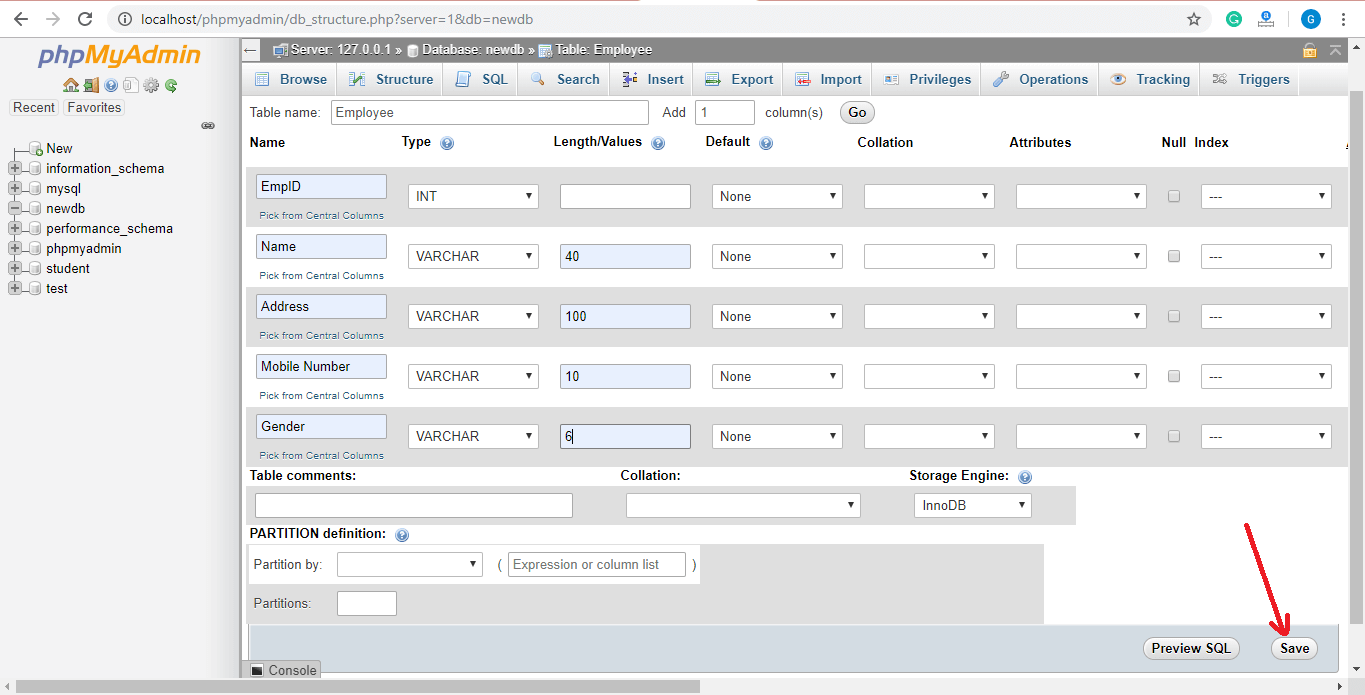
Step 3: Creating a Table
Once the database connection is established, the next step is to create a table within the database. A table is a structured collection of data organized into rows and columns. Each column represents a specific attribute or field, while each row represents a record or entry in the table. Follow these steps to create a table:
- Decide on the structure and attributes of your table. Consider the data you want to store and determine the appropriate columns and their data types. For example, if you’re creating a table to store user information, you might have columns like
id,name,email, andage. - Write a SQL query to create the table. The
CREATE TABLEstatement is used for this purpose. Here’s an example: - In the above example, we use the
CREATE TABLEstatement to create a table called “users” with four columns:id,name,email, andage. Theidcolumn is designated as the primary key, and thenameandemailcolumns are marked asNOT NULLto ensure they contain valid values. - Execute the query using the
mysqli_query()function. If the query executes successfully, a message indicating the successful creation of the table is displayed. Otherwise, an error message is displayed using themysqli_error()function.
php
$sql = “CREATE TABLE users (
id INT(6) UNSIGNED AUTO_INCREMENT PRIMARY KEY,
name VARCHAR(50) NOT NULL,
email VARCHAR(50) NOT NULL,
age INT(3)
)”;
if (mysqli_query($connection, $sql)) {
echo “Table created successfully”;
} else {
echo “Error creating table: ” . mysqli_error($connection);
}
Once the table is created, you can start inserting, updating, and retrieving data from it. Tables are the foundation of database organization, and designing them effectively is crucial for efficient data management. Now that we have a table in our database, let’s move on to inserting data into the table.
Step 4: Inserting Data
With the table created, you can now start inserting data into it. The INSERT INTO statement is used to add new records or rows to a table. Follow these steps to insert data into the table:
- Decide on the data you want to insert and its corresponding values. Each value should match the data type defined for the respective column.
- Write a SQL query using the
INSERT INTOstatement. Here’s an example: - In the above example, we use the
INSERT INTOstatement to insert a new record into the “users” table. We provide values for thename,email, andagecolumns. - Execute the query using the
mysqli_query()function. If the query executes successfully, a message indicating the successful creation of a new record is displayed. Otherwise, an error message with the specific error details is displayed using themysqli_error()function.
php
$sql = “INSERT INTO users (name, email, age) VALUES (‘John Doe’, ‘johndoe@example.com’, 25)”;
if (mysqli_query($connection, $sql)) {
echo “New record created successfully”;
} else {
echo “Error: ” . $sql . “
” . mysqli_error($connection);
}
You can insert multiple records at once by separating the values with commas, like this:
php
$sql = “INSERT INTO users (name, email, age)
VALUES
(‘John Doe’, ‘johndoe@example.com’, 25),
(‘Jane Smith’, ‘janesmith@example.com’, 30),
(‘Bob Brown’, ‘bobbrown@example.com’, 40)”;
With data now inserted into the database, you can proceed to retrieve and display the data from the table. Inserting data is a fundamental operation in database management, allowing you to store and organize information for later use. Now that we’ve inserted data, let’s move on to retrieving it.
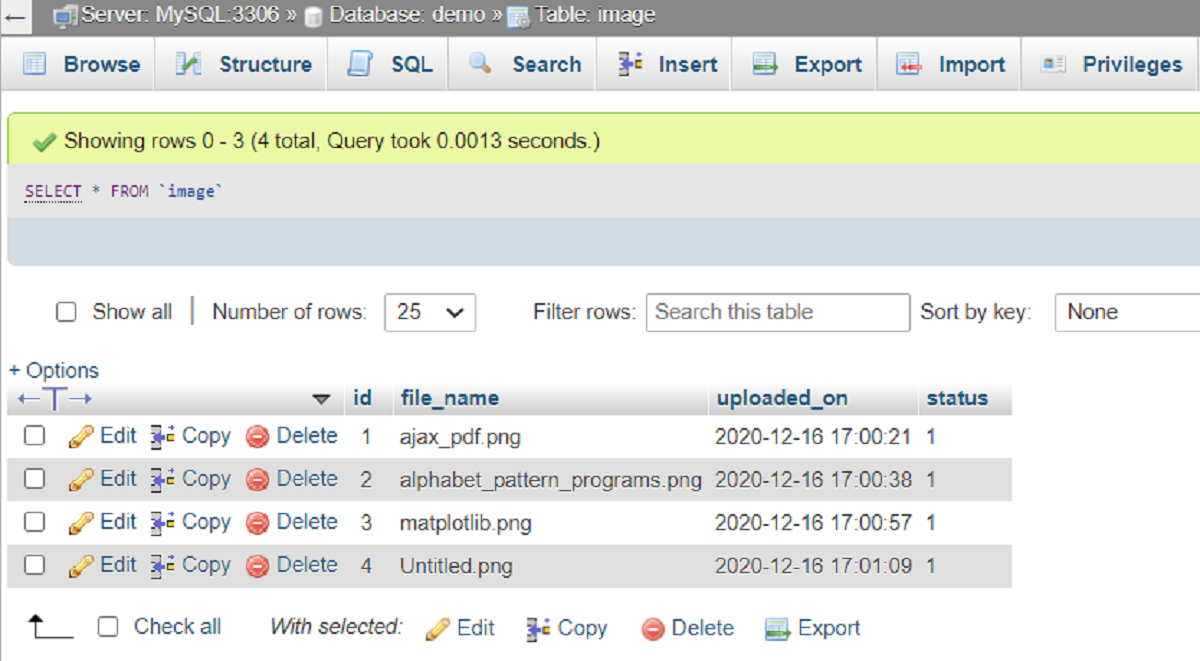
Step 5: Retrieving Data
After inserting data into the table, you may want to retrieve and display that data in your PHP application. The SELECT statement is used to retrieve data from one or more tables. Follow these steps to retrieve data from the table:
- Write a SQL query using the
SELECTstatement. Here’s an example: - In the above example, we use the
SELECTstatement to retrieve all columns (represented by the asterisk “*”) from the “users” table. - Execute the query using the
mysqli_query()function and store the result in the$resultvariable. - Use the
mysqli_num_rows()function to check if there are any records returned by the query. If there are records, loop through them using themysqli_fetch_assoc()function, which fetches each row as an associative array. You can now access the values of each column and display them as desired. - If no records are found, display a message indicating that no records were retrieved.
php
$sql = “SELECT * FROM users”;
$result = mysqli_query($connection, $sql);
if (mysqli_num_rows($result) > 0) {
while ($row = mysqli_fetch_assoc($result)) {
echo “ID: ” . $row[‘id’]. “, Name: ” . $row[‘name’]. “, Email: ” . $row[’email’]. “, Age: ” . $row[‘age’]. “
“;
}
} else {
echo “No records found”;
}
You can refine your retrieval by using conditions in the WHERE clause, specifying specific columns to retrieve, or ordering the results using the ORDER BY clause. The SELECT statement offers a wide range of possibilities to retrieve and filter data from your database.
With the ability to retrieve data, you have the power to display dynamic and personalized content in your PHP application. Now that we’ve retrieved data, let’s move on to updating data in the table.
Step 6: Updating Data
Sometimes, you may need to modify existing data in your database. The UPDATE statement in SQL allows you to update records in a table. Follow these steps to update data in the table:
- Identify the record or records you want to update. You can use conditions in the
WHEREclause to specify which rows should be updated. - Write a SQL query using the
UPDATEstatement. Here’s an example: - In the above example, we use the
UPDATEstatement to set the value of theagecolumn to 30 for the record where thenamecolumn is ‘John Doe’ in the “users” table. - Execute the query using the
mysqli_query()function. If the query executes successfully, a message indicating the successful update of a record is displayed. Otherwise, an error message with the specific error details is displayed using themysqli_error()function.
php
$sql = “UPDATE users SET age = 30 WHERE name = ‘John Doe'”;
if (mysqli_query($connection, $sql)) {
echo “Record updated successfully”;
} else {
echo “Error updating record: ” . mysqli_error($connection);
}
You can update multiple columns and rows at once, and you can use different conditions to narrow down the updates based on specific criteria. The flexibility of the UPDATE statement allows you to modify data in your database according to your application’s requirements.
Now that you know how to update data in the table, let’s move on to the final step: deleting data.
Step 7: Deleting Data
As part of maintaining your database, you may need to remove unwanted or outdated data. The DELETE statement in SQL allows you to delete records from a table. Follow these steps to delete data from the table:
- Identify the record or records you want to delete. You can use conditions in the
WHEREclause to specify which rows should be deleted. - Write a SQL query using the
DELETEstatement. Here’s an example: - In the above example, we use the
DELETE FROMstatement to delete all records from the “users” table where theagecolumn is greater than 40. - Execute the query using the
mysqli_query()function. If the query executes successfully, a message indicating the successful deletion of records is displayed. Otherwise, an error message with the specific error details is displayed using themysqli_error()function.
php
$sql = “DELETE FROM users WHERE age > 40”;
if (mysqli_query($connection, $sql)) {
echo “Records deleted successfully”;
} else {
echo “Error deleting records: ” . mysqli_error($connection);
}
You can delete specific records or delete all records from a table using the DELETE statement. Just be cautious when using the DELETE statement, as it permanently removes data from your database.
With the ability to delete data, you have the flexibility to maintain the integrity and cleanliness of your database. Deleting unnecessary or outdated data not only improves performance but also ensures accurate and up-to-date information in your application.
Now that we’ve covered all the crucial steps in creating, connecting, manipulating, and managing a database in PHP using MySQL, you are equipped with the knowledge and skills to build robust, data-driven web applications. So go ahead and make the most of your newfound expertise!
Conclusion
Congratulations! You have successfully learned how to create, connect, and manipulate a database in PHP using MySQL. This knowledge will empower you to build dynamic and data-driven web applications that can store and retrieve information efficiently.
In this tutorial, we covered the essential steps involved in working with databases in PHP:
- Setting up the database: We discussed how to create a database on your MySQL server and choose the appropriate character set and collation.
- Connecting to the database: We explored how to establish a connection between PHP and the MySQL database using the
mysqli_connect()function. - Creating a table: We learned how to design and create a table within the database using the
CREATE TABLEstatement. - Inserting data: We discovered how to add new records to the table using the
INSERT INTOstatement and themysqli_query()function. - Retrieving data: We explored how to fetch and display data from the table using the
SELECTstatement and themysqli_fetch_assoc()function. - Updating data: We discussed how to modify existing data in the table using the
UPDATEstatement and themysqli_query()function. - Deleting data: We learned how to remove unwanted records from the table using the
DELETEstatement and themysqli_query()function.
By mastering these steps, you have acquired the foundation to handle the core operations involved in database management. Remember to always validate and sanitize user inputs to protect your application from SQL injection attacks.
Working with databases is a fundamental skill for web developers, and understanding how to manipulate data using PHP and MySQL is a valuable asset. Stay curious, explore new features and functionalities of databases, and keep enhancing your skills in order to build even more powerful and efficient applications.
Now that you’re equipped with the knowledge to create and work with databases using PHP and MySQL, it’s time to start unleashing your creativity and building amazing web applications!