Introduction
Welcome to this step-by-step guide on how to delete imported calendars in Google Calendar. If you’ve recently imported a calendar into your Google Calendar app and no longer need it, cleaning up your calendar list can help you stay organized and avoid clutter. Google Calendar provides a simple and straightforward process for deleting imported calendars, and we’ll walk you through it.
Whether you imported a calendar by mistake, it’s no longer relevant, or you’re streamlining your calendar collection, deleting unwanted imported calendars is a breeze. With just a few clicks, you can remove the imported calendar from your Google Calendar app, making space for the calendars that matter most to you.
In this guide, we will outline the step-by-step process to delete imported calendars in Google Calendar. We’ll show you how to access your Google Calendar, navigate to the settings, locate the imported calendars, and delete them permanently. By following these instructions, you will be able to maintain a clean and organized calendar system that suits your needs.
Please note that this guide is specifically for deleting imported calendars in Google Calendar. If you want to delete a regular calendar or events within a calendar, the process may differ slightly. However, this guide will focus solely on removing imported calendars.
Now that we’ve covered the basics, let’s dive into the step-by-step process in the next section, where we will explain how to access Google Calendar and open the settings.
Step 1: Accessing Google Calendar
The first step to deleting imported calendars in Google Calendar is to access the Google Calendar app. You can do this through various devices, such as a web browser on your computer or the Google Calendar mobile app on your smartphone or tablet.
If you are using a computer:
- Open your preferred web browser.
- Type in the URL bar: calendar.google.com.
- Press Enter or Return on your keyboard.
- Sign in to your Google account if you haven’t already.
- You will be redirected to the Google Calendar interface.
If you are using a smartphone or tablet:
- Unlock your device and go to the home screen.
- Locate and tap on the Google Calendar app.
- If prompted, sign in to your Google account.
- You will be taken to the Google Calendar app interface.
Once you have accessed Google Calendar, you are ready to move on to the next step: opening the settings. In the next section, we will guide you through finding the settings menu.
Step 2: Opening Settings
After accessing Google Calendar, the next step in the process of deleting imported calendars is to open the settings menu. The settings menu allows you to manage various aspects of your calendar, including imported calendars. Here’s how to do it:
On a computer:
- In the top right corner of the Google Calendar interface, you will find a gear icon. Click on it to open the settings menu.
- A dropdown menu will appear. Scroll down and click on the Settings option.
- You will be directed to the Settings page.
On a mobile device:
- In the Google Calendar app interface, look for the three horizontal lines or “hamburger” icon. Tap on it to open the menu.
- Scroll through the menu and tap on the Settings option.
- A new screen will appear with various settings options.
Once you have successfully opened the settings menu, you are one step closer to deleting your imported calendars. In the next section, we will focus on finding the imported calendars within the settings.
Step 3: Finding Imported Calendars
Now that you have accessed the settings menu in Google Calendar, the next step is to locate the imported calendars section. This section will display a list of all the calendars you have imported into your Google Calendar app. Here’s how to find it:
On a computer:
- In the Settings page, you will see a sidebar on the left side of the screen. Scroll down until you find the View calendars section.
- Under the View calendars section, look for the Imported calendars subsection. It should be listed below the My calendars subsection.
- Click on the Imported calendars subsection to expand it.
On a mobile device:
- In the Settings menu, scroll down until you find the Calendars section.
- Tap on the Calendars option.
- In the Calendars screen, look for the Imported calendars section.
- Tap on the Imported calendars section to view the imported calendars list.
Once you have located the imported calendars section, you will be able to see a list of all the calendars you have imported into your Google Calendar app. In the next step, we will explain how to delete these imported calendars.
Step 4: Deleting Imported Calendars
Now that you’ve found the imported calendars within the settings menu, it’s time to delete them from your Google Calendar. Follow these steps to remove unwanted imported calendars:
On a computer:
- In the Imported calendars section, you will see a list of all the imported calendars.
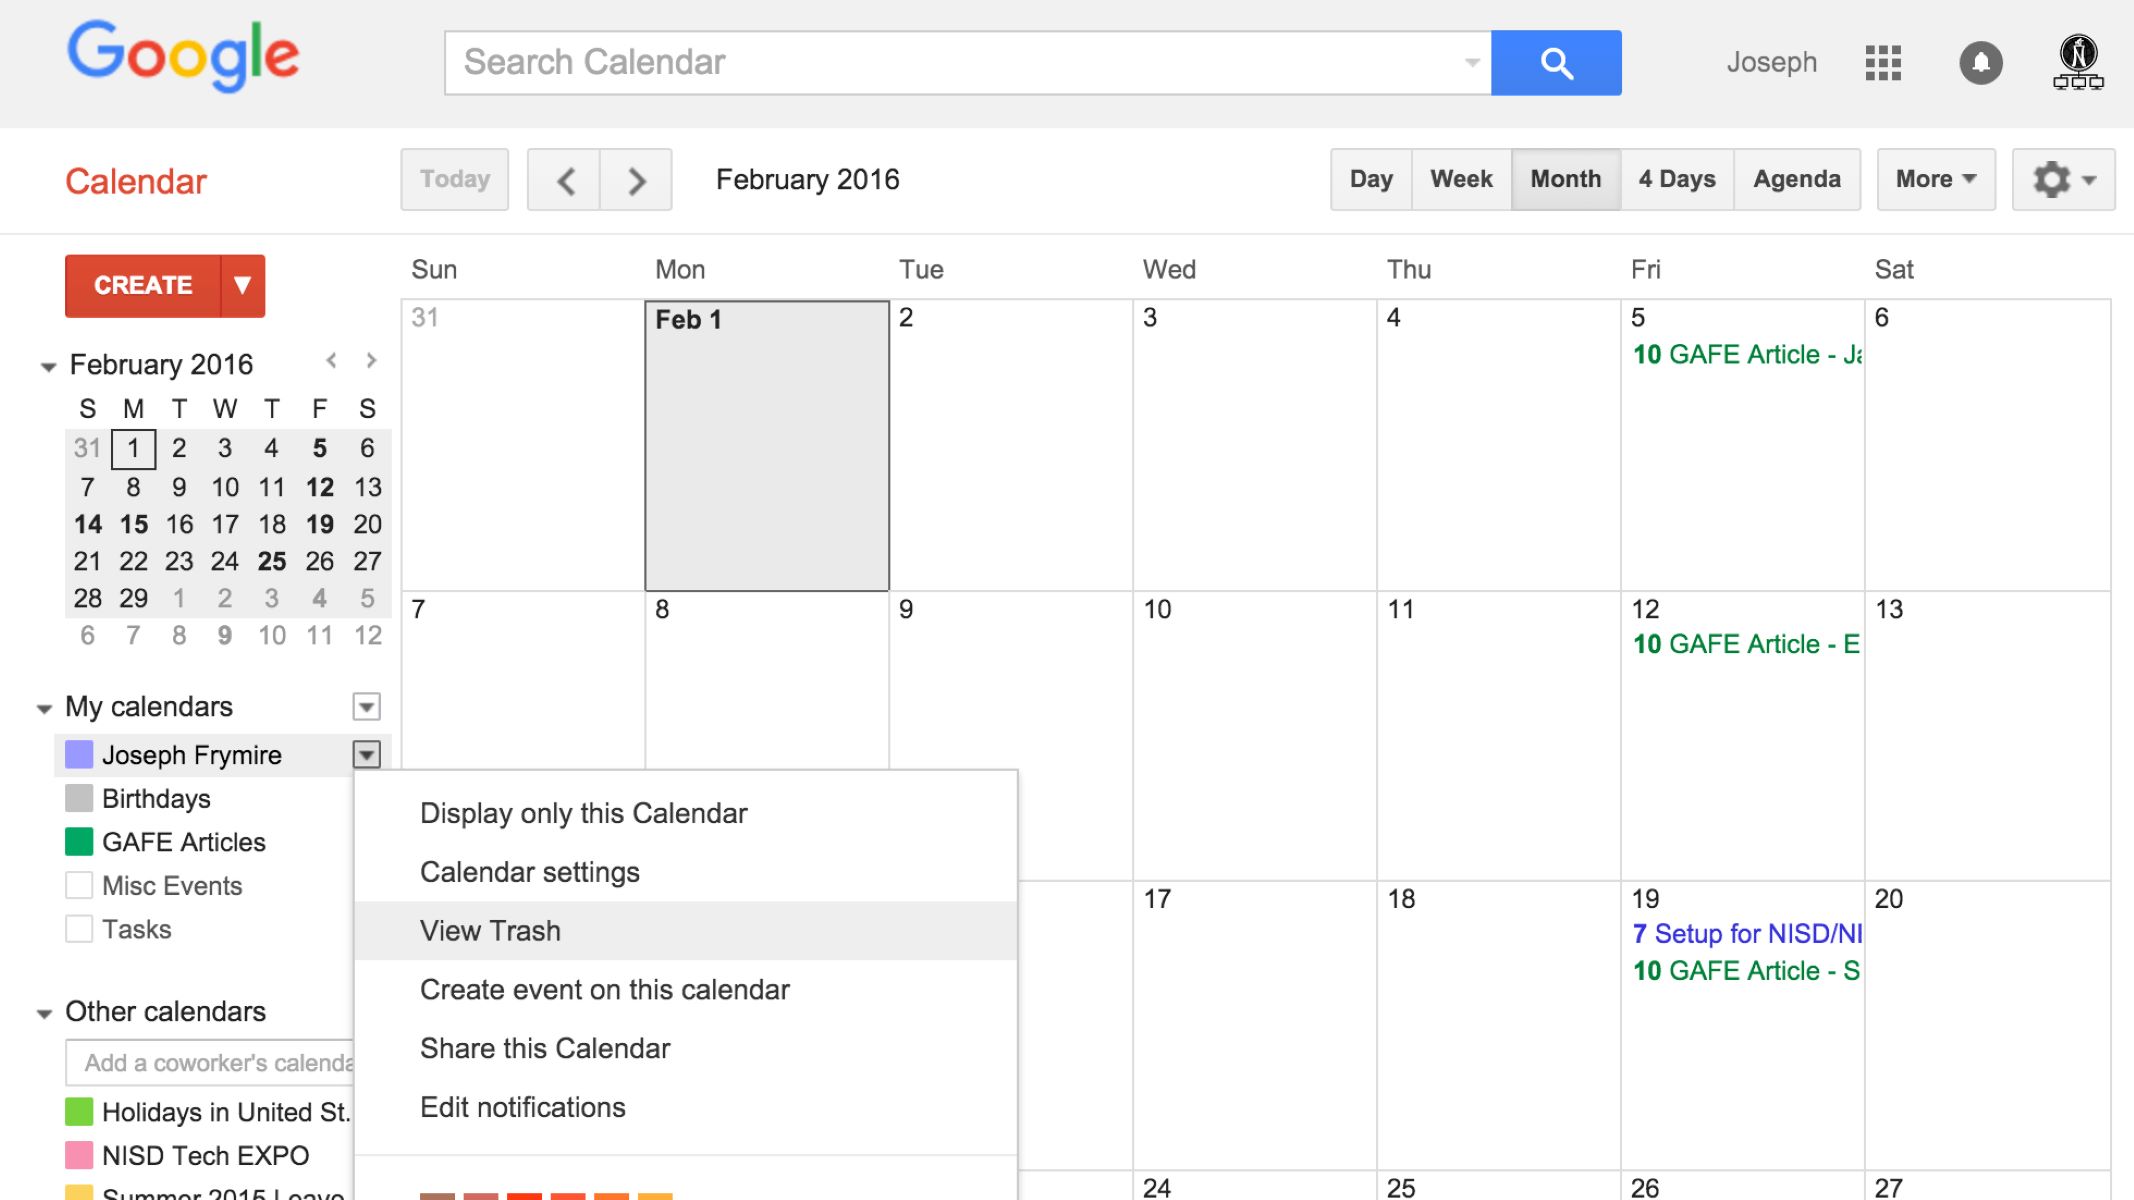
- Locate the calendar you want to delete and hover your mouse over it.
- A small menu icon (three vertical dots) will appear on the right-hand side of the calendar’s name. Click on it.
- A dropdown menu will appear. Click on the Delete option.
- A confirmation dialog box will appear asking if you want to permanently delete the calendar. Click on Delete to proceed.
On a mobile device:
- In the Imported calendars section, you will see a list of all the imported calendars.
- Tap on the calendar you want to delete and hold your finger on it.
- A menu will appear. Tap on the Delete option.
- A confirmation dialog box will appear asking if you want to permanently delete the calendar. Tap on Delete to proceed.
By following these steps, you will successfully delete the imported calendar from your Google Calendar. However, it’s important to note that deleting a calendar will permanently remove all its events and cannot be undone. Make sure you double-check before deleting any imported calendar to avoid losing important information.
In the next step, we will see how to confirm the deletion of the imported calendar.
Step 5: Confirming Deletion
After deleting an imported calendar in Google Calendar, it’s essential to confirm the deletion to ensure that you eliminate the unwanted calendar successfully. Here’s how to confirm the deletion:
On a computer:
- After clicking on the Delete option in the previous step, a confirmation message will appear.
- In the confirmation message, you will see the name of the calendar you are about to delete.
- Carefully review the name of the calendar to make sure it is the correct one.
- To proceed with the deletion, click on the Delete button in the confirmation message.
On a mobile device:
- After tapping on the Delete option in the previous step, a confirmation message will appear.
- The confirmation message will display the name of the calendar you are about to delete.
- Take a moment to verify the name of the calendar to ensure it is the correct one.
- To confirm the deletion, tap on the Delete button in the confirmation message.
Once you have confirmed the deletion of the imported calendar, it will be permanently removed from your Google Calendar. The deleted calendar and all its associated events will no longer appear in your calendar list.
It’s important to note that this action cannot be undone, so make sure to double-check the calendar you are deleting before confirming the deletion.
Now that you’ve successfully deleted the imported calendar from your Google Calendar, you can enjoy a clutter-free calendar experience. In the next section, we will conclude this guide and summarize the steps you’ve taken.
Conclusion
Managing your calendars effectively is crucial for staying organized, and deleting imported calendars that are no longer needed is a great way to streamline your Google Calendar app. In this step-by-step guide, we walked you through the process of deleting imported calendars in Google Calendar.
We started by accessing Google Calendar through either a web browser on a computer or the Google Calendar mobile app on a smartphone or tablet. From there, we opened the settings menu to find the imported calendars section. We then explained how to delete imported calendars by clicking on the three vertical dots icon or tapping and holding on a mobile device, followed by confirming the deletion.
Remember, once you delete an imported calendar, all its associated events will be permanently removed, so double-check before confirming the deletion.
By following these steps, you can keep your Google Calendar organized and free from unnecessary clutter. Taking the time to remove unwanted imported calendars allows you to focus on the calendars that are most relevant to you, ensuring a better overall calendar management experience.
We hope this guide has been helpful in assisting you with deleting imported calendars in Google Calendar. If you have any further questions or need additional assistance, feel free to consult the Google Calendar support resources for more information.
Happy organizing!