Introduction
Google Calendar is a popular online scheduling tool used by millions of people worldwide. It allows you to manage and organize your events, appointments, meetings, and reminders in a simple and convenient way. However, there may come a time when you need to delete all events from your Google Calendar, whether it’s to start fresh, clear out old entries, or for any other reason.
In this article, we will guide you through a step-by-step process on how to delete all events on Google Calendar. Whether you are using Google Calendar on your computer or mobile device, the process is relatively straightforward and can be completed in just a few minutes.
Before we begin, it’s important to note that deleting all events from your Google Calendar is irreversible. Once deleted, you won’t be able to recover the events unless you have previously backed them up. Therefore, it’s essential to make sure you have a backup or are certain that you want to remove all the events from your calendar.
Now, let’s dive into the steps required to delete all events on Google Calendar.
Step 1: Open Google Calendar
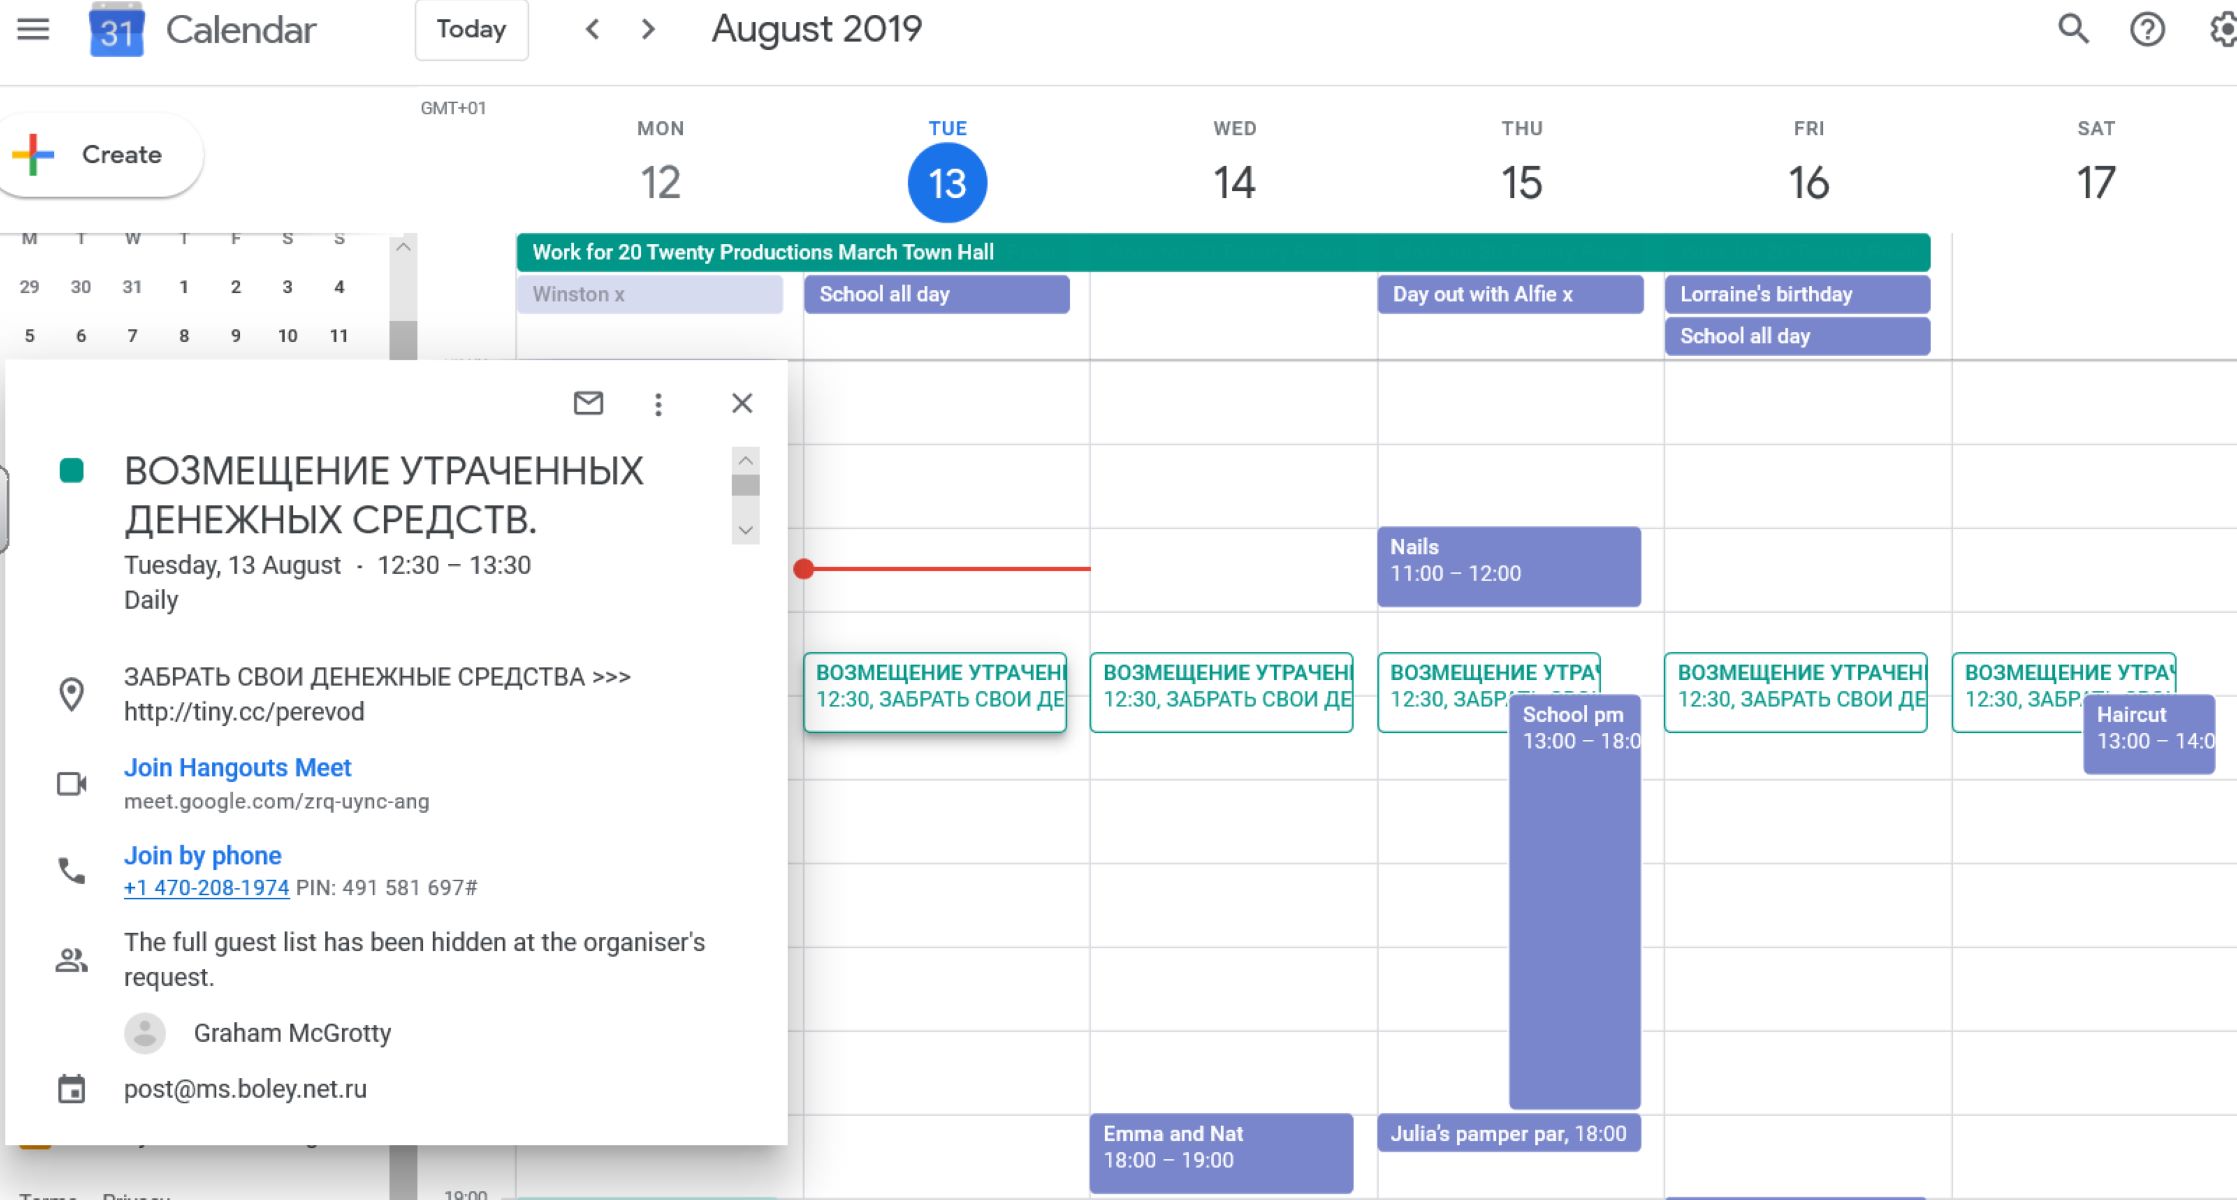
The first step in deleting all events from your Google Calendar is to open the Google Calendar application or website. You can access Google Calendar through your web browser on a computer or by downloading the Google Calendar app on your mobile device from the app store.
If you are using a web browser, navigate to https://calendar.google.com and sign in with your Google account credentials. Once signed in, you will be taken to your default calendar view.
If you are using a mobile device, locate and open the Google Calendar app. Sign in if prompted, and you will be directed to the main calendar screen.
Opening Google Calendar will give you access to all the necessary tools and options required to delete the events.
Ensure that you are connected to the internet to access and make changes to your Google Calendar successfully. A stable internet connection is vital to ensure the changes are saved to your account and reflected across all your devices.
Now that you have successfully opened Google Calendar, you are ready to proceed to the next step and select the calendar from which you want to delete the events.
Step 2: Select calendar to delete events from
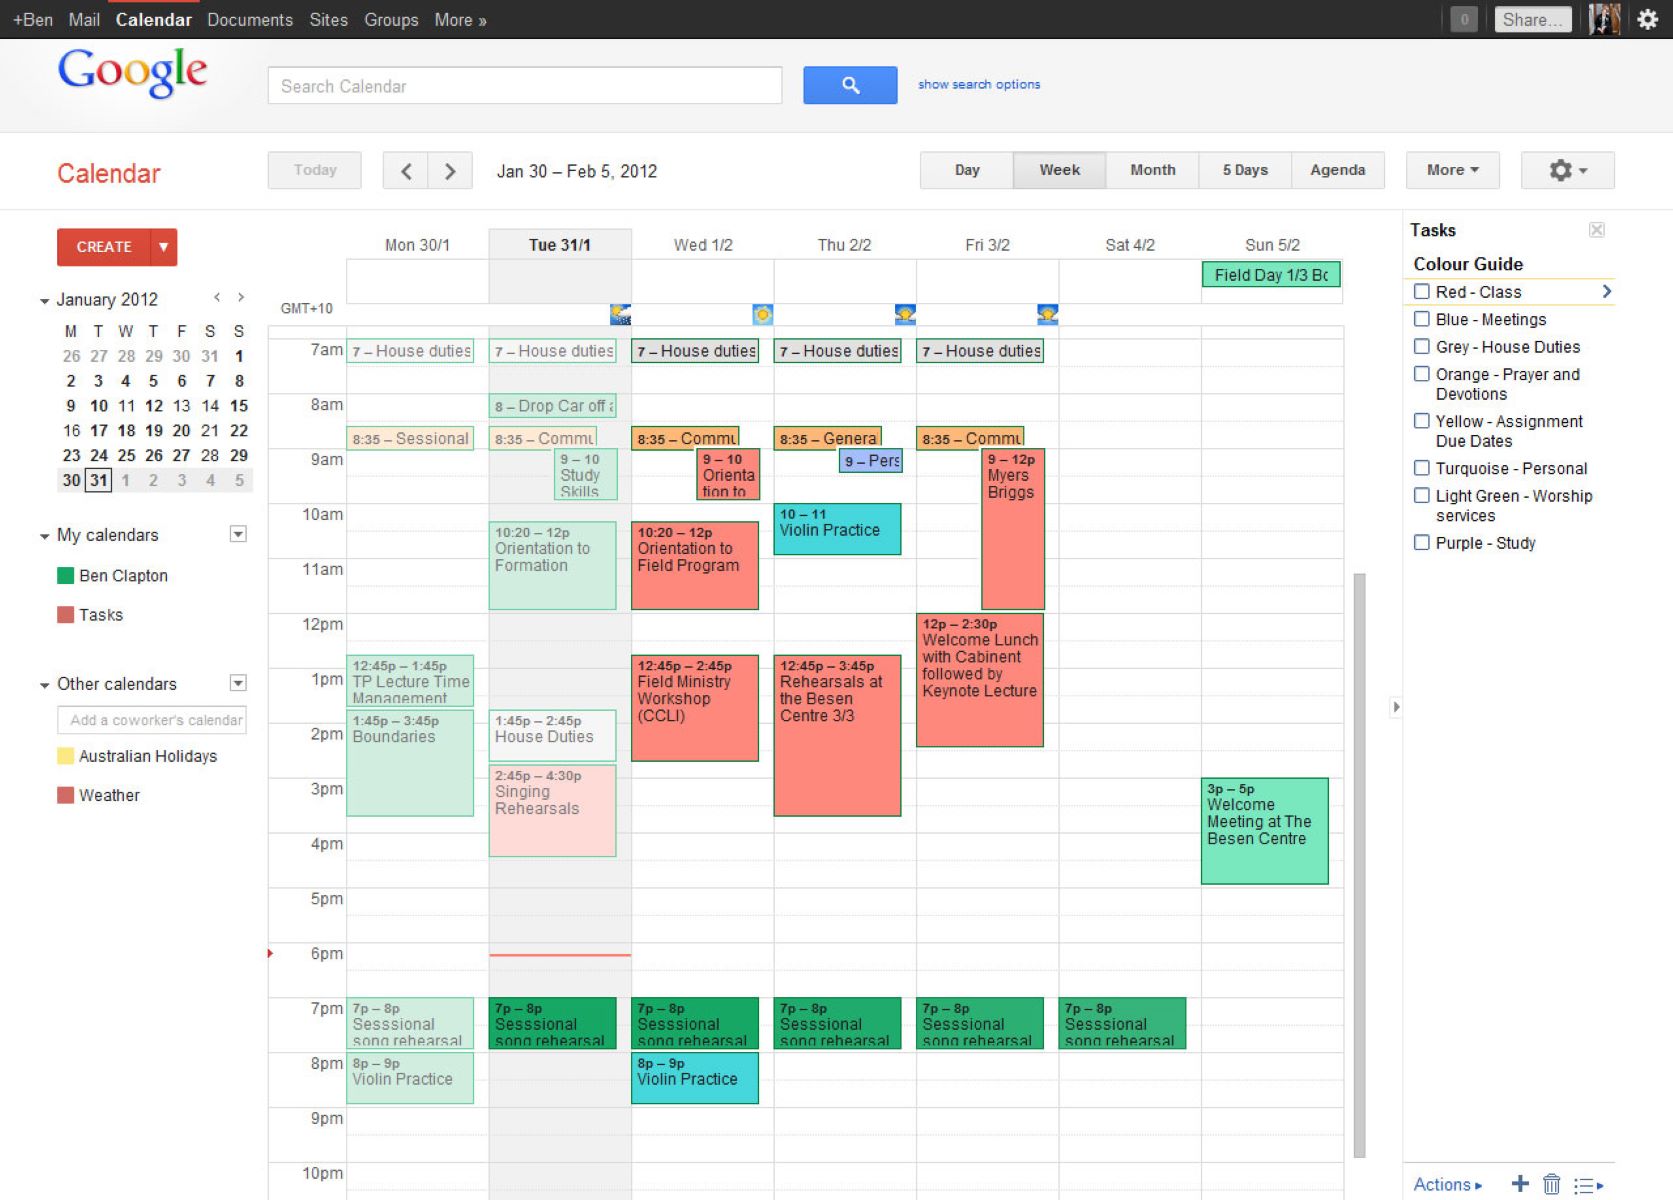
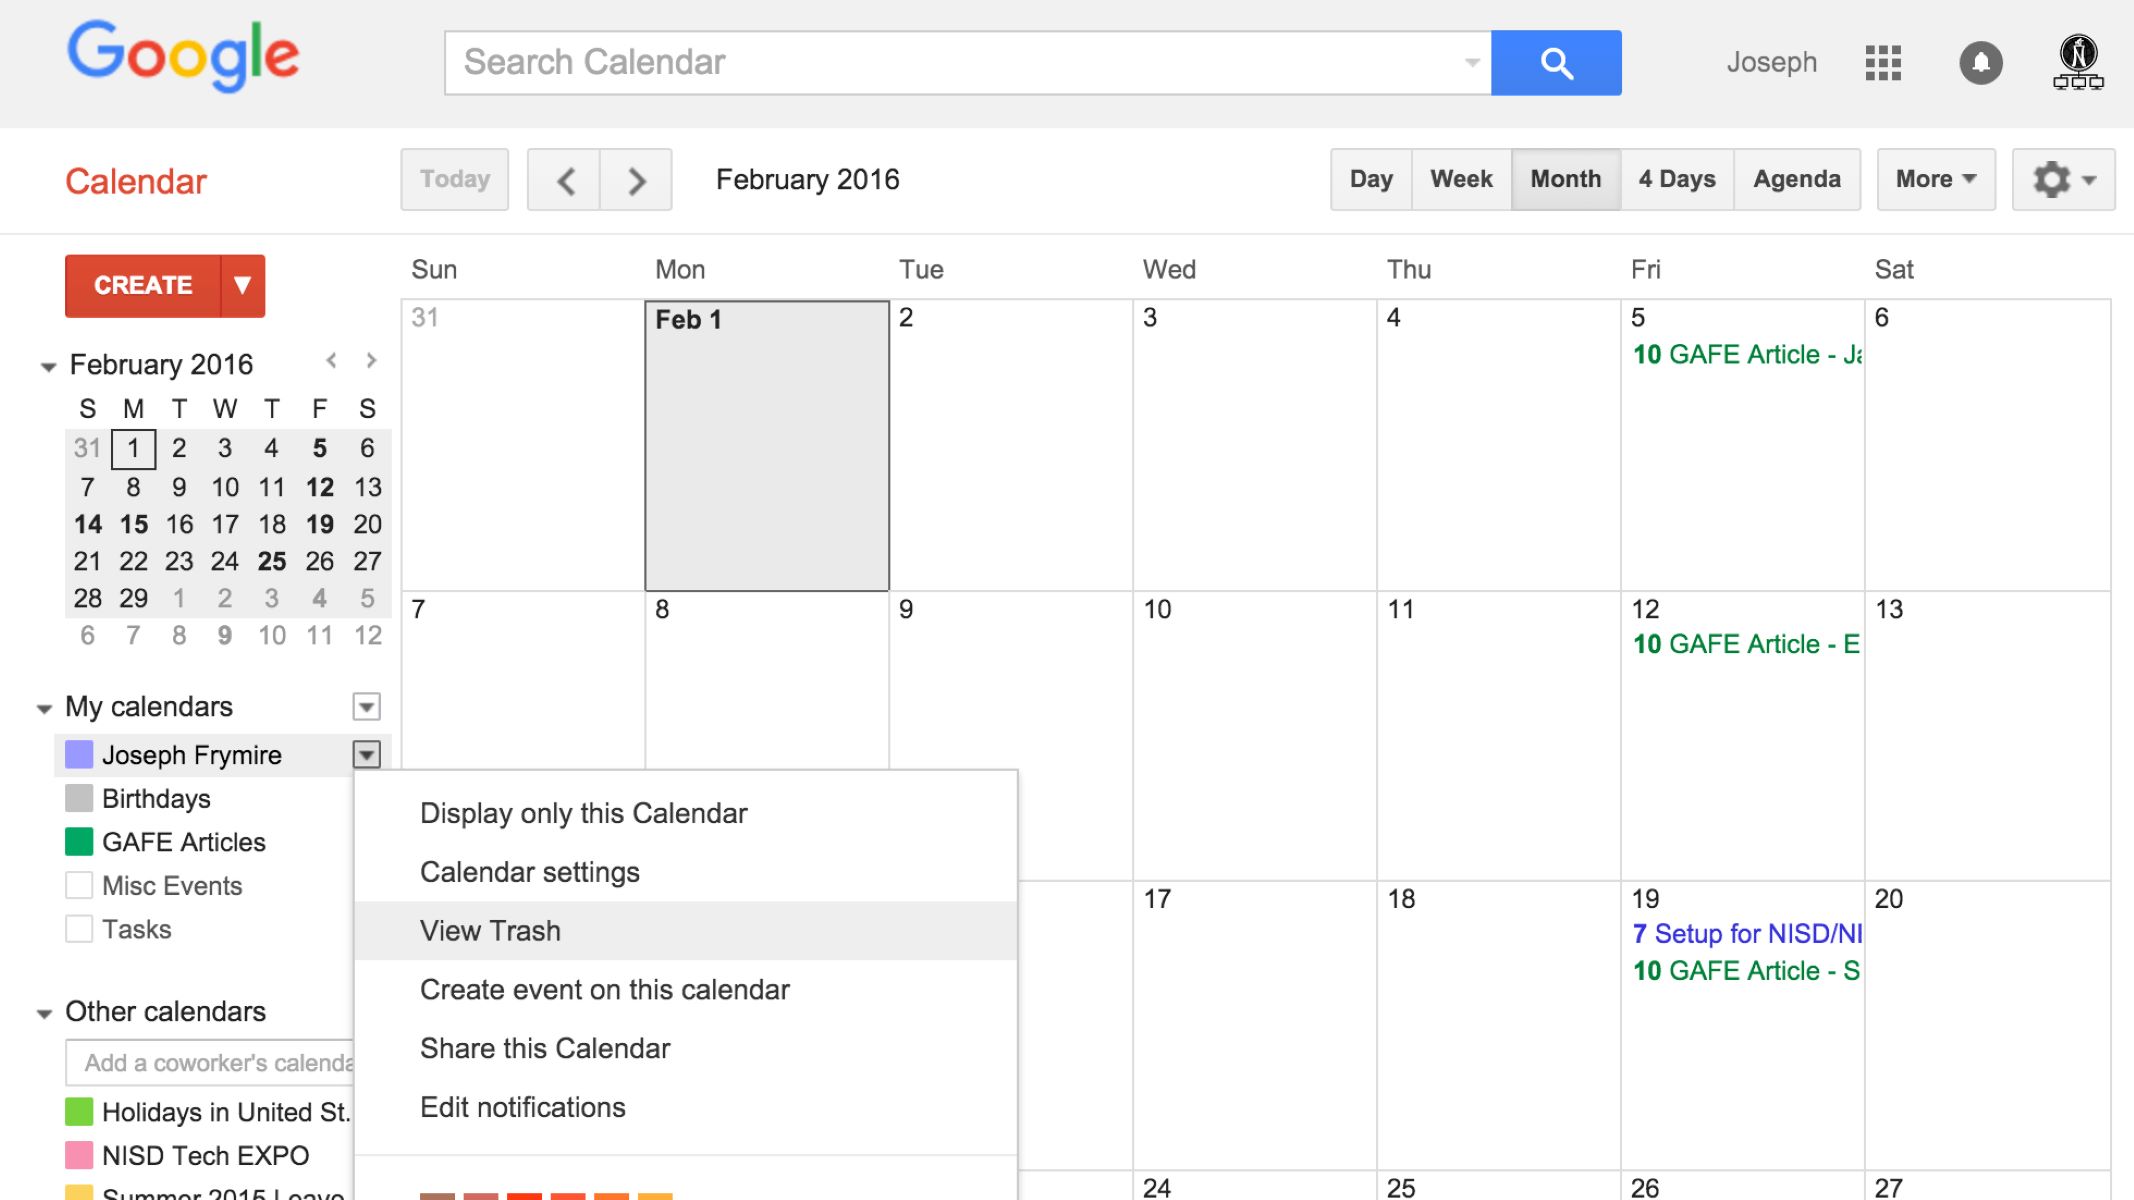
Once you have opened Google Calendar, the next step is to select the specific calendar from which you want to delete the events. If you have multiple calendars linked to your Google account, such as work, personal, or shared calendars, it’s important to choose the correct one to avoid deleting events from the wrong calendar.
To select the calendar you wish to delete events from, follow these steps:
- On the left-side menu of the Google Calendar web interface or app, you will see a list of calendars associated with your Google account.
- Scroll through the list and locate the calendar you want to delete events from. The calendar’s name will be displayed next to a checkmark or color, making it easier to identify.
- Once you have identified the correct calendar, click on the checkbox to the left of the calendar name on the web interface, or tap on the calendar name on the mobile app.
After selecting the calendar, it will be highlighted or checked, indicating that it is the active calendar for performing actions such as deleting events. This ensures that any events deleted will be specific to the selected calendar, and events from other calendars will remain unaffected.
By selecting the calendar you wish to delete events from, you have now prepared the foundation for removing the events in the subsequent steps. It’s important to double-check that you have chosen the correct calendar before proceeding to the next step.
Step 3: Filter events by date range
After selecting the specific calendar from which you want to delete events, the next step is to filter the events by a date range. This allows you to specify which events to delete based on their start and end dates.
To filter events by date range, follow these steps:
- In the Google Calendar web interface or app, locate the search bar or the “Search” button.
- Click on the search bar or tap on the “Search” button to activate the search feature.
- Enter the desired date range in the provided search field. You can enter specific dates or relative dates such as “this week” or “last month”.
- As you type, Google Calendar will start displaying the events that match your search criteria.
By filtering events by date range, you can narrow down the list of events to be deleted and ensure that only the events within the specified timeframe are affected. This is especially useful if you want to delete events from a specific period or if you only want to remove past events and keep future ones.
Take the time to carefully tailor the date range to match your deletion requirements. Make sure to review the events displayed after filtering to confirm that they are the ones you want to delete.
Once you have filtered the events by date range, you are ready to move on to the next step and select all the events within the specified timeframe for deletion.
Step 4: Select all events within the date range
After filtering events by the desired date range, the next step is to select all the events that fall within that timeframe. This will allow you to prepare for the deletion of multiple events simultaneously.
To select all events within the date range, follow these steps:
- Review the list of events displayed after applying the date range filter. Ensure that the events shown are the ones you want to delete.
- In the Google Calendar web interface, on the top left-hand side of the event list, you will see a checkbox. Click on this checkbox to select all the events on the page.
- If the events span multiple pages, you will see a message prompting you to select all events. Click on the link provided in the message to select all events across all pages.
- In the Google Calendar app, look for a menu or options button (typically represented by three dots) on the top right-hand side. Tap on this button to reveal a menu.
- Select the “Select All” or similar option in the menu to choose all the events displayed on the page.
By selecting all the events within the specified date range, you have grouped them together for deletion in the upcoming steps. This makes it easier to delete them in one go, rather than deleting each event individually.
It’s important to double-check that all the desired events have been selected before proceeding to the next step. Verifying the selection ensures that the correct events will be removed from your Google Calendar.
Now that you have successfully selected all the events within the date range, you can move on to the next step and initiate the deletion process.
Step 5: Delete selected events
Now that you have selected all the events within the date range that you want to delete, it’s time to proceed with deleting them from your Google Calendar. By following these steps, you can easily remove all the selected events in just a few clicks.
To delete the selected events, follow these steps:
- In the Google Calendar web interface, locate the menu or action button. It is typically represented by three vertical dots or an icon that resembles a trash bin.
- Click on the menu or action button to reveal a drop-down menu of options.
- Select the “Delete” or “Delete selected events” option from the menu. This will initiate the deletion process.
- If prompted, confirm your selection to delete the events. This step is essential to prevent accidental deletions.
In the Google Calendar app, the process is similarly straightforward:
- Locate and tap on the menu or action button on the top right-hand side of the screen.
- From the menu that appears, select the “Delete” or “Delete events” option.
- If prompted, confirm your selection to delete the events. As with the web interface, this step is necessary to avoid unintended deletions.
By following these steps, you will delete all the selected events from your Google Calendar. It may take a few moments for the deletion process to complete, depending on the number of events being removed.
Once the deletion is finished, you can proceed to the next step to verify that all the events have been successfully deleted.
Step 6: Confirm deletion of events
After deleting the selected events, it’s essential to confirm that they have been successfully removed from your Google Calendar. This step ensures that all the events you intended to delete are no longer present in your calendar.
Here’s how you can confirm the deletion of events:
- In the Google Calendar web interface, navigate back to your calendar view. You should no longer see the deleted events within the selected date range.
- If you have multiple pages of events, click through the pages to ensure that none of the deleted events are still visible.
- In the Google Calendar app, return to the main calendar screen. Verify that the selected events have been removed from the displayed calendar.
- Scroll through the calendar’s timeline to check that the deleted events are no longer present.
If you no longer see the events you deleted within the specified date range, it indicates that the deletion process was successful. Congratulations! You have successfully deleted the events from your Google Calendar.
If, by any chance, you still notice the presence of some or all of the deleted events, it’s possible that the deletion process did not complete properly. In such cases, you may need to repeat the previous steps to ensure all the events are deleted.
Remember, once you confirm the successful deletion, it’s important to note that the process is irreversible. Therefore, it’s always a good practice to double-check before initiating the deletion and to have a backup of any important events.
Now that you have confirmed the deletion of events, you can move on to the final step and conclude the process of deleting all events from your Google Calendar.
Step 7: Verify all events are deleted
After completing the deletion process, it’s crucial to verify that all the events have been successfully removed from your Google Calendar. This final step ensures that no remaining events are left behind and that your calendar is free of the events you intended to delete.
Here’s how you can verify the deletion of events:
- Open your Google Calendar on the web interface or app as you did in the initial step.
- Scroll through the calendar’s timeline and navigate through different dates to confirm that none of the deleted events are visible.
- If you have multiple calendars associated with your account, repeat the above step for each calendar to ensure all the deleted events have been removed.
- Check both the daily and monthly views of your calendar to cover different timeframes.
By thoroughly examining your Google Calendar, you can be certain that all the selected events have been deleted and that your calendar is free from them. If you no longer see any traces of the deleted events, it confirms the successful deletion process.
If, however, you notice any remaining events that were supposed to be deleted, double-check that you followed the previous steps correctly. Repeat the necessary steps to ensure complete deletion, or consider seeking further assistance if the issue persists.
By verifying that all events are deleted, you can have peace of mind knowing that your Google Calendar is up to date and no longer contains the events you wanted to remove. Now, you can enjoy a clean and organized calendar without any unnecessary clutter.
Congratulations on successfully deleting all the events from your Google Calendar! You have completed the process and can now take full advantage of a fresh start with your calendar.
Conclusion
Deleting all events from your Google Calendar can be a straightforward process when you follow the steps outlined in this guide. By opening Google Calendar, selecting the desired calendar, filtering events by date range, selecting all events within that range, and then deleting them, you can effectively clear your calendar of unwanted or outdated entries.
It’s important to remember that the deletion process is irreversible, so it’s crucial to double-check your actions and ensure that you have selected the correct events before proceeding. Additionally, it’s always a good practice to have a backup of any important events or data before performing a mass deletion.
Verifying that all events have been successfully deleted is essential to confirm the completion of the process. Take the time to thoroughly review your Google Calendar and ensure that no traces of the deleted events remain. This will give you peace of mind and a sense of organization as you move forward with a clean calendar.
By following these steps, you can easily manage and maintain your Google Calendar, keeping it updated and decluttered. Whether you’re starting fresh, clearing out old entries, or simply organizing your schedule, the ability to delete all events provides a valuable tool for calendar management.
Now, armed with the knowledge and steps provided in this guide, you can confidently take control of your Google Calendar and make it a more efficient and streamlined tool for managing your events, appointments, and commitments.
So go ahead, open your Google Calendar, follow the steps, and begin the process of deleting all unwanted events. Enjoy a more organized and clutter-free calendar experience!