Introduction
Google Photos is a widely popular online service that allows users to store, organize, and share their photos and videos. It offers a convenient way to free up storage space on your devices without losing your precious memories. However, there may come a time when you decide to delete your Google Photos account for various reasons, such as switching to a different cloud storage provider or simply wanting to declutter your digital presence.
In this article, we will guide you through the step-by-step process of deleting a Google Photos account. By following these instructions, you will be able to permanently remove your Google Photos data and ensure that none of your photos or videos are accessible through the platform anymore.
Before proceeding with the deletion process, it is important to note that deleting your Google Photos account will also remove all the photos and videos stored within it. Therefore, it is crucial to back up any important content beforehand to avoid irreversible loss. Once you delete your Google Photos account, it cannot be recovered, so proceed with caution.
Now, let’s dive into the step-by-step instructions on how to delete your Google Photos account.
Step 1: Go to the Google Photos website
The first step in deleting your Google Photos account is to visit the Google Photos website. Open your preferred web browser and enter https://photos.google.com/ in the address bar. This will take you to the Google Photos homepage.
If you are not already signed in to your Google account, you will be prompted to do so. Enter your email address and password to log in. Once logged in, you will have access to your Google Photos account and can proceed with the deletion process.
It’s important to note that the steps mentioned in this guide are applicable to the web version of Google Photos. The process may vary slightly if you are using the mobile app or a different device. However, the overall concept and options should remain the same.
Now that you are on the Google Photos website and have signed in to your account, let’s move on to the next step to begin the deletion process.
Step 2: Sign in to your Google account
In order to delete your Google Photos account, you need to be signed in to your Google account. If you are not already signed in, follow these steps:
- Open your web browser and go to the Google homepage.
- Click on the “Sign In” button located at the top right corner of the page.
- Enter your Google email address or phone number in the designated field and click “Next”.
- Enter your password in the corresponding field and click “Next” to proceed.
This will log you in to your Google account, giving you access to all the services associated with it, including Google Photos.
If you are using a public device or a device that is shared with others, make sure to uncheck the “Stay signed in” option for security purposes. This ensures that you will be prompted to enter your login credentials every time you want to access your Google account.
Signing in to your Google account is a necessary step to initiate the deletion process for your Google Photos account. Once you successfully sign in, you can move on to the next steps to complete the deletion process.
Step 3: Access the Google Account settings
Once you are signed in to your Google account, you need to navigate to the Google Account settings to continue with the deletion process. Follow these steps:
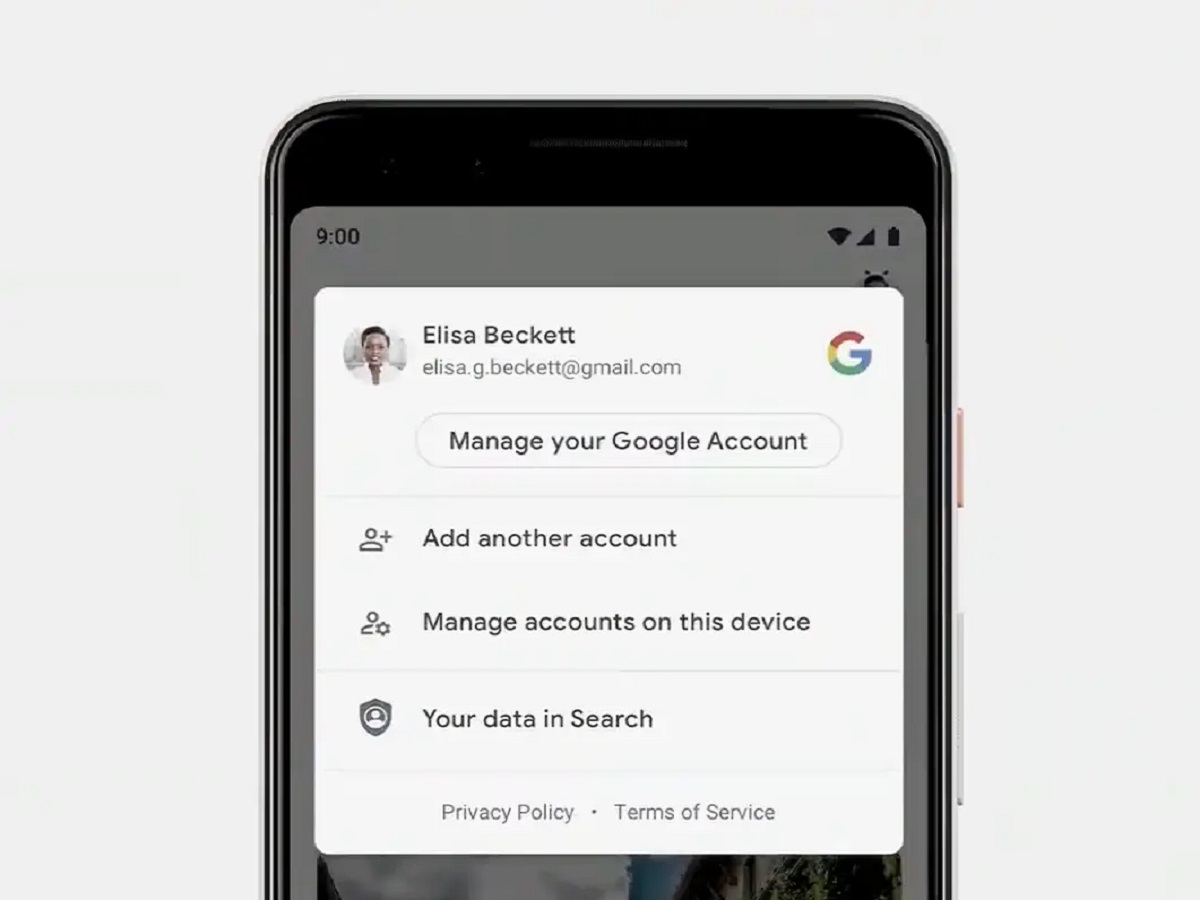
- Click on your profile picture or the initial of your name at the top right corner of the Google homepage. A dropdown menu will appear.
- From the dropdown menu, select “Manage Your Google Account”. You will be redirected to the Google Account settings page.
Alternatively, you can directly access the Google Account settings by going to https://myaccount.google.com in your web browser and signing in to your Google account if prompted.
The Google Account settings page is where you can manage various aspects of your Google account, including privacy and security settings, account information, and connected services.
Once you have successfully accessed the Google Account settings, you are ready to proceed to the next steps in order to delete your Google Photos account. These steps will guide you through the remaining process to ensure that your Google Photos data is permanently removed.
Step 4: Click on “Data & Personalization”
After accessing the Google Account settings, the next step is to navigate to the “Data & Personalization” section. This is where you can manage and control the data associated with your Google account, including Google Photos. Follow these steps:
- On the left-hand side of the Google Account settings page, you will find a list of different sections. Scroll down until you see the section labeled “Data & Personalization”. Click on it to expand the options within this section.
Clicking on “Data & Personalization” will reveal a range of settings and options related to the data associated with your Google account. This section allows you to control and manage the privacy and personalization settings for your account.
It’s essential to access the “Data & Personalization” section to proceed with deleting your Google Photos account. This section houses the necessary options and settings to initiate the deletion process effectively.
Now that you have successfully found and clicked on “Data & Personalization”, you are ready to move on to the next step to proceed with the deletion of your Google Photos account.
Step 5: Scroll down to “Download, delete, or make a plan for your data”
Once you are in the “Data & Personalization” section of your Google Account settings, the next step is to locate the option that allows you to manage your data, including the option to delete your Google Photos account. Follow these steps:
- Scroll down the “Data & Personalization” page until you reach the section titled “Download, delete, or make a plan for your data”.
This section provides you with options for managing and controlling the data associated with your Google account. It encompasses various features that allow you to take actions such as downloading your data, deleting specific services, or making plans for your data.
By scrolling down to this section, you are getting closer to the option that will enable you to delete your Google Photos account. It’s important to proceed carefully from this point on, as the steps you take will have a direct impact on your Google Photos data.
Now that you have successfully located the “Download, delete, or make a plan for your data” section, you are ready to move on to the next step and initiate the deletion process for your Google Photos account.
Step 6: Click on “Delete a service or your account”
Once you have scrolled down to the “Download, delete, or make a plan for your data” section in the Google Account settings, the next step is to select the option that allows you to delete a service or your entire Google account. Follow these steps carefully:
- Within the “Download, delete, or make a plan for your data” section, look for the option labeled “Delete a service or your account”. Click on it to proceed.
Clicking on “Delete a service or your account” will present you with options to manage and delete various Google services or delete your entire Google account altogether. In our case, we want to focus on deleting your Google Photos account.
Keep in mind that deleting a service or your entire Google account is a significant step, and it is irreversible. Exercise caution and ensure that you have backed up any important data before proceeding further.
Now that you have located and clicked on “Delete a service or your account”, you are ready to move on to the next step to specifically delete your Google Photos account.
Step 7: Select “Delete a Google service”
After clicking on “Delete a service or your account,” you will be presented with different options for managing your Google services and accounts. To delete your Google Photos account specifically, follow these steps:
- Within the options provided, look for and select the option labeled “Delete a Google service”. Click on it to continue.
By selecting “Delete a Google service,” you are indicating your intention to remove a specific service associated with your Google account—in this case, Google Photos. This step allows you to tailor the deletion process to the service you want to eliminate.
It’s important to note that deleting a Google service will only remove that specific service from your account. Your Google account itself remains intact, along with any other associated services, such as Gmail or Google Drive.
Now that you have selected “Delete a Google service,” you are ready to proceed to the next step, where you will specifically locate and delete your Google Photos account.
Step 8: Enter your password again for verification
After selecting “Delete a Google service,” you will be asked to provide your password again as a security measure for verification. This step helps ensure that only the account owner can initiate the deletion process. Follow these steps:
- In the prompt or form that appears after selecting “Delete a Google service,” enter your account password in the designated field.
- Once you have entered your password, click on the “Next” or “Continue” button to proceed.
Entering your password again is an added layer of security to prevent unauthorized access or accidental deletion of your Google Photos account. This step helps confirm your identity and ensure that you have the necessary authorization to make changes to your account.
Remember that your password should be kept confidential and not shared with anyone. If you have any concerns about the security of your password, it is always a good idea to update it regularly and choose a strong, unique password.
Now that you have entered your password for verification, you are ready to move on to the next step, where you will locate and click on the option to delete your Google Photos account.
Step 9: Locate and click on “Delete Google Photos”
After entering your password for verification, you are one step closer to deleting your Google Photos account. The next step is to locate and click on the option specifically meant for deleting your Google Photos account. Follow these steps:
- Look for the option labeled “Delete Google Photos” within the menu or list of services.
- Once you have located “Delete Google Photos,” click on it to proceed with the deletion process.
Clicking on “Delete Google Photos” will initiate the deletion process for your Google Photos account. This step ensures that you are targeting the correct service and confirms your intention to permanently remove all the photos and videos associated with your account.
It’s crucial to double-check that you have selected the correct option, as deleting your Google Photos account cannot be undone. Ensure that you have backed up any essential photos or videos before proceeding.
Now that you have successfully located and clicked on “Delete Google Photos,” you are ready to proceed to the final step to confirm the deletion of your Google Photos account.
Step 10: Confirm the deletion of your Google Photos account
After clicking on “Delete Google Photos,” you are almost at the end of the process to delete your Google Photos account. The final step is to confirm your decision to delete your account and permanently remove all your photos and videos. Follow these steps:
- A confirmation prompt will appear, informing you about the consequences of deleting your Google Photos account. Take the time to read the information provided carefully.
- If you are certain that you want to proceed with the deletion, click on the “Delete” or “Confirm” button to confirm your decision.
Confirming the deletion of your Google Photos account is a critical step, as it signifies your final authorization to permanently remove all your data from the platform. This action cannot be undone once completed, so ensure that you have backed up any photos or videos you wish to retain.
It’s important to note that it may take some time for Google to process the deletion of your account and remove all your data from their systems. During this time, abstain from using Google Photos or uploading any new content.
Congratulations! You have successfully learned how to delete your Google Photos account.
Remember, once your Google Photos account is deleted, any photos or videos stored in it will be permanently erased. Make sure to save any important memories before initiating the deletion process.
By following these step-by-step instructions, you can confidently delete your Google Photos account and take control of your digital presence.
Conclusion
Deleting your Google Photos account is a decision that may arise due to various reasons, such as switching to a different cloud storage provider or aiming to declutter your digital presence. While the process may seem daunting at first, following these steps can help you navigate through the deletion process smoothly.
Throughout this guide, we have walked you through the ten steps required to delete your Google Photos account:
- Go to the Google Photos website
- Sign in to your Google account
- Access the Google Account settings
- Click on “Data & Personalization”
- Scroll down and click on “Download, delete, or make a plan for your data”
- Select “Delete a service or your account”
- Enter your password again for verification
- Locate and click on “Delete a Google service”
- Locate and click on “Delete Google Photos”
- Confirm the deletion of your Google Photos account
By following these steps and taking the necessary precautions to safeguard your data, you can confidently delete your Google Photos account and ensure the permanent removal of your photos and videos from the platform.
Remember, it is crucial to back up any important photos and videos before initiating the deletion process. Additionally, take note that it may take some time for the deletion to be processed and for your data to be completely removed from Google’s systems.
We hope this guide has been helpful in assisting you with deleting your Google Photos account. If you have any further questions or concerns, referring to Google’s official documentation or reaching out to their support team can provide additional assistance.
Thank you for following this guide, and we wish you the best in managing your digital presence and organizing your personal data.