Introduction
Google Photos has become one of the go-to platforms for storing and organizing our treasured memories. Whether it’s family vacations, important milestones, or simply capturing random moments, Google Photos provides a convenient way to preserve and revisit these photos whenever we want.
However, there may be instances where you want to hide certain pictures within your Google Photos library. Perhaps there are images that you consider personal or sensitive, or maybe you just want to declutter your photo collection by hiding some pictures from view. Whatever the reason, Google Photos offers several methods to help you keep these pictures private.
In this article, we will explore different ways to hide pictures in Google Photos, ensuring that you can maintain the privacy and organization of your photo collection. We will walk you through step-by-step guides and provide useful tips for managing and organizing your hidden pictures.
Let’s dive into the world of Google Photos and discover how you can hide pictures to safeguard your cherished memories.
Why Hide Pictures in Google Photos?
There are several reasons why you might want to hide pictures in Google Photos. Here are a few common scenarios:
- Privacy: Some pictures may contain personal or sensitive information that you prefer to keep private. By hiding them in Google Photos, you can ensure that only you have access to these images.
- Organizational Purposes: Your photo collection may contain a mix of important and less significant pictures. By hiding certain pictures, you can declutter your library and make it easier to find and showcase the images that matter most to you.
- Sharing Limitations: While Google Photos allows you to share your albums with others, there may be specific pictures that you’d rather not share. Hiding these pictures ensures that they won’t accidentally be included when sharing albums or creating collages.
- Protecting Memories: There may be photos that evoke strong emotions or hold sentimental value but are not suitable for public viewing. By hiding these pictures, you can preserve cherished memories while keeping them private.
Whatever your reason, Google Photos offers flexible options for hiding pictures, giving you full control over your photo collection.
Now that we understand why hiding pictures in Google Photos can be beneficial, let’s explore the various methods you can use to keep your photos private.
Step-by-Step Guide to Hiding Pictures in Google Photos
Google Photos provides multiple methods to hide pictures and keep them private. Let’s go through each method step by step:
Method 1: Archive Pictures
Archiving pictures in Google Photos allows you to hide them from the main view while still keeping them accessible in a separate archived folder. Follow these steps to archive pictures:
- Open the Google Photos app on your device or access the web version.
- Select the picture or pictures you want to hide by long-pressing on them or using the checkbox icon.
- Tap on the three-dot menu icon in the top right corner and choose the “Archive” option.
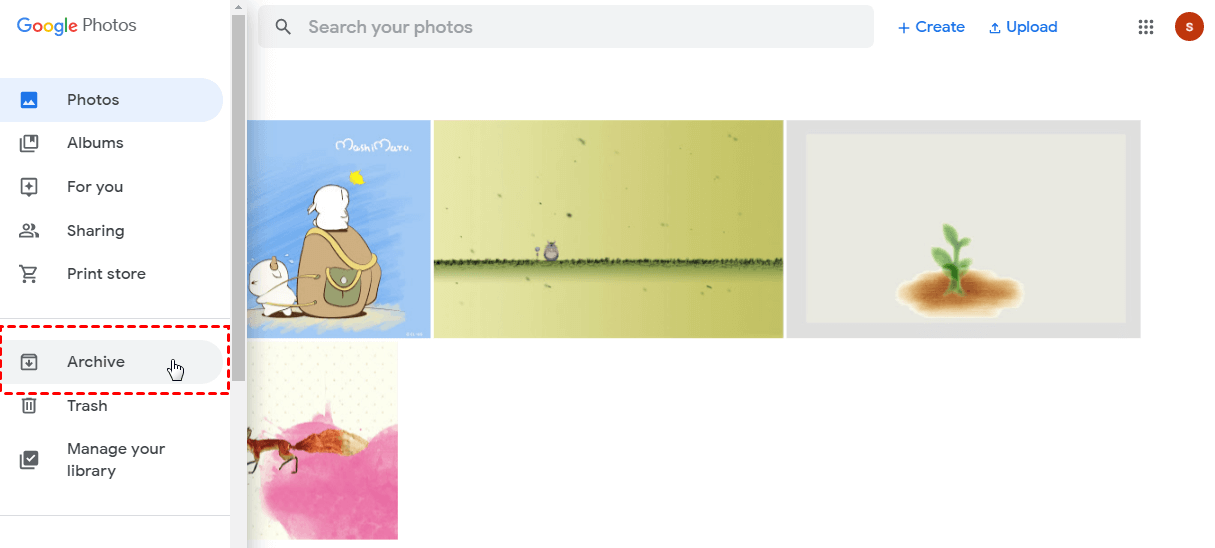
- The archived pictures will now be moved to the Archive folder, which you can access by tapping on the three-line menu icon and selecting “Archive” from the list.
Method 2: Add Pictures to a Hidden Album
If you prefer to keep specific pictures hidden in a separate album, you can create a hidden album and add the desired pictures to it. Follow these steps:
- Open the Google Photos app or access the web version.
- Select the pictures you want to hide by long-pressing on them or using the checkbox icon.
- Tap on the “+” sign or the “Add to” option, depending on your device.
- Create a new album and give it a name.
- Toggle on the “Hide” option to make the album hidden.
- Tap on “Add” or “Done” to confirm.
- The selected pictures will now be added to the hidden album, which you can access by tapping on the three-line menu icon and selecting “Albums” from the list.
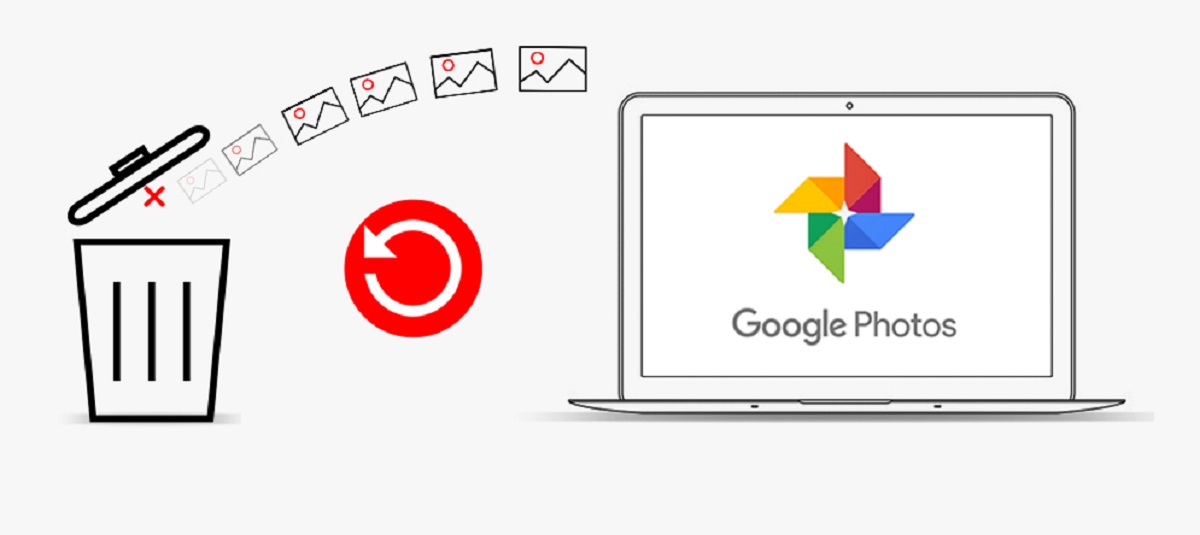
Method 3: Delete Pictures Permanently
If you have pictures that you want to remove from Google Photos completely, you can choose to delete them permanently. Remember that once deleted, these pictures cannot be recovered. Follow these steps:
- Open the Google Photos app or access the web version.
- Select the picture or pictures you want to delete by long-pressing on them or using the checkbox icon.
- Tap on the trashcan icon or the delete option.
- Confirm the deletion by tapping “Delete” or “OK” when prompted.
- The selected pictures will now be permanently deleted from Google Photos.
Now that you have learned how to hide pictures in Google Photos using various methods, let’s explore some additional tips for organizing and managing your hidden pictures.
Method 1: Archive Pictures
Archiving pictures in Google Photos is a simple yet effective method to hide them from the main view while still keeping them accessible in a separate archived folder. Here is a step-by-step guide on how to archive pictures:
- Open the Google Photos app on your device or access the web version.
- Select the picture or pictures you want to hide by long-pressing on them or using the checkbox icon.
- Tap on the three-dot menu icon in the top right corner and choose the “Archive” option.
- The selected pictures will now be moved to the Archive folder, which you can access by tapping on the three-line menu icon and selecting “Archive” from the list.
Archiving pictures is a convenient way to keep them hidden without permanently deleting them. It allows you to declutter your main photo view, making it easier to navigate and find the pictures you want to showcase.
While archived pictures are hidden from the main view, they are still accessible whenever you need them. You can browse through the Archive folder, search for specific archived pictures, or view them in albums where they may be included.
It’s important to note that archiving does not encrypt or protect the pictures in any additional way. If privacy is a concern and you want to ensure that your pictures are secure, you may consider using other methods of hiding, such as creating a hidden album, for more advanced privacy options.
By utilizing the archive feature in Google Photos, you can keep certain pictures hidden while maintaining easy access to them whenever necessary. This provides a simple and effective way to organize your photo collection and keep it visually streamlined.
Now that you are familiar with archiving pictures, let’s explore another method that allows you to create a hidden album for your private photos.
Method 2: Add Pictures to a Hidden Album
If you prefer to keep specific pictures hidden in a separate album, Google Photos allows you to create a hidden album and add the desired pictures to it. This method gives you more control over the privacy of your hidden photos. Here is a step-by-step guide on how to add pictures to a hidden album:
- Open the Google Photos app on your device or access the web version.
- Select the pictures you want to hide by long-pressing on them or using the checkbox icon.
- Tap on the “+” sign or the “Add to” option, depending on your device.
- Create a new album and give it a name.
- Toggle on the “Hide” option to make the album hidden.
- Tap on “Add” or “Done” to confirm.
- The selected pictures will now be added to the hidden album, which you can access by tapping on the three-line menu icon and selecting “Albums” from the list.
Creating a hidden album provides an additional layer of privacy for your pictures. The hidden album does not appear in your main photo view or album section, keeping your private photos separate from the rest of your collection.
Only you can access the hidden album, ensuring that the pictures remain private and hidden from others who may be browsing through your Google Photos account.
In addition to hiding individual pictures, you can also add entire folders, events, or even face groups to a hidden album. This allows you to easily organize and manage your private photos within a dedicated hidden space.
Remember to toggle on the “Hide” option when creating the album to ensure that it remains hidden. You can always access and view your hidden album by navigating to the “Albums” section in the menu and scrolling down to the hidden albums section.
Now that you know how to create a hidden album and add pictures to it, let’s explore another method – permanently deleting pictures that you want to remove from Google Photos completely.
Method 3: Delete Pictures Permanently
If you have pictures that you want to remove from Google Photos completely, you can choose to delete them permanently. This method is suitable for pictures that you no longer wish to keep in your photo collection. However, it’s important to note that once deleted, these pictures cannot be recovered. Here is a step-by-step guide on how to delete pictures permanently:
- Open the Google Photos app on your device or access the web version.
- Select the picture or pictures you want to delete by long-pressing on them or using the checkbox icon.
- Tap on the trashcan icon or the delete option.
- Confirm the deletion by tapping “Delete” or “OK” when prompted.
- The selected pictures will now be permanently deleted from Google Photos and cannot be recovered.
Deleting pictures permanently is useful for removing photos that are no longer needed, duplicated, or simply taking up unnecessary storage space. It allows you to streamline your photo collection and free up storage for new and important pictures.
Before deleting pictures permanently, ensure that you have backed up any important or sentimental images to another storage location. Once pictures are deleted from Google Photos, they will not be retrievable.
If you prefer to keep a backup of the deleted pictures, you can consider using a third-party backup service or manually saving them to another storage device or cloud platform.
Deleting pictures permanently can be a finalizing decision, so it is important to review your selection carefully before confirming the deletion.
Now that you have learned how to delete pictures permanently, let’s move on to some valuable tips for managing and organizing your hidden pictures in Google Photos.
Tips for Organizing and Managing Hidden Pictures
Once you have hidden pictures in Google Photos, it’s essential to effectively organize and manage them for easy retrieval and efficient photo management. Here are some helpful tips to consider:
1. Give Hidden Albums Descriptive Names:
When creating hidden albums, give them clear and descriptive names. This will make it easier to identify the content or theme of the album, even though they are hidden from view. For example, you can create albums named “Private Memories” or “Confidential Documents”.
2. Utilize Keywords and Tags:
Add keywords and tags to the hidden pictures to improve searchability. This can be especially helpful when you have a large collection of hidden images and need to locate specific pictures quickly. Think of relevant keywords or categories that describe the content of the hidden photos.
3. Use Facial Recognition for Private People Photos:
If you have hidden pictures of people that you want to keep private, utilize facial recognition features in Google Photos. This will help you easily identify and tag individuals, making it simpler to organize and manage these private photos.
4. Regularly Review and Update Hidden Pictures:
Take some time periodically to review and update your hidden pictures. Remove any images that are no longer necessary to keep hidden or add new ones that you want to keep private. This will ensure that your hidden photos remain organized and relevant.
5. Create Collaborative Albums for Shared Confidential Content:
If you need to share confidential content with specific individuals, create collaborative albums in Google Photos. This allows you to share and collaborate on private content while maintaining control over who can access and view the pictures.
6. Secure Your Google Photos Account:
Ensure the security of your Google Photos account by using strong, unique passwords and enabling two-factor authentication. This adds an extra layer of protection, preventing unauthorized access to your hidden photos and other important data.
7. Explore Additional Privacy Settings:
Take the time to explore the privacy settings in Google Photos and adjust them according to your preferences. Familiarize yourself with the available options, such as face grouping, sharing settings, and photo recognition, to customize the privacy of your hidden pictures.
By implementing these tips, you can effectively manage and organize your hidden pictures in Google Photos, ensuring easy access and enhanced privacy for your most personal and sensitive images.
Now that you have learned some valuable tips for organizing and managing hidden pictures, let’s wrap up this article on hiding pictures in Google Photos.
Conclusion
Google Photos offers several methods to hide pictures, allowing you to maintain privacy and organization within your photo collection. Whether you choose to archive pictures, create hidden albums, or delete pictures permanently, these options give you the flexibility to control what others can see in your Google Photos account.
We discussed the step-by-step process for each method, guiding you through archiving pictures, creating hidden albums, and permanently deleting pictures. Each method has its own advantages, depending on your specific needs and preferences.
It’s essential to be mindful of the content you choose to hide, ensuring that personal or sensitive images remain private and protected. Additionally, following tips for organizing and managing your hidden pictures will help you stay organized and easily retrieve your photos when needed.
Remember to regularly review and update your hidden pictures to keep your collection relevant and decluttered. Utilize descriptive names, tags, and keywords to make searching for specific hidden pictures a breeze.
Lastly, prioritize the security of your Google Photos account by using strong passwords and enabling two-factor authentication. This adds an extra layer of protection to your hidden pictures and other valuable data stored in your account.
With the knowledge gained from this article, you are equipped to protect your cherished memories, personal moments, and sensitive content within your Google Photos account.
So go ahead and utilize the various methods available to hide pictures in Google Photos, and enjoy the peace of mind that comes from knowing your private photos are secure.


![Best Torrentz2 Proxy Sites You Should Know [Updated]](https://robots.net/wp-content/uploads/2019/11/torrentz2-eu-home-page-300x200.png)