Introduction
Welcome to the era of digital photography, where capturing and storing memories has become easier than ever before. With the rise of smartphones and cloud storage services, such as Google Photos, we now have the ability to store thousands of photos in one place. However, with an ever-growing collection of photos, managing and organizing them can become a daunting task. At times, you may want to delete all your Google Photos to start fresh or free up storage space. In this guide, we will explore the various methods to delete all your Google Photos on different platforms.
Whether you’re using Google Photos on the web, Android, or iOS, we’ve got you covered. Each platform has its own unique steps and features for deleting photos. Additionally, we’ll discuss the Google Photos Trash feature, how to recover deleted photos if needed, and even removing Google Photos from Google Drive and Android Gallery. So, if you’re ready to declutter your digital photo collection, let’s get started!
But before we delve into the specific steps, it’s important to note that deleting your Google Photos will permanently erase them from your account. Therefore, it’s crucial to double-check and ensure that you’ve backed up any important or irreplaceable photos before proceeding with the deletion process.
Now, let’s explore the various methods to delete all your Google Photos on different platforms.
Deleting Google Photos on Web
If you prefer managing your Google Photos using a web browser, deleting them is a straightforward process. Here’s how you can delete all your Google Photos on the web:
- Open your preferred web browser and go to the Google Photos website.
- Sign in to your Google account if you haven’t already.
- Click on the “Photos” tab to access your photos.
- On the top right corner of the screen, you’ll find the three-dots menu icon. Click on it to open a drop-down menu.
- From the drop-down menu, select “Select All” to highlight all your photos.
- Once all your photos are selected, click on the three-dots menu icon again and choose “Move to trash” or “Delete”.
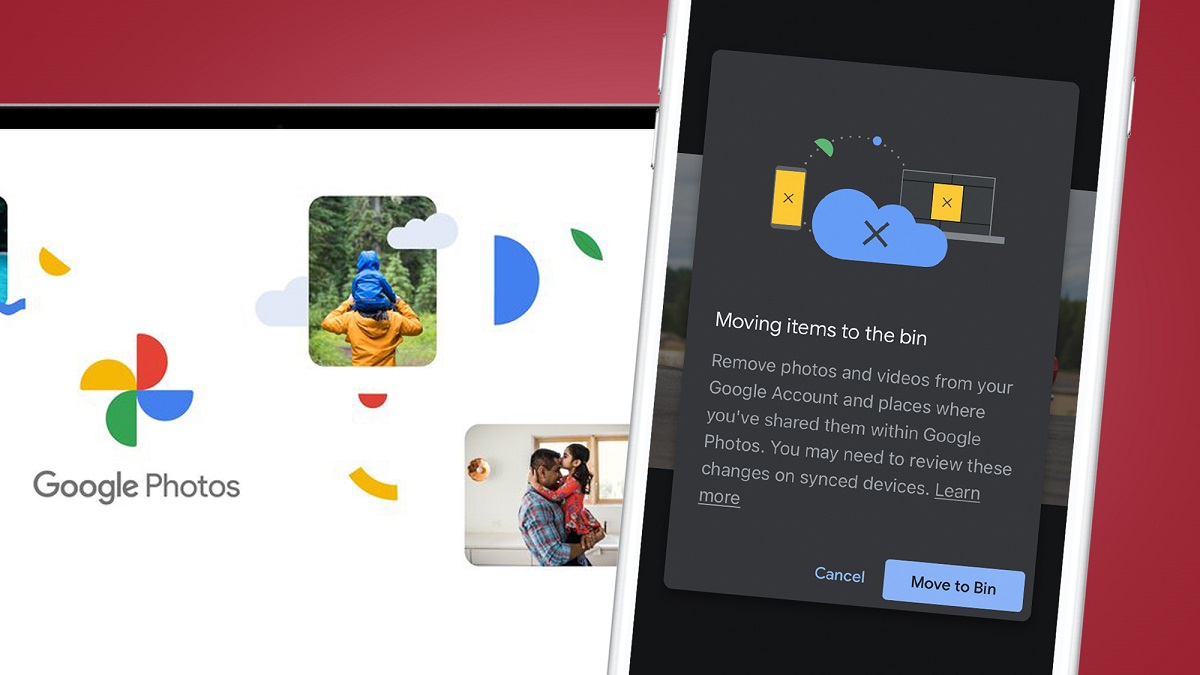
- A confirmation prompt will appear, asking if you want to move the selected photos to the trash. Click on “Move to trash” or “Delete” to confirm.
After confirming, all the selected photos will be moved to the Google Photos Trash folder. The Trash folder holds deleted photos for a period of 60 days before they are permanently removed. If you change your mind or accidentally delete a photo, you can restore it from the Trash folder within this timeframe.
Keep in mind that deleting your Google Photos on the web will also delete them from any connected devices or shared albums. So, ensure that you’ve securely backed up any important photos before proceeding with the deletion process.
Now that you know how to delete your Google Photos on the web, let’s move on to the process of deleting them on Android.
Deleting Google Photos on Android
If you primarily use Google Photos on your Android device, deleting all your photos can be done quickly and easily. Here’s how:
- Open the Google Photos app on your Android device.
- Sign in to your Google account if you haven’t already.
- In the app’s main interface, tap the three-line menu icon located at the top left corner of the screen to open the side menu.
- From the side menu, select “Settings”.
- In the “Settings” menu, tap on “Free up device storage” or “Manage storage”, depending on your device.
- You’ll be presented with options to free up space. To delete all your Google Photos, look for the option that says “Delete device copy”.
- Tap on “Delete device copy” to initiate the deletion process.
- A confirmation prompt will appear, asking if you want to delete the device copies of your photos. Confirm by tapping “Delete”.
By selecting the “Delete device copy” option, you are deleting the local copies of the photos on your Android device. The photos will still remain safely stored in your Google Photos account. This allows you to free up storage space on your device while retaining access to your photos through the Google Photos app.
If you want to delete the photos permanently from your Google Photos account, you can also use the web method discussed earlier or follow the steps below:
- Open the Google Photos app on your Android device.
- Sign in to your Google account if you haven’t already.
- Navigate to the “Photos” tab within the app.
- Tap and hold on one of the photos to initiate the selection mode.
- Select the photos you want to delete by tapping on them individually.
- Once all the desired photos are selected, look for the trash bin icon at the top right corner of the screen and tap on it.
- A confirmation prompt will appear, asking if you want to move the selected photos to the trash. Confirm by tapping “Move to trash”.
Now that you know how to delete your Google Photos on Android, let’s move on to the process of deleting them on iOS devices.
Deleting Google Photos on iOS
If you use Google Photos on your iOS device, deleting all your photos can be done easily using a few simple steps. Here’s how:
- Open the Google Photos app on your iOS device.
- Sign in to your Google account if you haven’t already.
- In the app’s main interface, tap the three-line menu icon located at the top left corner of the screen to open the side menu.
- From the side menu, select “Settings”.
- In the “Settings” menu, tap on “Manage device storage” or “Manage storage”, depending on your device.
- Select the option that says “Delete photos and videos from this device only”.
- Tap on “Delete” to confirm.
By selecting the “Delete photos and videos from this device only” option, you are deleting the local copies of the photos on your iOS device. The photos will still remain securely stored in your Google Photos account.
If you want to delete the photos permanently from your Google Photos account, you can also use the web method discussed earlier or follow the steps below:
- Open the Google Photos app on your iOS device.
- Sign in to your Google account if you haven’t already.
- Navigate to the “Photos” tab within the app.
- Tap and hold on one of the photos to initiate the selection mode.
- Select the photos you want to delete by tapping on them individually.
- Once all the desired photos are selected, look for the trash bin icon at the top right corner of the screen and tap on it.
- A confirmation prompt will appear, asking if you want to move the selected photos to the trash. Confirm by tapping “Move to trash”.
Now you know how to delete your Google Photos on iOS devices. Next, we’ll discuss the Google Photos Trash feature and how to recover deleted photos if needed.
Understanding Google Photos Trash
When you delete photos from your Google Photos, they are not immediately erased permanently. Instead, they are moved to the Google Photos Trash, where they are stored for a period of 60 days before being permanently deleted. The Trash serves as a temporary storage location for deleted photos, giving you a chance to recover them if needed.
To access the Google Photos Trash and manage your deleted photos, follow these steps:
- Open the Google Photos app on your device or access the Google Photos website on your computer.
- Sign in to your Google account if you’re not already signed in.
- In the Google Photos app, tap the three-line menu icon to open the side menu or navigate to the side menu on the website.
- From the side menu, select “Trash”.
In the Trash, you’ll find all the photos and videos you’ve deleted within the past 60 days. From here, you have the option to either restore deleted photos back to your main Google Photos library or permanently delete them.
To restore deleted photos from the Trash, follow these steps:
- Open the Trash folder in the Google Photos app or on the website.
- Select the photos you want to restore by tapping on them.
- Tap on the restore button, which looks like a back arrow or a folder icon with an arrow pointing upward.
- The selected photos will be moved back to your main Google Photos library and will be accessible as before.
If you want to permanently delete photos from the Trash, follow these steps:
- Open the Trash folder in the Google Photos app or on the website.
- Select the photos you want to permanently delete by tapping on them.
- Tap on the delete icon, usually represented by a trash bin or garbage can.
- A confirmation prompt will appear, asking if you want to permanently delete the selected photos. Confirm by tapping “Delete”.
Now that you understand how the Google Photos Trash works, let’s move on to the process of recovering deleted photos.
Recovering Deleted Photos
Accidentally deleting photos can be a heart-wrenching experience, but fear not! Google Photos provides a way to recover deleted photos within a certain timeframe. Here’s how you can recover deleted photos:
- Open the Google Photos app on your device or access the Google Photos website on your computer.
- Sign in to your Google account if you’re not already signed in.
- In the Google Photos app, tap the three-line menu icon to open the side menu or navigate to the side menu on the website.
- From the side menu, select “Trash”.
- Within the Trash folder, you’ll find all the photos and videos you’ve deleted within the past 60 days.
- Select the photos you want to recover by tapping on them.
- Tap on the restore button, which looks like a back arrow or a folder icon with an arrow pointing upward.
- The selected photos will be moved back to your main Google Photos library and will be accessible as before.
It’s important to note that the recovery option is only available for photos that are still within the 60-day window. After this period, the photos will be permanently deleted and cannot be recovered from the Google Photos Trash.
To prevent accidental deletion in the future, you can also enable the “Archive” feature in Google Photos. This allows you to move photos to a separate archive folder, keeping them safe from accidental deletions while still decluttering your main library.
Now that you know how to recover deleted photos in Google Photos, let’s move on to the process of deleting Google Photos from Google Drive.
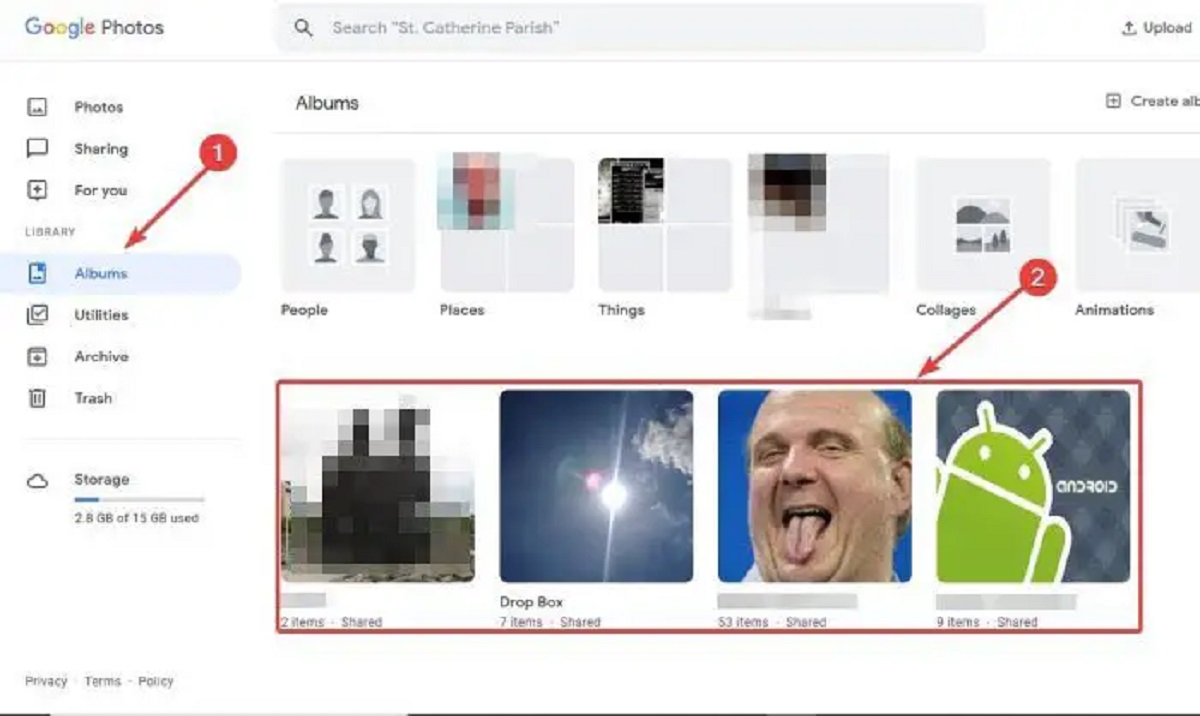
Deleting Google Photos from Google Drive
Google Drive and Google Photos are closely integrated platforms, allowing you to access and manage your photos seamlessly. However, if you want to remove your Google Photos from Google Drive for any reason, here’s how you can do it:
- Open your preferred web browser and go to the Google Drive website.
- Sign in to your Google account if you’re not already signed in.
- In the Google Drive interface, locate the “Google Photos” folder in the sidebar on the left side of the screen.
- Click on the folder to open it and view all the photos stored in your Google Photos account.
- Select the photos you want to delete from Google Drive by clicking on them or use the “Select All” option if you wish to remove all photos.
- Once the desired photos are selected, click on the trash bin icon or right-click and choose “Remove” from the context menu.
- A confirmation prompt will appear, asking if you want to move the selected photos to the trash. Confirm by clicking “Remove”.
By following these steps, you will delete the selected Google Photos from your Google Drive. It’s important to note that deleting photos from Google Drive does not delete them from your Google Photos account. They will still be accessible and stored within your Google Photos library.
If you change your mind and want to restore the deleted photos back to your Google Drive, you can do so by visiting the Google Drive Trash folder and recovering the photos from there.
Now that you know how to delete photos from Google Drive, let’s move on to the process of removing Google Photos from the Android Gallery.
Deleting Google Photos from Android Gallery
When you use Google Photos on your Android device, it automatically syncs your photos to the device’s native gallery app. If you want to remove the Google Photos from your Android gallery app, you can follow these steps:
- Open the gallery app on your Android device.
- Locate the “Albums” or “Folders” section, depending on the layout of your gallery app.
- Look for the album or folder named “Google Photos” or any other album that contains Google Photos.
- Tap and hold on the “Google Photos” album or folder until a menu appears.
- Select the “Delete” option or any other similar option provided by your gallery app.
- Confirm the deletion when prompted.
By following these steps, you will remove the Google Photos album or folder from your Android gallery app. This will help declutter your gallery and ensure that only the photos stored locally on your device are displayed.
However, it’s important to note that removing the Google Photos album from your Android gallery app does not delete the photos stored in your Google Photos account. They will still be accessible through the Google Photos app.
If you wish to remove the Google Photos album permanently and delete the synced photos from your device, you can follow the instructions provided in the earlier sections specific to deleting Google Photos on Android devices.
Now that you know how to remove Google Photos from the Android gallery app, it’s time to wrap up our guide.
Conclusion
Managing and organizing your digital photo collection is made easier with Google Photos. Whether you want to delete all your Google Photos to start fresh or free up storage space, the methods outlined in this guide provide you with the necessary steps for different platforms.
On the web, you can easily delete all your Google Photos by selecting them and moving them to the trash. On Android and iOS devices, you have the option to delete the local copies of your photos, freeing up storage space while keeping them safely stored in your Google Photos account.
Understanding the Google Photos Trash feature is crucial, as it allows you to recover deleted photos within 60 days. You can restore photos from the Trash back to your main library or permanently delete them.
If you no longer wish to keep your Google Photos in Google Drive, you can easily delete them from the Google Drive interface. Lastly, if you want to remove Google Photos from the Android gallery app, you can do so by deleting the Google Photos album or folder within your gallery app.
Remember to always backup important or irreplaceable photos before proceeding with any deletion process, as deleting photos will permanently remove them from your Google Photos account.
We hope this guide has been helpful in providing you with the necessary steps to delete all your Google Photos and manage your digital photo collection effectively. With these tools at your disposal, you can keep your Google Photos organized and maintain a clutter-free photo library.