Introduction
When it comes to managing files, photos, emails, and various other data on your Android device, it’s essential to have a system in place to handle unwanted items. This is where the “Trash” feature comes into play, providing a safety net for deleted content.
The Trash feature ensures that you don’t permanently lose valuable information or files accidentally deleted from your device. It acts as a temporary storage area where deleted items are stored, allowing you to recover or permanently delete them at a later time. In this article, we will explore where you can find the Trash feature on Android devices and how it works across different apps and services.
Whether you’re using the Files app, Google Photos, Gmail, Google Drive, or various messaging apps, each platform has its own way of managing deleted content. By understanding where to find the Trash feature and how it functions in different applications, you can optimize your device’s storage and ensure the secure management of your data.
So, let’s dive into the world of Trash on Android and discover where you can find it in different apps and services. We’ll explore how long deleted items are stored, the process of recovering or permanently deleting them, and provide tips for effectively managing your Trash to keep your device organized and your data protected.
Trash in Files App
The Files app, an essential file management tool on Android devices, allows users to organize, browse, and manage their files efficiently. It also includes a Trash feature, which serves as a temporary storage space for deleted files.
When you delete a file from the Files app, it isn’t immediately permanently deleted. Instead, it is moved to the Trash folder. To access the Trash folder, open the Files app and tap on the menu icon (usually three horizontal lines) in the top left corner. From the menu, select “Trash” to view all the deleted files.
Within the Trash folder, you can see a list of all the files you’ve recently deleted. The Files app retains these deleted files for a specific period, which may vary depending on your device’s settings or the app’s version. However, on most Android devices, the files remain in the Trash folder for 30 days before they are automatically permanently deleted.
If you want to restore a deleted file from the Trash folder, simply tap and hold on the desired file and select the “Restore” option. The file will then be moved back to its original location. Alternatively, you can permanently delete a file by selecting the “Delete” option. Keep in mind that permanently deleting a file will remove it from the Trash folder without the possibility of recovery.
Managing your Trash folder in the Files app is crucial for optimizing storage space and keeping your files organized. Regularly emptying the Trash folder can free up valuable storage on your device, especially if you’ve deleted large files or multiple files at once. To empty the Trash folder, open the Files app, access the Trash folder, tap on the menu icon, and select “Empty Trash” or a similar option.
It’s important to note that the availability and functionality of the Trash feature in the Files app may vary slightly depending on the device manufacturer or customized user interfaces. However, the general concept of temporary storage for deleted files remains consistent across most Android devices.
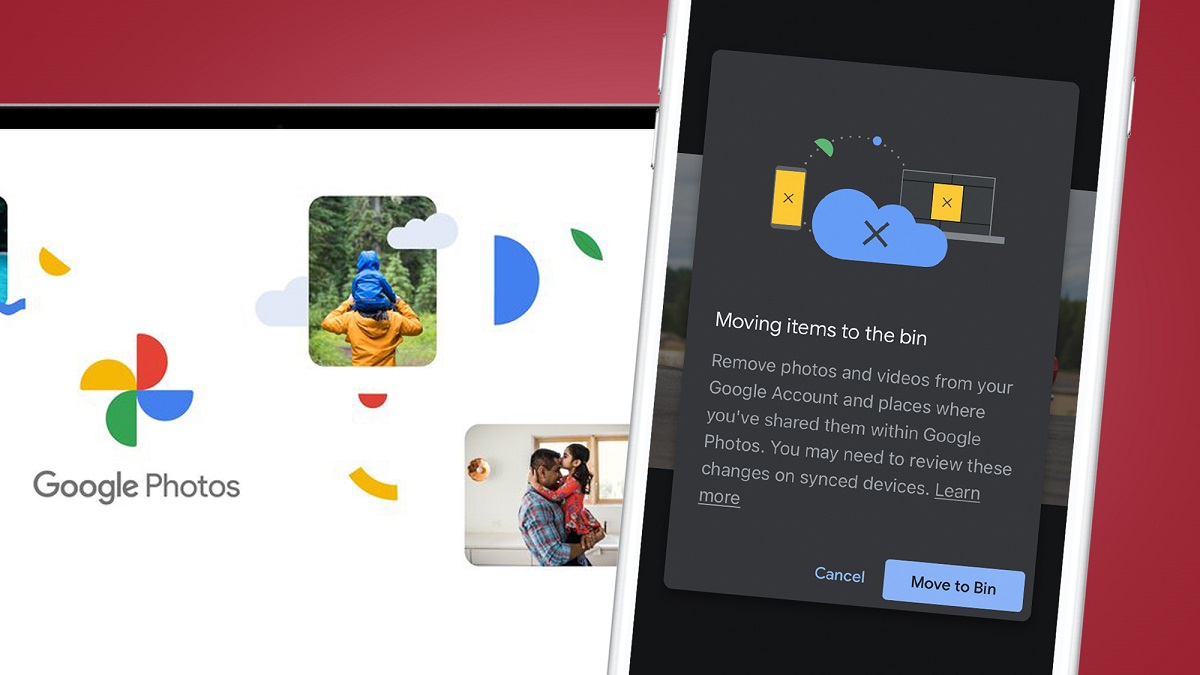
Trash in Google Photos
Google Photos is a popular app for managing and storing photos and videos on Android devices. It also includes a Trash feature that allows you to recover accidentally deleted media files and manage your storage effectively.
When you delete a photo or video from Google Photos, it is moved to the Trash folder, which acts as a temporary storage space for deleted items. To access the Trash folder, open the Google Photos app and tap on the menu icon (usually three horizontal lines) in the top left corner. From the menu, select “Trash” to view all the deleted photos and videos.
Unlike some other apps, Google Photos provides an extended period for retrieving deleted items. Deleted photos and videos reside in the Trash folder for 60 days before they are automatically permanently deleted. This allows you ample time to restore any mistakenly deleted files or decide whether you need to recover them.
To recover a deleted photo or video from the Trash folder, tap and hold on the desired item, and select the “Restore” option. The file will be moved back to your Google Photos library. If you want to delete a file permanently, select the “Delete” option. Keep in mind that once a file is permanently deleted, it cannot be recovered.
A useful feature in Google Photos is the ability to free up storage space by removing items from your device that have already been backed up to the cloud. This feature, known as “Free up space,” is accessed by tapping on the menu icon and selecting “Free up space.” It will show you a list of photos and videos that have already been backed up to your Google Account. You can then choose to delete these items from your device to save storage space while keeping them available in your Google Photos library.
Regularly checking and managing the Trash folder in Google Photos is essential to maintain an organized photo library and optimize storage space on your Android device. It’s recommended to review your deleted items regularly and empty the Trash folder when necessary. To empty the Trash folder, open Google Photos, go to the Trash folder, tap on the menu icon, and select “Empty Trash” or a similar option.
Note that the Trash feature and functionality might vary slightly depending on the version of the Google Photos app and device specifications. However, the basic concept of temporarily storing deleted photos and videos remains consistent across most Android devices.
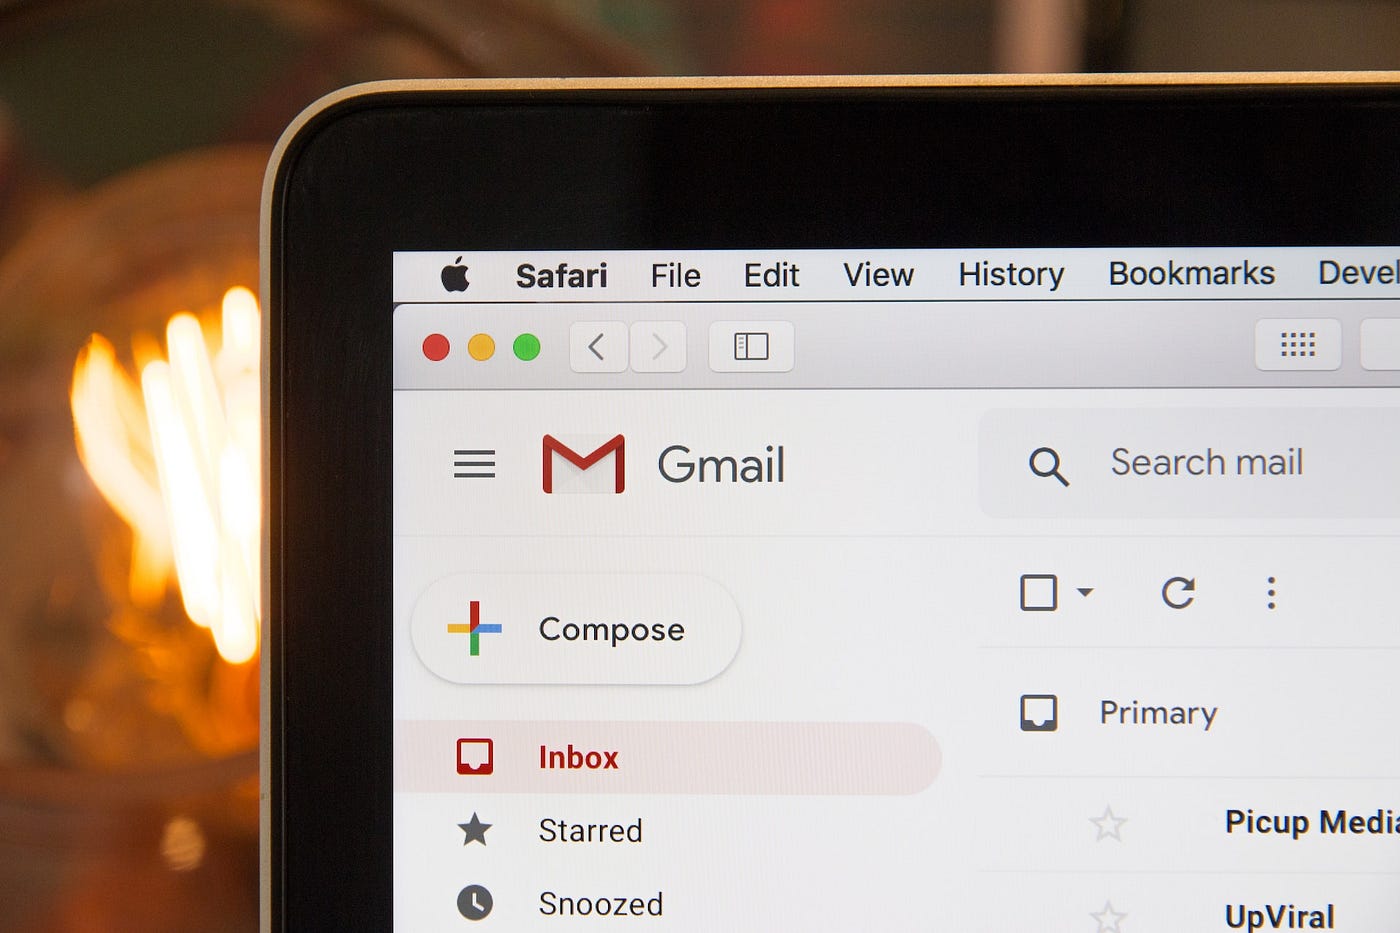
Trash in Gmail
Gmail, one of the most popular email services, offers a Trash feature that allows you to manage your deleted emails. When you delete an email, it is moved to the Trash folder, which acts as a temporary storage for deleted messages.
To access the Trash folder in Gmail, open the Gmail app on your Android device, and tap on the menu icon (usually three horizontal lines) in the top left corner. From the menu, scroll down and select “Trash” to view all the deleted emails.
The default retention period for emails in the Trash folder is 30 days. However, you can customize this setting in your Gmail account preferences. After the specified time, deleted emails are automatically permanently deleted from the Trash folder.
If you mistakenly deleted an email and want to recover it, open the Trash folder, find the email you wish to restore, and tap on it. Then, tap on the menu icon and select the “Move To” option. Choose the folder where you want to move the email, such as the Inbox or a specific label folder. The email will be moved back to the selected folder.
If you want to permanently delete an email from the Trash folder, open the folder, find the email you want to delete, and tap on it. Then, tap on the menu icon and select the “Delete” option. This action will immediately remove the email from the Trash folder without the possibility of recovery.
It’s important to note that Gmail also offers the option to automatically empty the Trash folder by enabling the “Auto-delete” feature. This feature permanently deletes emails in the Trash folder after a specific period, such as 30 days. To enable this feature, go to the Gmail settings, tap on your account, and navigate to the “Auto-delete” section. Select the desired time interval, and Gmail will automatically empty your Trash folder accordingly.
Regularly managing the Trash folder in Gmail not only helps you recover accidentally deleted emails but also ensures efficient use of storage space in your mailbox. It’s recommended to review your deleted emails periodically and empty the Trash folder to maintain an organized and clutter-free inbox. To empty the Trash folder in Gmail, open the folder, tap on the menu icon, and select the “Empty Trash” option.
Keep in mind that the Trash feature and functionality may vary slightly depending on the version of the Gmail app and your device’s specifications. However, the primary purpose of securely managing deleted emails remains consistent across most Android devices.
Trash in Google Drive
Google Drive is a robust cloud storage and file synchronization service that allows users to store, share, and manage files and folders seamlessly. Within Google Drive, there is a Trash feature specifically designed to handle deleted files and folders.
Whenever you delete a file or folder in Google Drive, it is moved to the Trash folder. To access the Trash folder, open Google Drive on your Android device and tap on the menu icon (usually three horizontal lines) in the top left corner. From the menu, select “Trash” to view all the deleted files and folders.
By default, files and folders remain in the Trash folder for 30 days before they are automatically permanently deleted. During this period, you can easily recover any mistakenly deleted item by selecting the file or folder and tapping on the “Restore” button. The restored item will return to its original location in Google Drive.
If you want to permanently delete a file or folder from the Trash folder, select the item and tap on the “Delete” button. Once deleted from the Trash, the file or folder cannot be recovered.
Google Drive also enables you to free up storage space by selectively removing files and folders that have already been synced to the cloud. Using the “Free up space” feature, you can retrieve space on your device by deleting items that are safely stored in Google Drive. This function can be accessed through the menu icon, where you can select “Free up space” to see a list of files and folders available for deletion.
It’s important to regularly manage the Trash folder in Google Drive to optimize your storage space and maintain an organized file structure. Review your deleted files and folders periodically and empty the Trash folder when necessary. To empty the Trash folder, open Google Drive, tap on the menu icon, and select “Trash.” Then, tap on the menu icon again and choose “Empty trash” to permanently delete all the items in the Trash folder.
Please note that the availability and functionality of the Trash feature may vary slightly depending on the version of the Google Drive app and your device specifications. However, the underlying concept of providing a temporary storage area for deleted files and folders remains consistent across most Android devices.
Trash in Gallery App
The Gallery app on Android devices is a convenient tool for organizing and managing photos and videos. While the specific features and functionalities may vary depending on the device manufacturer and the version of the app, some gallery apps include a Trash feature to handle deleted media files.
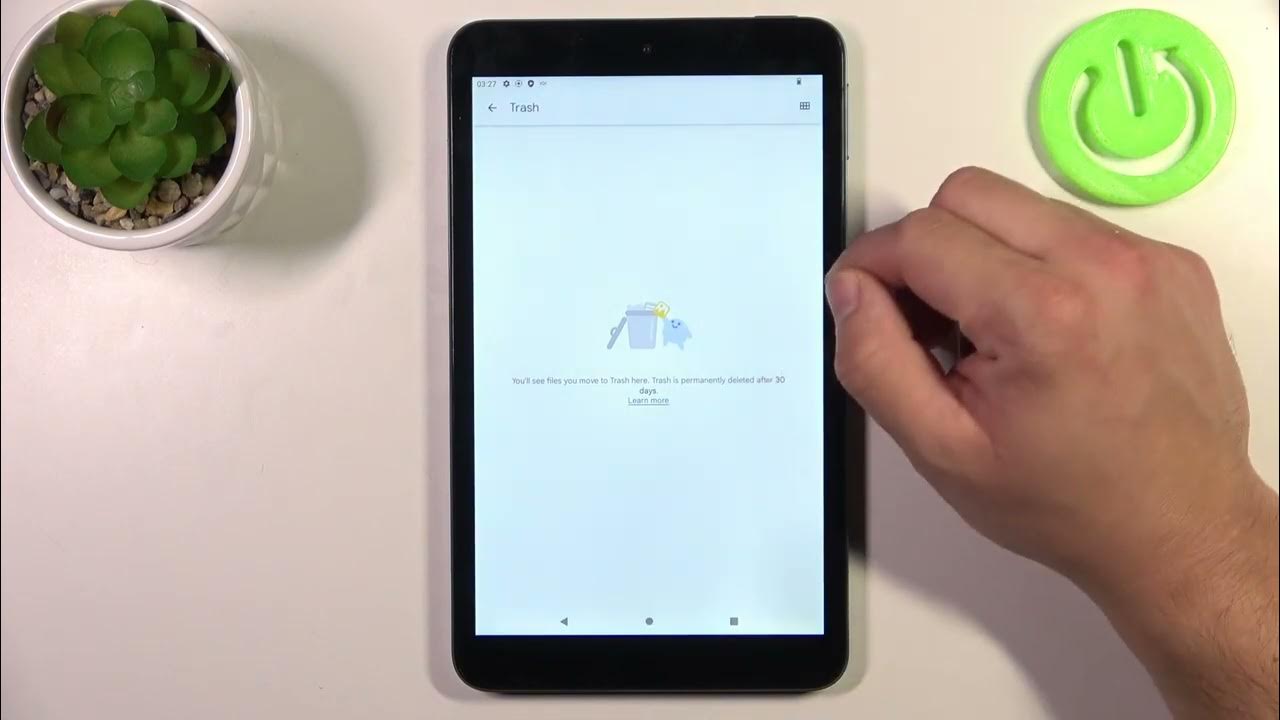
When you delete a photo or video from the Gallery app, it may not immediately erase the file permanently. Instead, it is often moved to a temporary storage area called the Trash folder. To access the Trash folder in the Gallery app, open the app and look for a section or tab specifically labeled as “Trash” or “Recently Deleted.”
Once inside the Trash folder, you can find all the media files that you have recently deleted from your gallery. The duration for which the files remain in the Trash folder can vary depending on the specific app version or device settings. Typically, these files will be automatically permanently deleted after a specific period, such as seven days.
If you accidentally deleted a photo or video and wish to restore it, you can simply select the file from the Trash folder and tap on the “Restore” or “Undelete” button. This action will move the file back to its original location within your gallery, making it accessible once again.
Keep in mind that the availability of the Trash feature and the way it functions can differ based on the specific gallery app you are using. Some apps may not have a dedicated Trash folder but instead show recently deleted items within the main gallery interface.
It is important to note that managing the Trash folder in the Gallery app is essential to optimize your storage space and keep your media files organized. Regularly review the files in the Trash folder and delete them permanently when necessary to free up storage space on your device.
Although the specific steps to permanently delete files may vary depending on your gallery app, it generally involves selecting the files from the Trash folder and tapping on the “Delete” or “Empty Trash” option. This action will remove the files permanently, without the possibility of recovering them.
Remember to check the settings or preferences of your gallery app to see if there are any specific options related to the Trash feature. Some apps may allow you to customize the duration for which files are kept in the Trash folder, or provide additional features to manage your deleted media files.
Please refer to the user guide or documentation of your specific gallery app for more precise instructions on how to access and manage the Trash folder. Understanding how the Trash feature works in your gallery app will enable you to effectively handle deleted photos and videos, ensuring an organized and clutter-free gallery on your Android device.
Trash in Messaging Apps
Messaging apps have become an integral part of our daily communication, allowing us to stay connected with friends, family, and colleagues. While the specific features can vary across different messaging apps, many of them include a Trash feature to handle deleted messages and conversations.
When you delete a message or conversation in a messaging app, it is typically moved to a temporary storage area known as the Trash or Recycle Bin. Accessing the Trash folder in a messaging app can vary depending on the app you are using.
For some messaging apps, you may find the Trash folder within the app’s settings or options menu. In other cases, deleted messages are automatically moved to the Trash folder, which is accessible by swiping or tapping on a specific tab or menu item in the app.
Once inside the Trash folder, you can review all the messages or conversations that you have deleted. The duration for which these items remain in the Trash folder can vary depending on your app’s settings or preferences but is usually a limited period, such as 30 days.
If you accidentally delete a message or conversation and want to restore it, you can select the desired item from the Trash folder and use the app’s restore or undelete option. This action will move the message or conversation back to its original location within the app, making it accessible again.
However, it’s important to note that some messaging apps may not have a dedicated Trash or Recycle Bin folder. In such cases, once you delete a message or conversation, it is often permanently removed without the option for recovery. Therefore, exercise caution when deleting messages in these apps.
To permanently delete messages from the Trash folder in messaging apps, select the desired item and use the app’s delete or empty trash option. This action will remove the messages or conversations permanently, without the possibility of restoring them.
Since the functionality of the Trash feature can differ across messaging apps, it is advisable to consult the documentation or user guide specific to your messaging app for precise instructions on how to access and manage the Trash folder.
Regularly managing the Trash folder in messaging apps is important to optimize storage space on your Android device and keep your conversations organized. It is recommended to review and delete the items in the Trash folder periodically to free up storage space and maintain a clutter-free messaging experience.
Remember to explore the settings or preferences of your messaging app to see if there are any specific options related to the Trash feature. Some apps may allow you to customize the duration for which deleted messages are kept in the Trash folder, or provide additional features to manage your deleted conversations.
By understanding how the Trash feature works in your messaging app, you can confidently delete messages, recover accidentally deleted conversations, and maintain a well-organized messaging experience on your Android device.
Trash in Apps like WhatsApp and Instagram
Apps like WhatsApp and Instagram have become immensely popular for messaging, sharing media, and connecting with others. While these apps may not have a traditional Trash feature, they do provide options for managing deleted content.
In WhatsApp, when you delete a message or media file, it is removed from your chat history. However, it’s important to note that WhatsApp does not have a dedicated Trash folder where deleted items are stored temporarily. Once a message or media file is deleted, it is typically permanently removed, with no option for recovery. Therefore, it is important to exercise caution when deleting messages or media in WhatsApp.
Regarding Instagram, the platform does not have a conventional Trash feature either. When you delete a post or story on Instagram, it is permanently removed from your profile and cannot be recovered. Similarly, if you accidentally delete a direct message or conversation on Instagram, it cannot be restored. It is recommended to double-check before deleting any content on these platforms to avoid losing them permanently.
Although WhatsApp and Instagram do not have traditional Trash folders, they offer some additional features in managing deleted content. For example, in WhatsApp, you can enable automatic backups to Google Drive or iCloud, depending on your device’s operating system. These backups allow you to restore your chat history if you uninstall and reinstall WhatsApp or switch devices. However, it’s crucial to note that these backups do not retain individual deleted messages.
In Instagram, you can archive posts instead of permanently deleting them. Archiving allows you to hide certain posts from your profile while keeping them accessible to you. To archive a post on Instagram, go to your profile, select the post you want to hide, tap on the three-dot menu icon, and choose the “Archive” option. This feature is useful when you want to temporarily remove a post from public view without permanently deleting it.
While WhatsApp and Instagram may not follow the conventional Trash approach, it is still essential to be cautious when deleting messages, media files, posts, or conversations on these platforms. Take a moment to review your actions and ensure that you intend to delete the content before proceeding. This will help prevent any accidental loss of important information or memories.
It’s also recommended to regularly back up your WhatsApp chat history and important Instagram content to ensure that you have a copy of your valuable conversations or media files. These backups can be stored in cloud services or on your local device as an added precaution.
By being mindful and aware of the deletion and backup options provided by WhatsApp and Instagram, you can effectively manage your content while minimizing the risk of accidental or permanent deletions.
Emptying the Trash
Emptying the Trash is an important step in effectively managing your deleted items and optimizing storage on your Android device. The Trash folder serves as a temporary storage area for deleted files, but over time, it can accumulate a significant amount of data that may no longer be needed.
To empty the Trash folder, the process may vary depending on the app or service you are using. Here are some general guidelines on how to empty the Trash in popular Android apps:
- In the Files app: Open the Files app, access the Trash folder, tap on the menu icon (usually three vertical dots), and select “Empty Trash” or a similar option.
- In Google Photos: Open Google Photos, go to the Trash folder, tap on the menu icon (usually three vertical dots), and select “Empty Trash” or a similar option.
- In Gmail: Open the Gmail app, navigate to the Trash folder, tap on the menu icon (usually three horizontal lines), and select “Empty Trash” or a similar option.
- In Google Drive: Open Google Drive, go to the Trash folder, tap on the menu icon (usually three vertical dots), and select “Empty Trash” or a similar option.
It’s important to note that emptying the Trash folder permanently deletes all the files and content within it, without the possibility of recovery. Therefore, before emptying the Trash, double-check that you have reviewed and restored any important files or data that you may need.
Regularly emptying the Trash folder is crucial for freeing up storage space on your Android device. As you delete files or data, they move to the Trash folder, where they continue to occupy storage until they are permanently deleted. By emptying the Trash, you can reclaim valuable space and maintain a more organized and efficient device.
It’s recommended to establish a routine to periodically review and empty the Trash folder in various apps and services. Set a schedule that works for you, whether it’s weekly, monthly, or as needed, to ensure that unused and unnecessary files are permanently deleted.
Keep in mind that the Trash emptying process might differ slightly depending on the specific version of the app or service you are using. Some apps may offer additional options or settings related to emptying the Trash, such as automatic emptying after a certain period or an option to select specific files for deletion.
By regularly emptying the Trash folder in your favorite apps and services, you can effectively manage your deleted items, maintain optimal storage space, and keep your Android device organized and clutter-free.
Conclusion
Managing the Trash feature in various Android apps and services is essential for organizing your files, photos, emails, messages, and other data effectively. Understanding where to find the Trash folder and how to recover or permanently delete items can help optimize storage space and maintain a clutter-free experience on your device.
Whether you’re using the Files app, Google Photos, Gmail, Google Drive, or messaging apps like WhatsApp and Instagram, each platform has its own way of handling deleted content. By familiarizing yourself with the specific Trash features and functionalities of these apps, you can make informed decisions and effectively manage your deleted items.
Regularly reviewing and emptying the Trash folder is an important step in optimizing storage space on your Android device. By regularly emptying the Trash, you can permanently delete unnecessary files and free up valuable storage, ensuring that your device runs smoothly and efficiently.
However, it’s crucial to exercise caution when emptying the Trash, as the process permanently deletes all the files and data within it. Before emptying the Trash, double-check that you have reviewed and restored any important files or data that you may need.
Remember to consult the documentation or user guides specific to the apps and services you are using for detailed instructions on accessing and managing the Trash folder. Each platform may have slight variations in terms of features and settings, but the underlying concept remains consistent.
By incorporating regular Trash management into your routine and maintaining an organized approach to handling deleted items, you can optimize storage, keep your files and data organized, and ensure a seamless user experience on your Android device.