Introduction
Welcome to our guide on how to convert 512MB RAM to 1GB. If you own an older computer or laptop with limited memory, upgrading your RAM can significantly improve its performance and responsiveness. Whether you’re experiencing sluggish performance during multitasking or struggling to run resource-intensive applications, increasing your RAM capacity can make a noticeable difference.
Understanding RAM (Random Access Memory) is crucial to grasp why upgrading it can enhance your system’s performance. RAM acts as a temporary storage space for your computer’s active programs and data. The more RAM you have, the more programs and data your computer can handle simultaneously, resulting in smoother multitasking and faster processing.
Before diving into the conversion process, it’s essential to check your system’s minimum requirements. Upgrading RAM is only effective if your computer’s other hardware components can support the increased memory capacity. It’s also worth noting that upgrading your RAM does not automatically solve all performance issues. Factors like the processor, storage type, and graphics card also contribute to overall system performance.
In this guide, we’ll first show you how to check your current RAM capacity and understand the types of RAM available. We’ll then provide a step-by-step guide on converting your 512MB RAM to 1GB, discussing various options and considerations along the way. Finally, we’ll offer troubleshooting tips and additional recommendations to ensure a successful upgrade process.
So, if you’re ready to give your computer a boost, let’s get started with checking your RAM and exploring the exciting world of memory upgrades!
Understanding RAM
RAM, which stands for Random Access Memory, plays a vital role in the performance of your computer. It acts as a temporary storage area where your system stores data and instructions that are actively being used by the processor. Unlike the hard drive or solid-state drive (SSD), RAM provides high-speed access to information, allowing for faster data retrieval and processing.
When you open a program or launch a task, your computer transfers the necessary data from the storage drive to the RAM. This enables the processor to quickly access and execute the program’s instructions. The more RAM you have, the more programs and data your computer can handle simultaneously, without causing a slowdown.
RAM operates on a different level compared to the storage drives. While storage drives permanently store data even when the computer is powered off, RAM is volatile and loses its data once the power is turned off. This is why it’s essential to save your work regularly to the storage drives, as the data in RAM will be lost in case of a power outage or system restart.
RAM capacity is measured in gigabytes (GB) and is one of the key factors determining your computer’s multitasking capabilities. If your system has insufficient RAM, it may struggle when running multiple applications simultaneously, leading to sluggish performance and frequent crashes.
It’s important to note that RAM speed, measured in megahertz (MHz), also affects system performance. Higher RAM speeds allow for faster data transfers between the RAM and the processor, resulting in improved overall responsiveness. When upgrading RAM, it’s recommended to ensure that the newly installed memory modules match the system’s supported speed. Mixing modules with different speeds may cause compatibility issues or result in the RAM operating at the speed of the slowest module.
There are different types of RAM available, including DDR2, DDR3, DDR4, and the latest DDR5. Each type has its own specification and compatibility requirements, so it’s crucial to check your computer’s motherboard specifications before purchasing and installing new RAM modules.
Now that we have a basic understanding of RAM and its importance in computer performance, it’s time to check your current RAM capacity and explore the options for upgrading to 1GB in the next section.
Minimum System Requirements
Before embarking on the journey of upgrading your RAM, it’s essential to ensure that your system meets the minimum requirements for a successful upgrade. Upgrading the RAM alone may not guarantee optimal performance if other hardware components are not up to par. Here are some key factors to consider:
1. Motherboard Compatibility: Check your motherboard’s specifications to verify the type and maximum capacity of RAM it supports. Some older motherboards may have limitations on the maximum amount of RAM they can accommodate. Additionally, ensure that your motherboard supports the type of RAM you intend to install (e.g., DDR3 or DDR4).
2. Operating System: Different operating systems have varying requirements for RAM. Ensure that your computer’s operating system supports the increased RAM capacity you plan to install. For example, older versions of Windows may have limitations on the maximum RAM they can utilize.
3. Processor (CPU): While upgrading RAM improves multitasking and overall system performance, the processor is equally crucial. If your processor is too old or underpowered, it may bottleneck the performance, even with increased RAM. Check the recommended processor specifications for your intended usage and ensure that your processor meets those requirements.
4. Power Supply: Upgrading RAM may slightly increase the power consumption of your system. Make sure that your power supply has sufficient capacity to handle the additional power requirements. If your power supply is already operating close to its maximum capacity, you may need to consider upgrading it as well.
By checking and ensuring that your system meets these minimum requirements, you’ll be on the right track to a successful RAM upgrade. It’s crucial to have a stable and compatible foundation before proceeding with the conversion process. Once you’ve verified the requirements, it’s time to move on to the next section, where you’ll learn how to check your current RAM and select the appropriate hardware for upgrading to 1GB.
Checking your RAM
Before diving into the process of upgrading your RAM, it’s important to check the current RAM capacity of your computer. This will help you determine if an upgrade is necessary and if your system meets the requirements for converting 512MB RAM to 1GB. Here are three methods you can use to check your RAM:
1. Task Manager (Windows): If you’re using a Windows operating system, you can easily check your system’s RAM capacity through the Task Manager. Simply right-click on the taskbar and select “Task Manager” from the menu. In the Task Manager window, go to the “Performance” tab. Under the “Memory” section, you’ll find information about the total installed RAM and the amount currently in use. This will give you an idea of your current RAM capacity.
2. System Information (Windows and macOS): Another method to check your RAM is by accessing the system information utility. In Windows, you can search for “System Information” in the Start menu and open the corresponding application. In macOS, click on the Apple menu, go to “About This Mac,” and then click on “System Report.” In the system information, look for the “Memory” or “RAM” section, which will provide details about the installed RAM capacity.
3. Command Line (Windows, macOS, and Linux): If you prefer using the command line interface, you can check your RAM capacity by running a simple command. Open the command prompt (Windows) or terminal (macOS/Linux) and enter the command “wmic MEMORYCHIP get Capacity” (Windows) or “sudo dmidecode -t memory | grep Size” (macOS/Linux). This will display the total RAM capacity in bytes. To convert it to gigabytes, divide the result by 1,073,741,824.
Once you’ve determined your current RAM capacity, compare it to your desired 1GB (approximately 1,073,741,824 bytes). If your current RAM falls short, you’ll need to proceed with the upgrade process.
Now that you have checked your RAM and confirmed the need for an upgrade, let’s explore the various options and considerations for converting your 512MB RAM to 1GB in the next section.
Upgrading RAM: Options and Considerations
When it comes to upgrading your RAM from 512MB to 1GB, there are several options and considerations to keep in mind. Depending on your computer’s specifications and your budget, you can choose from the following options:
1. Adding Additional RAM Modules: The most straightforward option is to add additional RAM modules to your existing ones. Determine the type of RAM your computer supports (e.g., DDR3 or DDR4), and purchase compatible modules with a total capacity of 1GB. Make sure to check the maximum RAM capacity your motherboard can handle.
2. Replacing Existing RAM Modules: If your computer has multiple RAM slots and all are occupied, you may need to replace the existing modules with higher-capacity ones. This option requires purchasing new RAM modules with a total capacity of 1GB and removing the old ones. Ensure compatibility with your motherboard and follow proper installation procedures.
3. Upgrading to Higher Speed RAM: In addition to increasing the capacity, you can also consider upgrading to RAM modules with faster speeds. Higher-speed RAM can provide a performance boost, especially for tasks that involve heavy data processing, such as video editing or gaming. Check your motherboard’s specifications for supported RAM speeds.
Considerations: Before making a decision, consider the following:
– Budget: Determine how much you are willing to invest in upgrading your RAM. Different RAM modules come at different price points, so it’s essential to find a balance between cost and performance improvement.
– Future Upgrades: Consider your future plans for the computer. If you anticipate needing more than 1GB of RAM in the near future, it may be more cost-effective to upgrade to a higher capacity (e.g., 2GB or 4GB) rather than limiting yourself to 1GB.
– Operating System Limits: Check the maximum RAM capacity that your computer’s operating system can utilize. Some older versions of operating systems have limitations on the amount of RAM they can address.
– Compatibility: Ensure that the RAM modules you choose are compatible with your motherboard and other hardware components. Refer to your motherboard’s specifications and consult with experts if needed.
By considering these options and factors, you can make an informed decision about upgrading your RAM to 1GB. Once you’ve determined the best approach, it’s time to dive into the step-by-step guide for converting your 512MB RAM to 1GB in the next section.
Step-by-Step Guide: Converting 512MB RAM to 1GB
Now that you’ve decided to upgrade your RAM from 512MB to 1GB, follow this step-by-step guide to successfully complete the conversion process:
Step 1: Identify the type of RAM: Determine the specific type of RAM supported by your motherboard (e.g., DDR3 or DDR4). This will ensure compatibility when purchasing new RAM modules.
Step 2: Choose the right RAM modules: Look for RAM modules that are compatible with your motherboard and have a total capacity of 1GB. Consider factors such as speed and latency if you want to further enhance performance.
Step 3: Power off your computer: Shut down your computer completely and unplug it from the power source. This is necessary to prevent any electrical damage during the RAM installation process.
Step 4: Open the computer case: If you’re using a desktop computer, remove the screws from the side panel of the computer case. Carefully slide off the panel to access the RAM slots. If you’re using a laptop, consult the manufacturer’s documentation for instructions on accessing the RAM compartment.
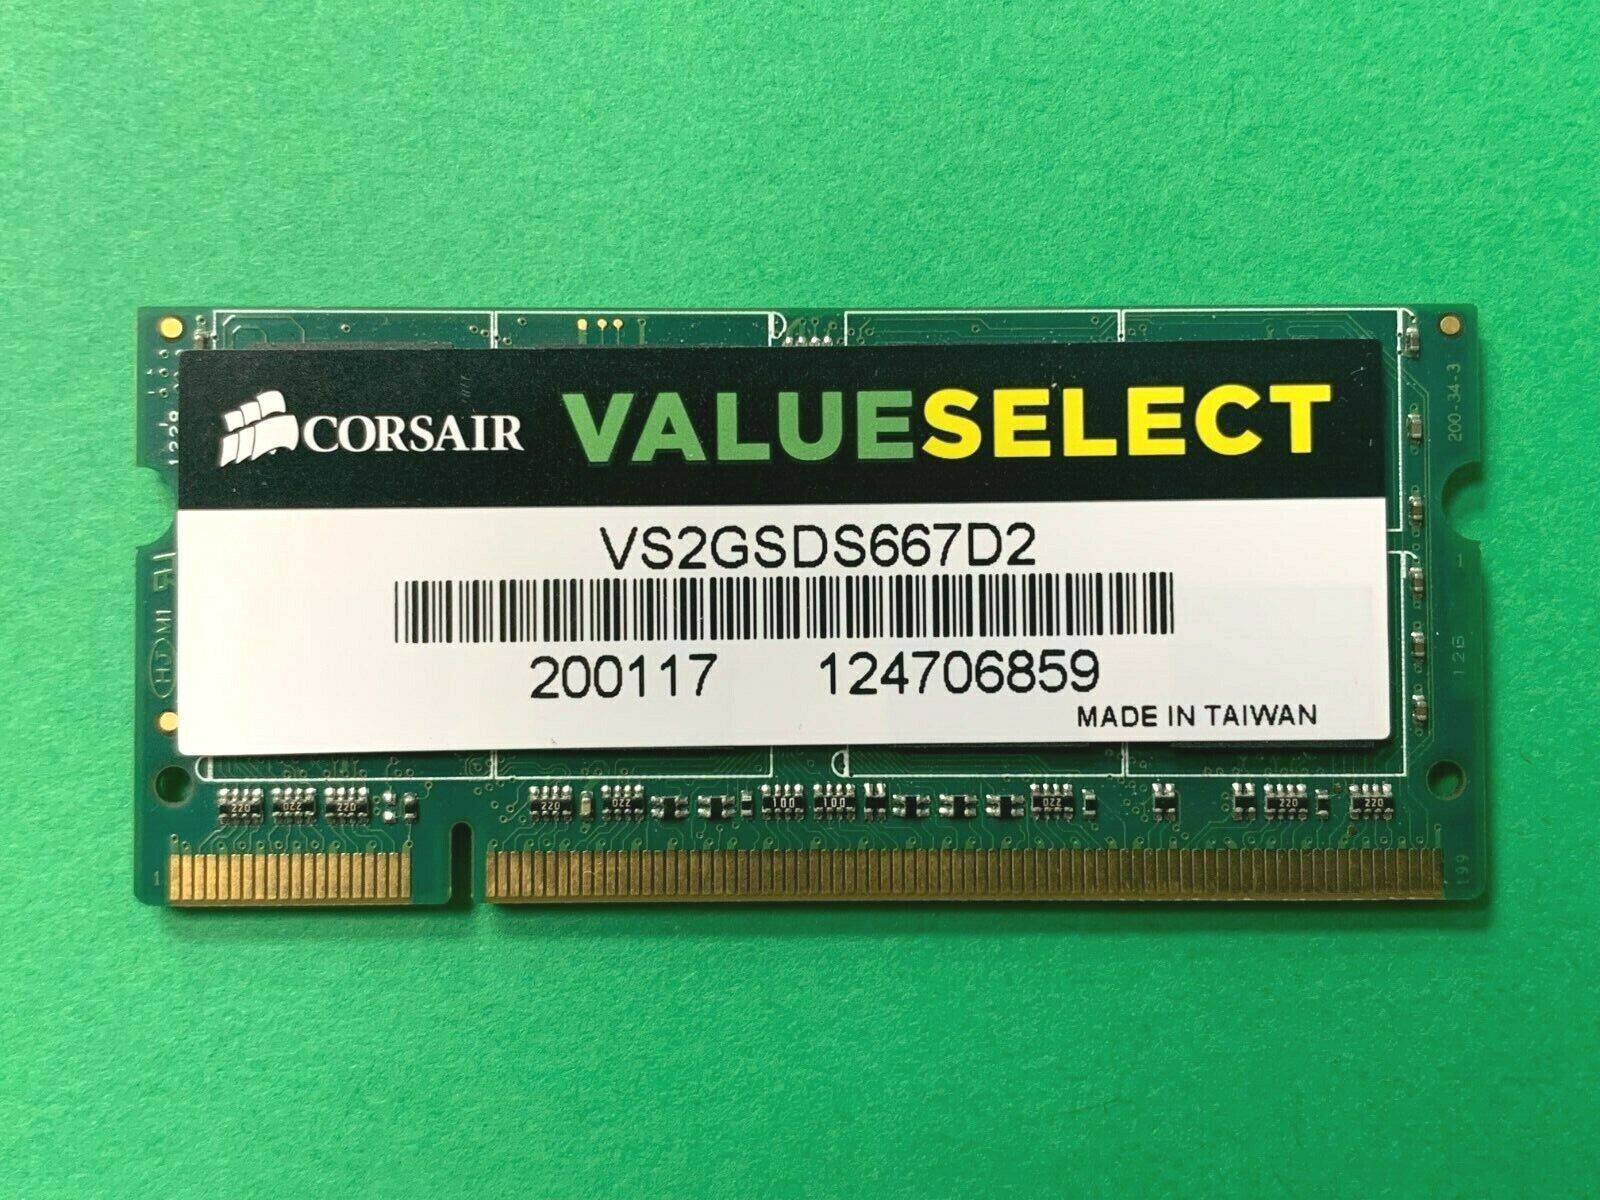
Step 5: Install the new RAM module: Locate the RAM slots on your motherboard. Insert the new RAM module into an empty slot, ensuring that the alignment notch on the module matches the slot. Apply equal force to the module until it clicks into place. Be careful not to force it or touch the gold contacts.
Step 6: Replace the computer case: If you’re using a desktop computer, reattach the side panel and secure it with the screws. Make sure it’s firm and properly aligned. For laptops, close the RAM compartment cover according to the manufacturer’s instructions.
Step 7: Power on your computer: Plug in your computer and power it on. Depending on your operating system, it will automatically detect the new RAM module and adjust its settings accordingly.
Step 8: Verify the installed RAM: To ensure that the RAM was recognized and installed correctly, go back to the methods mentioned in the “Checking your RAM” section. Use the Task Manager (Windows) or System Information (Windows and macOS) to verify that your computer now shows a total RAM capacity of 1GB.
Following these steps will help you successfully convert your 512MB RAM to 1GB. It’s crucial to handle the RAM modules with care, avoid static electricity, and follow proper installation procedures to prevent any damage.
In the next section, we’ll provide troubleshooting tips and additional recommendations to ensure a smooth upgrade process.
Troubleshooting and Tips
While upgrading your RAM from 512MB to 1GB is a relatively straightforward process, you may encounter some challenges along the way. Here are some troubleshooting tips and additional recommendations to help you navigate through the upgrade process:
1. Compatibility Issues: If your newly installed RAM module is not recognized by the computer or causes system instability, it’s possible that there is a compatibility issue. Double-check that the RAM module is compatible with your motherboard and that it matches the specifications outlined in your motherboard’s documentation.
2. Proper Installation: Ensure that the RAM module is inserted correctly and firmly into the slot. If it’s not seated properly, it may not be recognized by the computer. Remove and reinstall the module if necessary, making sure to align it correctly with the notch on the slot.
3. Mixed RAM Modules: If you’re adding new RAM modules to existing ones, make sure they have the same specifications, including type, speed, and capacity. Mixing different types or speeds of RAM may cause compatibility issues or result in the system operating at the speed of the slowest module.
4. BIOS Settings: In some cases, you may need to adjust the BIOS settings to properly recognize the new RAM module. Enter the BIOS setup utility (usually by pressing a specific key during boot, such as F2 or Del) and navigate to the memory settings. Ensure that the correct memory frequency and timings are set for optimal performance.
5. Memory Testing: If you suspect an issue with the RAM module or want to ensure its stability, you can run a memory diagnostic test. There are various software tools available for this purpose, such as memtest86, which can help identify any potential RAM-related issues.
6. Keep Your System Clean: Regularly clean dust and debris from your computer to prevent overheating. Excessive heat can affect the performance and lifespan of your RAM. Use compressed air or a soft brush to clean the internal components, taking care not to touch any sensitive parts.
7. Future Upgrades: Keep in mind that upgrading your RAM is just one aspect of improving system performance. Consider other upgrades, such as upgrading your storage drive to an SSD or replacing an outdated processor, to further enhance your computer’s capabilities.
By following these troubleshooting tips and recommendations, you can overcome any issues that may arise during the RAM upgrade process. Remember to take your time, double-check compatibility, and handle the hardware with care.
With your RAM successfully upgraded to 1GB, you can now enjoy improved multitasking, faster application launching, and an overall smoother computing experience.
Conclusion
Congratulations on successfully converting your 512MB RAM to 1GB! By upgrading your RAM, you have taken a significant step towards improving the performance and responsiveness of your computer. With the increased memory capacity, you will experience smoother multitasking, faster program launches, and enhanced overall system performance.
In this guide, we started by understanding the importance of RAM and its role in your computer’s performance. We then explored the minimum system requirements and how to check your current RAM capacity. We discussed various options and considerations for upgrading your RAM, including adding or replacing RAM modules, as well as upgrading to higher-speed RAM.
Following the step-by-step guide, you successfully installed the new RAM module, ensuring that it was compatible and seated properly in the slot. We also provided troubleshooting tips to address any potential issues that may arise during the upgrade process.
Remember, upgrading your RAM is just one aspect of optimizing your system’s performance. Consider other factors such as your processor, storage drive, and graphics card when looking to further enhance your computer’s capabilities. Regular maintenance, including cleaning your computer’s components and keeping your operating system up to date, will also contribute to its overall performance.
Now that you’ve completed the RAM upgrade, enjoy the improved multitasking, smoother program execution, and enhanced computing experience. Don’t hesitate to explore further upgrades or seek professional assistance if needed.
Thank you for choosing our guide to convert your 512MB RAM to 1GB. We hope this information has been informative and helpful. Happy computing!


