Introduction
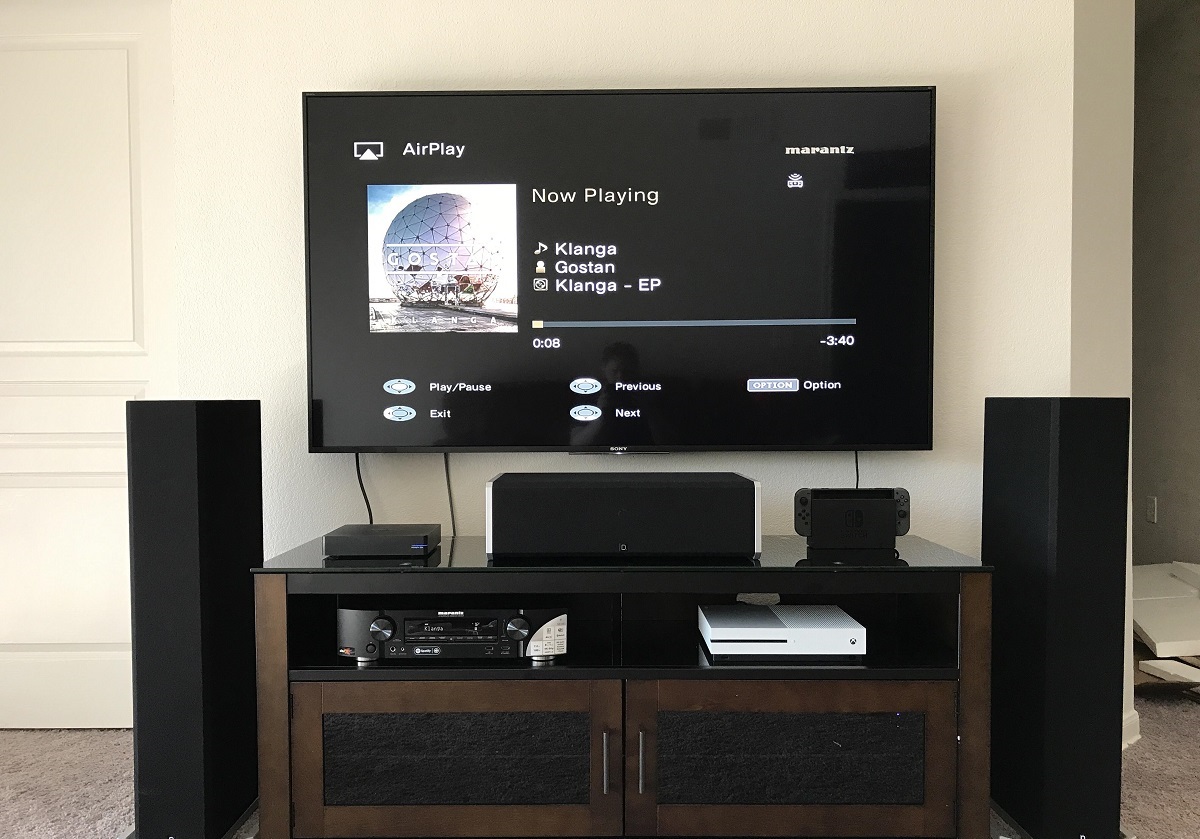
Connecting a smart TV to a sound system can greatly enhance your viewing experience by providing superior audio quality. Whether you’re watching your favorite movies, streaming shows, or playing video games, a sound system can bring the immersive sound that complements the stunning visuals of your smart TV.
In this guide, we will walk you through the step-by-step process of connecting your smart TV to a sound system. We will explore various audio output options and provide easy-to-follow instructions for each method. Whether you have a home theater system, soundbar, or even a pair of external speakers, we’ve got you covered.
Before we dive into the different connections, it’s important to note that the available audio output options may vary depending on your smart TV’s make and model. So, we recommend referring to your TV’s user manual for specific instructions and compatibility.
Now, let’s get started and discover how you can connect your smart TV to a sound system and unlock a new level of audio enjoyment!
Step 1: Determine the audio output options of your smart TV
Before you can connect your smart TV to a sound system, it’s crucial to identify the audio output options available on your TV. This step ensures that you choose the appropriate connection method based on your TV’s capabilities.
Most modern smart TVs offer several audio output options, including HDMI ARC, optical audio, RCA, and headphone jacks. Here’s how you can determine which options are available on your TV:
- Check the user manual: The user manual is a valuable resource that provides detailed information about your TV’s features and connectivity options. Look for the audio output section in the manual to find out which ports are available on your TV.
- Inspect the physical ports: Examine the back or side panels of your smart TV to locate the audio output ports. HDMI ARC ports and optical audio ports are commonly found on most modern TVs. RCA ports may also be present, particularly on older models.
- Access the TV settings: Navigate to the settings menu on your smart TV. Look for the audio or sound settings option and explore the available audio output settings. It may display the type of audio outputs supported by your TV.
Once you have determined the audio output options of your smart TV, you can proceed to the next step of choosing the appropriate sound system connection method.
Step 2: Choose the type of sound system you want to connect to your smart TV
Now that you have identified the audio output options of your smart TV, it’s time to choose the type of sound system that you want to connect. The sound system you select will depend on your preferences, budget, and the audio experience you want to achieve.
Here are some popular options to consider:
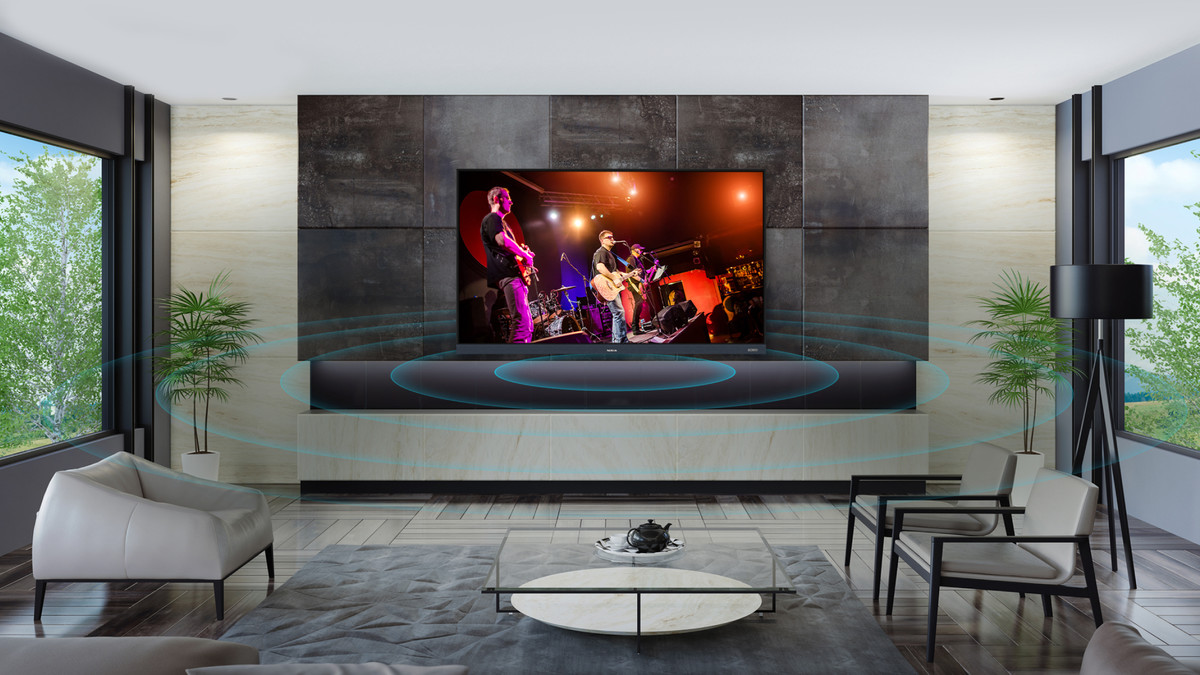
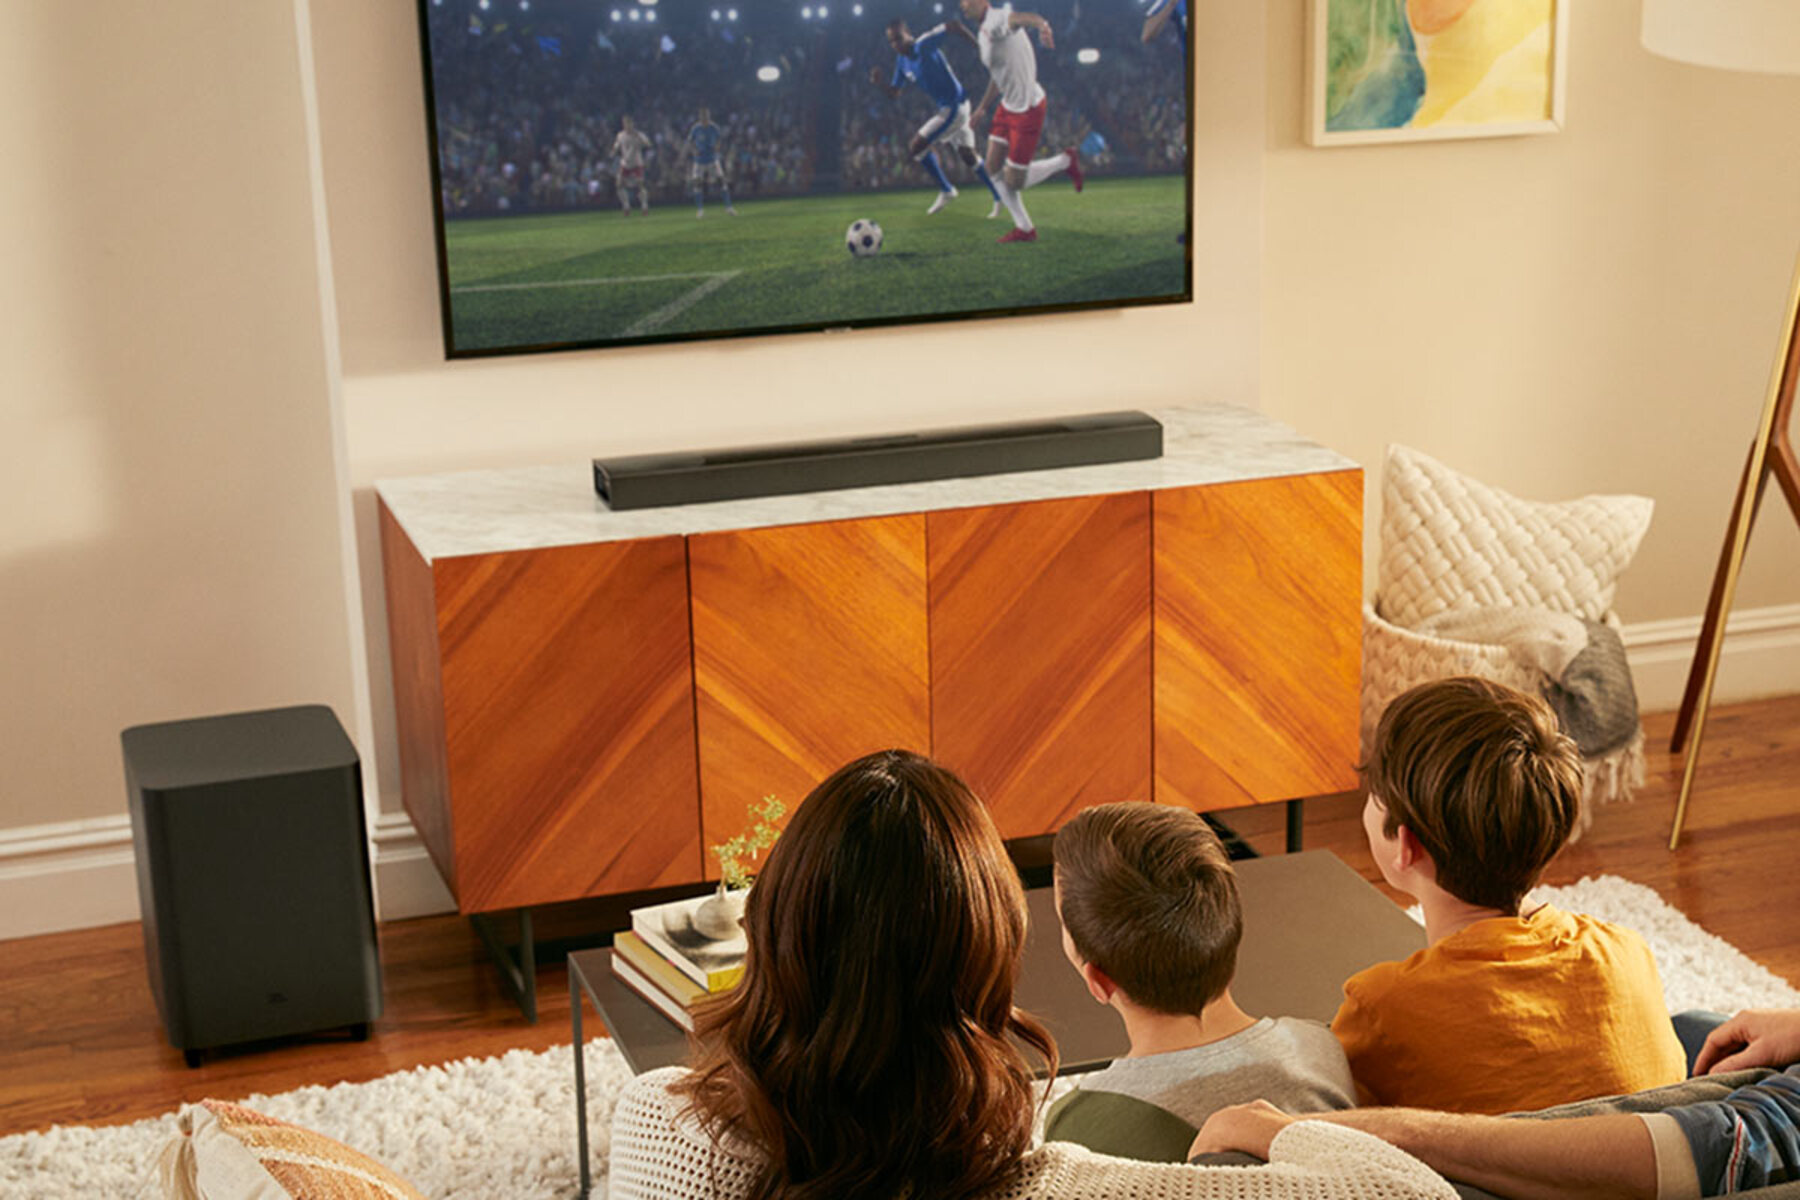
- Home Theater System: If you want a complete surround sound experience with multiple speakers and a dedicated subwoofer, a home theater system is the way to go. These systems deliver cinematic sound quality and are perfect for movie enthusiasts.
- Soundbar: Soundbars are sleek and compact, making them a popular choice among those who want better sound without the hassle of setting up multiple speakers. They are designed to enhance the audio from your TV and provide a wider soundstage.
- External Speakers: If you already have a set of high-quality speakers, you can connect them to your smart TV for an immersive audio experience. This option is ideal for audiophiles who prioritize audio performance.
Consider the size of your room, your audio preferences, and your budget when making your decision. Each sound system has its own advantages and can greatly enhance your TV viewing experience.
Once you have chosen the type of sound system, you can proceed to the next step of connecting it to your smart TV using the appropriate method based on the audio output options available.
Step 3: Connect your sound system using HDMI ARC (Audio Return Channel)
If your smart TV and sound system both support HDMI ARC, this is one of the easiest and most convenient ways to connect them. HDMI ARC allows for both audio and video signals to be transmitted through a single HDMI cable.
Here’s how you can connect your sound system to your smart TV using HDMI ARC:
- Locate the HDMI ARC ports: On your smart TV, find the HDMI ARC port. It is usually labeled as “HDMI ARC” or “Audio Return Channel”. On your sound system, locate the HDMI ARC port as well.
- Connect the HDMI cable: Take an HDMI cable and insert one end into the HDMI ARC port on your smart TV. Then, plug the other end into the HDMI ARC port on your sound system.
- Enable HDMI ARC on your devices: Go to the settings menu on your smart TV and look for the HDMI ARC option. Ensure that it is turned on. Similarly, check the settings on your sound system and enable the HDMI ARC feature.
- Test the connection: Play a video or audio file on your smart TV and check if the sound is coming from your connected sound system. You may need to adjust the audio settings on your TV to ensure that the sound is being output through the sound system.
Remember that both your smart TV and sound system must support HDMI ARC for this method to work. HDMI ARC offers several advantages, including the ability to control the sound system volume with your TV remote and automatic synchronization of audio and video signals.
Once you have successfully connected your sound system using HDMI ARC, you can proceed to test the audio output and make any necessary adjustments on your smart TV.
Step 4: Connect your sound system using an optical cable
If your smart TV does not have an HDMI ARC port or your sound system does not support HDMI ARC, you can use an optical cable to connect them. An optical cable, also known as TOSLINK or SPDIF, transmits digital audio signals from your TV to the sound system.
Follow these steps to connect your sound system using an optical cable:
- Locate the optical audio port: On your smart TV, find the optical audio port. It is usually labeled as “Optical” or “TOSLINK”. On your sound system, locate the corresponding optical audio input.
- Insert the optical cable: Take one end of the optical cable and plug it into the optical audio port on your TV. Insert the other end into the optical audio input on your sound system.
- Configure the audio settings: Go to the settings menu on your smart TV and look for the audio settings. Ensure that the audio output is set to the optical audio option. This may vary depending on your TV’s manufacturer and model.
- Test the connection: Play a video or audio file on your smart TV and check if the sound is being output through your connected sound system. Adjust the audio settings on your TV if needed.
Using an optical cable is a reliable method for connecting your sound system, as it delivers high-quality digital audio. However, it does not support features like volume control through the TV remote. You will need to control the sound system’s volume separately.
Once you have successfully connected your sound system using an optical cable, you can move on to the next step of connecting it using RCA cables if applicable, or proceed to test the audio output on your smart TV.
Step 5: Connect your sound system using RCA cables
If your smart TV and sound system have RCA ports, you can use RCA cables to connect them. RCA cables, also known as composite audio cables, transmit analog audio signals from your TV to the sound system.
Follow these steps to connect your sound system using RCA cables:
- Locate the RCA ports: On your smart TV, find the RCA output ports. The RCA ports are typically color-coded red and white, corresponding to the right and left audio channels. On your sound system, locate the RCA input ports.
- Insert the RCA cables: Take one end of the RCA cables and plug the red connector into the red RCA port on your TV. Connect the white connector to the white RCA port. Insert the other end of the RCA cables into the corresponding RCA input ports on your sound system.
- Configure the audio settings: Access the audio settings on your smart TV and ensure that the audio output is set to the RCA output option. This may require selecting the appropriate audio output settings or adjusting the audio output mode.
- Test the connection: Play a video or audio file on your smart TV and check if the sound is being output through your connected sound system. If necessary, adjust the audio settings on your TV and sound system to optimize the audio output.
Connecting your sound system using RCA cables is a straightforward and cost-effective method. However, it is important to note that RCA cables transmit analog audio signals, which may result in slightly lower audio quality compared to digital connections like HDMI or optical cables.
Once you have successfully connected your sound system using RCA cables, you can move on to the next step of connecting it using a headphone or AUX jack or proceed to test the audio output on your smart TV.
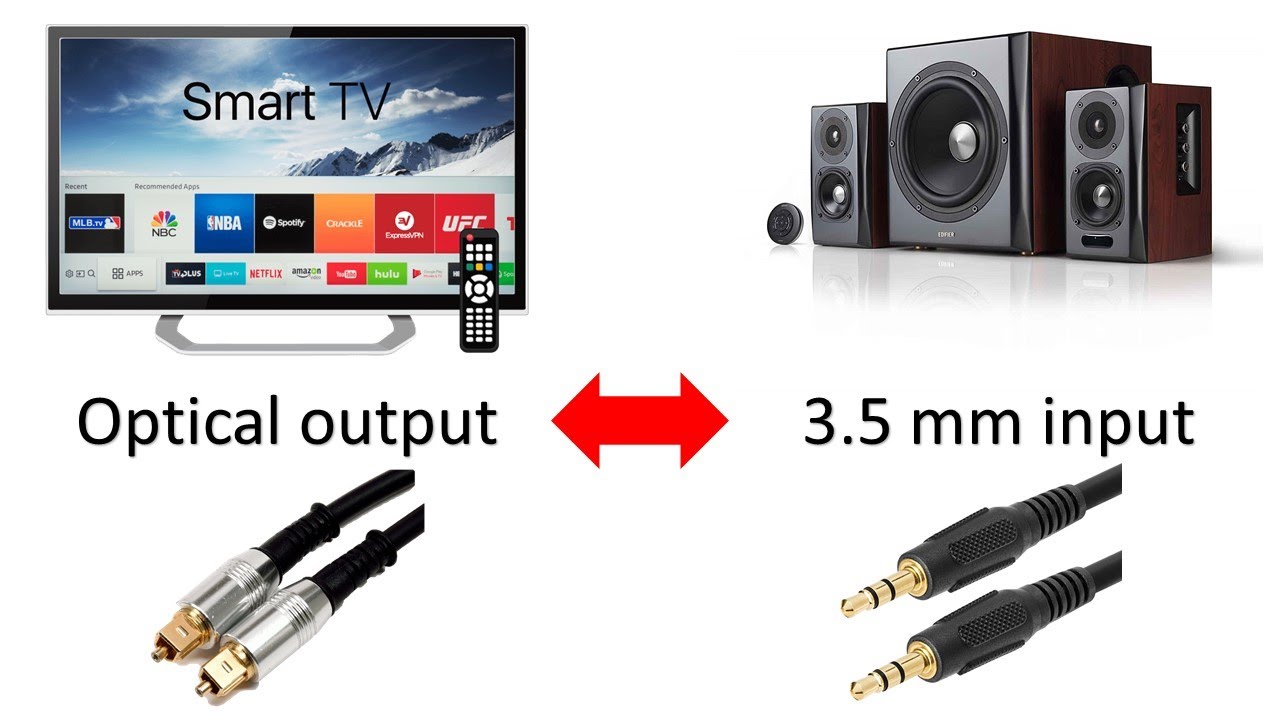
Step 6: Connect your sound system using a headphone or AUX jack
If your smart TV has a headphone or AUX jack, you can easily connect your sound system using a compatible cable. This method is suitable for those who prefer a simple and direct connection.
Follow these steps to connect your sound system using a headphone or AUX jack:
- Locate the headphone or AUX jack: On your smart TV, find the headphone or AUX jack. It is usually located on the side or back of the TV. On your sound system, look for an input labeled as “AUX” or “Line-In”.
- Plug the cable: Take one end of the cable (usually a 3.5mm audio jack) and insert it into the headphone or AUX jack on your TV. Insert the other end of the cable into the corresponding input on your sound system.
- Configure the audio settings: Access the audio settings on your smart TV and ensure that the audio output is set to the headphone or AUX option. This might require selecting the appropriate audio output settings or adjusting the audio output mode.
- Test the connection: Play a video or audio file on your smart TV and check if the sound is being output through your connected sound system. If necessary, adjust the audio settings on your TV and sound system to optimize the audio playback.
Connecting your sound system using a headphone or AUX jack is a quick and easy method that requires minimal setup. However, it’s important to note that this connection may not offer the same audio quality as digital connections like HDMI or optical cables.
Once you have successfully connected your sound system using a headphone or AUX jack, you can proceed to test the audio output and make any necessary adjustments on your smart TV.
Step 7: Test the audio output and adjust settings on your smart TV
After connecting your sound system to your smart TV, it’s important to test the audio output to ensure everything is working correctly. Additionally, you may need to adjust some settings on your TV to optimize the audio experience.
Follow these steps to test the audio output and make necessary adjustments:
- Play different types of content: Test the audio output by playing various types of content, such as movies, TV shows, music, and games. This allows you to evaluate the sound quality and performance of your connected sound system.
- Adjust the audio settings: Explore the audio settings on your smart TV to fine-tune the audio output. Depending on your TV’s capabilities, you may have options to adjust the equalizer, sound modes, surround sound settings, and more. Experiment with different settings to find the optimal audio configuration for your preferences.
- Control audio volume: Ensure that you can control the volume of your sound system using your TV remote or sound system controls. This allows you to easily adjust the volume without having to use multiple remotes.
- Check for lip-sync issues: Pay attention to any delay between the audio and video playback. If you notice a lip-sync issue where the audio is out of sync with the visuals, refer to your TV’s user manual for options to correct the synchronization.
By testing the audio output and adjusting the settings, you can optimize the sound quality and achieve a more immersive audio experience while enjoying your favorite content on your smart TV.
Remember that the available settings and options may vary depending on your smart TV’s make and model. Consult your TV’s manual or online support resources for specific instructions related to audio settings.
Once you have ensured that the audio output is satisfactory and the settings are configured to your liking, congratulations! You have successfully connected your smart TV to your sound system, and you can now enjoy an enhanced audio experience with your favorite entertainment.
Conclusion
Connecting your smart TV to a sound system can greatly enhance your viewing experience by delivering immersive and high-quality audio. By following the steps outlined in this guide, you can easily connect your sound system to your smart TV and unlock a new level of audio enjoyment.
We started by determining the audio output options of your smart TV, ensuring that you choose the appropriate connection method based on your TV’s capabilities. Then, we explored different types of sound systems, including home theater systems, soundbars, and external speakers, allowing you to choose the option that suits your preferences and budget.
Next, we discussed the step-by-step process for connecting your sound system using various methods, such as HDMI ARC, optical cables, RCA cables, and headphone/AUX jacks. Each method provides a different level of audio quality and convenience, allowing you to choose the most suitable option for your setup.
After connecting your sound system, it is essential to test the audio output and make any necessary adjustments on your smart TV. By playing different types of content, adjusting audio settings, controlling volume, and checking for lip-sync issues, you can optimize the sound quality and achieve a truly immersive audio experience.
Remember to refer to your smart TV’s user manual for specific instructions and to ensure compatibility with your chosen sound system. Additionally, consider upgrading your cables or investing in a higher-quality sound system for the best audio performance.
Now that you have successfully connected your smart TV to a sound system, sit back, relax, and enjoy an incredible audio experience as you watch your favorite movies, TV shows, or play games. Immerse yourself in the rich soundscapes and feel like you’re right in the heart of the action.
So, go ahead and take your entertainment journey to new heights by unlocking the full potential of your smart TV with a connected sound system. Happy viewing and listening!