Introduction
Wireless earbuds have gained immense popularity in recent years, and Apple’s AirPods are among the most sought-after options on the market. While they are primarily designed to work seamlessly with iPhones and other Apple devices, many people are unaware that AirPods can also be connected to a PC. This allows you to enjoy the freedom of wireless audio while working or streaming content on your computer.
In this article, we will guide you through the step-by-step process of connecting AirPods to your PC. Whether you use Windows or macOS, we will cover the necessary steps to ensure a successful connection. We will also address common compatibility issues and provide troubleshooting tips to help you overcome any obstacles you may encounter.
Before we dive into the connection process, let’s first clarify a few things. AirPods come in two versions: the standard AirPods and the AirPods Pro. Both models offer a similar connection process, but the AirPods Pro come with additional features such as Active Noise Cancellation. Regardless of which model you have, the steps outlined in this article should still be applicable.
It is also worth noting that the following instructions assume that your PC is equipped with Bluetooth capabilities. Most modern computers come with built-in Bluetooth functionality, but if your PC doesn’t have it, you will need to purchase an external Bluetooth adapter. These adapters are inexpensive and easy to install, and they will enable your PC to connect to Bluetooth devices like AirPods.
With that said, if you’re ready to enjoy the convenience and freedom that AirPods bring to your PC experience, let’s get started with the first step: checking the compatibility of your PC.
Checking Compatibility
Before attempting to connect your AirPods to your PC, it’s important to ensure that your computer meets the necessary requirements for Bluetooth connectivity. Here’s how you can check the compatibility:
Step 1: Determine the operating system of your PC, whether it’s Windows or macOS. This is crucial as the connection process may vary slightly between the two.
Step 2: Verify that your PC has built-in Bluetooth functionality. On a Windows PC, you can do this by going to the Start menu, typing “Bluetooth,” and selecting the “Bluetooth settings” option from the search results. This will open the Bluetooth settings page, where you can see if Bluetooth is available and enabled. On a macOS PC, click on the Apple menu in the top-left corner, select “System Preferences,” and then click on “Bluetooth.” If Bluetooth is present, it should be listed and turned on.
Step 3: If your PC doesn’t have built-in Bluetooth, you will need to purchase an external Bluetooth adapter. These adapters can be found at most electronics stores or online retailers. Make sure to choose a reputable brand and check for compatibility with your operating system.
Step 4: Ensure that your AirPods are fully charged. Connecting them to your PC with low battery may result in connection issues or an unstable connection.
By following these steps, you can ensure that your PC is equipped with the necessary Bluetooth capabilities to connect with your AirPods. With compatibility confirmed, you’re now ready to move on to the next steps in the connection process.
Installing Bluetooth Adapter (If Needed)
If your PC doesn’t have built-in Bluetooth functionality, you will need to install an external Bluetooth adapter. Follow these steps to install the adapter:
Step 1: Purchase a Bluetooth adapter that is compatible with your PC’s operating system. When choosing an adapter, consider factors such as the version of Bluetooth it supports and its range.
Step 2: Power off your PC and unplug it from any power source to ensure safety during the installation process.
Step 3: Locate an available USB port on your PC. Most Bluetooth adapters connect via USB, so ensure that you have a free port to plug the adapter into.
Step 4: Remove the Bluetooth adapter from its packaging and gently insert it into the USB port. Be careful not to force it in, as this could damage both the adapter and the USB port.
Step 5: Once the adapter is inserted, power on your PC and wait for it to boot up completely.
Step 6: Your operating system should automatically recognize the newly installed Bluetooth adapter. It may take a few moments for the necessary drivers to install. If prompted, follow any on-screen instructions to complete the installation process.
Step 7: Once the adapter is successfully installed, you can verify its presence by going to the Bluetooth settings on your PC. On Windows, go to the Start menu, type “Bluetooth,” and select “Bluetooth settings” from the search results. On macOS, click on the Apple menu, select “System Preferences,” and then click on “Bluetooth.” The adapter should be listed among the available devices.
With the Bluetooth adapter successfully installed, you now have the necessary hardware to connect your AirPods to your PC. In the next section, we will guide you through the steps to enable Bluetooth on your PC.
Enabling Bluetooth on your PC
Before you can connect your AirPods to your PC, you need to ensure that the Bluetooth functionality is enabled. Follow the steps below to enable Bluetooth on your PC:
Step 1: On a Windows PC, click on the Start menu and navigate to the Settings option. On a macOS PC, click on the Apple menu and select “System Preferences.”
Step 2: In the Settings or System Preferences window, look for the Bluetooth option and click on it to open the Bluetooth settings menu.
Step 3: In the Bluetooth settings menu, locate the toggle switch or button that enables Bluetooth. Click on it to turn Bluetooth on. On some PCs, you may need to wait a few moments while the system enables the Bluetooth functionality.
Step 4: Once Bluetooth is enabled, your PC will start searching for nearby Bluetooth devices. Keep the Bluetooth settings menu open as you proceed to the next steps.
It’s important to note that the appearance and layout of the Bluetooth settings may vary depending on your PC’s operating system version and manufacturer. However, the general steps to enable Bluetooth should remain similar.
With Bluetooth now enabled on your PC, you’re one step closer to connecting your AirPods. In the next section, we will guide you through the process of putting your AirPods into pairing mode.
Putting AirPods in Pairing Mode
In order to connect your AirPods to your PC, you need to put your AirPods into pairing mode. Follow the steps below to put your AirPods in pairing mode:
Step 1: Open the lid of your AirPods case. Ensure that both AirPods are inside the case.
Step 2: On the back of the AirPods case, locate the small button. This is the button you will use to enter pairing mode.
Step 3: Press and hold the button on the back of the AirPods case. Keep holding the button until the LED light on the case starts flashing white or amber. This indicates that your AirPods are now in pairing mode.
Step 4: Release the button once the LED light starts flashing. Your AirPods are now ready to be paired with your PC.
Note that if you have already connected your AirPods to another device, such as an iPhone, you may need to disconnect them from that device first. This can be done by going to the Bluetooth settings on that device and selecting “Forget this device” or a similar option.
With your AirPods in pairing mode, you’re now ready to move on to the next section and pair them with your PC.
Pairing AirPods with your PC
After putting your AirPods in pairing mode, you can now proceed to pair them with your PC. The steps to pair AirPods may vary slightly depending on your PC’s operating system. Follow the instructions below based on your PC:
For Windows:
- Open the Start menu and go to the Settings option.
- In the Settings window, select the “Devices” option.
- In the Devices settings, click on the “Bluetooth & other devices” tab.
- Click on the “Add Bluetooth or other device” button.
- A new window will appear. Select the “Bluetooth” option.
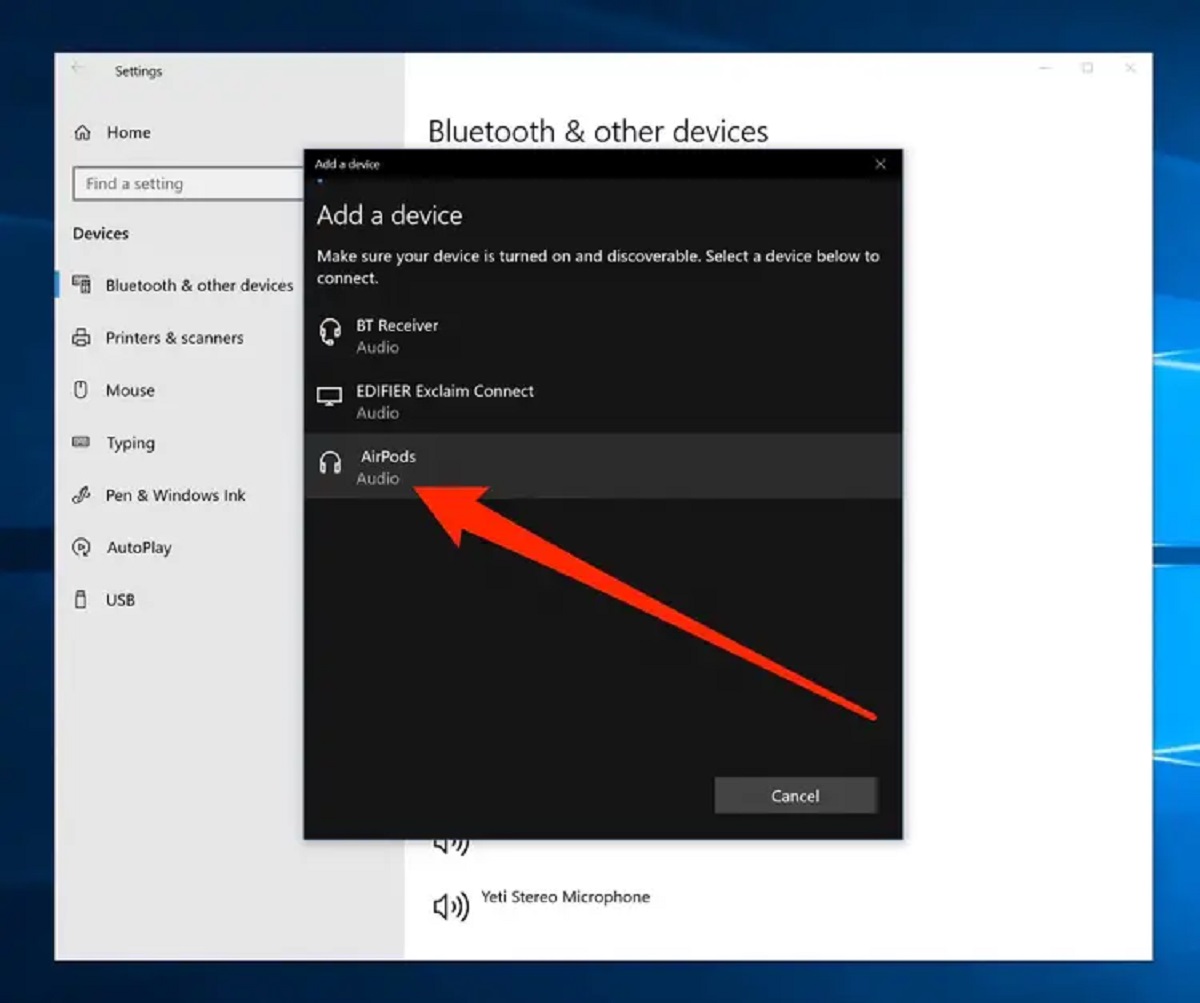
- Your PC will now start searching for nearby Bluetooth devices. Wait for your AirPods to appear on the list.
- Click on your AirPods when they appear in the list.
- Follow any additional on-screen instructions to complete the pairing process.
For macOS:
- Click on the Apple menu and go to the “System Preferences” option.
- In the System Preferences window, click on the “Bluetooth” option.
- Make sure that Bluetooth is turned on.
- Your Mac will start searching for Bluetooth devices. Wait for your AirPods to appear on the list.
- Click on your AirPods when they appear in the list.
- Follow any additional on-screen instructions to complete the pairing process.
Once the pairing process is completed, your AirPods should be successfully connected to your PC. You can now enjoy the wireless audio experience offered by your AirPods while using your computer.
In the next section, we will discuss how to configure AirPods settings on your PC.
Configuring AirPods Settings
After successfully pairing your AirPods with your PC, you may want to configure some settings to optimize your audio experience. Here are a few settings you can adjust:
Sound Output: By default, your PC may be set to use the built-in speakers or another audio device for sound output. To switch the audio output to your AirPods, follow these steps:
- On a Windows PC, right-click on the speaker icon in the system tray and select “Open Sound settings.” Under the “Output” section, select your AirPods as the default device.
- On a macOS PC, click on the Apple menu, select “System Preferences,” and click on “Sound.” In the “Output” tab, select your AirPods from the list of devices.
Microphone Input: If you want to use your AirPods’ microphone for audio input, such as during online calls or voice recordings, you can configure it as the default microphone. Here’s how:
- On a Windows PC, follow the same steps as above to open the Sound settings. Under the “Input” section, select your AirPods as the default microphone.
- On a macOS PC, open the “Sound” settings as mentioned earlier. In the “Input” tab, select your AirPods as the preferred microphone.
Additional Settings: Depending on your PC’s operating system, you may have access to additional settings for your AirPods. These settings may include options for auto-pausing audio when an AirPod is removed, adjusting the double-tap gestures, and more. To access these settings:
- On a Windows PC, you may need to download and install the official AirPods software or the manufacturer’s utility software (if applicable) to access advanced settings.
- On a macOS PC, click on the Apple menu, select “System Preferences,” and click on “Bluetooth.” In the Bluetooth settings, click on the “Options” button next to your AirPods’ name to access additional settings.
By configuring these settings, you can personalize your AirPods’ functionality to suit your preferences and optimize your user experience on your PC.
In the next section, we will discuss some common connection issues with AirPods and how to troubleshoot them.
Troubleshooting Common Connection Issues
While connecting AirPods to your PC is usually a straightforward process, you may encounter some common connection issues. Here are a few troubleshooting steps to help you resolve these issues:
1. Ensure AirPods are charged: Make sure your AirPods have sufficient battery charge to establish a stable connection. If they are running low on battery, place them in the charging case and connect it to a power source.
2. Restart Bluetooth: Sometimes, resetting the Bluetooth connection can fix connectivity problems. Turn off Bluetooth on your PC and then turn it back on. Similarly, turn off Bluetooth on your AirPods by disconnecting them from your PC, and then reconnect them.
3. Update Bluetooth drivers: Outdated or corrupted Bluetooth drivers can cause connection issues. Check the manufacturer’s website or use Windows Update (for Windows PCs) to ensure you have the latest Bluetooth drivers installed.
4. Keep devices in close proximity: Maintain a close distance between your AirPods and your PC to ensure a strong and stable Bluetooth connection. Physical obstacles and long distances can weaken the connection quality.
5. Disconnect from other devices: If your AirPods are connected to another device (such as a phone or tablet) within range, disconnect them from that device before attempting to connect them to your PC. This can prevent conflicts and ensure a smoother connection process.
6. Reset AirPods: If all else fails, you can try resetting your AirPods to their factory settings. To do this, open the Bluetooth settings on your PC, forget your AirPods, and then put them back in pairing mode as described earlier. This should clear any connection-related issues.
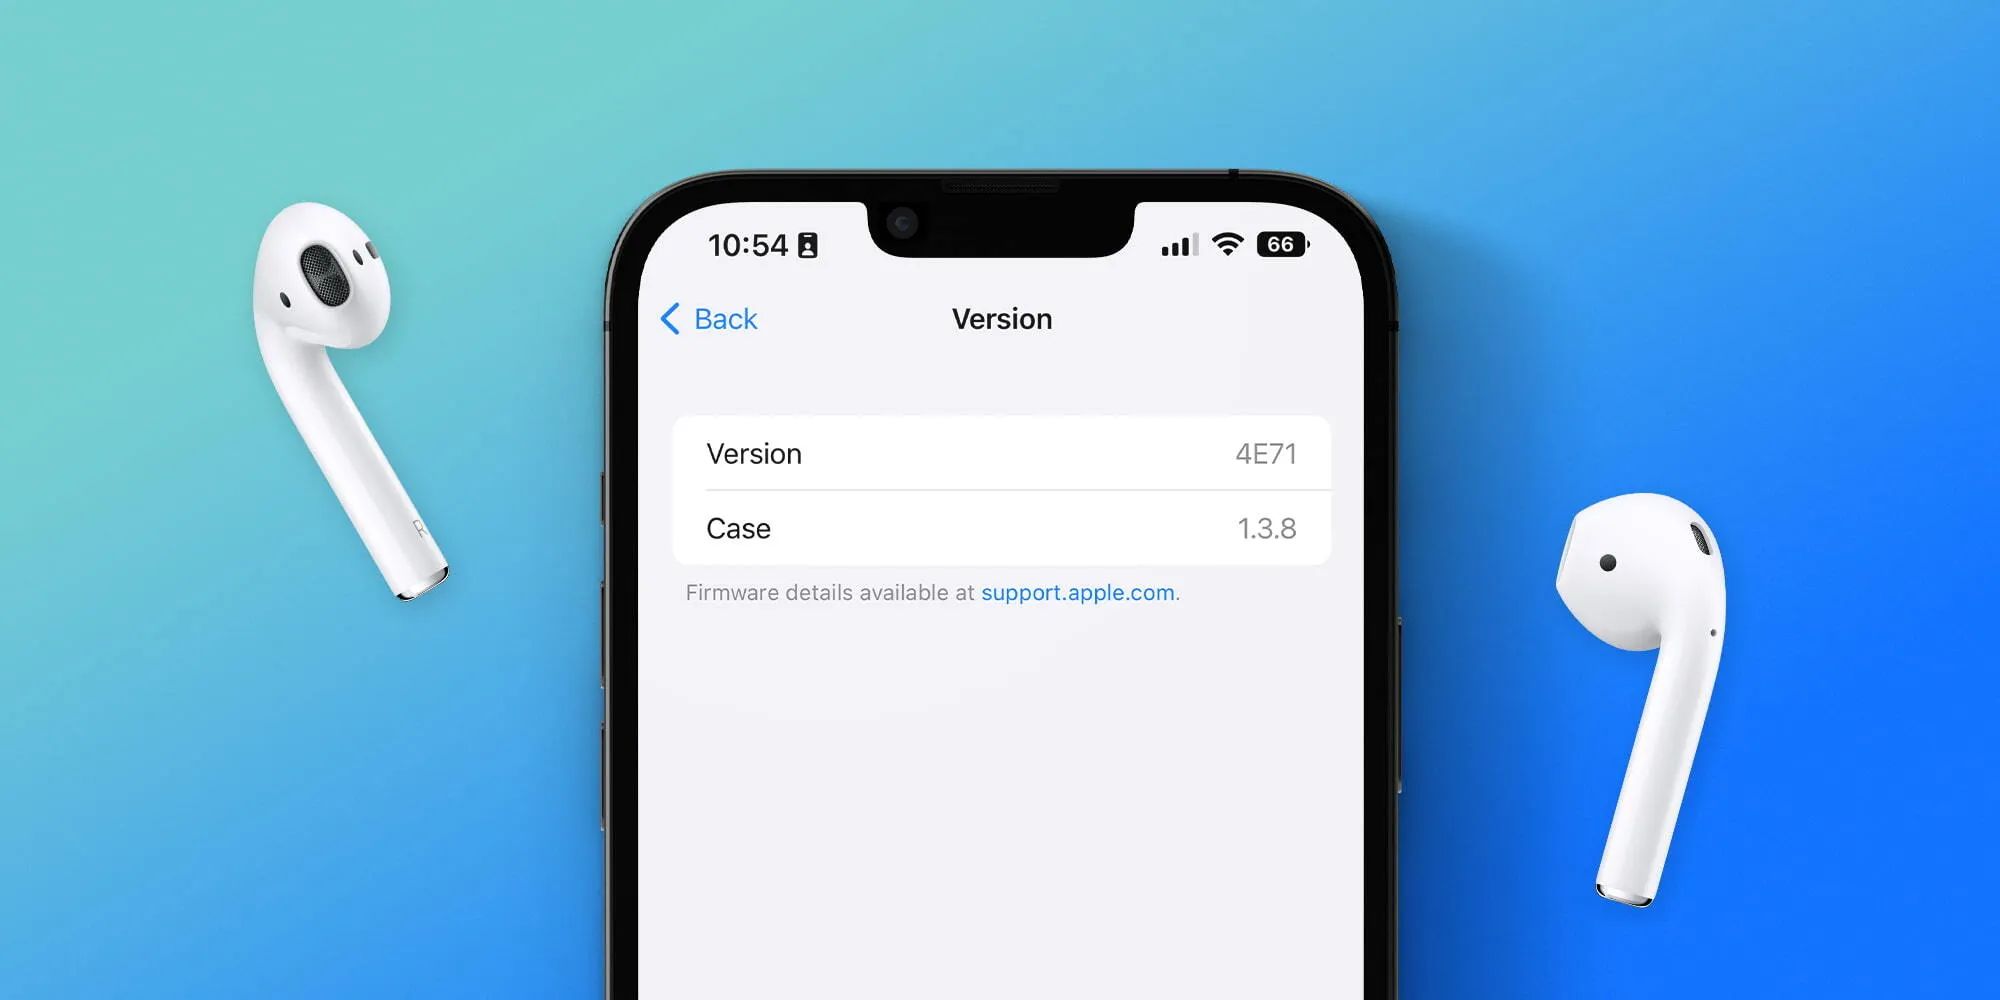
7. Update firmware: Check for firmware updates for your AirPods. Apple periodically releases firmware updates that can improve performance and fix connectivity issues. Connect your AirPods to an Apple device and update their firmware through the device’s settings.
If none of these troubleshooting steps resolve your connection issues, it may be helpful to consult the manufacturer’s support documentation or contact their customer support for further assistance.
With these troubleshooting tips, you should be able to overcome common connection problems and enjoy the seamless wireless experience that AirPods offer on your PC.
Now that you’re equipped with the necessary knowledge to connect and troubleshoot AirPods with your PC, you can make the most of your wireless audio experience.
Conclusion
Connecting your AirPods to your PC opens up a world of wireless audio convenience and freedom. Whether you’re working, streaming, or simply enjoying your favorite content, the ability to use AirPods with your PC enhances your overall user experience.
In this article, we have provided a step-by-step guide to help you connect your AirPods to your PC, regardless of whether you are using Windows or macOS. We started by checking the compatibility of your PC, ensuring that it has built-in Bluetooth or installing an external Bluetooth adapter if needed. We then walked you through the process of enabling Bluetooth on your PC, putting your AirPods in pairing mode, and pairing them with your PC.
Additionally, we discussed how to configure AirPods settings on your PC to further personalize your audio experience. We highlighted troubleshooting tips to overcome common connection issues, ensuring that you can enjoy a stable and seamless wireless connection between your AirPods and your PC.
By following the steps and tips provided in this article, you can confidently connect your AirPods to your PC and enjoy the convenience of wireless audio. Remember to keep your AirPods charged, maintain a close proximity between devices, and stay updated with the latest drivers and firmware.
Now you can immerse yourself in your favorite music, podcasts, videos, and conference calls without the constraints of tangled wires. Embrace the seamless integration of AirPods and your PC for an enhanced audio experience.