Introduction
When it comes to upgrading your SSD (Solid State Drive), one of the simplest and most efficient methods is to clone your existing SSD onto a larger one. This process allows you to seamlessly transfer all your data, settings, and applications to the new SSD, without the hassle of reinstalling everything from scratch.
By moving to a larger SSD, you can take advantage of increased storage capacity, improved performance, and a smoother overall computing experience. Whether you need additional space for your growing media library, want faster load times for your favorite games, or just want to future-proof your system, cloning your SSD is the way to go.
In this step-by-step guide, we will walk you through the process of cloning your SSD to a larger SSD. We will cover everything from selecting the right cloning software to verifying the success of the clone and swapping out the old SSD for the new one.
Before we dive into the details, it’s important to note that cloning an SSD requires a few specific tools and software. You will need the new SSD, a separate storage medium (such as an external hard drive or a USB flash drive) to create a backup, and cloning software capable of creating an exact replica of your current SSD’s contents.
It’s also worth mentioning that while cloning an SSD is generally a straightforward process, it’s always a good idea to back up your data before attempting any disk-related tasks. This safety precaution ensures that you have a copy of your important files in case anything goes wrong during the cloning process.
So, if you’re ready to give your computer a boost by upgrading your SSD, let’s dive into the steps required to clone your current SSD to a larger one.
Getting Started
Before you begin the process of cloning your SSD to a larger one, there are a few things you need to gather and prepare. Having all the necessary tools and software will ensure a smooth and successful cloning process. Here’s what you need to do to get started:
1. Determine the size of the new SSD: Assess your storage needs and choose a larger SSD that suits your requirements. Make sure the new SSD has enough capacity to accommodate all your data, programs, and operating system.
2. Acquire cloning software: Look for reliable and reputable cloning software that supports SSD cloning. There are various options available, both free and paid, such as Clonezilla, EaseUS Todo Backup, and Samsung Data Migration Tool. Choose the one that best meets your needs and download it from the manufacturer’s website.
3. Prepare a backup medium: Before performing any disk-related tasks, it’s essential to create a backup of your current SSD. This ensures that your data is safe in case of any mishaps during the cloning process. Use an external hard drive or a USB flash drive to store the backup, ensuring it has enough capacity to hold all your data.
4. Gather the necessary cables and adapters: If you are using an external hard drive or a USB flash drive as a backup medium, ensure you have the required cables and adapters to connect them to your computer securely. This may include USB-A or USB-C cables, depending on the ports available on your computer.
5. Ensure a stable power source: It’s crucial to have your laptop or computer connected to a stable power source during the cloning process. This prevents any interruptions or power failures that could potentially damage your SSD or result in data loss.
6. Familiarize yourself with the cloning software: Before proceeding with the cloning process, take some time to explore the cloning software you have chosen. Read the user manual or online tutorials to understand its features and functionalities. This will help you navigate the software confidently and ensure you make the correct selections during the cloning process.
By thoroughly preparing for the cloning process, you will have everything you need to successfully transfer your data to a larger SSD. Now that you are all set, it’s time to move on to the next steps and start the cloning process.
Step 1: Selecting the Right Cloning Software
Choosing the right cloning software is crucial for a successful SSD cloning process. With numerous options available in the market, it’s important to select a reliable and user-friendly tool that supports SSD cloning. Here are the key factors to consider when selecting the right cloning software:
Compatibility: Ensure that the chosen software is compatible with your current SSD and the new SSD you plan to clone to. Check the software’s specifications or website to verify compatibility with your specific SSD models.
Features: Assess the features offered by the cloning software. Look for features such as sector-level cloning, disk resizing, and support for different file systems. These features will ensure a smooth and efficient cloning process, especially when transferring data from a smaller SSD to a larger one.
User Interface: Opt for a cloning software with an intuitive and user-friendly interface. A well-designed user interface will make the cloning process easier to navigate, especially for those who are new to SSD cloning. Look for a software that provides clear instructions and tooltips to guide you through each step.
Reliability and Performance: Read reviews and check the reputation of the cloning software. Look for software that is known for its reliability and performance in cloning SSDs. User feedback and ratings can provide valuable insights into the software’s efficiency and success rate.
Safety Measures: Ensure that the chosen software has safety measures in place to protect your data during the cloning process. Features like automatic data verification and integrity checks can help ensure that the clone is created accurately and without any data loss.
Technical Support: Check if the cloning software offers technical support in case you encounter any issues during the process. Having access to prompt and reliable support can be beneficial, especially for beginners or in case of any unexpected errors or difficulties.
Cost: Consider the cost of the cloning software. While there are free options available, paid software often offers additional features and reliable support. Evaluate your budget and requirements to choose the best option that suits your needs.
By carefully considering these factors, you can select the right cloning software that guarantees a smooth and successful SSD cloning process. Once you have chosen the software, proceed to the next step of preparing the new SSD for cloning.
Step 2: Preparing the New SSD
Before you can clone your current SSD to the new one, it’s essential to prepare the new SSD for the cloning process. This involves a few simple steps to ensure that the new SSD is ready to receive the cloned data. Here’s what you need to do:
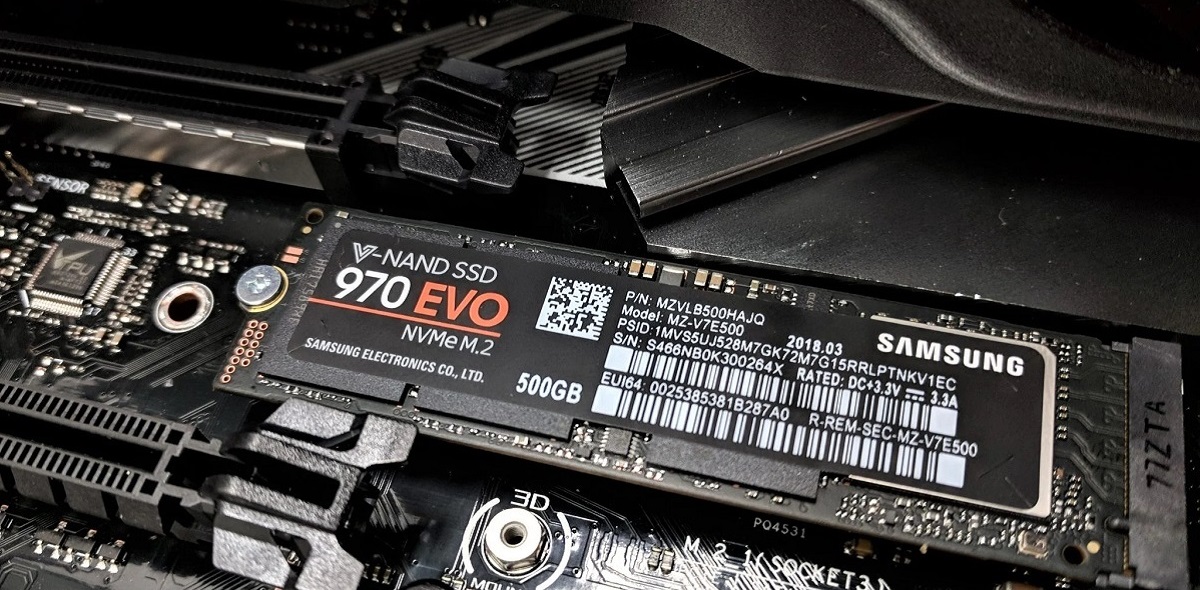
1. Connect the new SSD: If your new SSD is an internal drive, power down your computer and open the case. Connect the new SSD to an available SATA port on your motherboard. If you are using an external SSD, connect it to your computer using the appropriate cable or adapter.
2. Initialize and format the new SSD: Once the new SSD is connected, you may need to initialize and format it before it can be used. To do this, open the Disk Management utility on your computer (Windows) or Disk Utility (macOS) and locate the new SSD. Initialize the drive if prompted and format it with the desired file system (usually NTFS for Windows or APFS for macOS).
3. Partition the new SSD (optional): If you prefer to have multiple partitions on your new SSD, you can divide the drive into separate sections. This can be useful for organizing data or creating dual-boot configurations with different operating systems. Use the Disk Management utility (Windows) or Disk Utility (macOS) to create additional partitions on the new SSD.
4. Check the new SSD’s health: It’s a good practice to check the health of the new SSD before performing the cloning process. Various SSD health monitoring tools are available that can provide valuable information about the drive’s condition, including its remaining lifespan and any potential issues. Ensure that the new SSD is in good health and functioning properly.
5. Clear unnecessary data (optional): If the new SSD previously contained data or was used in another device, consider performing a secure erase or formatting the drive to remove any remnants of previous data. This ensures a clean slate for the cloning process and eliminates any potential conflicts or errors.
6. Update firmware (optional): Check the manufacturer’s website for any firmware updates available for the new SSD. If updates are available, download and install them before proceeding with the cloning process. Firmware updates can help improve the SSD’s performance, stability, and compatibility.
By following these steps, you will ensure that the new SSD is properly prepared for the cloning process. Once the new SSD is ready, you can move on to creating a backup of your current SSD before initiating the cloning process.
Step 3: Creating a Backup of Your Current SSD
Before proceeding with the SSD cloning process, it’s essential to create a backup of your current SSD. This backup will serve as a safety net in case anything goes wrong during the cloning process. Here’s how to create a backup of your SSD:
1. Choose a backup medium: Select a suitable storage medium to store the backup of your current SSD. This can be an external hard drive, a USB flash drive, or a network-attached storage (NAS) device. Ensure that the chosen medium has enough capacity to hold all your data.
2. Install backup software (optional): If you prefer to use backup software for creating the backup, install a reliable and reputable backup tool. There are numerous options available, such as Acronis True Image, Macrium Reflect, and EaseUS Todo Backup. These programs offer features like incremental backups, compression, and encryption for added convenience and security.
3. Initiate the backup process: Open the backup software or use the built-in backup utility provided by your operating system. Select the source drive (your current SSD) and the destination drive (the backup medium). Choose the backup method (full backup is recommended) and start the backup process.
4. Wait for the backup to complete: Depending on the size of your SSD and the speed of the backup medium, the backup process may take some time. It’s important to be patient and let the backup continue until completion. Avoid interrupting or disconnecting the backup medium during this process to prevent data loss or corruption.
5. Verify the backup: Once the backup is complete, verify its integrity to ensure that all your data has been successfully backed up. Cross-check a few files and folders to confirm that they are present and accessible on the backup medium.
6. Keep the backup in a safe place: Store the backup medium in a safe and secure location. Consider keeping it in a different physical location to protect against data loss due to theft, fire, or other unforeseen events. Regularly update the backup to ensure it captures any changes or new data on your current SSD.
By creating a backup of your current SSD, you have a safeguard against any potential issues that may arise during the cloning process. This ensures that your data remains intact and can be easily restored if needed. With the backup in place, you are now ready to proceed to the actual cloning process in the next step.
Step 4: Cloning Your Current SSD to the New SSD
Now that you have prepared the new SSD and created a backup of your current SSD, it’s time to proceed with the cloning process. Follow these steps to clone your current SSD to the new SSD:
1. Launch the cloning software: Open the cloning software that you selected in Step 1 and ensure that both your current SSD and the new SSD are recognized by the software.
2. Select the source and destination drives: In the cloning software, choose your current SSD as the source drive and the new SSD as the destination drive. Double-check the selections to ensure you have chosen the correct drives.
3. Customize cloning settings (if available): Depending on the cloning software you are using, you may have options to customize the cloning process. This can include options to resize partitions, exclude specific files or folders, or enable sector-by-sector cloning. Adjust these settings according to your preferences and requirements.
4. Start the cloning process: Once you have reviewed your selections and customized any necessary settings, click on the “Start” or “Clone” button to initiate the cloning process. The software will start copying the data from your current SSD to the new SSD.
5. Monitor the cloning progress: During the cloning process, you can monitor the progress bar or status indicator provided by the software. This allows you to track the estimated time remaining and ensure that the cloning process is proceeding smoothly.
6. Wait for the cloning to complete: The duration of the cloning process will depend on the size of your current SSD and the speed of your system. It’s important to be patient and avoid interrupting the process. Allow the software to complete the cloning process.
7. Verify the cloned data: Once the cloning process is finished, verify the cloned data on the new SSD. Check a few files and folders to ensure that everything has been successfully transferred and is accessible on the new SSD.
8. Perform a final check: Double-check that all your data, applications, and settings have been accurately cloned to the new SSD. Ensure that any encrypted files, licenses, or activation keys are still in place.
By following these steps, you will successfully clone your current SSD to the new SSD. You can now move on to the next step of verifying the clone to ensure its accuracy and completeness.
Step 5: Verifying the Clone
After cloning your current SSD to the new SSD, it’s crucial to verify the clone to ensure that it has been accurately and completely transferred. Verifying the clone helps identify any potential issues or errors that may have occurred during the cloning process. Follow these steps to verify the clone:
1. Restart your computer: After the cloning process is complete, restart your computer with the new SSD as the boot drive. This allows the system to recognize and load the operating system from the new SSD.
2. Check for successful booting: During startup, observe whether your computer boots up smoothly and without any unusual errors or warnings. Pay attention to the loading time and performance to ensure that the new SSD is functioning properly.
3. Examine the file structure: Navigate through the file system on the new SSD to ensure that all your files, folders, and applications have been successfully transferred. Check various locations to confirm that everything is in place and accessible.
4. Test specific applications: Open your commonly used applications and test them for proper functionality. Verify that all settings, preferences, and customizations have been preserved in the cloned version. Pay attention to any specific software licenses or activation keys that may need to be re-entered.
5. Test external devices: If you have any external devices connected to your computer, such as printers, scanners, or external storage, test their functionality with the new SSD. Ensure that they are recognized and function correctly.
6. Check system performance: Evaluate the overall performance of your system with the new SSD. Monitor the speed of boot times, program launches, and file transfers to ensure that the new SSD is providing the expected performance improvements.
7. Perform data integrity checks: Use reliable data integrity checking tools to scan your files and ensure their integrity on the new SSD. This helps identify any potential data corruption or errors that may have occurred during the cloning process.
8. Compare the new and old SSD: If needed, keep your old SSD as a reference and compare specific folders and files with the new SSD. This step provides additional assurance that the clone is accurate and complete.
By following these steps, you can effectively verify the clone and ensure that everything has been successfully transferred to the new SSD. If you encounter any issues or discrepancies during the verification process, consult the troubleshooting resources provided by the cloning software or seek assistance from technical support.
Step 6: Swap the Old SSD with the New SSD
Once you have successfully verified the clone on the new SSD and ensured that everything is functioning properly, it’s time to swap the old SSD with the new one. Follow these steps to complete the process:
1. Power off your computer: Before proceeding with the swap, power off your computer completely. Ensure that it is not connected to any power source or peripheral devices.
2. Open the computer case: If the old SSD is an internal drive, open your computer case according to the manufacturer’s instructions. Use appropriate tools if necessary to remove the case cover and gain access to the SSD slot.
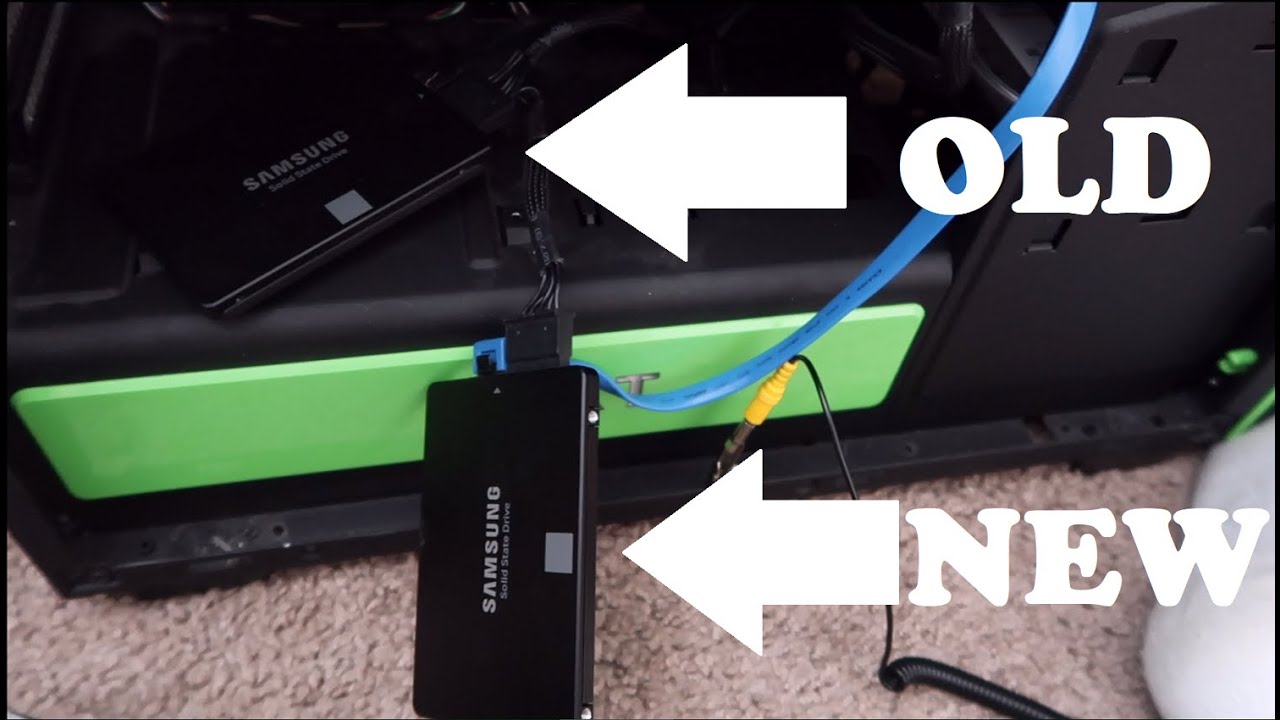
3. Disconnect the old SSD: Carefully disconnect the cables connected to the old SSD, including the power cable and the SATA data cable. Take note of the location and orientation of the old SSD to ensure correct installation of the new SSD.
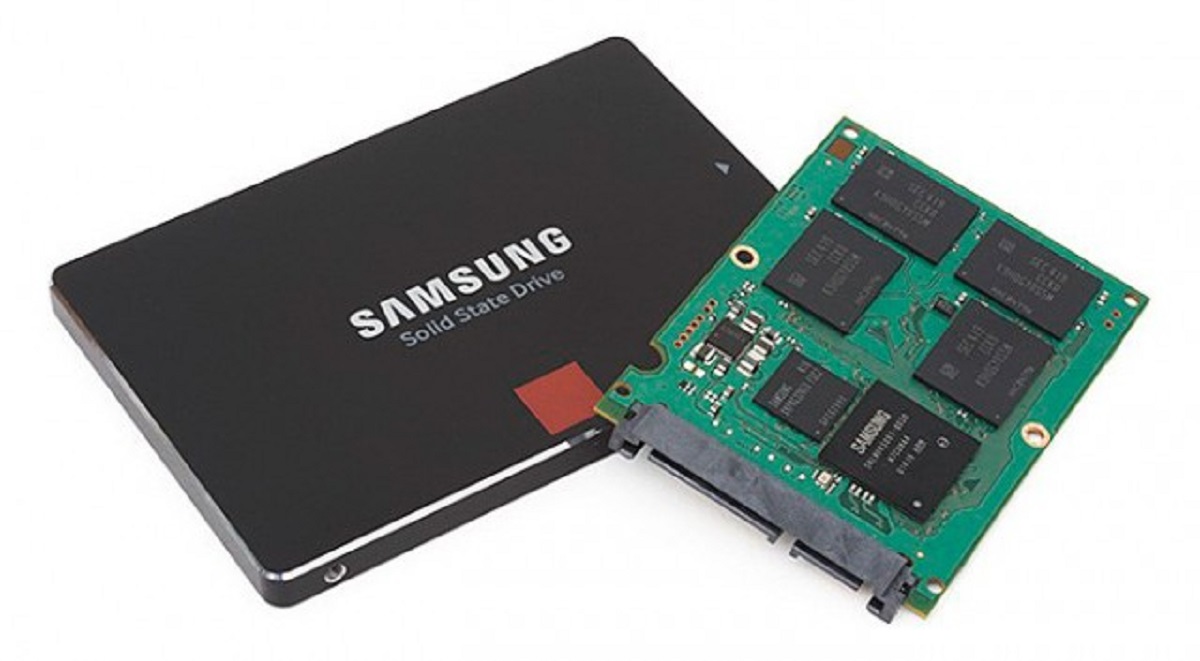
4. Install the new SSD: Insert the new SSD into the slot previously occupied by the old SSD. Ensure that it is securely and firmly connected. Use the mounting screws or brackets included with your computer case to secure the new SSD in place, if required.
5. Connect the cables: Attach the necessary cables to the new SSD. Connect the power cable and the SATA data cable to the corresponding ports on the new SSD. Ensure that the cables are connected firmly and securely to avoid any connectivity issues.
6. Close the computer case: Carefully close the computer case, making sure that all cables are properly organized and secured. Screw the case cover back into place, ensuring that it is tightly secured. Refer to the manufacturer’s instructions if you are unsure about the proper closing procedure.
7. Power on your computer: Once the computer case is closed, reconnect the power source and any peripheral devices that were previously disconnected. Power on your computer and allow it to boot up with the new SSD as the primary drive.
8. Verify the functionality: After the computer has finished booting, check whether the new SSD is recognized by the system and functioning correctly. Ensure that the operating system, files, and applications are all accessible and working as expected.
Congratulations! You have successfully swapped the old SSD with the new one. Enjoy the benefits of increased storage capacity and improved performance on your computer with the upgraded SSD.
Conclusion
Upgrading your SSD to a larger one by cloning your current SSD is a convenient and effective way to enhance your computer’s performance and storage capacity. By following the steps outlined in this guide, you can successfully clone your current SSD and swap it with a larger one.
We started with the importance of selecting the right cloning software that is compatible with your SSD and offers the necessary features and reliability. Preparing the new SSD involved connecting it to your system, initializing and formatting it, and ensuring it is in good health. Creating a backup of your current SSD helps protect your data and provides a safety net during the cloning process.
The actual cloning process requires selecting the correct source and destination drives, customizing any cloning settings, and initiating the cloning process. Verifying the clone ensures that the data has been accurately transferred and all applications and settings are intact. Finally, swapping the old SSD with the new SSD completes the process, allowing you to enjoy the benefits of the upgraded storage and performance.
Remember to consult the user manuals or online resources provided by your SSD manufacturer and the cloning software to ensure a smooth and successful process. If you encounter any difficulties or issues, seek assistance from technical support or professional services.
Now that you have the knowledge and understanding of how to clone your SSD to a larger one, you can confidently upgrade your storage capacity and boost the performance of your computer. Enjoy the improved speed, increased storage space, and enhanced efficiency that a larger SSD can provide!


