Introduction
When it comes to upgrading your computer’s hard drive, cloning your existing hard drive to a solid-state drive (SSD) can be a game-changer. Not only does it allow you to retain all your valuable files and settings, but it also provides a significant boost in performance and speed. If you’re using Windows 8.1, this article will guide you through the process of cloning your hard drive to an SSD, ensuring a seamless transition to a more efficient storage solution.
Upgrading to an SSD comes with a multitude of benefits. First and foremost, an SSD offers lightning-fast boot times, significantly reducing the time it takes for your computer to start up. In addition, the improved read and write speeds of an SSD enhance overall system responsiveness, making every interaction with your computer more fluid and seamless. You’ll notice a noticeable improvement in tasks such as opening applications, loading files, and accessing data.
Another advantage of cloning your hard drive to an SSD is the increased durability and reliability. Unlike traditional hard drives, SSDs don’t have any moving parts, resulting in improved resistance to shocks and vibrations. This makes SSDs perfect for laptops and other portable devices where physical damage is a concern. Furthermore, SSDs generate less heat and consume less power, which can lead to longer battery life and cooler operating temperatures for your computer.
Before diving into the cloning process, it’s important to ensure that your SSD is prepared for the migration. This involves checking for firmware updates from the manufacturer and formatting the SSD to ensure compatibility with your system. Additionally, you’ll need to select the right cloning software that suits your needs and preferences. There are numerous reliable options available, many of which offer user-friendly interfaces and step-by-step instructions to make the process as straightforward as possible.
In the following sections, we’ll explore the necessary steps to clone your hard drive to an SSD in Windows 8.1. We’ll cover everything from backing up your data and connecting the SSD to selecting the source and destination drives to initiating the cloning process. We’ll also address troubleshooting scenarios that may arise and provide guidance on successfully booting from the cloned SSD. By the end of this article, you’ll have all the information you need to upgrade your hard drive to an SSD and experience a significant improvement in performance and efficiency.
Understanding the Benefits
Before we delve into the process of cloning a hard drive to an SSD in Windows 8.1, it’s important to understand the benefits that come with this upgrade. By switching to an SSD, you can expect a significant improvement in overall system performance and user experience.
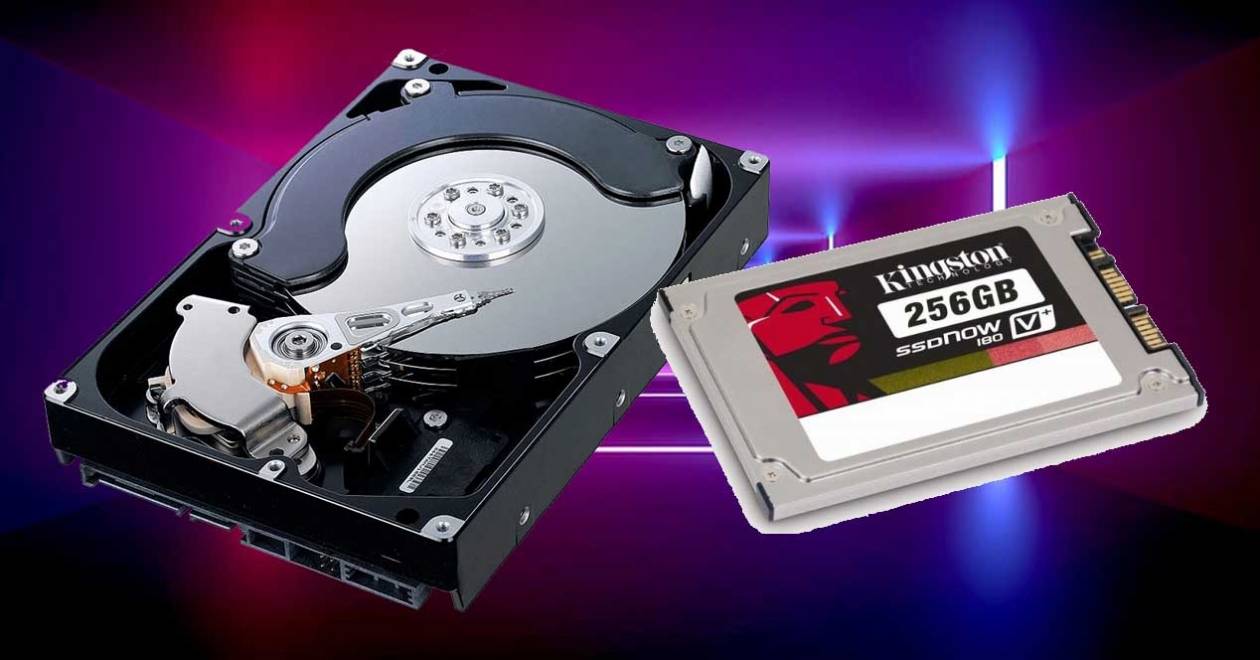
One of the most noticeable advantages of upgrading to an SSD is the lightning-fast speed that it offers. Unlike traditional hard drives, which rely on spinning platters and a mechanical arm to access data, SSDs use flash memory to store and retrieve information. This allows for near-instantaneous data access, resulting in blazing-fast boot times and quicker application launches. You’ll no longer have to wait for your computer to catch up with your demands – it will be ready to go in a matter of seconds.
Not only will an SSD enhance boot and load times, but it will also improve the overall responsiveness of your system. Applications will open almost instantly, and file transfers will happen in the blink of an eye. Whether you’re working on intensive tasks such as video editing or simply browsing the web, you’ll notice a significant improvement in performance and smoothness.
Another advantage of SSDs is their durability and reliability. Unlike traditional hard drives, which are susceptible to mechanical failures and damage from shock, SSDs have no moving parts. This makes them more resistant to physical wear and tear, ensuring that your data remains safe even in rugged environments. Additionally, SSDs generate less heat and consume less power than traditional hard drives, leading to increased energy efficiency and longer battery life for laptops and portable devices.
SSDs also offer a quieter and more silent computing experience. Without the sound of spinning disk platters and moving mechanical arms, your computer will operate in near silence. This can be especially beneficial for those who work in quiet environments or who simply prefer a noise-free computing experience.
In summary, upgrading to an SSD brings a multitude of benefits to your Windows 8.1 system. From faster boot times and improved application performance to increased durability and energy efficiency, an SSD can revolutionize your computing experience. The following sections will guide you through the process of cloning your hard drive to an SSD, enabling you to take full advantage of these benefits and enjoy a more efficient and responsive system.
Preparing Your SSD
Before you embark on the process of cloning your hard drive to an SSD in Windows 8.1, it’s essential to ensure that your SSD is properly prepared for the migration. Taking the time to perform a few preliminary steps will help optimize the cloning process and ensure a smooth transition to your new storage solution.
The first step in preparing your SSD is to check for any firmware updates from the manufacturer. SSD firmware updates often include performance enhancements, bug fixes, and compatibility improvements. Visiting the manufacturer’s website and downloading the latest firmware update, if available, will ensure that your SSD is running on the most up-to-date software. This will help maximize its performance and address any potential bugs or issues that may exist.
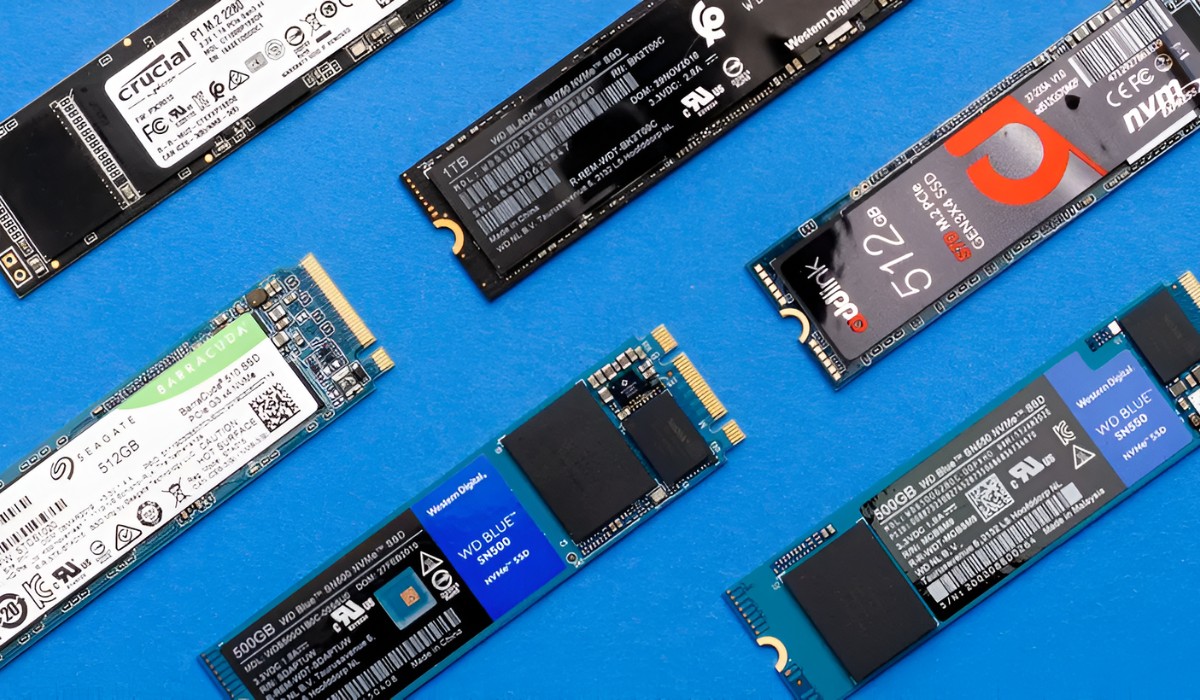
Next, you’ll want to format your SSD. Formatting ensures that the SSD is compatible with your Windows 8.1 system and ready to receive the cloned data. To format your SSD, connect it to your computer using the appropriate connectors (SATA or M.2, depending on your SSD model), and open the Disk Management utility in Windows 8.1. Locate your SSD in the list of drives, right-click on it, and select “Format.” Follow the on-screen prompts to format the SSD with the file system of your choice (typically NTFS).
Before proceeding with the formatting process, make sure to back up any important data stored on the SSD. Formatting erases all existing data on the drive, so it’s crucial to have a backup to ensure you don’t lose any valuable files or documents. You can either create a backup on an external storage device or use cloud storage services to store your data temporarily.
Furthermore, if your SSD is brand new and has not been used before, it’s a good idea to double-check its capacity. Sometimes SSDs have a slightly smaller capacity than advertised due to formatting and file system overhead. Verifying the available storage capacity will ensure that you have enough space to clone your hard drive without any issues.
Once you have completed these preparatory steps, your SSD is ready to go. It’s now time to move on to the next steps of selecting the right cloning software and backing up your data before initiating the cloning process. By properly preparing your SSD, you’re setting the stage for a successful and hassle-free migration from your hard drive to your newly cloned SSD.
Choosing the Right Cloning Software
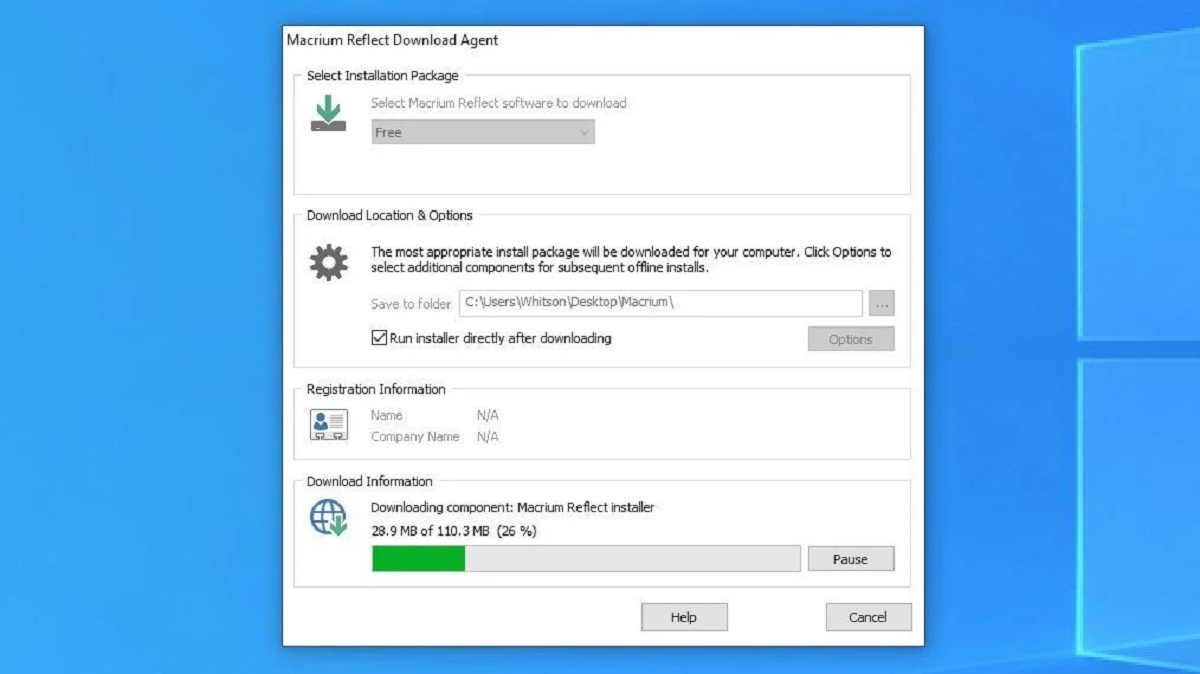
Selecting the appropriate cloning software is a crucial step in successfully cloning your hard drive to an SSD in Windows 8.1. In today’s market, there are several reliable and user-friendly cloning software options available, each with its own unique features and capabilities. Consider the following factors when choosing the right software for your needs.
First and foremost, check for compatibility with your specific SSD model and Windows 8.1 operating system. Ensure that the software you choose supports both the source hard drive and the destination SSD, as well as the version of Windows you’re using. Most SSD manufacturers provide their own cloning software, which is specifically designed to work seamlessly with their drives. However, there are also third-party options available that offer a wider range of compatibility.
Ease of use is another important consideration. Look for a cloning software with a user-friendly interface and intuitive workflow. The software should provide clear instructions and a step-by-step process to guide you through the cloning process. This will make the entire process much simpler, especially if you’re new to cloning or not particularly tech-savvy.
It’s also worth considering additional features offered by the cloning software. Some software allows for selective cloning, allowing you to choose specific partitions or folders to clone instead of cloning the entire hard drive. This can be useful if you have limited space on your SSD or if you only want to clone certain files and applications. Additionally, some software offers features like SSD optimization and automatic alignment, which can further enhance the performance and longevity of your SSD.
Reading user reviews and seeking recommendations from trusted sources can also help you make an informed decision. Look for software that has positive reviews, a high rating, and a track record of successful cloning processes. Real user experiences can provide valuable insights into the software’s reliability and ease of use.
Lastly, consider the cost of the cloning software. While some software options are free, others may require a one-time purchase or a subscription fee. Consider your budget and whether the additional features offered by paid software are worth the investment for your specific cloning needs.
By taking these factors into account, you’ll be able to choose the right cloning software that meets your requirements and ensures a smooth and successful cloning process. In the next section, we’ll discuss the importance of backing up your data before initiating the cloning process to safeguard against potential data loss and ensure a secure migration to your new SSD.
Backing up Your Data
Before you begin the cloning process to migrate your hard drive to an SSD in Windows 8.1, it’s crucial to back up your data. This step ensures that your files and documents are protected in case of any unforeseen issues during the cloning process. Additionally, having a backup gives you peace of mind knowing that you can easily restore your data if needed.
There are several methods you can use to back up your data. One option is to manually copy your important files and folders to an external storage device, such as a USB drive or an external hard drive. Simply select the files you want to back up, right-click, and choose “Copy” before pasting them onto your external storage device. This method is useful for backing up individual files or specific folders that you deem crucial.
Alternatively, you can utilize backup software to create a system image or a full backup of your entire hard drive. Windows 8.1 provides a built-in backup tool called File History, which allows you to back up your files to an external drive or a network location. Simply navigate to the Control Panel, search for “File History,” and follow the instructions to set up and configure your backup preferences.
For a more comprehensive backup solution, consider using third-party backup software that offers advanced features such as incremental backups, encryption, and cloud storage integration. Many reputable backup software options are available in the market, providing you with flexibility and peace of mind when it comes to data protection.
Regardless of the method you choose, it is essential to ensure that your backup is up to date and includes all your important files and documents. Take the time to verify that your backup is complete and accessible before proceeding with the cloning process. Doing so will eliminate the risk of potential data loss during the transition to your new SSD.
Remember that the purpose of backing up your data is to protect yourself against any unexpected issues that may occur during the cloning process. While cloning is usually a straightforward procedure, it’s always better to be safe than sorry. Having a reliable backup allows you to recover your files and easily restore your system in case anything goes wrong.
Now that you’ve backed up your data, you’re ready to move on to the next steps of connecting the SSD and launching the cloning software. These steps will be covered in detail in the upcoming sections, so be sure to follow along for a smooth and successful migration process.
Connecting the SSD
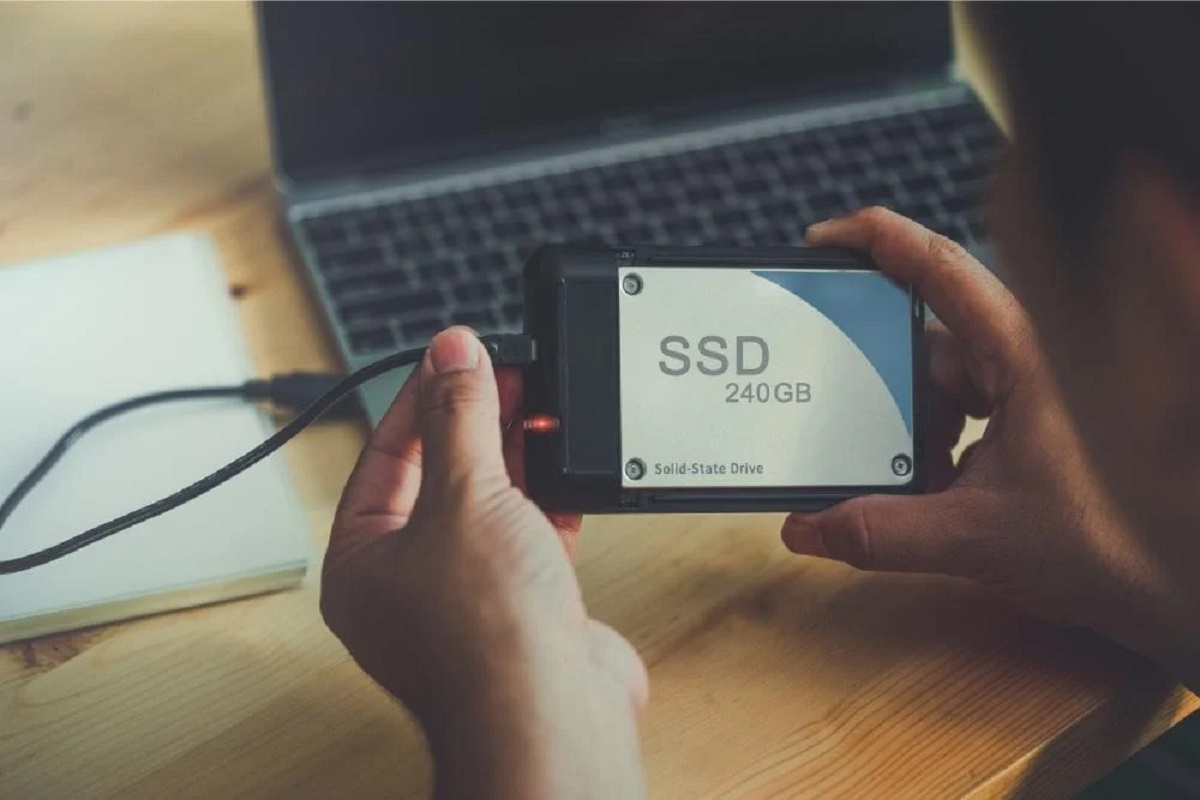
Once you have prepared your SSD and backed up your data, it’s time to connect the SSD to your computer. Properly connecting the SSD ensures that it can be recognized by the system and serves as the destination drive for the cloning process. Follow these steps to connect your SSD to your Windows 8.1 computer.
1. Shut down your computer and unplug it from the power source. This ensures that you are working with the hardware safely.
2. Open your computer case or access the area where your hard drive resides. The location may vary depending on the type of computer you have. Note that if you are using a laptop, the hard drive and SSD connection process may differ slightly.
3. Locate an available SATA port on your motherboard. Most desktop computers have multiple SATA ports, usually labeled SATA0, SATA1, etc. Alternatively, if you have an M.2 SSD, it will slot directly into the M.2 slot on your motherboard.
4. Connect one end of a SATA data cable to the SATA port on your motherboard or the M.2 slot, ensuring a secure connection.
5. Connect the other end of the SATA data cable to the corresponding SATA port on your SSD. Be gentle and secure the cable properly to prevent it from getting loose during operation.
6. If you are using a traditional SSD that requires power, connect a SATA power cable from the power supply unit to your SSD. Ensure a secure connection and proper alignment to prevent any electrical issues.
7. Double-check all connections to ensure they are secure and properly aligned. Once you are confident that everything is connected correctly, you can proceed to close your computer case or secure the SSD in its designated location.
Once you have connected your SSD, you can plug your computer back into the power source and power it on. The system should recognize the newly connected SSD, and it will show up in the list of drives in Windows Explorer. You are now ready to move on to the next steps of launching the cloning software and initiating the cloning process, which will be covered in detail in the following sections.
Connecting your SSD properly is a crucial step in the cloning process. Ensure that all connections are secure and aligned to avoid any potential issues during the cloning process. With your SSD now connected, you’re one step closer to experiencing the performance benefits of a solid-state drive.
Launching the Cloning Software
With your SSD connected and recognized by your system, it’s time to launch the cloning software that you have chosen. The cloning software will guide you through the process of transferring all data from your existing hard drive to the newly connected SSD. Follow these steps to launch the cloning software and initiate the cloning process.
1. Open the cloning software on your Windows 8.1 computer. You can typically find the software in your Start menu or desktop if you have previously installed it. If you are using a manufacturer-provided cloning software, it may come bundled with your SSD or available for download from the manufacturer’s website.
2. Once the software is open, carefully review the user interface and familiarize yourself with its features. Take note of any specific instructions or prompts provided by the software.
3. In most cloning software, you will be presented with options to select the source drive (your existing hard drive) and the destination drive (your newly connected SSD). Make sure to select the correct drives to ensure a successful cloning process. Double-check the drive sizes and model names to avoid any confusion.
4. Some cloning software may provide additional options or settings to customize the cloning process. These options might include the ability to choose specific partitions or adjust partition sizes on the destination drive. Take your time to understand and configure these options, if necessary, according to your preferences.
5. Once you have reviewed all the settings and options, you can proceed to initiate the cloning process. Depending on the software, there may be a “Start” or “Clone” button to click, or you may need to follow a series of prompts to confirm your selections and begin the cloning process.
6. During the cloning process, the software will copy all the data from your source drive to the destination SSD. The time required will vary depending on the size of your hard drive and the speed of your computer. Some software may provide a progress bar or estimate the remaining time.
7. Once the cloning process is complete, the software will display a confirmation message. Take a moment to review the completion message and ensure that the cloning process was successful with no errors reported. If any errors or issues arise, consult the documentation or support resources provided by the software manufacturer for guidance.
Launching the cloning software is a crucial step that sets the stage for successfully transferring all your data and settings from your hard drive to the newly connected SSD. By following these steps and carefully reviewing the software’s user interface and instructions, you’ll be well on your way to experiencing the improved performance and efficiency that comes with an SSD upgrade.
Selecting the Source and Destination Drives
Selecting the correct source and destination drives is a critical step when cloning your hard drive to an SSD in Windows 8.1. This ensures that all your data is transferred accurately and efficiently. Follow these steps to correctly identify and select the source and destination drives in your chosen cloning software.
1. Launch the cloning software on your Windows 8.1 computer. Most cloning software will have a user-friendly interface that guides you through the process.
2. Locate the option to select the source drive. In most cases, the software will automatically detect your existing hard drive as the source drive. However, double-check to ensure that the correct drive is selected. This is crucial to ensure that all your data is cloned accurately.
3. Look for the option to select the destination drive. The newly connected SSD should be listed as an available drive. Choose the SSD as the destination drive for the cloning process. Again, verify the drive’s model name and capacity to ensure that you have selected the correct SSD.
4. Some cloning software might provide additional options or settings related to the source and destination drives. For example, you may have the option to exclude certain files or partitions from the cloning process. Take your time to review and configure these settings according to your specific requirements.
5. Before proceeding with the cloning process, double-check that you have selected the correct source and destination drives. Ensure that the drive sizes and model names are accurate to avoid any data loss or cloning errors.
6. Once you are confident that you have selected the correct source and destination drives, you can proceed with the cloning process. Depending on the software you are using, it may provide a “Start” or “Clone” button to initiate the process. Follow any additional prompts or confirmations required by the software to begin the cloning process.
It’s essential to pay close attention during the drive selection process to prevent any data loss or errors. Verifying the source and destination drives before starting the cloning process will help ensure a smooth and successful migration from your existing hard drive to the SSD. Following these steps will help you accurately select the drives and move on to the next stages of the cloning process.
Adjusting Partition Sizes (if necessary)
When cloning your hard drive to an SSD in Windows 8.1, it may be necessary to adjust partition sizes on the destination drive. This step ensures that the partitions on your SSD are properly aligned and optimized for the best performance and utilization of available space. Here’s how you can adjust partition sizes if required in your chosen cloning software.
1. Launch the cloning software and navigate to the section or option related to partition resizing or adjustment. Not all cloning software may offer this feature, especially if you want to keep the same partition sizes.
2. Once you’ve located the partition resizing option, carefully consider your requirements and determine the appropriate partition sizes for your SSD. You might choose to allocate more space to certain partitions that contain important files or applications, or you may want to consolidate or resize partitions to maximize storage efficiency.
3. Follow the instructions provided by the software to adjust the partition sizes. Some software may allow you to manually enter specific sizes for each partition, while others may provide a graphical interface where you can drag and resize partition boundaries.
4. Pay attention to any warnings or notifications the software may provide when adjusting partition sizes. Some restrictions apply, such as the need to keep certain system partitions intact or within specific size limits.
5. Confirm and apply the changes once you’re satisfied with the adjusted partition sizes. Pay close attention to any final prompts or confirmations provided by the software to ensure that the changes are made accurately.
It’s important to note that adjusting partition sizes can potentially result in data loss if not done correctly. Be sure to back up any important data before making any changes to ensure you have a safety net in case any issues arise during the process.
Not all cloning software may offer the option to adjust partition sizes. In some cases, the software may automatically resize partitions based on the destination drive’s capacity. If you have specific requirements or preferences regarding partition sizes, it’s recommended to choose cloning software that allows for this customization.
By adjusting partition sizes if necessary, you can ensure optimal storage utilization and performance on your cloned SSD. Once you have adjusted the partition sizes to your satisfaction, you can proceed to initiate the cloning process and move closer to experiencing the benefits of your new SSD.
Initiating the Cloning Process
After verifying the source and destination drives, adjusting partition sizes (if necessary), and ensuring you have a proper backup, you are now ready to initiate the cloning process. This step transfers all the data from your existing hard drive to the new SSD. Follow these steps to start the cloning process using your chosen cloning software.
1. Open the cloning software on your Windows 8.1 computer and navigate to the section or option related to initiating the cloning process. This will typically be labeled as “Start Clone” or something similar.
2. Before proceeding, double-check your source and destination drives to ensure you have selected the correct ones. This is crucial to cloning the data accurately without any errors or data loss.
3. Some cloning software may offer additional options or settings before starting the cloning process. Take a moment to review these options and configure them based on your preferences and requirements. This may include options such as selecting the cloning method (sector-by-sector or intelligent cloning) or enabling advanced optimization features.
4. Once you are ready to begin, click the “Start Clone” or equivalent button to initiate the cloning process. The software will start copying the data from your source drive to the destination SSD.
5. Depending on the size of your hard drive and the speed of your computer, the cloning process may take some time. You may see a progress bar, estimated time remaining, or other indications of the cloning progress within the software’s user interface. Be patient and allow the software to complete the process without interrupting it.
6. Once the cloning process is complete, the software will display a confirmation message. Take a moment to review the message and ensure that there were no errors or interruptions during the cloning process. If any issues are reported, consult the software’s documentation or seek support from the manufacturer if necessary.
With the cloning process completed, you have successfully transferred all your data from the source drive to the destination SSD. The next steps involve verifying the cloned drive and preparing for the final stages of the migration. In the following sections, we will cover how to verify the cloned drive and make the necessary changes to ensure a successful transition to your newly cloned SSD.
Verifying the Cloned Drive
After completing the cloning process of your hard drive to the SSD in Windows 8.1, it is essential to verify the cloned drive to ensure that the data has been successfully transferred and the SSD is ready to be used as the new primary storage. To verify the cloned drive, follow these steps:
1. Shut down your computer and disconnect the power source. This precautionary step will protect both you and your computer during the verification process.
2. Open your computer case and locate the newly cloned SSD. Ensure that it is securely connected to your system and properly seated in its designated slot.
3. Close the computer case and reconnect the power source.
4. Power on your computer and let it boot up. Once the operating system loads, navigate to the File Explorer or This PC to view the newly cloned SSD. Verify that the SSD is listed as an available drive and that its capacity matches your expectations.
5. Double-click on the SSD drive to open it and browse its contents. Check if all your files, folders, and applications from the source drive are present on the SSD. Ensure that no data was left behind or lost during the cloning process.
6. Test the SSD’s functionality by opening some files and launching a few applications. Ensure that these operations work smoothly without any noticeable performance issues.
7. Pay attention to the performance of your computer. The SSD should enhance the overall speed and responsiveness of your system compared to the previous hard drive. If you experience any unexpected slowdowns or issues, consider investigating the potential causes further.
By verifying the cloned drive, you can be confident that the data has been successfully transferred, and your new SSD is ready for use. This step ensures that you have a functional and reliable storage solution that will provide improved performance and efficiency.
If you encounter any errors or issues during the verification process, consult the documentation provided with the cloning software or reach out to the software manufacturer’s support team for assistance. It’s important to address any problems promptly to ensure a smooth transition to the newly cloned SSD.
Once you have successfully verified the cloned drive, you’re now ready to proceed with the final stages of the migration, including rebooting your computer, entering the BIOS, and changing the boot priority to prioritize the SSD. This will be covered in detail in the upcoming sections.
Rebooting and Entering BIOS
After verifying the cloned drive and ensuring that all your data is successfully transferred to the SSD in Windows 8.1, the next step is to reboot your computer and enter the BIOS (Basic Input/Output System) to make the necessary changes for your system to recognize and boot from the SSD. Follow these steps to reboot and enter the BIOS on your computer:
1. Save and close any open applications or files on your computer.
2. Click on the “Start” button on your Windows 8.1 computer and select “Restart.” Alternatively, you can press the Windows key + X and choose “Shut down or sign out” and then “Restart.”
3. As your computer restarts, pay close attention to the screen for any instructions or prompts to enter the BIOS. Commonly used keys to access the BIOS include Esc, F2, F10, F12, or Del. The specific key varies depending on the manufacturer and model of your computer. If you’re unsure which key to press, consult your computer’s documentation or perform a quick internet search for your specific make and model.
4. Once you’ve identified the correct key, press it repeatedly during the computer’s startup phase until you enter the BIOS setup utility. It is important to press the key at the right time to avoid missing the opportunity to access the BIOS.
5. Inside the BIOS settings, navigate to the “Boot” or “Boot Options” section. This section may have a different name depending on your computer’s manufacturer.
6. Locate the “Boot Priority” or “Boot Order” option within the “Boot” section. This determines the sequence in which your computer will search for a bootable device.
7. Set the SSD as the first boot device in the boot priority list. This ensures that your computer will prioritize booting from the SSD instead of the old hard drive. Use the instructions provided within the BIOS interface to change the boot priority order.
8. Save the changes and exit the BIOS. Look for an option to save the settings and exit the BIOS setup utility. The specific steps may differ depending on your BIOS version and manufacturer. Generally, you will need to press a key such as F10 or Esc to save the changes.
By rebooting your computer and entering the BIOS, you can properly configure the boot priority to ensure that the system boots from the newly cloned SSD. Once you have made these changes and saved the settings, your computer will recognize the SSD as the primary boot device, leading to faster startup times and improved overall performance.
In the next section, we will discuss the final steps of booting from the SSD and verifying the successful cloning process, allowing you to fully experience the benefits of your newly upgraded storage solution.
Changing Boot Priority
After entering the BIOS and accessing the boot settings, the next step is to change the boot priority to ensure that your computer boots from the newly cloned SSD instead of the old hard drive. Follow these steps to change the boot priority in the BIOS on your Windows 8.1 computer:
1. Inside the BIOS setup utility, navigate to the “Boot” or “Boot Options” section. The specific location may vary depending on your computer’s manufacturer and BIOS version.
2. Locate the “Boot Priority” or “Boot Order” option within the “Boot” section. This option determines the order in which your computer looks for a bootable device during startup.
3. Adjust the boot priority so that the SSD is set as the first boot device. This ensures that your computer will attempt to boot from the SSD before any other devices. Use the provided instructions within the BIOS interface to change the boot priority order.
4. To change the boot priority, you usually need to select the device and use the designated keys (e.g., +/-, F5/F6) to move it to the top of the boot list. The SSD should be selected as the primary boot device, and any other devices can be moved down the list or disabled if desired.
5. Review your changes in the BIOS and ensure that the SSD is now set as the first boot device. Double-check that all other devices are in the desired order.
6. Save the changes and exit the BIOS setup utility. Look for an option to save the settings and exit the BIOS. The exact steps may vary depending on your BIOS version and manufacturer. Typically, you will need to press a key such as F10 or Esc to save the changes and exit the BIOS.
By changing the boot priority, you are instructing your computer to prioritize booting from the SSD, which houses your cloned Windows 8.1 system. Once these changes are saved and the computer is restarted, it should now boot directly from the SSD, resulting in faster startup times and improved overall performance.
In the next section, we will discuss the final steps to boot from the SSD and verify the successful cloning process, ensuring that your Windows 8.1 system is fully migrated and functional on the newly upgraded SSD.
Booting from the SSD
After changing the boot priority in the BIOS, the final step is to boot your computer from the newly cloned SSD. This step ensures that your Windows 8.1 system loads from the SSD, providing you with the improved performance and benefits of the upgraded storage. Follow these steps to successfully boot from the SSD:
1. Restart your computer to initiate the boot process. If you have open applications or files, save your work and close them before restarting.
2. As your computer restarts, pay close attention to the initial screen or any prompts that appear. Look for a message that instructs you to press a key to enter the boot menu or boot options. Common keys used to access the boot menu include F12, F10, Esc, or Del. The specific key varies based on your computer’s manufacturer.
3. Press the designated key repeatedly to enter the boot menu. It’s important to press the key at the right time during the startup phase to access the boot options effectively.
4. In the boot menu, locate the SSD in the list of available devices. Select the SSD as the device to boot from by highlighting it using the arrow keys on your keyboard.
5. Once the SSD is selected, press Enter to confirm your choice and proceed with the boot process. Your computer will now boot from the SSD, loading your Windows 8.1 system from the newly cloned drive.
6. Be patient as the computer boots from the SSD. It may take slightly longer for the initial boot compared to subsequent boots, as your system may need to adjust certain settings during the first boot from the new drive.
7. Once the boot process completes, you’ll be greeted with your familiar Windows 8.1 desktop. Take a moment to ensure that everything is functioning properly and that your system recognizes the cloned SSD as the primary storage device.
Congratulations! You have successfully booted from the SSD, and your Windows 8.1 system is now running on the upgraded storage. Enjoy the improved performance, faster startup times, and overall enhanced user experience that the SSD brings.
In the final section, we’ll discuss the importance of verifying the successful cloning process to ensure that all your data and settings have been transferred accurately to the newly cloned SSD.
Verifying the Successful Cloning Process
After booting your computer from the newly cloned SSD in Windows 8.1, it’s crucial to verify the successful cloning process to ensure that all your data and settings have been accurately transferred. Verifying the cloning process gives you peace of mind, knowing that your Windows system is fully functional and operational on the upgraded SSD. Follow these steps to verify the successful cloning process:
1. Take a moment to explore your Windows 8.1 system as you normally would. Open different applications, access files, and perform typical tasks to ensure everything is functioning as expected.
2. Verify that your personal files and folders are all intact on the SSD. Check important directories such as Documents, Pictures, Videos, and Desktop to ensure that your files are present and accessible.
3. Test any specialized software or applications that you regularly use. Verify that they open without any issues and that your custom settings and preferences are preserved.
4. Check your internet connectivity and ensure that your network settings are correctly configured. Test your web browser and verify that you can access websites without any problems.
5. Examine the performance of your computer. Notice if the boot times are faster, applications load quickly, and overall system responsiveness has improved compared to the previous hard drive.
6. If you encounter any issues or discrepancies during the verification process, review any error messages and consider consulting the documentation provided with the cloning software or seeking support from the software manufacturer.
By verifying the successful cloning process, you can ensure that all your data and settings are accurately transferred to the newly cloned SSD. It gives you confidence that the migration was successful and that your Windows 8.1 system is fully functional on the upgraded storage.
If you encounter any issues or believe that the cloning process was not successful, it’s recommended to consult professional help or reach out to the cloning software’s support team for assistance. They can guide you through troubleshooting steps and provide solutions to address any potential issues.
Now that you have verified the successful cloning process and confirmed that your Windows 8.1 system is functioning optimally on the newly cloned SSD, you can fully enjoy the improved performance, responsiveness, and efficiency that the SSD brings to your computer.
Conclusion
Cloning a hard drive to an SSD in Windows 8.1 is a worthwhile upgrade that can significantly improve your computer’s performance and user experience. By following the steps outlined in this guide, you can successfully migrate your data and operating system to a faster and more reliable storage solution.
Throughout the process, we discussed the benefits of upgrading to an SSD, the importance of preparing your SSD and selecting the right cloning software. We covered the crucial steps of backing up your data, connecting the SSD, launching the cloning software, adjusting partition sizes if necessary, and verifying the cloned drive.
We also provided guidance on changing the boot priority in the BIOS and booting from the newly cloned SSD. Finally, we emphasized the significance of verifying the successful cloning process to ensure a seamless transition and avoid any data loss or errors.
Remember, always exercise caution and ensure you have a backup of your data before proceeding with any major changes to your system. Additionally, seek professional assistance or reference the documentation provided with your cloning software if you encounter any difficulties or uncertainties.
With your Windows 8.1 system now running on the upgraded SSD, you can enjoy faster boot times, improved application performance, and an overall enhanced user experience. Utilizing the full potential of your new SSD, you can work more efficiently, access your files and applications quicker, and enjoy a smoother computing experience.
It’s important to note that the specific steps and details may vary depending on your computer’s manufacturer, SSD model, and the cloning software you choose. Always refer to the relevant documentation and resources specific to your setup to ensure accurate and successful execution.
Congratulations on successfully cloning your hard drive to an SSD in Windows 8.1! You’ve taken a significant step towards optimizing the performance and efficiency of your computer. Enjoy the benefits of your upgraded storage solution and get ready for a faster and more responsive computing experience.


