Introduction
Welcome to the comprehensive guide on how to change the password on your Xfinity wireless router. Your Wi-Fi network password is a critical security measure that helps safeguard your internet connection and personal information from unauthorized access. By periodically changing your Wi-Fi password, you can ensure that only trusted individuals have access to your network, improving the overall security of your home or office network.
Changing the password on your Xfinity wireless router is a straightforward process that requires accessing the router interface and navigating to the appropriate settings. In this step-by-step guide, we will walk you through each stage, making the entire process quick and hassle-free.
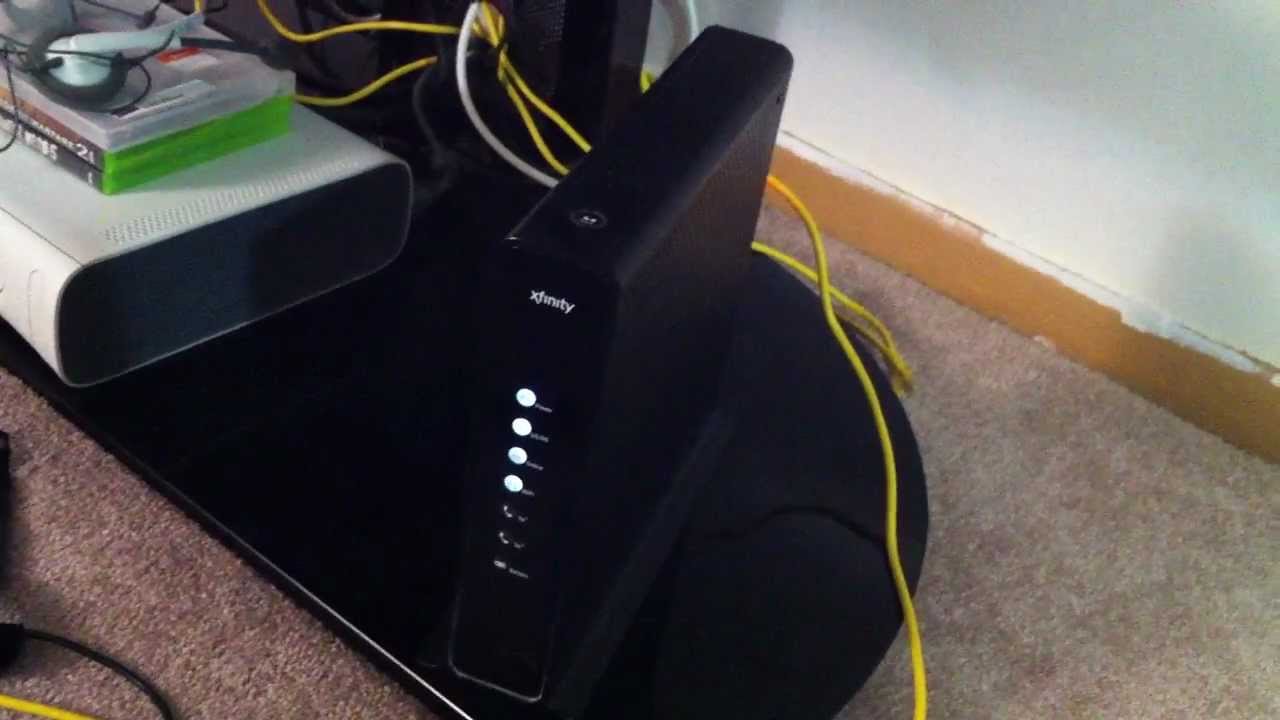
Before we dive into the steps, it is essential to gather a few details. First, make sure you have your Xfinity router’s IP address, username, and password on hand. Typically, this information can be found on the router itself or in the documentation provided by Xfinity. If you cannot locate these details, contact Xfinity customer support for assistance.
It’s important to note that altering your Wi-Fi password will result in all devices currently connected to your network being disconnected. Consequently, once you change your password, you will need to reconnect all your devices using the new password to regain internet access.
With these preliminary details in mind, let’s proceed to the first step: accessing the Xfinity wireless router interface.
Step 1: Access the Xfinity Wireless Router Interface
To change the password on your Xfinity wireless router, you first need to access the router’s interface through a web browser. Follow these steps:
- Connect to your Xfinity Wi-Fi network by selecting it from the list of available networks on your device.
- Open a web browser such as Google Chrome, Mozilla Firefox, or Safari.
- In the address bar, type in the IP address of your Xfinity router. The default IP address is usually “192.168.0.1” or “10.0.0.1”.
- Press Enter to load the router’s login page.
Upon successful entry, you will be prompted to enter your router’s login credentials in order to proceed.
If you have not changed the default login information, use the default username and password provided by Xfinity. Alternatively, if you have modified the login credentials in the past and cannot recall them, you may need to perform a factory reset on the router by pressing and holding the small reset button located on the back or bottom of the device. Refer to your router’s manual for specific instructions on how to perform a factory reset.
Once you have entered the correct login credentials, click the “Login” or “Submit” button to proceed to the router’s interface. This will give you access to various router settings, including the option to change your Wi-Fi password.
Now that you have successfully accessed the Xfinity wireless router interface, it’s time to move on to the next step: logging in to the router.
Step 2: Login to the Router
Once you have accessed the Xfinity wireless router interface in the previous step, the next step is to log in to the router. Follow these instructions:
- On the router’s login page, enter your username and password in the respective fields. If you have not changed the default login credentials, use the default username and password provided by Xfinity. However, if you have modified the login information in the past and cannot recall it, you may need to perform a factory reset on the router. Refer to the router’s manual for specific instructions on how to do this.
- After entering the correct login credentials, click on the “Login” or “Submit” button to proceed.
Once you have successfully logged in to the router, you will gain access to the router’s settings and configuration options. At this point, you can continue to the next step to find the Wi-Fi settings.
It’s important to note that if you encounter any issues logging in to the router, such as forgotten login credentials or difficulty accessing the router interface, you should contact Xfinity customer support for assistance. They will be able to provide guidance and help you regain access to the router.
Now that you have successfully logged in to the router, it’s time to move on to the next step: finding the Wi-Fi settings.
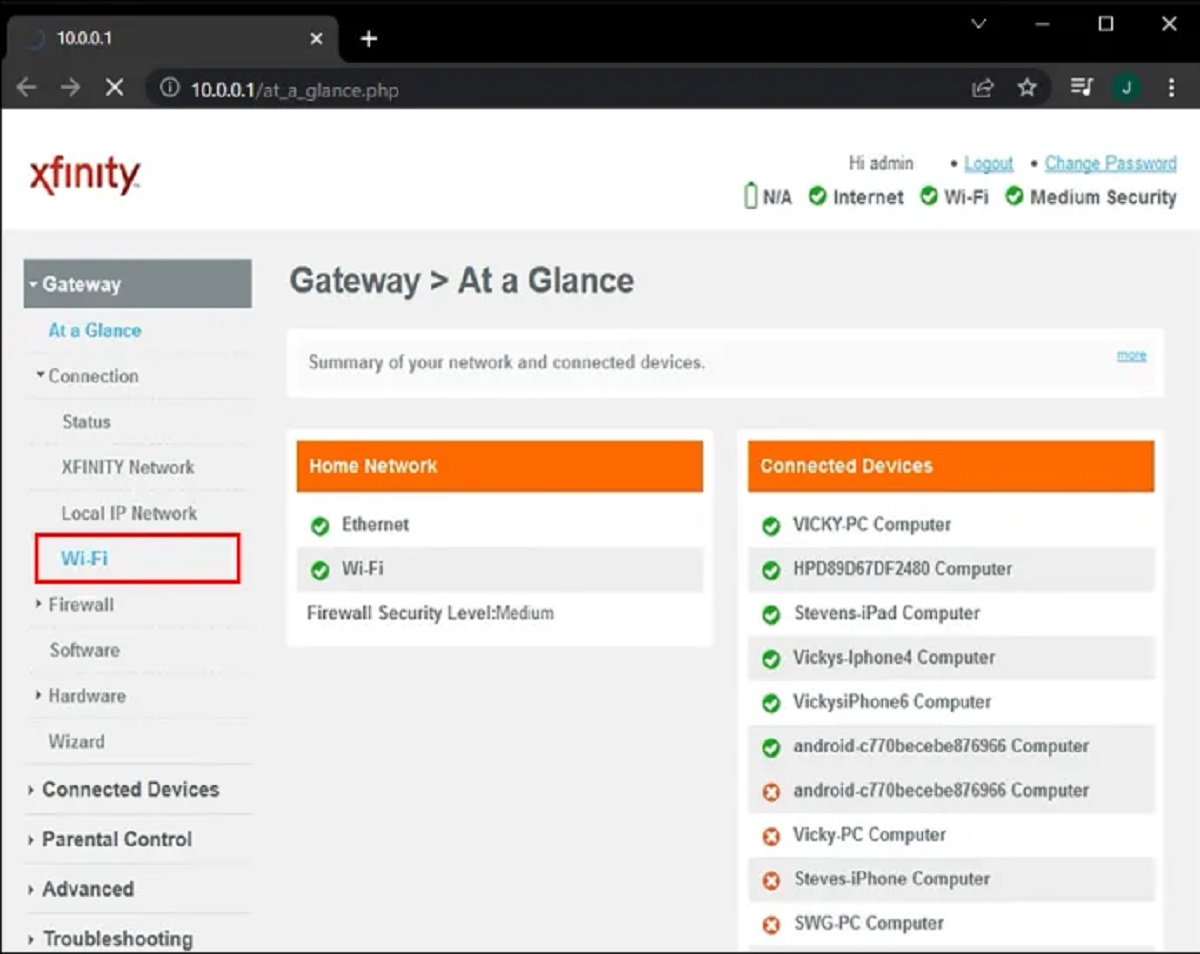
Step 3: Find the Wi-Fi Settings
After logging in to the Xfinity wireless router interface, the next step is to locate the Wi-Fi settings. Follow these simple instructions:
- Once you are logged in to the router, you will be presented with a dashboard or a main menu that contains various options and settings.
- Navigate through the menu or tabs until you find the “Wi-Fi” or “Wireless” settings. The exact location of these settings may vary depending on the router model and firmware version.
- Click on the “Wi-Fi” or “Wireless” settings option to proceed.
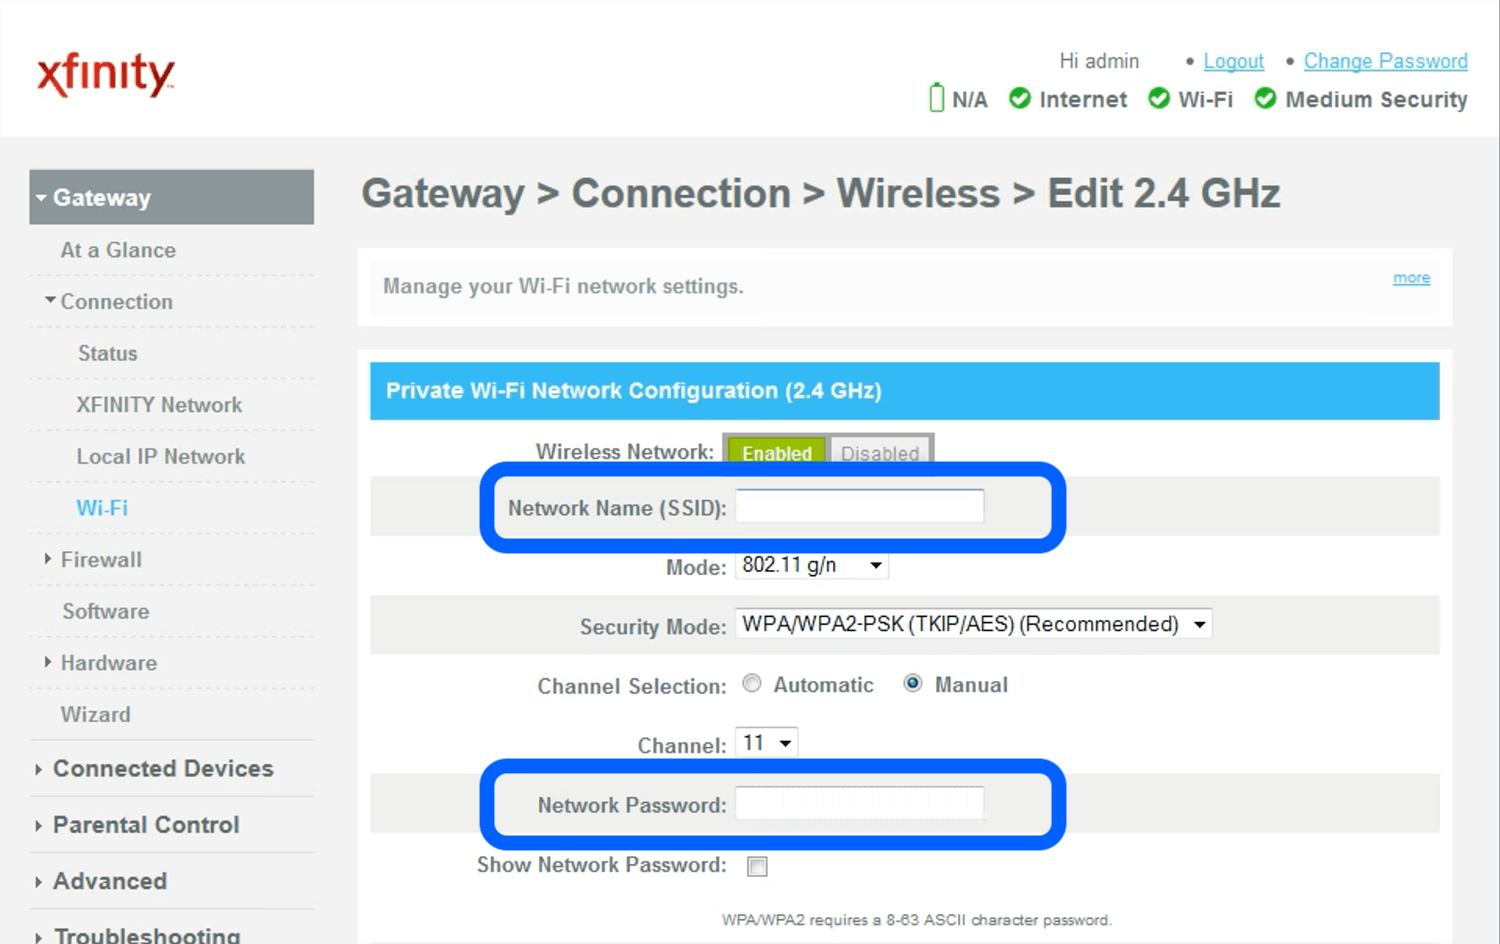
Once you have accessed the Wi-Fi settings, you will have the ability to change various parameters related to your Wi-Fi network, including the network name (SSID) and the Wi-Fi password. This password is what you will need to change in the next step.
If you are having trouble finding the Wi-Fi settings or are unsure which settings to modify, consult the router’s user manual or seek assistance from Xfinity customer support. They will be able to provide you with specific instructions based on your router model.
Now that you have successfully located the Wi-Fi settings, we can proceed to the next step: changing the Wi-Fi password.
Step 4: Change the Wi-Fi Password
Now that you have accessed the Wi-Fi settings on your Xfinity wireless router, it’s time to change the Wi-Fi password. Follow these simple instructions:
- In the Wi-Fi settings, look for the option that allows you to change the Wi-Fi password. This option may be labeled as “Password,” “Security Key,” or similar.
- Click on the password field to highlight the existing password or, if applicable, a placeholder text.
- Enter your new desired Wi-Fi password. Make sure to create a strong password that combines uppercase and lowercase letters, numbers, and special characters. The password should be at least 8 characters long, although longer passwords are generally more secure.
- Confirm the new password by re-entering it in the provided confirmation field.
Take a moment to double-check the password you entered to ensure it matches your intended choice. It is crucial to get the password right to avoid connectivity issues later on.
Changing the Wi-Fi password will help protect your network from unauthorized access. It is recommended to change your password periodically to maintain the security of your network.
Once you have entered and confirmed the new Wi-Fi password, proceed to the next step to save and apply the changes to your router.
Step 5: Save and Apply the Changes
You are now on the final step of changing the password on your Xfinity wireless router: saving and applying the changes. Follow these steps to ensure your new password takes effect:
- Locate the “Save” or “Apply” button within the Wi-Fi settings page.
- Click on the “Save” or “Apply” button to confirm and save the changes you made to the Wi-Fi password.
It may take a few moments for the router to apply the new password and update the settings. During this time, do not turn off or restart the router to avoid any potential issues.
After the changes have been successfully applied, your Xfinity router will now use the new Wi-Fi password to authenticate devices trying to connect to the network. You should keep the new password secure and only share it with trusted individuals who need access to your Wi-Fi network.
It’s important to note that changing the Wi-Fi password will require all devices previously connected to your network to reconnect using the new password in order to regain internet access.
Congratulations! You have successfully changed the Wi-Fi password on your Xfinity wireless router. Make sure to update the password on all your connected devices to ensure uninterrupted connectivity.
Now that you have completed the process of changing the password and saving the changes, you can proceed to the final step: reconnecting devices with the new password.
Step 6: Reconnect Devices with New Password
After successfully changing the Wi-Fi password on your Xfinity wireless router, it is essential to reconnect all your devices using the new password. Follow these instructions to ensure uninterrupted internet access:
- On each device that was previously connected to your Wi-Fi network, navigate to the Wi-Fi settings or network preferences.
- Search for the list of available Wi-Fi networks and locate your Xfinity network name (SSID).
- Select your network and click on the “Connect” or “Join” button.
- When prompted, enter the new Wi-Fi password that you set in the previous steps.
- Click on “Connect” or “Join” to establish a connection to your network using the new password.
Repeat these steps for every device that was previously connected to your Wi-Fi network, including smartphones, tablets, laptops, smart TVs, and any other wireless-enabled devices.
It’s important to note that if any of your devices encounter difficulties connecting to the network after changing the Wi-Fi password, you may need to double-check the password and ensure it is entered correctly. Additionally, check that the device is within range of your Xfinity router and that the router is functioning correctly.
By reconnecting your devices with the new Wi-Fi password, you will regain access to the internet and be able to enjoy secure and reliable connectivity.
With all your devices reconnected using the new password, you have successfully completed the process of changing the Wi-Fi password on your Xfinity wireless router. Congratulations!
Now you can enjoy a secure network with peace of mind, knowing that only authorized individuals have access to your Wi-Fi.
Conclusion
Changing the password on your Xfinity wireless router is a simple but important task that enhances the security of your Wi-Fi network. By following the step-by-step guide outlined in this article, you can easily update your Wi-Fi password and protect your network from unauthorized access.
We started by accessing the Xfinity wireless router interface and logging in to the router using the correct credentials. Then, we located the Wi-Fi settings and changed the Wi-Fi password to a strong and secure one. Finally, we saved and applied the changes, ensuring that the new password takes effect on the router.
Remember that after changing the Wi-Fi password, you must reconnect all your devices using the new password to regain internet access. This step helps maintain the security of your network and ensures that only trusted individuals can connect to your Wi-Fi.
If you encounter any difficulties during the process or have any questions related to changing the password on your Xfinity wireless router, do not hesitate to contact Xfinity customer support for assistance. They are available to provide guidance and help resolve any issues you may encounter.
By taking the time to change your Wi-Fi password regularly, you can proactively protect your network from potential breaches and unauthorized access. This simple measure contributes to a secure online environment for you and your family or colleagues.
Thank you for following this comprehensive guide on how to change the password on your Xfinity wireless router. Enjoy your secure and reliable Wi-Fi connection!