Introduction
Welcome to the world of streaming entertainment, where you can dive into a vast library of movies and TV shows at your fingertips. Netflix has revolutionized the way we consume media, offering a wide range of content for every taste. However, due to licensing agreements and regional restrictions, the available Netflix library can vary from one country to another.
But fear not! With a VPN (Virtual Private Network), you can easily change your Netflix VPN to access content from different regions. A VPN allows you to mask your IP address and connect to servers in different locations, giving you the ability to bypass geo-restrictions and unlock a whole new world of entertainment.
Changing your Netflix VPN opens up a plethora of possibilities. It allows you to watch shows and movies that may not be available in your country, discover international content, and enjoy region-specific releases. Whether you’re an expat missing the shows from your home country, a traveler wanting to catch up on a series, or simply curious about what’s popular in other regions, changing your Netflix VPN can fulfill your streaming desires.
So, if you’re ready to embark on a video streaming adventure, this article will guide you through the steps to change your Netflix VPN. We’ll cover everything from choosing a reliable VPN service provider to troubleshooting common issues. By the end, you’ll be binge-watching your favorite content from around the world without any geographical limitations.
What is a VPN?
A VPN, short for Virtual Private Network, is a technology that creates a secure connection between your device and the internet. It encrypts your internet traffic and routes it through a server located in a different region or country. This masks your IP address and gives the appearance that you are browsing the internet from that specific location.
But why would you need a VPN? Well, there are several benefits to using a VPN beyond just changing your Netflix VPN. Firstly, it enhances your online privacy and security by encrypting your internet traffic. This means that your data is protected from hackers, cybercriminals, and other prying eyes who may want to access your personal information.
Secondly, a VPN allows you to bypass censorship and access restricted websites or content. In countries where internet access is restricted or certain websites are blocked, a VPN can unblock these restrictions and give you access to a free and open internet.
When it comes to streaming services like Netflix, a VPN can help you bypass geographical limitations. By connecting to a server in a different country, you can access that country’s Netflix library, which may have a wider selection of movies and TV shows. This is particularly useful for travelers or expats who want to access content from their home country while abroad.
It’s important to note that not all VPNs are created equal, and choosing a reliable VPN service provider is crucial. A good VPN should have high-speed connections, a large number of servers in various locations, strong encryption protocols, and a strict no-log policy to protect your privacy.
So, in essence, a VPN is a powerful tool that enables you to secure your internet connection, bypass restrictions, and change your Netflix VPN to access content from different regions. It’s a must-have for anyone who values online privacy and wants to unlock a world of entertainment.
Why would you want to change your Netflix VPN?
Changing your Netflix VPN opens up a whole new world of possibilities for your streaming experience. Here are a few key reasons why you might want to consider changing your Netflix VPN:
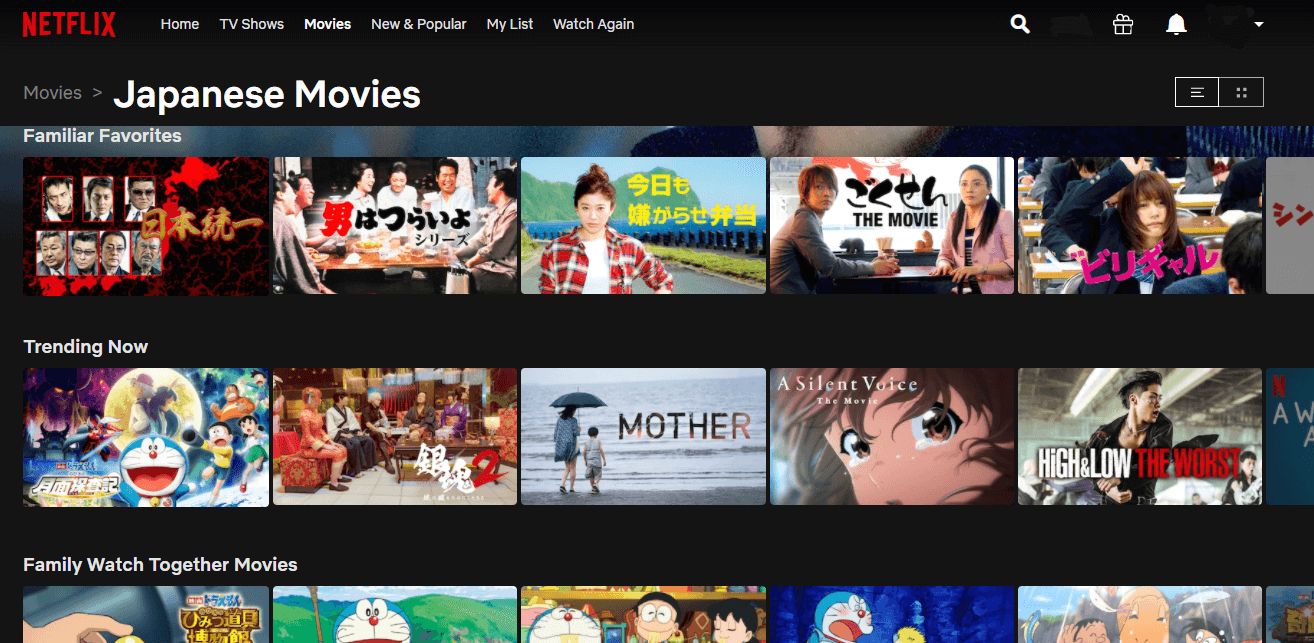
Access to a wider selection of content: Netflix has different content libraries for each country or region due to licensing agreements. By changing your Netflix VPN, you can access content from different regions and enjoy a wider selection of movies and TV shows. This means you can watch popular shows that might not be available in your country or discover hidden gems from around the world.
Unlock region-specific releases: Some movies or TV shows are released in specific regions before others. By changing your Netflix VPN, you can stay up-to-date with the latest releases and watch them as soon as they are available in a different country. This is particularly useful for fans of international shows and movies who want to stay in the loop and avoid spoilers.
Watch content from your home country while abroad: If you’re a traveler or an expat living in a different country, you might miss the shows and movies from your home country. By changing your Netflix VPN, you can virtually transport yourself back home and access the content that is familiar and nostalgic. It’s a great way to stay connected to your culture and keep up with the latest offerings.
Discover new and diverse content: Each region has its own unique entertainment scene, and by changing your Netflix VPN, you can explore content that you might not have discovered otherwise. Whether it’s foreign language films, international TV series, or documentaries from different cultures, changing your Netflix VPN allows you to broaden your horizons and enjoy a diverse range of content.
Bypass country restrictions and censorship: In some countries, Netflix is subject to strict censorship or may not be available at all. By changing your Netflix VPN, you can bypass these restrictions and enjoy unrestricted access to the streaming platform. This is particularly useful if you’re traveling to a country where certain websites or streaming services are blocked.
Overall, changing your Netflix VPN gives you the freedom to explore and enjoy a wide range of content from different regions. It enhances your streaming experience and allows you to customize your viewing preferences to suit your tastes and interests. So, if you’re ready to unlock a world of entertainment, read on to learn how to change your Netflix VPN.
Steps to change your Netflix VPN
Changing your Netflix VPN may sound complex, but it’s actually a straightforward process. Follow these simple steps to unlock a world of content:
Step 1: Choose a reliable VPN service provider: Start by selecting a VPN service provider that meets your needs. Look for providers that offer a wide range of server locations, fast and stable connections, strong encryption protocols, and a user-friendly interface. Research customer reviews and ratings to ensure you’re choosing a reputable and trustworthy provider.
Step 2: Sign up and download the VPN app: Once you’ve chosen a VPN provider, visit their website and sign up for an account. Follow the instructions to create your login credentials. Then, download the VPN app on the device you plan to use for streaming. Most VPN providers offer apps for Windows, Mac, Android, iOS, and even certain smart TVs and gaming consoles.
Step 3: Connect to a server in the desired location: Launch the VPN app and sign in using your login credentials. Choose a server location in the country or region whose Netflix library you want to access. The VPN app will establish a secure connection to the chosen server, masking your IP address and giving you a virtual presence in that specific location.
Step 4: Clear your browser cache and cookies: To ensure that your changes take effect, clear your browser cache and cookies. This will prevent Netflix from recognizing your previous location and allow you to access the content from the desired region. Instructions for clearing cache and cookies vary depending on the browser you’re using, so consult the browser’s support documentation for guidance.
Step 5: Log in to Netflix and start streaming: Open your web browser and visit the Netflix website. Log in to your Netflix account, and you should now have access to the content from the region you selected. Browse through the different categories and enjoy streaming movies and TV shows that were previously unavailable in your country.
Remember to keep your VPN app running in the background while streaming Netflix to maintain a secure and uninterrupted connection. You can also experiment with different server locations to find the most optimal one for your streaming needs.
Now that you know the steps to change your Netflix VPN, you’re ready to discover a whole new range of content from different regions. Enjoy the freedom to watch your favorite shows and movies from around the world!
Step 1: Choose a reliable VPN service provider
When it comes to changing your Netflix VPN, the first step is to choose a reliable VPN service provider that meets your needs and requirements. With so many options available, it’s important to consider the following factors in order to make an informed decision:
1. Server locations: Check if the VPN provider offers a wide range of server locations. The more server locations they have, the more options you’ll have to access different Netflix libraries. Look for providers that have servers in countries where your desired content is available.
2. Speed and performance: Streaming requires a fast and stable internet connection. Ensure that the VPN provider offers high-speed connections and has optimized their servers for streaming. Look for providers that offer unlimited bandwidth to prevent any buffering or slowdowns while watching Netflix.
3. Strong encryption and security: Your privacy and security should be a top priority. Look for a VPN service provider that offers strong encryption protocols, such as OpenVPN or IKEv2. Additionally, check if they have a strict no-log policy, meaning they do not track or store your online activities.
4. User-friendly interface: A VPN app that is easy to navigate and use will make the process of changing your Netflix VPN much simpler. Look for providers that offer user-friendly apps with a clean interface and clear instructions, even for beginners.
5. Compatibility with your devices: Ensure that the VPN provider offers apps for all the devices you plan to use for streaming Netflix. Look for compatibility with Windows, Mac, Android, iOS, and any other devices you might use, such as smart TVs or gaming consoles.
6. Customer support: In case you encounter any issues or have questions, reliable customer support is essential. Check if the VPN service provider offers 24/7 customer support through channels such as live chat or email. This way, you can quickly get assistance if needed.
7. Price and subscription plans: Consider your budget and compare the pricing and subscription plans of different VPN service providers. Look for providers that offer competitive pricing while still meeting all the necessary features and requirements.
Take the time to research and read customer reviews to get an understanding of each VPN service provider’s reputation and reliability. This will help you make an informed decision and select a VPN service provider that best fits your needs.
By choosing a reliable VPN service provider, you can ensure a seamless and secure streaming experience when changing your Netflix VPN. So, invest some time in comparing options, reading reviews, and finding the provider that offers the best combination of features and performance for your needs.
Step 2: Sign up and download the VPN app
Once you have chosen a reliable VPN service provider, it’s time to sign up for an account and download the VPN app. Follow these steps to get started:
1. Visit the VPN provider’s website: Open your web browser and go to the official website of the VPN service provider you have chosen.
2. Sign up for an account: Look for a “Sign Up” or “Get Started” button on the website. Click on it to begin the registration process. You will typically be asked to provide an email address and create a password. Some VPN providers may ask for additional information, such as payment details for subscription plans.
3. Choose a subscription plan: Most VPN service providers offer different subscription plans with varying durations and pricing. Select the plan that suits your needs and budget. Keep in mind that longer-term plans often come with discounted prices.
4. Enter payment details: If required, provide the necessary payment details to complete your subscription. Most VPN providers offer multiple payment options, including credit/debit cards, PayPal, and even cryptocurrencies.
5. Access your account: After completing the sign-up process, you will receive an email with instructions to access your account. Follow the provided link to log in.
6. Download the VPN app: Once logged in, locate the section or page on the VPN provider’s website that allows you to download their app. Most VPN providers offer apps for a variety of operating systems, including Windows, Mac, Android, and iOS.
7. Choose your device: Select the operating system or device that you’ll be using for streaming Netflix and click on the appropriate download link or button. This will start the download process for the VPN app.
8. Install the VPN app: Once the app has finished downloading, locate the downloaded file on your device and run the installation. Follow the on-screen instructions to complete the installation process.
9. Launch the VPN app: After the installation is complete, launch the VPN app on your device. Enter your login credentials (email address and password) to log in to your VPN account within the app.
10. Connect to a server: Once you’ve logged in, you’ll have access to the VPN app’s interface. Look for options or settings related to server locations and choose a server located in the country or region where the desired Netflix library is available.
Congratulations! You’ve successfully signed up for an account and downloaded the VPN app. In the next steps, we’ll guide you through connecting to a server in the desired location and accessing the content you’ve been longing to watch on Netflix.
Step 3: Connect to a server in the desired location
Now that you have downloaded the VPN app, it’s time to connect to a server in the desired location to change your Netflix VPN. Follow these steps to connect to a server:
1. Launch the VPN app: Open the VPN app on your device. This will typically be an application with a distinctive logo or icon.
2. Log in to your VPN account: Enter your login credentials (username and password) to log in to your VPN account within the app. If you’re logging in for the first time, ensure that you use the same credentials you used during the sign-up process.
3. Select a server location: Once you’re logged in, you’ll be presented with a list of server locations. Look for the option to select a server manually or choose a specific country or region from the list. This will vary depending on the VPN app you’re using.
4. Choose a server in the desired location: Scroll through the available server locations and select a server in the country or region that corresponds to the Netflix library you want to access. Some VPN apps may display server load or speed indicators to help you make an informed choice.
5. Initiate the connection: Once you have selected the desired server, initiate the connection by clicking a button that says “Connect” or similar. The VPN app will establish a secure connection with the chosen server.
6. Verify the connection: After a few moments, your VPN app will indicate that you are connected to the chosen server. This is usually indicated by a green status indicator or a message confirming the connection. Take note of the server location you are connected to.
7. Test your connection: Open a web browser and visit a website, preferably one that shows your IP address. Use a search engine to search for “what is my IP address” and check if the displayed IP address matches the location of the server you connected to. This will confirm whether your VPN connection is working correctly.
By connecting to a server in the desired location, you have successfully changed your Netflix VPN. Your IP address is now masked, and Netflix will recognize your browsing activity as originating from the server location you selected.
Keep in mind that server availability can be subject to demand, so if you encounter any issues connecting to a specific server, try selecting a different one. Additionally, some VPN apps may have additional features like a favorite server list or an auto-connect option, which can further streamline the process of connecting to the desired server.
In the next step, we’ll discuss how to clear your browser cache and cookies to ensure that the changes to your Netflix VPN take effect successfully.
Step 4: Clear your browser cache and cookies
Clearing your browser cache and cookies is an important step in changing your Netflix VPN. This ensures that Netflix recognizes your new virtual location and allows you to access content from the desired region. Follow these simple steps to clear your browser cache and cookies:
1. Open your browser’s settings: Launch your web browser and locate the settings menu. This is typically represented by three vertical dots or horizontal lines found in the top-right or top-left corner of the browser window.
2. Access the browsing history settings: In the settings menu, look for an option related to browsing history. This may be labeled as “History,” “Privacy & Security,” or something similar. Click on this option to proceed.
3. Clear browsing data: Within the browsing history settings, you will find an option to clear browsing data or similar. Click on this option to open the clear browsing data menu.
4. Choose the time range: In the clear browsing data menu, you will be prompted to choose a time range for clearing data. Select “All time” or a similar option to clear all cached data and cookies.
5. Select cache and cookies: Within the clear browsing data menu, opt to clear cache and cookies. These options may be listed individually, or you may find a single option to clear “cached images and files” or “cookies and other site data.” Ensure that both cache and cookies are selected.
6. Clear browsing data: Once you have selected cache and cookies, click on the “Clear data” or similar button to initiate the clearing process. The time required to clear the data will depend on the amount of data stored and the speed of your internet connection.
7. Restart your browser: After the browsing data has been cleared, close and relaunch your web browser. This will ensure that the changes take effect and that your browser is ready for your new Netflix VPN session.
By clearing your browser cache and cookies, you remove any stored data that could indicate your previous browsing location to Netflix. This allows you to access the content from the region associated with your new VPN server location.
It’s worth noting that the steps to clear cache and cookies may vary slightly depending on the browser you are using. If you are unsure, consult the browser’s help documentation or search online for specific instructions.
In the next step, we’ll guide you on how to log in to Netflix and start streaming content from the desired location.
Step 5: Log in to Netflix and start streaming
Now that you’ve changed your Netflix VPN and cleared your browser cache and cookies, it’s time to log in to Netflix and start streaming content from the desired location. Follow these steps to get started:
1. Open your web browser: Launch your preferred web browser and enter the Netflix website URL in the address bar. The URL is usually “www.netflix.com”.
2. Sign in to your Netflix account: On the Netflix homepage, click on the “Sign In” button located in the top-right corner. Enter your Netflix email address and password in the provided fields.
3. Navigate to the Netflix homepage: After logging in, you will be redirected to the Netflix homepage. This is where you can browse and search for the movies and TV shows you want to watch.
4. Browse the available content: Explore the various categories, genres, and recommendations to find the content you’re interested in. You can also search for specific movies or TV shows using the search bar located at the top of the page.
5. Start streaming: Once you’ve found something you want to watch, click on the respective title to access its individual page. From there, click on the “Play” button to start streaming the content.
6. Enjoy the show! Sit back, relax, and enjoy streaming your favorite movies and TV shows from the desired Netflix library. Remember to use the media controls provided by Netflix to pause, resume, or skip to different parts of the content whenever needed.
With your Netflix account and VPN connection in place, you can now watch the content that was previously inaccessible in your region. The VPN disguises your IP address, making it appear as if you are accessing Netflix from the country or region associated with your chosen server location.
Keep in mind that you may need to repeat the process of connecting to the VPN server and clearing your browser cache and cookies each time you wish to change your Netflix VPN. This ensures a consistent and seamless streaming experience.
If you encounter any difficulties while accessing or streaming content on Netflix after changing your VPN, check for any troubleshooting tips provided by your VPN service provider or reach out to their customer support for assistance.
Now that you know how to log in to Netflix and start streaming, it’s time to sit back, relax, and enjoy a world of entertainment at your fingertips!
Troubleshooting tips
While changing your Netflix VPN usually goes smoothly, you may encounter some common issues along the way. Here are some troubleshooting tips to help you overcome these challenges:
1. Connection issues: If you are unable to connect to the VPN server, try selecting a different server location. Some servers may be more congested than others, so switching to a less crowded server can improve your connection. Additionally, ensure that your internet connection is stable and reliable.
2. Slow streaming speeds: If you experience slow streaming speeds, it could be due to a busy VPN server or a slow internet connection. Try connecting to a different VPN server location closer to your physical location to improve speeds. It’s also recommended to close any unused applications or devices that might be consuming internet bandwidth.
3. Netflix proxy error: Sometimes, Netflix may detect that you’re using a VPN and display a proxy error message. If you encounter this error, first, clear your browser cache and cookies, and then reconnect to a different VPN server. If the issue persists, you may need to contact your VPN service provider for assistance or try using a different VPN protocol.
4. Compatibility issues: Ensure that your chosen VPN app is compatible with the device and operating system you are using. If the app is not working correctly or causing conflicts, try restarting your device or reinstalling the VPN app. You can also check for any available app updates and install them if necessary.
5. Netflix streaming issues: If you experience issues with streaming Netflix content, such as buffering or stalling, it may be unrelated to your VPN connection. Try adjusting the video quality settings in your Netflix account or restarting your streaming device. You can also run a speed test to check if your internet connection meets Netflix’s recommended speeds.
6. Clear DNS cache: In some cases, you may need to clear your DNS cache to ensure that your device is not using outdated IP address information. To do this, open the command prompt or terminal and enter the appropriate command to clear the DNS cache based on your operating system.
7. Contact VPN customer support: If you have followed the troubleshooting tips above and are still encountering issues, don’t hesitate to reach out to the customer support team of your VPN service provider. They will have the expertise to help you troubleshoot specific issues and provide further guidance.
Remember, troubleshooting steps may vary depending on the VPN service provider and device you are using. Always refer to the support documentation or contact customer support for guidance tailored to your specific situation.
By following these troubleshooting tips, you can overcome common obstacles and ensure a smooth and enjoyable streaming experience when changing your Netflix VPN. Now, go ahead and explore the vast world of content that awaits you!
Conclusion
Congratulations! You have successfully learned how to change your Netflix VPN and unlock a world of entertainment from different regions. By following the steps outlined in this guide, you can now access a wider selection of movies and TV shows, discover new content, and watch region-specific releases.
A VPN is an essential tool for enhancing your streaming experience, providing you with privacy, security, and the ability to bypass geoblocks and censorship. Remember to choose a reliable VPN service provider that offers a wide range of server locations, high-speed connections, strong encryption, and user-friendly apps.
Throughout this guide, we have covered the necessary steps, including choosing a VPN service provider, signing up and downloading the VPN app, connecting to a server in the desired location, clearing your browser cache and cookies, logging in to Netflix, and troubleshooting common issues. By following these steps, you can enjoy seamless streaming and access content from around the globe.
It’s important to note that while changing your Netflix VPN is a fantastic way to access a wider range of content, it’s essential to respect copyright laws and licensing agreements. Always be mindful of the terms of service and abide by them when using VPN services.
Now that you are equipped with the knowledge to change your Netflix VPN, go ahead and start exploring the diverse libraries of movies and TV shows. Indulge in different genres, explore international releases, and enjoy a truly personalized streaming experience. Happy streaming!