Introduction
Welcome to our guide on how to change the GPU on your PC. If you’re looking to upgrade your graphics performance or replace a faulty GPU, this step-by-step tutorial will walk you through the process. Whether you’re a seasoned PC enthusiast or a beginner, changing your GPU is relatively straightforward.
Your GPU, or graphics processing unit, is responsible for rendering the visuals on your computer’s screen. It plays a crucial role in gaming, video editing, and other graphically intensive tasks. Upgrading to a more powerful GPU can significantly enhance your PC’s performance and allow you to enjoy the latest games and applications at higher resolutions and frame rates.
Before we begin, it’s important to ensure you have the necessary tools and materials. You’ll need a compatible replacement GPU, a Phillips head screwdriver, and an antistatic wrist strap or mat to prevent damage from static electricity. It’s also advisable to have a clean workspace with adequate lighting.
In this guide, we’ll cover the step-by-step process for changing your GPU, from preparing your PC to installing the new graphics card and testing it. We’ll also provide some tips and precautions along the way to help you complete the process smoothly and without any issues.
Changing your GPU can be an exciting project, as it offers the potential to transform your PC’s graphics capabilities. So, without further ado, let’s get started on this GPU upgrade journey!
Step 1: Gathering the necessary tools and materials
Before diving into the process of changing your GPU, it’s essential to gather all the necessary tools and materials. This ensures that you have everything you need at hand and can smoothly proceed with the upgrade. Here’s a list of items you’ll need:
- Compatible Replacement GPU: Research and choose a GPU that is compatible with your PC’s specifications and requirements. Check the manufacturer’s website or consult your PC’s documentation to determine the appropriate GPU model.
- Phillips Head Screwdriver: Most PC cases use Phillips head screws to secure the GPU. Have a screwdriver of the appropriate size readily available.
- Antistatic Wrist Strap or Mat: Static electricity can damage sensitive PC components. Use an antistatic wrist strap or mat to ground yourself and prevent static discharge when handling the GPU or other internal components.
- Clean Workspace: Clear a workspace that provides ample room for you to work comfortably. Ensure good lighting to see the components clearly and avoid misplacing any screws or parts.
Having these tools and materials prepared will save you time and ensure a smoother process during the GPU replacement. Now that you have everything ready, let’s move on to the next step: preparing your PC for the GPU swap.
Step 2: Preparing your PC
Before you can start changing the GPU, it’s important to properly prepare your PC for the upgrade. Following these steps will help ensure a seamless transition:
- Power Off and Unplug: Shut down your PC and unplug it from the power source. This will prevent any electrical accidents and ensure your safety throughout the process.
- Remove Side Panel: Open the side panel of your PC case. This will give you access to the internal components of your PC, including the GPU.
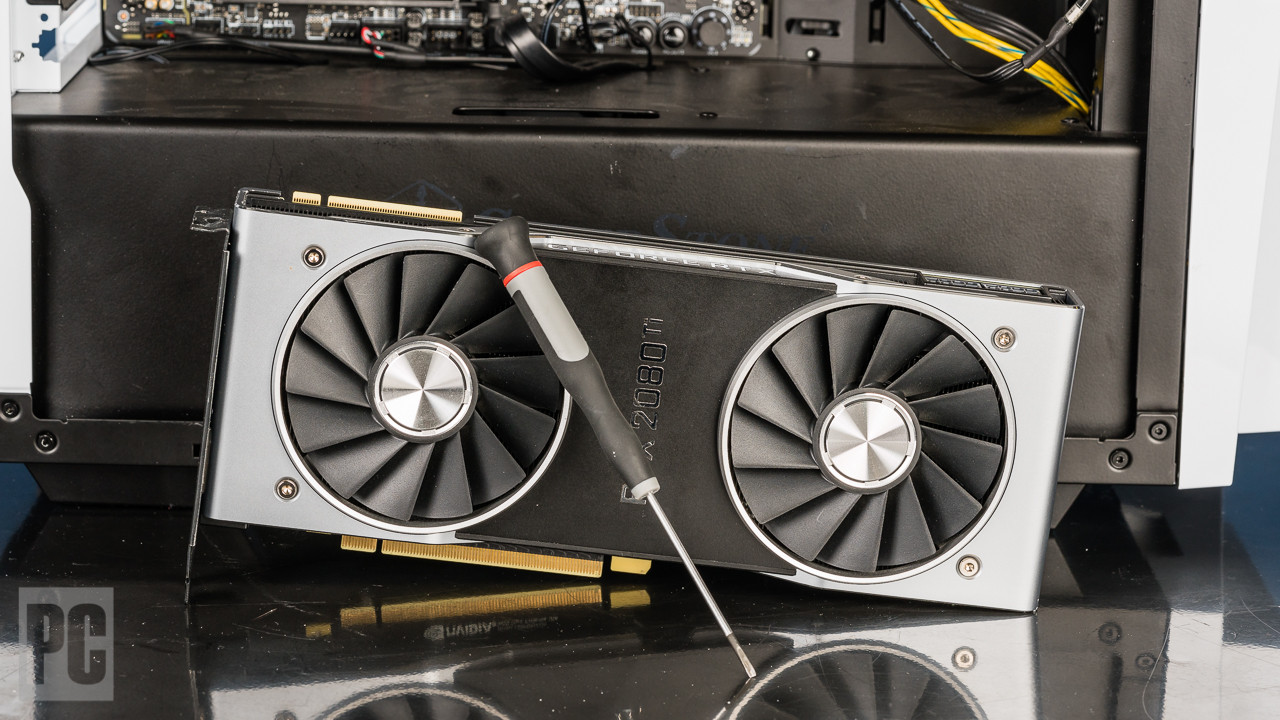
- Identify the Old GPU: Take a moment to locate the current GPU inside your PC. Note how it’s connected, what screws are holding it in place, and any cables that are attached to it. This will help you during the removal process.
- Disconnect Power Cables: Carefully detach any power cables connected to the old GPU. These cables provide power to the GPU and are usually located near the back of the card.
- Remove Screws: Using the appropriate Phillips head screwdriver, remove the screws that secure the old GPU to the PC case. Keep these screws in a safe place, as you may need them later.
- Ground Yourself: Before removing the old GPU, it’s important to ground yourself to discharge any static electricity. This can be done by wearing an antistatic wrist strap or touching a grounded metal object regularly.
- Remove the Old GPU: Gently lift the old GPU out of its slot, ensuring you release any locks or tabs securing it in place. Be cautious not to damage any surrounding components or connectors.
By following these steps, you have now prepared your PC for the GPU upgrade. In the next step, we will proceed to remove the old GPU and make way for the installation of the new one.
Step 3: Removing the old GPU
Now that your PC is prepared, it’s time to remove the old GPU from its slot. Follow these steps to safely remove the old GPU:
- Inspect the Slot: Take a moment to inspect the PCIe slot where the GPU was installed. Ensure there are no dust, debris, or any obstacles that may hinder the installation of the new GPU.
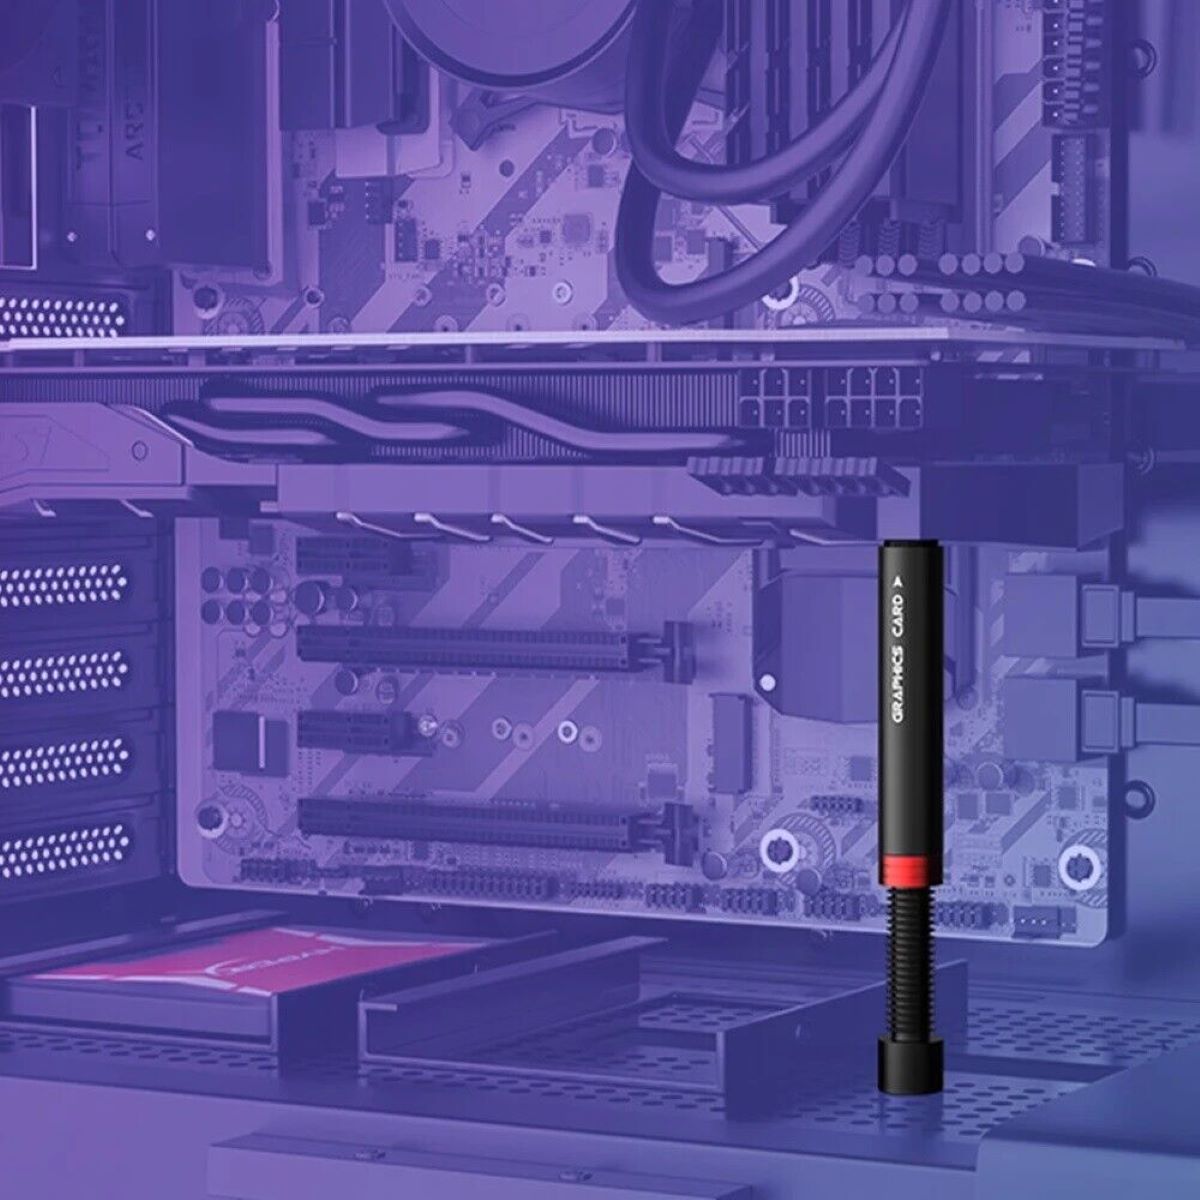
- Unlock the PCIe Slot: Most PCIe slots have a locking mechanism to secure the GPU in place. Locate the tab or latch, typically positioned at the back of the slot, and gently push or lift it to unlock the slot.
- Remove the Old GPU: Holding the old GPU by its edges, carefully pull it straight out of the PCIe slot. If the GPU feels stuck, double-check that you have properly unlocked the slot and try again.
- Handle with Care: GPUs are delicate components, so handle them with care to avoid any damage. Avoid touching the GPU’s connectors or sensitive parts, and place it in an anti-static bag or on an anti-static surface to protect it.
- Clean the Slot: Take a moment to clean the PCIe slot using compressed air or a soft brush. This will remove any dust or debris that may have accumulated, ensuring a clean and reliable connection for the new GPU.
With the old GPU successfully removed and the PCIe slot cleaned, you’re now ready to move on to the next step: installing the new GPU. Stay tuned!
Step 4: Installing the new GPU
Now that you’ve removed the old GPU, it’s time to install the new one. Follow these steps to ensure a proper and secure installation:
- Prepare the New GPU: Take the new GPU out of its packaging, handle it by its edges, and inspect it for any signs of damage. Double-check that it is compatible with your PC and matches the specifications you desire.
- Align the GPU: Position the new GPU over the vacant PCIe slot, making sure the connectors align with the slot. Be gentle and avoid touching the connectors or sensitive parts.
- Insert the GPU: Carefully push the new GPU into the PCIe slot, applying gentle and even pressure. Ensure that it is inserted evenly and fully into the slot. The locking mechanism should engage and secure the GPU in place.
- Screw the GPU: Once the GPU is properly inserted, use the screws you removed earlier to secure it to the case. Tighten the screws firmly, but be careful not to overtighten and damage the GPU or the case.
- Connect Power Cables: Locate the appropriate power connectors on the new GPU and connect the corresponding power cables from your power supply unit (PSU). Make sure they are firmly attached and properly seated.
- Reattach Side Panel: Put the side panel of your PC case back on, ensuring that it is aligned correctly and securely fastened. This will help maintain optimal airflow and protect your internal components.
With the new GPU successfully installed, you’re one step closer to experiencing improved graphics performance on your PC. In the next step, we’ll guide you through the process of connecting the necessary cables. Keep reading!
Step 5: Connecting the necessary cables
Now that you’ve installed the new GPU in your PC, it’s time to connect the necessary cables to ensure proper power and functionality. Follow these steps to properly connect the cables:
- Power Off and Unplug: Before connecting any cables, ensure that your PC is powered off and unplugged from the power source. This will prevent any electrical accidents during the cable connections.
- Identify Power Connectors: Locate the appropriate power connectors on the new GPU. These are usually located near the top or back of the card and can be either 6-pin or 8-pin connectors.
- Connect the Power Cables: Take the power cables from your power supply unit (PSU) and connect them to the corresponding power connectors on the GPU. Make sure the connections are secure and properly seated.
- Reconnect Other Cables: Depending on your setup, you may need to reconnect other cables, such as HDMI, DisplayPort, or DVI cables, to your monitor. Ensure these connections are secure on both ends.
- Check Cable Management: Take a moment to tidy up your cable management inside the PC. Ensure that the cables are neatly routed and not obstructing any fans or other components.
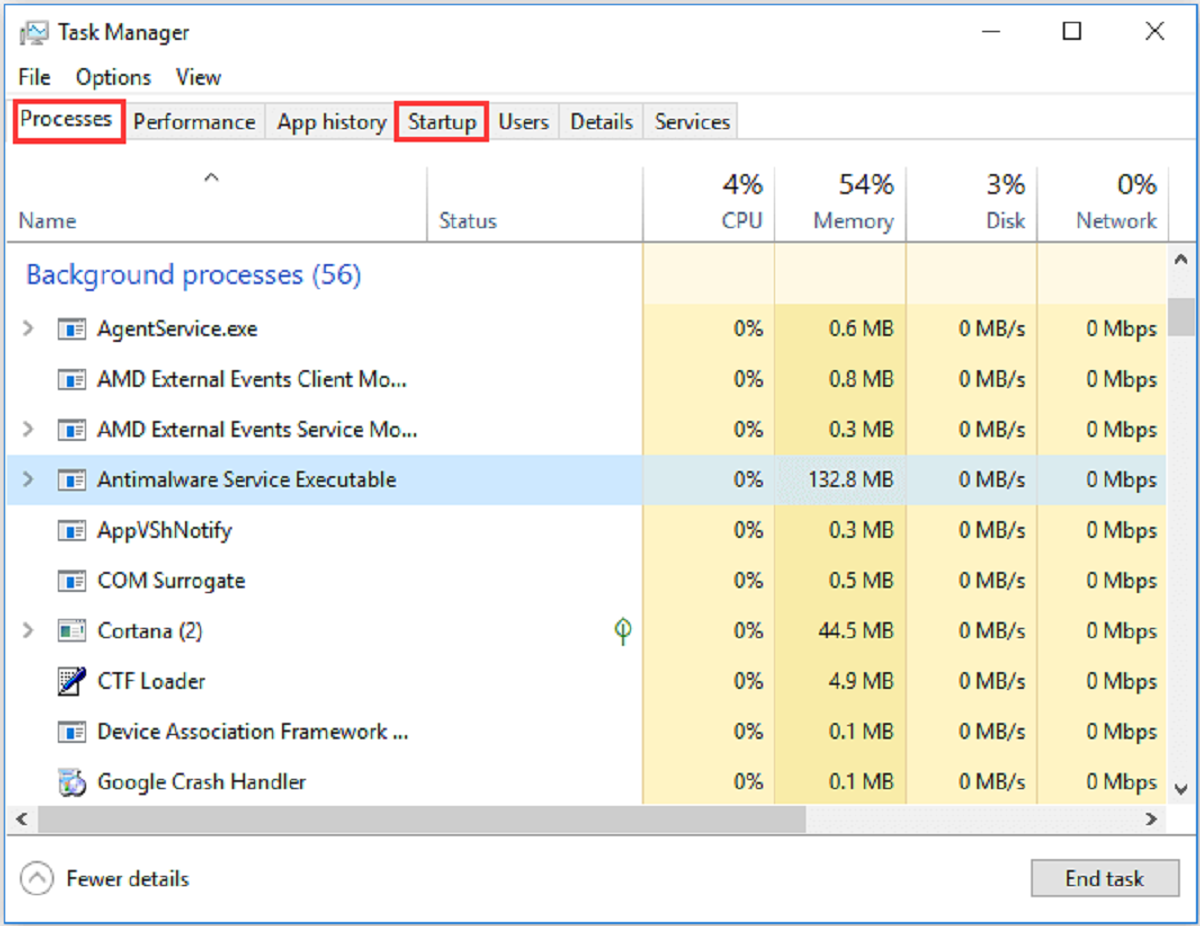
- Power On and Test: Once all cables are connected, power on your PC and check if the new GPU is properly recognized. You can do this by checking the device manager or running GPU diagnostic software.
By properly connecting the necessary cables, you’re ensuring that your new GPU receives the required power and is ready to deliver enhanced graphics performance. In the next step, we’ll guide you through the process of testing the new GPU. Stay tuned!
Step 6: Testing the new GPU
Now that you’ve installed and connected the new GPU in your PC, it’s crucial to test its functionality to ensure everything is working as intended. Follow these steps to properly test the new GPU:
- Power On the PC: Power on your PC and wait for it to boot up. Make sure all fans and lights are functioning correctly.
- Check Display: Verify that your monitor is properly connected to the new GPU and turned on. Check if the display is working and showing a clear image.
- Update GPU Drivers: Visit the manufacturer’s website and download the latest drivers for your new GPU. Install the drivers following the provided instructions. This ensures optimal performance and compatibility.
- Run Graphics Tests: Use benchmarking or stress-testing software to put your new GPU through its paces. These tests will assess its performance, temperature, and stability under different workloads.
- Monitor GPU Temperatures: Use monitoring software to keep an eye on the GPU temperatures during the tests. Ensure that they stay within safe operating limits and do not exceed the manufacturer’s specifications.
- Check for Artifacts: While running graphics tests or playing demanding games, keep an eye out for visual artifacts like flickering, tearing, or unusual graphical glitches. These could indicate an issue with the GPU.
- Assess Performance: Compare the performance of the new GPU with the previous one. Check whether it meets your expectations in terms of improved graphics quality, smoother gameplay, or faster rendering times.
By thoroughly testing the new GPU, you can ensure that it is working as intended and delivering the desired results. If any issues or discrepancies are detected during the testing process, consult the manufacturer’s support or seek professional assistance to troubleshoot and resolve the problem.
Congratulations! You have successfully changed the GPU on your PC and tested its functionality. Now you can enjoy enhanced graphics performance, smoother gameplay, and improved visual experiences on your computer.
Conclusion
Congratulations on successfully changing the GPU on your PC! By following the step-by-step guide provided, you have taken a significant step towards enhancing your computer’s graphics performance. Whether you upgraded for gaming, video editing, or other graphic-intensive tasks, the new GPU will unlock a world of visual possibilities.
Throughout this guide, we covered the necessary tools and materials needed for the GPU swap, as well as the preparation and removal of the old GPU. We explained the importance of properly aligning and securing the new GPU and connecting the necessary power cables. Lastly, we emphasized the significance of testing the new GPU to ensure optimal functionality and performance.
Remember, each PC configuration may have slight differences, so always refer to the manufacturer’s instructions and your PC’s documentation for specific details. If at any point you encounter difficulties or uncertainties, it’s always best to seek support from the manufacturer or consult a professional.
Now that your new GPU is up and running, you can enjoy enhanced visuals, smoother gameplay, and improved performance in all your favorite applications and games. Take advantage of the increased power and capabilities of your new GPU, and explore the vast world of high-resolution gaming, immersive virtual reality experiences, and more.
We hope this guide has been helpful and that your GPU replacement process was a success. Happy gaming and enjoy the stunning visuals your upgraded GPU brings to your PC!