NVIDIA has been making GPUs for quite some time now, and it hasn’t been long since they’ve unveiled some good graphics cards such as the GeForce line for the gaming populace to pursue. And, in addition to these, they also have GPU drivers. Thus, we’re going to check what their GPU drivers can offer users and how to update NVIDIA drivers frequently and efficiently.
What Are NVIDIA Drivers?
NVIDIA drivers are the software drivers that the Nvidia GPU has installed on the user’s PC. It’s a program that transmits data from the Windows PC operating system into the graphics card. This software is important in many cases for the hardware device to operate properly.
In many cases, these drivers are bundled with the Windows OS. Alternatively, they can be found by going to Windows Update on the Control Panel. Here you can check for updates as well as information downloaded from the NVIDIA support website.
Why Should You Update Your NVIDIA Drivers?
If you want your PC to be in tip-top shape, you should have your PC’s device drivers updated properly. This will not only keep your PC in good condition to operate, but it can also save said PC from potentially very bad problems down the line that’ll drain your wallet.
Neglecting to update your PC’s device drivers is a pretty common cause of bad PC problems. However, updating them through manual means can be a pretty hard process, not to mention incredibly tedious as you’ll learn below.
How Often Do You Need to Update GPU Display Drivers?
You might think that just because your GPU is doing fine, you don’t have to update it, right? Every time Nvidia announces a new GPU, software developers over time can know more about its architecture, and can then obtain better performance from this GPU architecture through the use of updated drivers. Also, as the product develops, driver updates typically provide some bug fixes and resolve compatibility issues with newer kinds of software.
If the NVIDIA-based GPU you have is a newer model, it’s typically recommended that you update your NVIDIA drivers regularly to get the best performance from your PC. If your NVIDIA graphics card is an older model, then it’s suggested that you update the drivers only if you are getting problems with running newer software or games on your PC. Otherwise, it may also be wise to get a new and better GPU.
How Do NVIDIA Drivers Help or Affect Your Computer?
If you notice that your PC’s been running slower than the usual speed, it could be blamed on outdated GPU drivers. This is because when these drivers are outdated, PCs can start to run sluggishly and cause noticeable performance issues that can be a serious pain to deal with.
GPU drivers are a necessary piece of software that helps the PC’s different hardware parts to work smoothly within the user’s PC. When these are updated, you can expect that your PC will run smoothly. Do note though, that when they’re outdated, they have the possibility to start causing performance problems that are sure to annoy any user.
Thus, knowing how to update NVIDIA GPU drivers typically solves this problem for many users. However, it’s recommended to have them update automatically to not cause a headache.
Problems Caused by Outdated Device Drivers
Computer problems can sometimes look bad when they are not and vice versa. A large number of these are caused by outdated GPU drivers. These issues come in a lot of ways and they all have a common reason. They’re often fixed by installing software like Driver Support.
PC Monitor Display Problems
There’s nothing more annoying than PC monitors that go dark for no reason. While frustrating, the usual cause for this annoyance is that your GPU drivers may be incredibly outdated.
Having outdated GPU drivers on your PC can have serious issues that manifest in your PC monitor. Fixing these problems after they’ve appeared is a lot more challenging than the simple task of avoiding them using software solutions like the aforementioned Driver Support. This software helps in keeping all of your PC drivers updated automatically in a routine manner.
This is particularly true in cases where the PC displays turn blank while still showing the mouse cursor after you have logged in.
Windows USB Mouse Not Detected
If your mouse shows a “Not Detected” error even when using a wired mouse, there’s a chance that it could be because of an outdated driver. When GPU drivers are outdated, there’s a chance that it will impede essential functions on the PC like recognizing the same mouse that the user’s been using for years.
Webcam Problems
Webcam problems are incredibly annoying, especially on Windows 10 OS. One of the possible reasons is due to your GPU device drivers being outdated.
Having a dysfunctional webcam is an extremely frustrating affair and something that can be an utter annoyance to fix. It’s especially bad when you need a webcam for work. With video conferencing becoming a major trend, it’s necessary for many individuals to have their webcam functioning properly.
The best method to ensure that you never run into this kind of problem is to install Driver Support for your PC to ensure that the webcam drivers are updated automatically.
This hands-off approach to doing updates removes the worry of having to manually update all of your GPU drivers so that it won’t affect the webcam as well as other important PC functions.
Another Reason Why You Need to Update NVIDIA Drivers
Outdated GPU drivers are a big security risk for your PC, making it more susceptible to hackers and other malicious software out there. They’re serious weaknesses on your PC that any hacker with a hint of sense can easily exploit.
NVIDIA drivers are typically secure when they’re initially released and after they’ve been updated by the PC or the user. But after some time, hackers can and have managed to sniff out whatever weaknesses that are present in the software’s code and begin to prod and poke at them to get in.
After some time, and if it’s already a good long while that the NVIDIA driver’s been out, hackers and cybercriminals would already discover enough weaknesses on the software for them to successfully use to hack the PC itself.
As an example, hackers that find security flaws on the PC’s kernel level can then make use of them to compromise the PC’s entire OS. This can and has led to disastrous levels of damage as well as the possibility of stolen files for both personal and business PC’s as both types are equally at risk from this type of attack.
When this kind of thing happens, your PC is at a considerable amount of risk. This is the reason why it’s incredibly vital for users to ensure that all of the NVIDIA device drivers your PC has are routinely updated.
Are Manual Driver Updates Safe and How Does It Work?
A lot of PC users are on the fence about whether it’s a safer or a better idea for them to manually update their NVIDIA drivers. Now, as we’ve discussed above, updating them is always a good thing. Doing it manually, on the other hand, is not always a good idea.
Not only are manual NVIDIA GPU driver updates incredibly tedious, but sometimes, they also take up long hours of head-scratching, checking manuals, and yelling against your PC monitor. They also have the potential to be incredibly risky to even perform. This is more apparent for those that are unfamiliar with technology.
What Do You Need Before Updating NVIDIA GPU Drivers?
There’s only one thing that any user worth their salt would need to know before proceeding to update their NVIDIA drivers. That’s knowing what graphics card model is on your PC. The GPU’s model name is typically plastered on the box it came in.
However, an alternative is through the DirectX Diagnostic Tool, also known as Dxdiag:
- Open Run (Windows + R), or search for and type DXDIAG.
- Then, check if you’re working with a 32-bit or 64-bit system. You’ll need that info at a later time. You’ll see the answer on the System tab that’s underneath the OS.
- Immediately go to the Display tab of Dxdiag. Look at what’s specified under Chip Type. That’s the model of your NVIDIA GPU.
How to Update NVIDIA Drivers on PC?
Updating NVIDIA GPU Drivers Manually
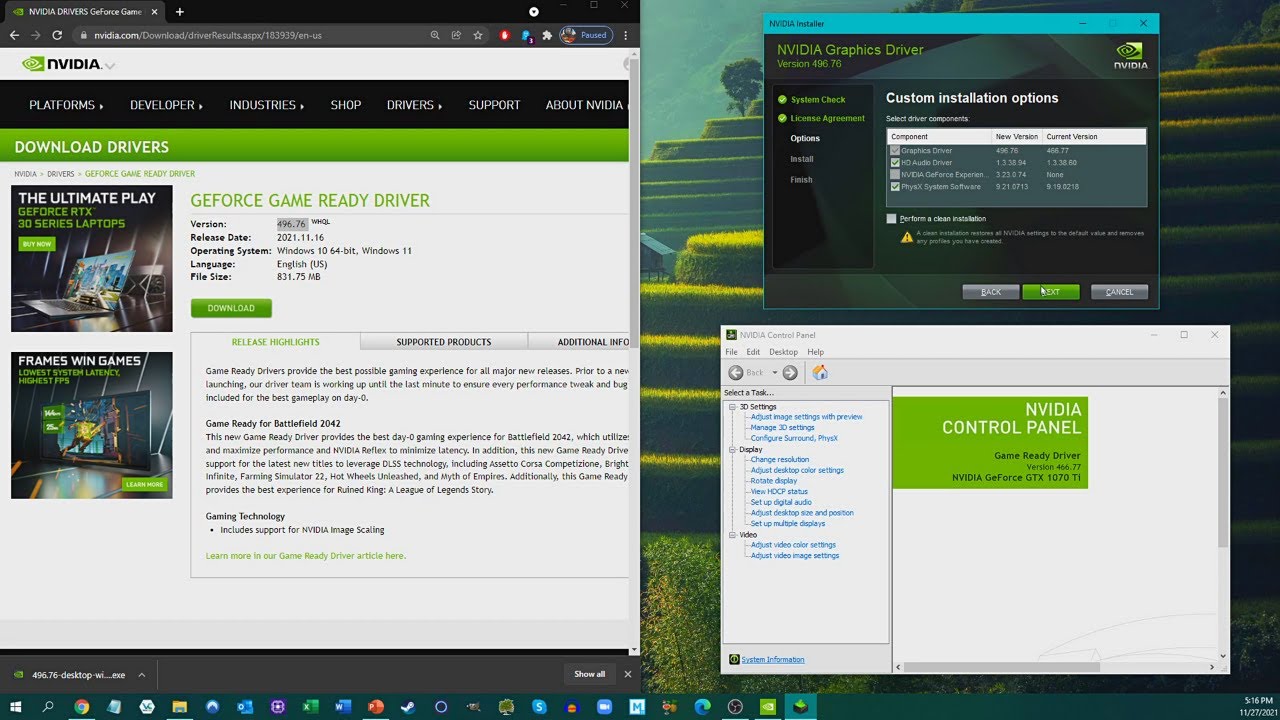
If you want to update your NVIDIA drivers manually, you’ll have to download the currently available GPU drivers on their website. You then have to start the GPU driver installer and then overwrite the old driver. Follow the steps below to do so:
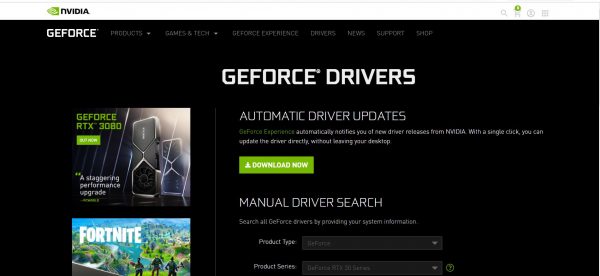
- Launch your preferred web browser and look for the NVIDIA GeForce Driver Download page.
- Search for the most recent NVIDIA GPU driver manually.
- Find and download the most recent version of the NVIDIA GPU driver that’s available and needed for your PC.
- Once the download process gets done, all you need to do is update your drivers using the installer.
Note: It’s typically encouraged by many people for new users to create a backup before updating any drivers. This way, you can simply start System Restore and go back to a previous state should anything not go according to plan.
If you’re still not certain at this point what NVIDIA GPU version you have on your PC, you can make use of the “Auto-Detect Your GPU” feature that’s found right below the Manual Driver Search.
Updating Through GeForce Experience
Yes, you can also use the GeForce Experience program to update your drivers. The GeForce Experience is a program that Nvidia released to compliment the NVIDIA Driver. GeForce was made to do a lot of things. These include screenshots, video capture, live streams, and most importantly, driver updates.
- Download and install the GeForce Experience.
- You’ll need to log in to continue. Select “Create Account” if you’ve just started to use it, and fill out the online form provided. If you do have an account, type in your login credentials. You can also log in through the use of Google, Facebook, etc.
- Once you’re logged in, select the Drivers tab. Then “Download and install” all the available NVIDIA GPU drivers that your PC might need.
Updating Through Windows Updates
There are instances when NVIDIA releases updates alongside Windows updates. As to how you can see them, here’s how:
- Go to Settings. (Windows + I) > Update & Security > Windows Update.
- Select “Check for Updates” to know if there are NVIDIA/Windows updates that are available.
- Select Download if there are.
Do take note that some updates take a while to finish. Also, critical updates are likely to require having to reboot the PC once or twice. So, if you’re updating your NVIDIA GPU driver through the use of Windows Updates, you might wish to save your current work and take a break from working until the updates are fully installed.
It’s a good idea if you have a manual backup just in case you run into any kind of complications while you’re updating your NVIDIA GPU drivers. Normally, if your PC has System Restore enabled, Windows usually takes a snapshot/version of your previous System before installing any kind of update.
How to Update NVIDIA Drivers on MacOS?
When it comes to MacOS, all GPU Driver updates typically come from Apple through the macOS software updates. So there’s no need to update them by yourself manually. (The single exception to this is the Mac Pro that is the only Mac model available in the market to have user-upgradeable GPUs.)
It’s typically not recommended to do this unless you know what you’re doing and are confident in your ability to do so successfully. And even then, if you’re confident about making the updates manually, you might want to think more before you do it: is it necessary? Do you even need it? Apple usually optimizes MacOS and updates the drivers by themselves to deliver the most stable and safe OS environment for the Mac.
Finding Out Your NVIDIA Driver’s Version on Mac
First things first, you need to find out what driver version your MacOS is on currently.
Here are the steps for you to know what version your drivers are working with.
- Select the Apple logo, typically found at the top left of the desktop. Then select “About This Mac.”
- Now Select the “System Report.”
- Scroll down the System Report’s left-hand list until you see “Software” then select “Extensions.” This usually takes a while to load up, so take your time, get some coffee.
- Now scroll down the “Extension” list of names until you see GeForce and select it. The details of your NVIDIA GeForce will then show up in the bottom part of the window:
- If you’re the type to manually update your NVIDIA GPU Drivers through the use of NVIDIA at any point a new extension will appear called “GeForceWeb.” This extension shows the current Driver version of the MacOS’s GPU. The GeForce one won’t change at all unless Apple shows up with an update on their drivers:
- You can tell what program your Mac is currently using because the loaded title will say either “Yes” or “No.”
Now that you have an idea as to what driver version that your MacOS currently has installed, it’s now time to start the update. But first, there are a few things that you have to keep in mind.
Restarting Your Mac Computer

If you’re not able to start your Mac after installing any kind of update, you can do a rollback into Apple’s driver by executing an NVRAM reset. To start this, make sure that your Mac PC power is off. Switch it back on and instantly hold down the CMD, Option (the Alt key), P, and R keys. Keep holding them down until you start to hear the MAC startup chime for the second time and then let go.
If you’re still wondering about the method, Apple does have a support page about the NVRAM method here.
Manual Update Instructions
- Open your web browser and go to NVIDIA’s website. Choose Quadro as the Product Type. On the Product dropdown, choose one of the specific Mac products, it doesn’t matter which one. On the OS dropdown, choose what version of macOS you’re currently using. Under Recommended/Beta, select All.
- Select the most recent NVIDIA GPU Driver that shows up on the search field. You’ll then be taken into the product’s download page. Take note, however, that only a specific few Mac Pros that are available are officially supported by NVIDIA. Below the Release Highlights tab, you’ll find a list of the Macs the service supports in beta. If your Mac isn’t compatible, there’s no point in performing this update for your MacOS.
- Download and install the update.
- You’ll need to restart your MacOS PC. Once you’ve restarted it, you’ll see a new little NVIDIA Driver Manager icon located on your menu bar.
If you’re looking to read more about topics under the NVIDIA banner, here is our NVIDIA GeForce Now guide. Also, we have articles that discuss what ray tracing is, which is a famous breakthrough by NVIDIA.