Introduction
Are you an avid PC gamer looking to improve your gaming experience? One of the key factors that can greatly affect your gaming performance is the frames per second (FPS) rate. Higher FPS ensures smoother gameplay, reduces lag, and provides a more immersive gaming experience. However, achieving optimal FPS can be a challenge, especially if you’re dealing with outdated hardware or settings that are not optimized for gaming.
In this article, we will explore various methods and techniques to help you get better FPS on your PC. Whether you’re playing the latest AAA titles or competitive online games, implementing these strategies can significantly enhance your gaming experience.
Before we dive into the specifics, it’s important to note that improving FPS is a multi-faceted process that requires a combination of hardware and software optimizations. By following these steps, you can maximize your PC’s performance and enjoy smoother gameplay, sharper graphics, and faster response times.
Whether you’re a casual gamer or a serious enthusiast, implementing these tips will help you get the most out of your gaming sessions. So, let’s jump right in and discover how you can enhance your PC’s FPS!
Update Your Graphics Drivers
One of the most crucial steps in optimizing your PC for better FPS is to ensure that your graphics drivers are up to date. Graphics drivers serve as the bridge between your PC’s hardware and software, and outdated drivers can hinder performance and compatibility with the latest games.
To update your graphics drivers, you can follow these simple steps:
1. Start by identifying your graphics card manufacturer. Common manufacturers include Nvidia, AMD, and Intel.
2. Visit the official website of the manufacturer and navigate to their support or driver download section.
3. Locate the appropriate driver for your graphics card model and operating system.
4. Download the driver and run the setup file.
5. Follow the on-screen instructions to install the updated drivers.
Updating your graphics drivers not only improves game performance but also ensures that your system is compatible with the latest graphics technologies and bug fixes. By keeping your drivers up to date, you can potentially unlock additional features and optimizations specific to your graphics card, resulting in smoother gameplay and improved FPS.
It’s worth noting that some graphics cards have automatic driver update functionalities. These tools, such as Nvidia GeForce Experience or AMD Radeon Software, can automatically detect and install the latest drivers for your system. Utilizing these tools can simplify the driver update process and keep your system optimized without manual intervention.
Remember to periodically check for driver updates to ensure that you’re using the most up-to-date version. Outdated drivers can lead to compatibility issues, graphical glitches, and decreased performance. By taking the time to update your graphics drivers, you can set a solid foundation for achieving better FPS in your games.
Adjust Your Power Settings
Power settings play a crucial role in managing the performance and energy consumption of your PC. By optimizing your power settings, you can potentially improve FPS by ensuring that your system operates at its maximum capacity during gaming sessions.
Here are some steps to adjust your power settings:
1. Open the Control Panel on your PC and navigate to the Power Options.
2. Select the power plan that you’re currently using, usually labeled as “Balanced” or “Power Saver.”
3. Click on “Change plan settings” next to the selected power plan.
4. In the new window, click on “Change advanced power settings.”
5. Look for the “Processor power management” option and expand it.
6. Set the “Minimum processor state” and “Maximum processor state” to 100% for both plugged in and on battery settings.
7. Save the changes and exit the Power Options.
By setting the minimum and maximum processor state to 100%, you ensure that your CPU operates at its full potential throughout gaming sessions. This prevents any unnecessary power-saving features from limiting your PC’s performance and can lead to improved FPS in games.
It’s important to note that adjusting power settings to maximize performance might lead to increased energy consumption and potentially higher temperatures for your hardware. Ensure that your PC has proper cooling mechanisms in place and monitor the temperature levels during gameplay to prevent overheating.
In addition to adjusting processor power settings, you should also consider disabling any power-saving features specific to your graphics card. These options, such as “PowerPlay” for AMD or “PowerMizer” for Nvidia, can impede performance by limiting GPU clock speeds. Keeping your graphics card running at its maximum performance state can result in better FPS and smoother gameplay.
However, if you’re using a laptop and gaming on battery power, it’s advisable to select a power plan specifically designed for better battery life. Balancing performance with battery conservation is crucial to extend your gaming sessions without draining the battery excessively.
By fine-tuning your power settings, you can ensure that your PC delivers optimal performance during gaming sessions, leading to improved FPS and an overall enhanced gaming experience.
Optimize Your Game Settings
Optimizing your game settings is a crucial step in improving FPS on your PC. Each game comes with its own set of graphics options that can be adjusted to achieve a balance between visual quality and performance. By fine-tuning these settings, you can significantly improve FPS and ensure smoother gameplay.
Here are some tips to optimize your game settings:
1. Start by launching the game you want to optimize.
2. Navigate to the graphics or video settings within the game’s options menu.
3. Adjust the resolution to match your monitor’s native resolution. Lower resolutions can lead to higher FPS.
4. Set the graphics quality setting to a level that suits your preferences and hardware capabilities. Lowering the graphics quality will improve performance.
5. Disable or lower demanding features such as anti-aliasing, ambient occlusion, motion blur, and post-processing effects.
6. Experiment with the settings and test the performance impact on FPS. Modifying settings like texture quality, shadow quality, and draw distance can offer significant improvements.
7. Consider using the “Optimize” or “Auto-detect” feature if available, which automatically adjusts the settings based on your hardware specifications.
Additionally, some games may have advanced graphics settings that can be further customized to balance performance and visuals. These settings may include options like texture filtering, shader details, and view distance, allowing you to fine-tune the game to your liking.
It’s important to note that each game is unique, and there is no one-size-fits-all solution for optimizing game settings. Experimentation and finding the sweet spot between performance and visual quality is key.
Furthermore, keep in mind that optimizing your game settings may require you to restart the game for the changes to take effect. Additionally, updating your game to the latest version can also improve performance and fix potential bugs that could impact FPS.
By taking the time to optimize your game settings, you can achieve a smoother gaming experience with improved FPS. Make sure to periodically review and adjust the settings as newer games or updates might introduce additional graphics options that can further enhance your gaming performance.
Close Unnecessary Background Programs
When it comes to optimizing your PC for better FPS, it’s important to minimize any resource-hungry programs running in the background. These programs can consume valuable system resources, causing a strain on your CPU, RAM, and other hardware components, which in turn can result in decreased FPS and overall performance.
To close unnecessary background programs, follow these steps:
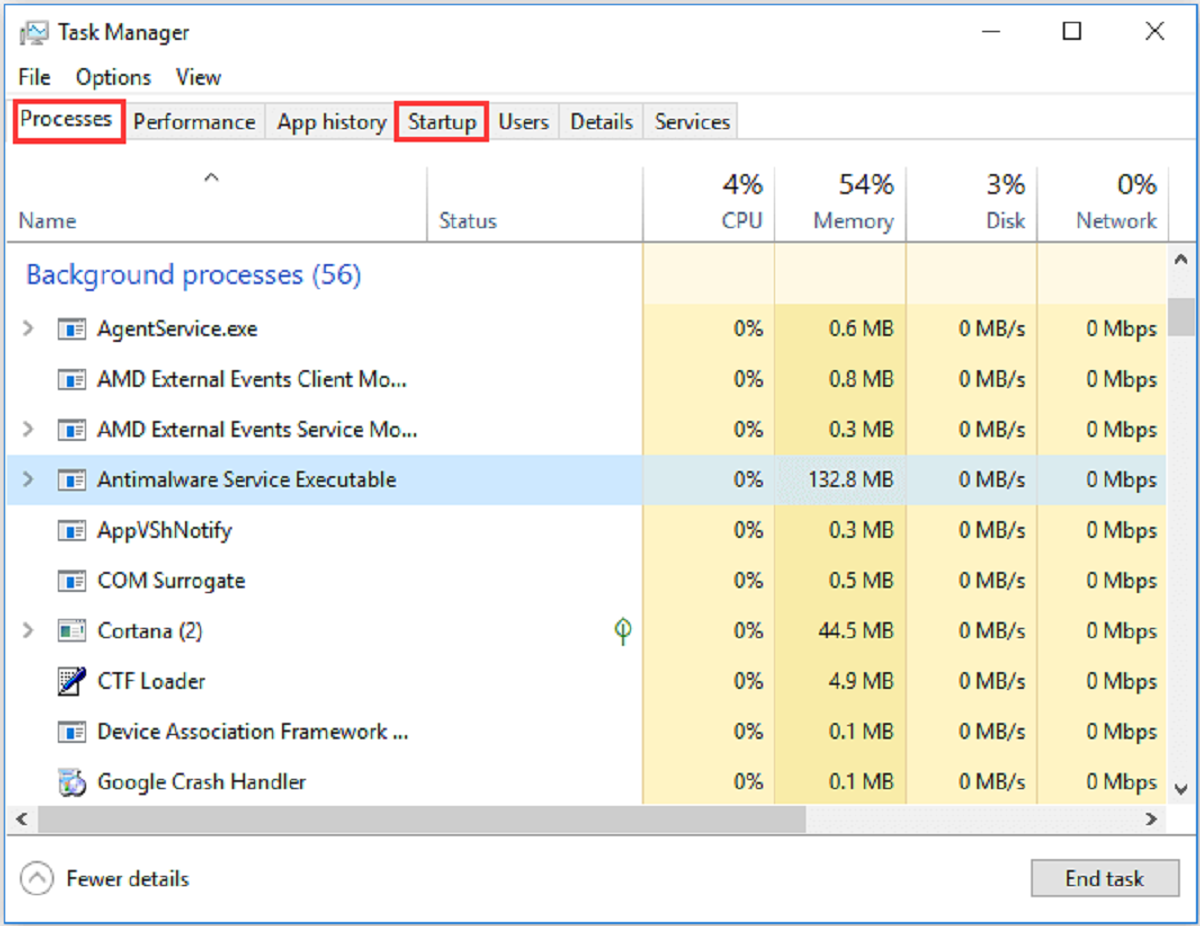
1. Open the Task Manager by pressing Ctrl+Shift+Esc or right-clicking the taskbar and selecting “Task Manager”.
2. In the Task Manager window, navigate to the “Processes” tab, where you’ll see a list of running programs and background processes.
3. Identify any resource-intensive programs that are not required for your gaming session. Examples include web browsers, video players, music streaming apps, and unnecessary system utilities.
4. Right-click on these programs and select “End Task” to close them.
By closing unnecessary background programs, you free up valuable system resources that can be utilized by your game, resulting in improved FPS and smoother gameplay.
In addition to manually closing programs, you can also benefit from using specialized software that can help you identify and close unnecessary processes automatically. These software, known as game boosters, can streamline your system by temporarily disabling non-essential services and processes, optimizing your PC for gaming performance.
Keep in mind that certain background programs are essential to the proper functioning of your operating system, so exercise caution when closing programs. Avoid terminating processes related to system stability, security, or essential drivers. Additionally, be mindful of any programs or services that are running in the background but required for online gaming or accessing game servers.
Regularly closing unnecessary background programs and utilizing game boosters can ensure that your PC is dedicated to running your game smoothly, maximizing your FPS and minimizing any performance hindrances. By keeping distractions to a minimum, you can fully immerse yourself in your gaming experience.
Overclock Your GPU
If you’re looking to squeeze out every ounce of performance from your graphics card, overclocking can be a viable option. Overclocking involves increasing the clock speed of your GPU, allowing it to perform at higher frequencies and potentially achieve better FPS in games.
Before proceeding with overclocking, it’s important to note that this process carries certain risks and should be done with caution. Overclocking can increase power consumption, generate more heat, and potentially reduce the lifespan of your GPU if not done properly. It’s vital to follow proper procedures and monitor temperatures to prevent any damage to your hardware.
Here are some general steps to overclock your GPU:
1. Download and install a reliable GPU overclocking tool such as MSI Afterburner or EVGA Precision X.
2. Open the overclocking tool and familiarize yourself with its interface.
3. Increase the GPU core clock by small increments, such as 10-20 MHz, and test the stability of your system by running a benchmark or playing a demanding game.
4. Monitor the temperature of your GPU during the stress test and make sure it stays within safe limits. If the temperatures are too high, consider adjusting the fan curve or adding additional cooling solutions.
5. Repeat the process of increasing the core clock and testing stability until you notice artifacts or instability in your system. If this occurs, revert back to the last stable setting.
6. Once you’ve found a stable overclock, you can increase the memory clock by small increments and repeat the stability testing process.
7. Remember to save your overclock settings and apply them each time you start your PC to ensure they are applied consistently.
It’s essential to closely monitor the temperatures and stability of your system during the overclocking process. Overheating can lead to thermal throttling, reducing performance, and possibly damaging your GPU. If you encounter stability issues or notice a significant increase in temperatures, it may be necessary to adjust your overclock settings or consider reverting to the default clock speeds.
Overclocking your GPU can yield noticeable improvements in FPS, especially in graphically demanding games. However, it’s important to strike a balance between performance gains and the potential risks and drawbacks associated with overclocking. Evaluate the specific capabilities of your GPU and do thorough research to understand its overclocking potential and limitations.
Ultimately, overclocking can be an effective way to boost FPS on your PC if done correctly. However, it’s crucial to approach it with caution, prioritize the health and safety of your hardware, and be prepared to accept the risks involved.
Upgrade Your Hardware
If you’re experiencing consistently low FPS and have already optimized your software settings, it may be time to consider upgrading your hardware. Upgrading critical components of your PC can provide a substantial performance boost, allowing you to enjoy smoother gameplay and higher FPS.
Here are some key hardware components to consider upgrading:
1. Graphics Card (GPU): The GPU has a significant impact on gaming performance. Upgrading to a more powerful GPU with better processing capabilities and more VRAM can greatly improve FPS and graphics quality.
2. RAM: Insufficient RAM can cause performance bottlenecks, leading to decreased FPS in games. Consider upgrading to higher-capacity or faster RAM to ensure your system has enough memory to handle the demands of modern games.
3. CPU: A faster and more powerful CPU can enhance overall system performance, especially in CPU-intensive games. Upgrading to a newer generation or higher core count CPU can help increase FPS and reduce any CPU-related bottlenecks.
4. Storage: If you’re using a traditional hard drive, upgrading to a solid-state drive (SSD) can significantly improve loading times, reducing lag and providing a smoother gaming experience.
5. Power Supply: In cases where your current power supply is insufficient to support higher-end components, upgrading to a higher wattage power supply can ensure stability and prevent potential performance issues.
Before upgrading any component, it’s important to ensure compatibility with your motherboard and other hardware. Research the specifications of your existing system and consult manufacturer guidelines or forums for recommendations on compatible upgrades.
While hardware upgrades can be effective in improving FPS, they can also be costly. It’s crucial to evaluate your budget and prioritize the components that will yield the most significant performance gains for your specific needs.
It’s worth noting that upgrading hardware requires technical knowledge and, in some cases, may require professional assistance. Improper installation or compatibility issues can cause system instability or damage. If you’re unsure, consult with a knowledgeable technician or seek guidance from reputable online resources.
Upgrading your hardware can make a substantial difference in your gaming experience, elevating your system’s performance and improving FPS. However, it’s essential to do thorough research, evaluate your specific needs and budget constraints, and ensure the compatibility of the components before making any upgrades.
Use a Game Booster Software
If you’re seeking a convenient and efficient way to optimize your PC for gaming, using a game booster software can be a valuable solution. Game booster software is designed to enhance your gaming experience by optimizing system resources, disabling unnecessary background processes, and prioritizing resources for your games.
Here are some key benefits of using a game booster software:
1. Resource Optimization: Game boosters streamline your system by temporarily disabling non-essential processes and services that consume system resources. This frees up valuable CPU, GPU, and RAM resources, ensuring that your games have maximum access to the hardware they need for optimal performance and FPS.
2. Background Process Management: Game boosters help identify and close unnecessary background programs and processes that can potentially impact gaming performance. By closing resource-hungry applications, such as web browsers, streaming services, or system utilities, you can prevent them from competing with your game for system resources.
3. System Tweaks: Game boosters often offer a variety of system optimization settings that can further enhance gaming performance. These settings may include CPU prioritization, RAM optimization, and network optimization, all targeted at providing a smoother gaming experience with improved FPS.
4. Easy-to-Use Interface: Most game booster software provides a user-friendly interface that allows you to access their features and optimizations with just a few clicks. You don’t need extensive technical knowledge to use these tools effectively.
5. Automated Optimization: Some game boosters can automatically detect when a game is launched and apply the necessary optimizations. This eliminates the need to manually enable or configure settings each time you want to play a game, simplifying the optimization process.
When choosing a game booster, it’s important to select a reputable and trusted software. Look for user reviews, ratings, and features that align with your specific needs. Popular game booster software that have garnered positive feedback from gamers include Razer Cortex, Wise Game Booster, and MSI Dragon Center.
While game booster software can be effective in improving FPS and optimizing your gaming experience, keep in mind that they may not work for all systems or games. Hardware limitations, system configurations, and specific game requirements can impact the effectiveness of a game booster. It’s advisable to experiment and monitor the performance of your system with and without the game booster to determine the actual impact it has on your particular setup.
Overall, using a game booster software can be a convenient and efficient way to enhance your gaming performance. By optimizing system resources and managing background processes, you can ensure that your PC is dedicated to providing the best possible gaming experience with improved FPS and smoother gameplay.
Adjust Your Windows Settings
When it comes to optimizing your PC for better gaming performance and FPS, adjusting your Windows settings can have a significant impact. By making a few tweaks and customization changes, you can streamline your system’s performance and ensure that it is tailored for gaming.
Here are some Windows settings that you can adjust to improve FPS:
1. Power Options: Access the Power Options in the Control Panel and select the “High Performance” power plan. This ensures that your system operates at its maximum capability, providing better performance during gaming sessions.
2. Multitasking and Background Processes: In the Windows Settings, navigate to the Privacy tab and then to Background Apps. Disable any unnecessary apps from running in the background, as they can consume system resources and impact gaming performance.
3. Game Mode: In the Windows Settings, go to Gaming and enable the Game Mode feature. Game Mode optimizes your system’s performance for gaming by prioritizing resources and minimizing background processes.
4. Graphic Settings: In the Windows Settings, under the System tab, select Display and then Graphics Settings. Ensure that the Graphics Performance Preference is set to “High Performance.” This helps prioritize your GPU for gaming applications.
5. Windows Updates: Keeping your Windows operating system up to date is essential for optimal performance and security. Regularly check for and install Windows updates to ensure that you have the latest updates and bug fixes that can improve gaming performance.
6. Game DVR and Game Bar: In the Gaming section of Windows Settings, disable features like Game DVR and Game Bar if you don’t use them. These features can potentially impact performance by consuming system resources.
In addition to these settings, it’s also important to consider disabling unnecessary visual effects, such as animations and transparency, to reduce the workload on your GPU. To access these settings, right-click on the Start button, select System, and then click on Advanced system settings. In the Performance section, choose “Adjust for best performance” or manually customize which visual effects to enable or disable.
Keep in mind that while adjusting Windows settings can improve gaming performance, it’s important to strike a balance between system optimizations and functionality. Certain Windows features and settings serve important purposes for security and system stability. Be selective in disabling or modifying settings to avoid inadvertently causing issues with your operating system.
By taking the time to adjust your Windows settings for gaming, you can optimize your system’s performance and squeeze out every bit of FPS, translating into a smoother and more enjoyable gaming experience.
Monitor Your CPU and GPU Usage
Monitoring your CPU and GPU usage is an essential step in understanding the performance of your system and identifying any potential bottlenecks that may be affecting your FPS. By keeping an eye on these metrics, you can make informed decisions regarding optimizations and upgrades to improve gaming performance.
To monitor CPU and GPU usage, you can utilize various tools and software:
1. Task Manager: The built-in Task Manager in Windows provides basic CPU and GPU monitoring. Press Ctrl+Shift+Esc to open Task Manager, navigate to the Performance tab, and monitor the utilization graphs for CPU and GPU.
2. Third-Party Monitoring Software: There are numerous third-party applications available, such as MSI Afterburner, HWMonitor, and HWiNFO, that provide more detailed and real-time monitoring of CPU and GPU usage, temperatures, and other performance metrics.
3. In-Game Overlays: Some gaming software, such as GeForce Experience and Radeon Overlay, offer in-game overlays with performance metrics, including CPU and GPU usage. These overlays can provide real-time information without needing to switch out of your game.
Monitoring your CPU and GPU usage allows you to identify any potential performance bottlenecks. If your CPU usage consistently reaches near 100% during gaming, it may indicate that your CPU is the limiting factor and could benefit from an upgrade. Similarly, if your GPU usage remains low while gaming, it may suggest that your GPU is not fully utilized, requiring adjustments to your game settings or consideration for a more powerful graphics card.
Additionally, monitoring CPU and GPU temperatures is vital to ensure your components are operating within safe limits. High temperatures can lead to thermal throttling and reduced performance. If you notice temperatures exceeding safe thresholds, consider improving your PC’s cooling by ensuring proper airflow, cleaning dust from fans and heatsinks, or investing in additional cooling solutions.
It’s important to note that CPU and GPU usage can vary depending on the game and scene complexity. Some games may be more CPU-intensive, while others may heavily rely on GPU processing power. Monitoring your usage across various games and settings can give you a broader understanding of your system’s performance capabilities.
By regularly monitoring CPU and GPU usage, you can gain valuable insights into your system’s performance and identify any areas that require attention or optimization. This knowledge empowers you to make informed decisions about hardware upgrades, software optimizations, and overall system tweaks to achieve better gaming performance and FPS.
Conclusion
Improving FPS on your PC is an essential step in enhancing your gaming experience. By implementing the strategies discussed in this article, you can optimize your system for better performance, smoother gameplay, and higher FPS.
Updating your graphics drivers ensures compatibility and unlocks potential optimizations specific to your graphics card. Adjusting your power settings maximizes performance during gaming sessions, while optimizing game settings strikes the right balance between visuals and performance.
Closing unnecessary background programs and using game booster software help free up system resources and prioritize them for gaming. Overclocking your GPU, if done correctly and cautiously, can provide a significant performance boost, though it requires careful monitoring of temperatures.
If you’re still unsatisfied with your FPS, considering hardware upgrades to components like the graphics card, RAM, CPU, or storage can provide substantial performance gains. Adjusting Windows settings, such as power options and disabling unnecessary background processes, further optimizes your system for gaming.
Lastly, monitoring your CPU and GPU usage allows you to identify potential bottlenecks and make informed decisions about optimizations or upgrades. Regularly monitoring usage and temperatures ensures your system is operating within safe limits.
Remember that the effectiveness of these strategies may vary depending on your specific hardware, software, and the games you play. Experimentation and customization to suit your individual needs are key.
By combining these techniques, you can maximize your PC’s performance and create an immersive gaming experience with smooth gameplay and outstanding FPS. So, go ahead, apply these strategies, and get ready to take your gaming to new heights!