Introduction
Changing a PC case is an exciting task for tech enthusiasts who enjoy customizing their computer setup. Whether you’re looking for a sleeker design, better airflow, or just a change of scenery, swapping PC cases can give your rig a fresh new look. While it may sound daunting for beginners, with the right knowledge and tools, the process can be relatively straightforward.
In this guide, we’ll take you through the step-by-step process of changing a PC case to another in PC Building Simulator. You’ll learn how to safely remove components from the old case, prepare the new case, and install the components correctly. We’ll also cover important steps such as connecting cables and verifying the connections before testing the system.
Before diving into the details, it’s crucial to note that changing a PC case requires careful handling of delicate components. Always ensure you have a clean and organized workspace, and take proper precautions to avoid static electricity. Additionally, be sure to consult the manufacturer’s instructions for your specific components, as they may have unique requirements or additional steps.
So, if you’re ready to give your PC a makeover and learn the ins and outs of case swapping, let’s get started with step 1: preparing for the case swap.
Step 1: Preparing for the Case Swap
Before you begin swapping your PC case, it’s important to take some preliminary steps to ensure a smooth and hassle-free process. Here’s what you need to do to prepare for the case swap:
- Backup your data: Before making any changes to your PC, it’s always a good idea to back up your important data. This includes documents, photos, videos, and any other files you don’t want to lose. You can either use an external hard drive, cloud storage, or a combination of both to create a backup of your files.
- Create a checklist: Making a checklist of all the components installed in your current case can be helpful during the case swap. Take note of all the hardware, including the motherboard, CPU, GPU, RAM, and storage devices. This will ensure that you don’t miss any components while transferring them to the new case.
- Gather necessary documentation: If you’re not familiar with the process of disassembling and reassembling your PC, it’s a good idea to review the documentation that came with your components. The motherboard manual, in particular, will be useful as it provides detailed instructions on connecting cables and installing hardware. You can also find valuable resources online, such as video tutorials or forums, that can guide you through the process.
- Prepare the workspace: Clear a clean and well-lit workspace where you can comfortably work on your PC. Make sure you have enough room to lay out the components and tools you’ll be using. Additionally, consider using an anti-static mat or wearing an anti-static wrist strap to protect your components from static electricity.
By following these preparatory steps, you’ll be ready to proceed with the case swap process confidently. Taking the time to backup your data, create a checklist, review documentation, and prepare your workspace will help ensure a successful and stress-free transition to your new PC case.
Step 2: Gathering the Necessary Tools and Equipment
Before you dive into swapping your PC case, it’s essential to gather the necessary tools and equipment to ensure a smooth and efficient process. Having the right tools on hand will make disassembling and reassembling your components much easier. Here’s a list of the tools and equipment you’ll need:
- Screwdriver Set: A set of screwdrivers with different types and sizes, including Phillips and flathead, will be crucial for removing screws holding various components in place.
- Zip Ties: Zip ties are handy for cable management and keeping your cables organized within the new case. They’ll help improve airflow and give your build a cleaner look.
- Pliers: Pliers can be useful for removing stubborn screws or connectors and provide a better grip when dealing with smaller components.
- Anti-Static Wrist Strap: An anti-static wrist strap helps protect your components against static electricity discharge. Wear it to ground yourself and prevent accidental damage to sensitive parts.
- Cable Extensions (optional): If you’re swapping to a larger case, you may need cable extensions to ensure your existing cables reach the appropriate connections without issues.
- Thermal Paste: If you’re reusing your CPU cooler, it’s a good idea to have some thermal paste on hand to reapply it when installing the cooler in the new case.
- Cable Ties: Cable ties will assist in keeping your cables organized and prevent them from becoming tangled or obstructing airflow.
Having these tools and equipment readily available will save you time and frustration during the case swap. Make sure to gather everything before you start the process to ensure a seamless experience. Additionally, it’s always a good idea to have a clean and lint-free cloth nearby to wipe down components and surfaces as needed.
With your tools and equipment prepared and in hand, you’re one step closer to successfully swapping your PC case. In the next step, we’ll walk through removing the components from the old case.
Step 3: Removing the Components from the Old Case
Now that you have everything prepared, it’s time to start removing the components from your old PC case. Follow these steps to ensure a smooth and systematic disassembly process:
- Power Off and Unplug: Before you begin, make sure your PC is powered off and unplugged. This is crucial for your safety and to avoid any electrical damage to your components.
- Remove the Side Panel: Most PC cases have removable side panels held in place by screws. Use your screwdriver to carefully remove the screws and slide off the panel. Some cases may have a latch or clip that needs to be released first. Set the side panel aside in a safe place.
- Disconnect Power Cables: Begin by disconnecting the power cables from your components. Carefully unplug the main power cable from the motherboard and any auxiliary power cables connected to your GPU and other components. Take note of their locations to ensure proper reconnection later.
- Remove the GPU: If you have a dedicated graphics card (GPU), unscrew any retention brackets holding it in place. Gently remove the GPU from its slot, being careful not to apply excessive force or damage the delicate connectors.
- Disconnect Data Cables: Next, disconnect any data cables such as SATA cables from your storage drives, optical drives, and other peripherals. Take note of their positions and connectors for reconnection later.
- Remove RAM and Expansion Cards: Carefully remove the RAM modules by pressing down on the side clips and lifting them out of their slots. If you have any expansion cards, such as sound cards or networking cards, unscrew them from their slots and gently remove them.
- Unscrew and Remove the Motherboard: Locate and remove the screws securing the motherboard to the case. Take care not to drop any screws onto the motherboard or other components. Once all screws are removed, gently lift the motherboard out of the case and set it aside on an anti-static surface.
- Disconnect and Remove Storage Drives: Disconnect any remaining cables from your storage drives, such as hard drives or solid-state drives. Unscrew the mounting brackets holding the drives in place and carefully remove them from the case.
By following these steps, you’ll successfully remove the components from your old PC case, ready to be installed in the new one. Take your time to ensure each step is completed carefully, noting the location of screws and connectors for easy reassembly later.
In the next step, we’ll guide you through preparing the new case for the installation of the components.
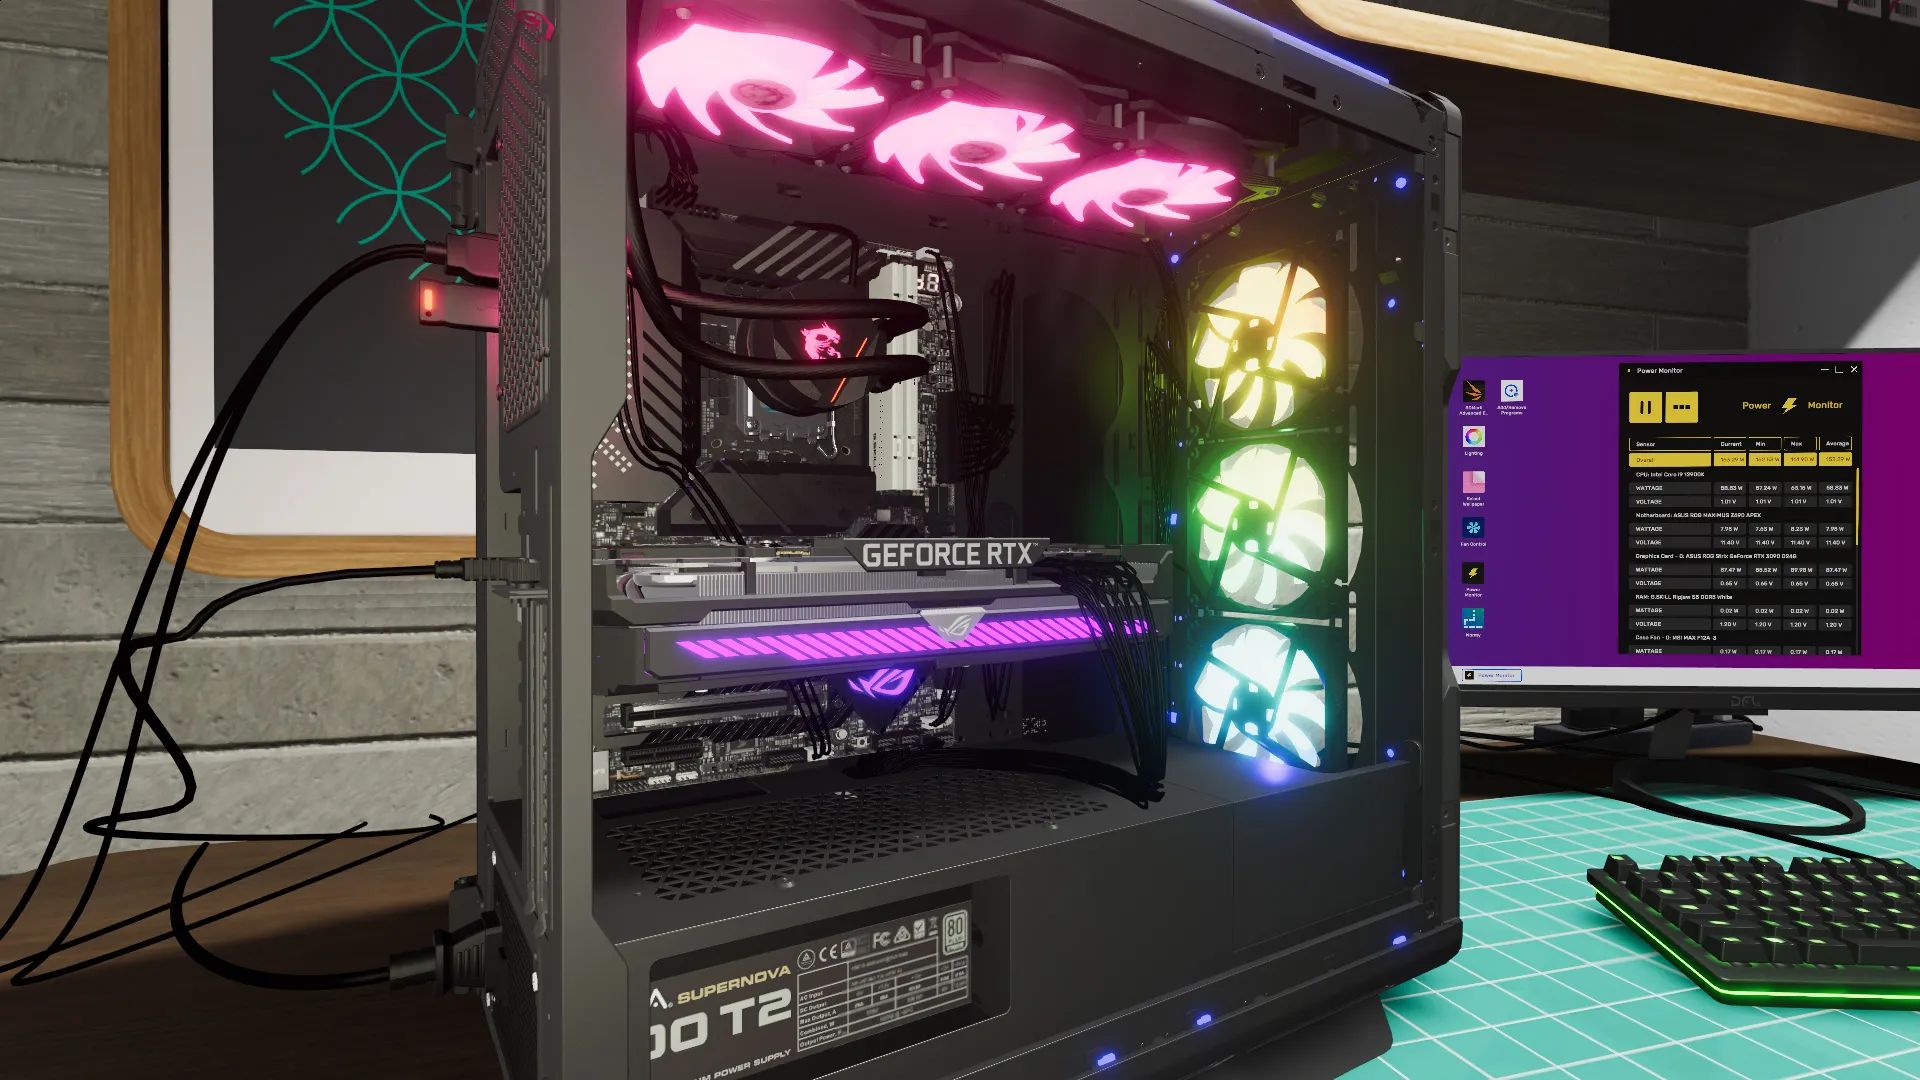
Step 4: Preparing the New Case
With the components safely removed from the old case, it’s time to prepare the new case for their installation. This step involves ensuring the new case is clean, properly configured, and ready to house your components. Follow these steps to prepare the new case effectively:
- Clean the Case: Before starting, take a moment to clean the new case. Use a soft cloth or compressed air to remove any dust or debris that may have accumulated during storage. This will ensure optimal airflow and prevent any potential issues down the line.
- Check Cable Management Options: Assess the cable management options available in the new case. Look for routing channels, cable tie-down points, and other features that will help keep your cables organized and minimize clutter. Plan your cable management strategy before installing the components to ensure a clean and tidy build.
- Position the Standoffs: Locate the standoffs on the motherboard tray in the new case. Standoffs are small brass or metal pegs that elevate the motherboard and prevent it from touching the case directly. Ensure that the standoffs align with the motherboard’s mounting holes. If any extra standoffs are present, remove them to avoid short circuits.
- Install Case Fans: If your new case includes additional case fans, now is the time to install them. Refer to the case’s manual for instructions on how to mount the fans properly. Consider the best placement for optimal airflow, typically with intake fans at the front and bottom of the case and exhaust fans at the rear and top.
- Prepare Cable Extensions (if necessary): If you’ve determined that your existing cables won’t reach all the necessary connections in the new case, now is the time to install any cable extensions. These extensions will ensure that your cables can reach their destinations comfortably and without strain.
By following these steps, you’ll effectively prepare the new case for the installation of your components. Taking the time to clean the case, assess cable management options, position the standoffs correctly, install case fans, and prepare cable extensions (if necessary) will set the foundation for a successful and well-organized build.
In the next step, we’ll guide you through installing the components in the new case, bringing your PC build one step closer to completion.
Step 5: Installing the Components in the New Case
Now that you have prepared the new case, it’s time to start installing your components. Follow these steps to ensure a smooth and successful installation process:
- Install the Motherboard: Begin by carefully placing the motherboard onto the standoffs in the new case. Ensure that the motherboard’s I/O ports align with the case’s I/O shield. Once aligned, use the screws provided with the case to secure the motherboard in place. Make sure not to overtighten the screws.
- Connect Power Supply: Install the power supply unit (PSU) in the designated area of the case, typically at the bottom. Connect the necessary power cables from the PSU to the motherboard, storage drives, GPU, and other components. Consult your PSU’s manual or the manufacturer’s instructions for proper cable connections.
- Install RAM: Carefully insert the RAM modules into the appropriate slots on the motherboard. Align the notch on the module with the slot and press firmly until the clips on both sides click into place. Ensure the modules are fully inserted, but be cautious not to apply excessive force.
- Install GPU: If you have a dedicated graphics card, carefully insert it into the appropriate PCIe slot on the motherboard. Ensure it is fully seated and secure it with the retention bracket or screws. Connect the necessary power cables from the PSU to the GPU if required.
- Install Storage Drives: Install your storage drives, such as hard drives or solid-state drives, into the designated drive bays in the case. Use screws or toolless brackets, depending on the case design, to secure the drives in place. Connect the SATA data cables to the drives and the appropriate SATA ports on the motherboard.
- Connect Data Cables: Connect any additional data cables for peripherals, such as optical drives or external devices. Ensure proper cable management by routing the cables through the designated channels and using cable ties to secure them.
- Connect Case Fans: If you have additional case fans, connect them to the appropriate fan headers on the motherboard. Ensure proper airflow by positioning intake fans at the front or bottom of the case and exhaust fans at the rear or top. Use the fan’s provided cables or extensions to reach the headers if necessary.
- Double-Check Connections: Before closing up the case, double-check all connections to ensure everything is properly seated and connected. Take your time to verify that no cables are obstructing any fans or components.
Following these steps will help you install your components effectively and efficiently. Take care to handle the components gently and follow any specific instructions provided by the component manufacturers. With the components securely installed, you’re one step closer to completing your PC build.
In the next step, we’ll guide you through connecting cables and wiring to finalize the setup.
Step 6: Connecting Cables and Wiring
With your components installed, it’s time to connect the necessary cables and wire up your build. Proper cable management is not only aesthetically pleasing but also enhances airflow and reduces the risk of tangled or obstructed cables. Follow these steps to ensure a clean and organized wiring setup:
- Connect Power Cables: Begin by connecting the main power cable from the power supply to the motherboard. Ensure it is securely plugged into the correct port. Connect any necessary auxiliary power cables to your GPU and other components that require additional power.
- Connect SATA Cables: Connect the SATA cables from the storage drives to the appropriate SATA ports on the motherboard. Ensure the cables are properly aligned and fully seated to ensure reliable data transfer.
- Connect Front Panel Cables: Connect the front panel cables from the case to the corresponding headers on the motherboard. These cables control the power button, reset button, front USB ports, audio ports, and any other front panel features your case may have. Consult your motherboard’s manual for the proper pin configuration and cable connections.
- Connect Fans: If you have additional case fans, connect them to the appropriate fan headers on the motherboard or fan controller if available. Ensure the fans are correctly positioned for optimal airflow and use cable ties to secure the fan cables and keep them organized.
- Route and Manage Cables: Take the time to route and manage your cables. Use the cable management options provided in the case, such as routing channels, tie-down points, and Velcro straps, to keep your cables neat and organized. Use zip ties or Velcro cable ties to bundle and secure cables together, preventing them from obstructing fans or components.
- Test Connections: Before closing up the case, double-check all cable connections to ensure everything is properly seated. Make sure there are no loose or unplugged cables. This step is crucial to avoid any potential issues or malfunctions when powering on your system.
Taking the time to connect cables properly and manage your wiring will result in an organized and efficient build. This will not only make your PC visually appealing but also aid in better airflow and cooling. It’s important to ensure that cables are not excessively strained and are routed in such a way that they don’t obstruct any components or fans.
In the next step, we’ll guide you through verifying the connections and testing the system to ensure everything is functioning correctly.
Step 7: Verifying the Connections and Testing the System
After connecting all the necessary cables and wiring, it’s crucial to verify the connections and test your system to ensure everything is functioning correctly. Follow these steps to complete this important step:
- Double-Check Connections: Take a final look at all cable connections to ensure they are properly seated. Verify that no cables are obstructing fans or components, and that all connections are secure.
- Close the Case: Carefully close the case and secure it with the screws or fasteners provided. Ensure that the case is securely closed and all panels are properly aligned.
- Connect Peripheral Devices: Connect your monitor, keyboard, mouse, and any other peripheral devices to your PC.
- Power On: Plug in your PC and power it on. Listen for any unusual noises, such as beeps or rattling fans, and watch for any error messages on the screen.
- Check BIOS/UEFI Settings: Access your BIOS/UEFI settings by pressing the appropriate key during startup (usually Del, F2, or F11). Verify that the system recognizes all the installed components and adjust any necessary settings, such as enabling XMP for RAM or setting the boot order.
- Test Hardware Functionality: Run diagnostic software or stress tests to ensure that all hardware components are functioning properly. Monitor temperatures, fan speeds, and overall system stability during these tests.
- Install Operating System: If everything is working as expected, proceed to install your preferred operating system. Follow the on-screen prompts and instructions to complete the installation process.
- Check Device Functionality: Once the operating system is installed, test the functionality of all peripherals and devices. Ensure that drivers are installed correctly and that all devices are functioning as intended.
By following these steps, you can verify the connections, ensure proper functionality, and address any potential issues that may arise during the testing phase. It’s important to take the time to thoroughly test your system before regular use to avoid any unexpected hardware or software problems.
Once you have confirmed that your system is running smoothly, you’re ready to move on to the final step: cleaning and organizing your setup.
Step 8: Cleaning and Organizing
After successfully building your PC and ensuring that everything is functioning correctly, it’s time to clean up and organize your setup. This step will not only improve the overall aesthetics of your build but also contribute to its longevity and ease of maintenance. Follow these steps to complete the cleaning and organizing process:
- Clean the Exterior: Use a soft, lint-free cloth to wipe down the exterior of the case, removing any fingerprints, dust, or smudges. Pay special attention to the front panel, side panels, and any prominent areas that may be visible.
- Cable Management: Take a moment to evaluate and optimize your cable management. Use cable ties or Velcro straps to secure and bundle cables together. Route them neatly through cable management channels or tie-down points, ensuring they do not obstruct airflow or components.
- Clean the Interior: Use compressed air to carefully clean the interior of the case, removing any dust or debris that may have accumulated during the building process. Pay close attention to areas around fans, heatsinks, and other components where dust is likely to accumulate.
- Organize Accessories: Gather any leftover screws, cables, or accessories and organize them in a separate container or designated area. Label them if needed, making it easier to locate specific components in the future.
- Arrange Peripherals: Organize and position your peripheral devices, such as the monitor, keyboard, mouse, and speakers, in a comfortable and ergonomic manner. Ensure that cables are neatly routed and not tangled or causing any obstructions.
- Optimize Workspace: Take a moment to optimize your workspace for comfort and productivity. Arrange your desk or workstation to minimize clutter and provide an efficient workflow. Consider using cable management solutions, such as cable clips or cable sleeves, to keep peripheral cables organized and out of the way.
By completing these steps, you’ll have a clean and organized setup that not only looks great but also contributes to better airflow, easier maintenance, and an overall enjoyable computing experience. Regularly dusting and organizing your setup will help prolong the life of your components and maintain optimal performance throughout their lifespan.
Congratulations! You have successfully completed all the steps necessary to change your PC case in PC Building Simulator. Enjoy your revamped PC setup and the satisfaction of a job well done!
Conclusion
Changing a PC case in PC Building Simulator is an exciting and rewarding endeavor. By following the step-by-step process outlined in this guide, you can confidently swap your PC case and give your rig a fresh new look. From preparing for the case swap to verifying connections and testing the system, each step plays a vital role in ensuring a successful and hassle-free experience.
Throughout the process, it’s important to prioritize safety and take the necessary precautions to protect your components and yourself from static electricity. Creating a checklist, gathering the right tools and equipment, and reviewing documentation will help you stay organized and ensure a smooth transition. Properly removing components, preparing the new case, and connecting cables and wiring play a crucial role in the overall success of the case swap.
Furthermore, cleaning and organizing your setup not only improves aesthetics but also enhances airflow and makes future maintenance easier. With a clean and organized build, you can enjoy a more efficient and visually appealing PC experience.
Remember to consult the manual or manufacturer’s instructions for specific information about your components and case, as they may have unique requirements or additional steps. Additionally, don’t hesitate to seek assistance or guidance from online resources, video tutorials, or forums if you encounter any difficulties during the process.
By following this guide and incorporating a creative touch, you can successfully change a PC case in PC Building Simulator and create a personalized and stylish setup that reflects your unique preferences. Enjoy the process of customizing your PC and revel in the satisfaction of a job well done!