Introduction
Welcome to this guide on how to connect a car stereo to a house plug without a power supply unit (PSU). If you have a spare car stereo lying around and want to repurpose it for indoor use, this tutorial will show you how to safely connect it to a house plug.
Many people choose to use their old car stereos as portable sound systems, but what if you want to unleash its potential in your home? By following these steps and taking the necessary safety precautions, you can easily connect your car stereo to a house plug and enjoy your favorite music indoors.
Before we begin, it’s important to note that working with electrical connections can be dangerous if not done properly. Always exercise caution, and if you’re unsure about any step, it’s best to consult a professional.
In this guide, we will walk you through the process of connecting a car stereo to a house plug without a PSU. We will cover the items you need, the safety precautions to take, and each step required to make the connection. So let’s get started and bring your car stereo back to life in your home!
Items Required
Before you can start connecting your car stereo to a house plug, you will need a few essential items. Make sure you gather all of the following before beginning the process:
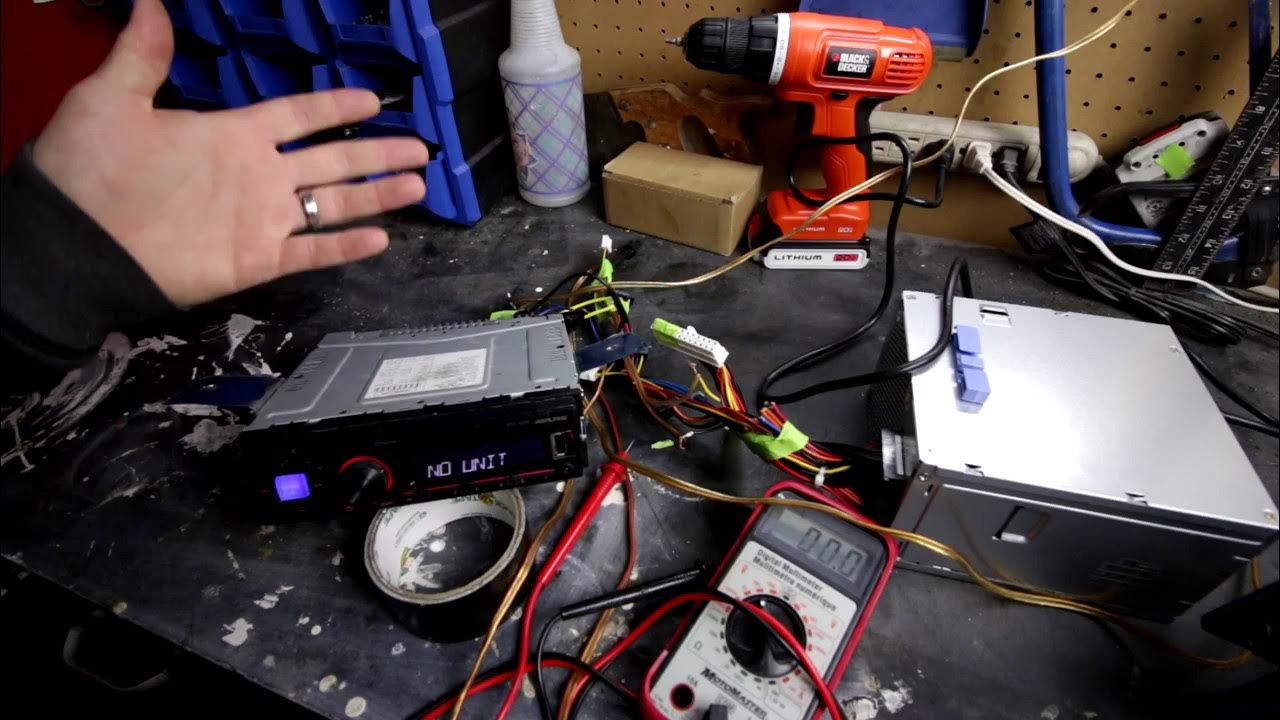
- Car Stereo: Choose a car stereo that you want to connect to the house plug. Ensure that it is in working condition.
- House Plug: You will need a compatible house plug to power the car stereo. Make sure it can handle the voltage and amperage requirements of the stereo.
- Wire Strippers: These tools will be necessary for stripping the wire insulation to expose the copper strands.
- Electrical Tape: This will be used to secure and insulate the wire connections.
- Wire Connectors: These connectors are essential for joining the wires of the car stereo to the house plug.
- Screwdriver: You may need a screwdriver to remove any panels or covers on the car stereo for easy access to the wiring.
- Electrical Tester: An electrical tester will help you verify the voltage and polarity of the house plug before making any connections.
It’s crucial to have all the required items readily available to ensure a smooth and safe installation process. Double-check that you have everything before proceeding with the steps.
Safety Precautions
Working with electrical connections requires utmost caution to prevent accidents and ensure your safety. Before you begin connecting the car stereo to a house plug, make sure to follow these important safety precautions:
- Turn Off Power: Before starting any wiring work, turn off the power to the area where you will be working. This will help prevent electrical shocks or short circuits.
- Verify Voltage: Use an electrical tester to confirm that the house plug voltage matches the voltage requirements of the car stereo. Mismatched voltages can damage the equipment and pose a safety risk.
- Disconnect Power Source: Make sure the car stereo is disconnected from any power source before attempting to connect it to the house plug.
- Handle Wires Safely: Treat all wires as if they are live and carry electrical current. Avoid touching exposed wires while the power is on.
- Insulate Connections: Apply electrical tape to insulate and secure all wire connections. This will prevent accidental shocks and short circuits.
- Secure Cables: Ensure that cables and wires are safely routed and secured, away from any potential hazards such as sharp objects or water sources.
- Seek Professional Assistance: If you are unsure about any part of the process or uncomfortable working with electrical connections, it’s best to consult a professional electrician for assistance.
Remember, safety should always be the top priority when working with electricity. Take your time, follow the precautions, and proceed with caution to create a secure and reliable connection between your car stereo and the house plug.
Step 1: Disconnect the Car Stereo
The first step in connecting your car stereo to a house plug is to disconnect it from any power source. This will ensure your safety while working on the wiring.
Follow these steps to disconnect the car stereo:
- Turn off the car stereo: If the car stereo is currently turned on, switch it off before proceeding.
- Remove the car stereo from the dashboard: Depending on the model, you may need to remove screws or use a specific tool to detach the stereo from the dashboard.
- Disconnect the wiring harness: Locate the wiring harness connected to the back of the car stereo. Carefully unplug the harness by gently pulling on the connector.
- Remove any additional connections: Some car stereos may have additional connections, such as antenna wires or auxiliary cables. Disconnect these as well, if applicable.
Once you have disconnected the car stereo from all power sources and removed any additional connections, set it aside in a safe place. This will allow you to work on the wiring without any electrical interference or potential hazards.
Remember to handle the car stereo with care to avoid any damage, and keep track of any removed screws or accessories for later reinstallation.
Step 2: Prepare the Wire
Once you have disconnected the car stereo, it’s time to prepare the wire that will connect it to the house plug. Follow these steps to ensure the wire is ready for connection:
- Select the appropriate wire: Choose a wire that is suitable for the electrical requirements of the car stereo and house plug. Consider factors such as wire gauge and insulation material.
- Measure the required length: Determine the distance between the car stereo and the house plug. Measure and cut the wire to the appropriate length, leaving some extra length for flexibility.
- Strip the wire ends: Using wire strippers, carefully remove about half an inch of insulation from each end of the wire. This will expose the copper strands for connection.
It’s important to choose an appropriate wire to ensure efficient power transmission and maintain safety standards. The wire gauge should be capable of handling the current and voltage required by the car stereo. If you are unsure about the gauge, consult a professional or refer to the user manual of your car stereo for guidance.
When stripping the wire ends, be cautious not to damage the copper strands. Strip just enough insulation to expose the necessary amount of copper for a secure and reliable connection in the next steps.
With the wire prepared and ready for connection, you can proceed to the next step of connecting the wires to the house plug.
Step 3: Strip the Wire Insulation
Before connecting the wires to the house plug, you need to strip the insulation from the wire ends. This will expose the copper strands, allowing for a secure and efficient connection.
Follow these steps to strip the wire insulation:
- Prepare your wire strippers: Ensure that your wire strippers are sized appropriately for the wire gauge you are working with.
- Identify the wire gauge: Determine the gauge of the wire you will be stripping. This information is usually printed on the insulation or can be found in the wire’s specifications.
- Adjust the wire strippers: Set your wire strippers to the appropriate gauge size by selecting the corresponding notch or hole for stripping.
- Position the wire: Hold the wire firmly between your fingers, making sure to align the end with the desired stripping length.
- Strip the insulation: Insert the wire end into the wire strippers until it reaches the desired stripping length. Squeeze the stripper handles together firmly and smoothly to cut through the insulation. Then, carefully pull the wire away from the strippers to remove the insulation.
- Repeat the process: Repeat the stripping process for the other end of the wire, ensuring that both ends are stripped to the same length.
It’s crucial to strip the wire insulation carefully to avoid damaging the copper strands. Take your time and use a controlled motion when operating the wire strippers, ensuring that you do not cut into the wire itself.
Once you have successfully stripped the insulation from both ends of the wire, you’re ready to proceed to the next step of connecting the wires to the house plug.
Step 4: Connect the Wires to the House Plug
With the wire ends stripped and ready, it’s time to connect them to the house plug. This step will establish the electrical connection between the car stereo and the power source.
Follow these steps to connect the wires to the house plug:
- Identify the terminals on the house plug: Take a close look at the house plug and identify the positive (+) and negative (-) terminals.
- Connect the positive wire: Take the stripped end of the positive wire and wrap it around the positive terminal of the house plug. Secure the connection by tightening the screw or using an appropriate connector.
- Connect the negative wire: Similarly, take the stripped end of the negative wire and wrap it around the negative terminal of the house plug. Again, secure the connection with a screw or connector.
When wrapping the wire around the terminals, ensure that the copper strands are tightly wound and in direct contact with the metal. This will create a solid electrical connection and minimize the risk of loose connections or electrical sparks.
If your house plug does not have screw terminals, you may need to use wire connectors or other appropriate connectors to establish the connection. Consult the instructions or guidelines provided with the house plug for the correct method of connecting the wires.
Once you have securely connected both the positive and negative wires to the house plug, you are ready to move on to the next step of securing the connections.
Step 5: Secure the Connections
After connecting the wires to the house plug, it is essential to secure the connections to ensure a safe and reliable electrical connection. This step will help prevent loose or exposed wires, minimizing the risk of electrical shocks or short circuits.
Follow these steps to secure the connections:
- Inspect the wire connections: Take a moment to visually inspect the connections between the wires and the house plug. Ensure that the wires are tightly wrapped around the terminals and there are no loose strands or exposed copper.
- Wrap electrical tape: Starting from where the wires meet the terminals, wrap electrical tape around the base of the connection. Continue wrapping the tape in a tight and overlapping manner along the exposed wire, covering at least an inch of insulation.
- Check for insulation coverage: Inspect the wrapped connections to verify that there are no exposed wires or terminals. The electrical tape should provide a secure and insulating layer, protecting the connection from external elements.
By securing the connections with electrical tape, you provide an extra layer of protection against potential electrical hazards. The tape acts as insulation and helps prevent accidental contact with the wires, reducing the risk of shocks or short circuits.
After securing the connections, give them a gentle tug to ensure they are firmly and securely in place. If any connections feel loose, recheck the wrapping and tightening of the wires around the terminals.
With the connections securely wrapped and protected, you can proceed to the next step of reconnecting the car stereo.
Step 6: Reconnect the Car Stereo
Now that the connections between the wires and the house plug are secure, it’s time to reconnect the car stereo and complete the installation process. This step will allow you to power up the car stereo using the house plug as the power source.
Follow these steps to reconnect the car stereo:
- Position the car stereo: Carefully place the car stereo back into its original position in the dashboard or mounting bracket.
- Reconnect the wiring harness: Take the wiring harness of the car stereo and plug it back into the corresponding connector on the stereo. Ensure a secure and snug connection.
- Reconnect other connections: If there were any additional connections, such as antenna wires or auxiliary cables, reconnect them to their respective ports on the car stereo.
- Double-check the connections: Take a moment to visually inspect all the connections, ensuring that they are properly attached and secure.
Once you have reconnected all the necessary components, you can turn on the car stereo to test if it powers up successfully. Plug the house plug into a power outlet and switch it on. If everything is connected correctly, your car stereo should receive power from the house plug and turn on.
During the testing phase, pay attention to any abnormal signs, such as unusual noises or smoke. If you notice anything out of the ordinary, immediately turn off the power and double-check your connections, seeking professional assistance if needed.
If the car stereo powers up as expected, you have successfully connected it to the house plug. Enjoy your music and make sure to safely route any excess cables, keeping them away from any potential hazards.
Conclusion
Congratulations! You have successfully learned how to connect a car stereo to a house plug without a power supply unit (PSU). By following the steps outlined in this guide, you can now enjoy your car stereo’s audio capabilities indoors.
Throughout the process, we emphasized the importance of safety precautions. Remember always to turn off the power before working with any electrical connections, verify voltage compatibility, and handle wires with caution. If you are unsure about any step, it is wise to consult a professional electrician for guidance.
Starting with disconnecting the car stereo, you prepared and stripped the wire, connected it to the house plug, secured and wrapped the connections with electrical tape, and finally, reconnected the car stereo. These steps ensure a secure and reliable electrical connection between the car stereo and the house plug.
The joy of repurposing your car stereo for home use is now at your fingertips. Whether you want to enjoy your favorite tunes, upgrade your home’s sound system, or simply repurpose your old car stereo, connecting it to a house plug opens up new possibilities.
Remember to take your time, follow the steps carefully, and prioritize safety throughout the installation process. If you encounter any challenges or have any doubts, always consult a professional to ensure a successful and secure connection.
We hope this guide has been helpful to you in connecting your car stereo to a house plug. Enjoy your enhanced audio experience at home!