Introduction
Changing your email address in Gmail can be a necessary step when you switch to a new service provider, want to update your username, or simply prefer a different email address. Gmail makes it easy to change your email address while ensuring that your account remains secure and your messages are not lost.
In this step-by-step guide, we will walk you through the process of changing your email address in Gmail. Whether you are changing to a new email domain or simply updating your username, the steps are straightforward and can be completed in just a few minutes. By the end of this guide, you’ll have a fresh email address associated with your Gmail account.
It’s worth mentioning that while changing your email address in Gmail won’t affect your existing emails, it’s important to update your new email address with any recurring subscriptions, online accounts, or important contacts to ensure uninterrupted communication. Now, let’s dive into the steps to change your email address in Gmail.
Step 1: Sign in to your Gmail account
The first step to changing your email address in Gmail is to sign in to your Gmail account. Open your preferred web browser and navigate to the Gmail website. Enter your current email address and password, and click the “Sign In” button.
If you have multiple Gmail accounts, make sure you sign in with the account that you want to change the email address for. Once you are successfully logged in, you will be redirected to your Gmail inbox.
It’s important to note that if you have enabled two-step verification for your Gmail account, you may be required to enter a verification code that is sent to your registered mobile device. This adds an extra layer of security to protect your account from unauthorized access.
If you have forgotten your Gmail password, you can click on the “Forgot password?” link on the sign-in page to initiate the recovery process. Follow the on-screen instructions to reset your password and regain access to your account.
Ensure that you are signed in to the correct Gmail account before proceeding to the next step. Now that you are successfully signed in to your Gmail account, let’s move on to the next step of changing your email address.
Step 2: Go to your Account settings
Once you are signed in to your Gmail account, the next step is to navigate to the Account settings page. To do this, click on the gear icon in the top right corner of the Gmail interface. A drop-down menu will appear, and from there, select “Settings.”
This will take you to the Settings page, where you can customize various aspects of your Gmail account. Here, you will find different tabs such as General, Labels, Inbox, and more. To change your email address, you need to access the “Accounts and Import” tab.
Click on the “Accounts and Import” tab to proceed. In the “Accounts and Import” section, you will see different options to manage your email accounts, import contacts, and change your email address.
Scroll down until you find the “Change account settings” section. Here, Gmail provides the option to change your email address. Click on the “Change email address” link to begin the process.
At this point, Gmail may prompt you to enter your password again as an added security measure. This is to ensure that only the account owner can make changes to the email address associated with the account.
Enter your password and click “Next” to proceed. You will then be directed to a new page where you can input your new email address. Stay tuned for the next step on how to add your new email address to your Gmail account.
Step 3: Add your new email address
Now that you have accessed the “Change email address” option in the Account settings, it’s time to add your new email address to your Gmail account.
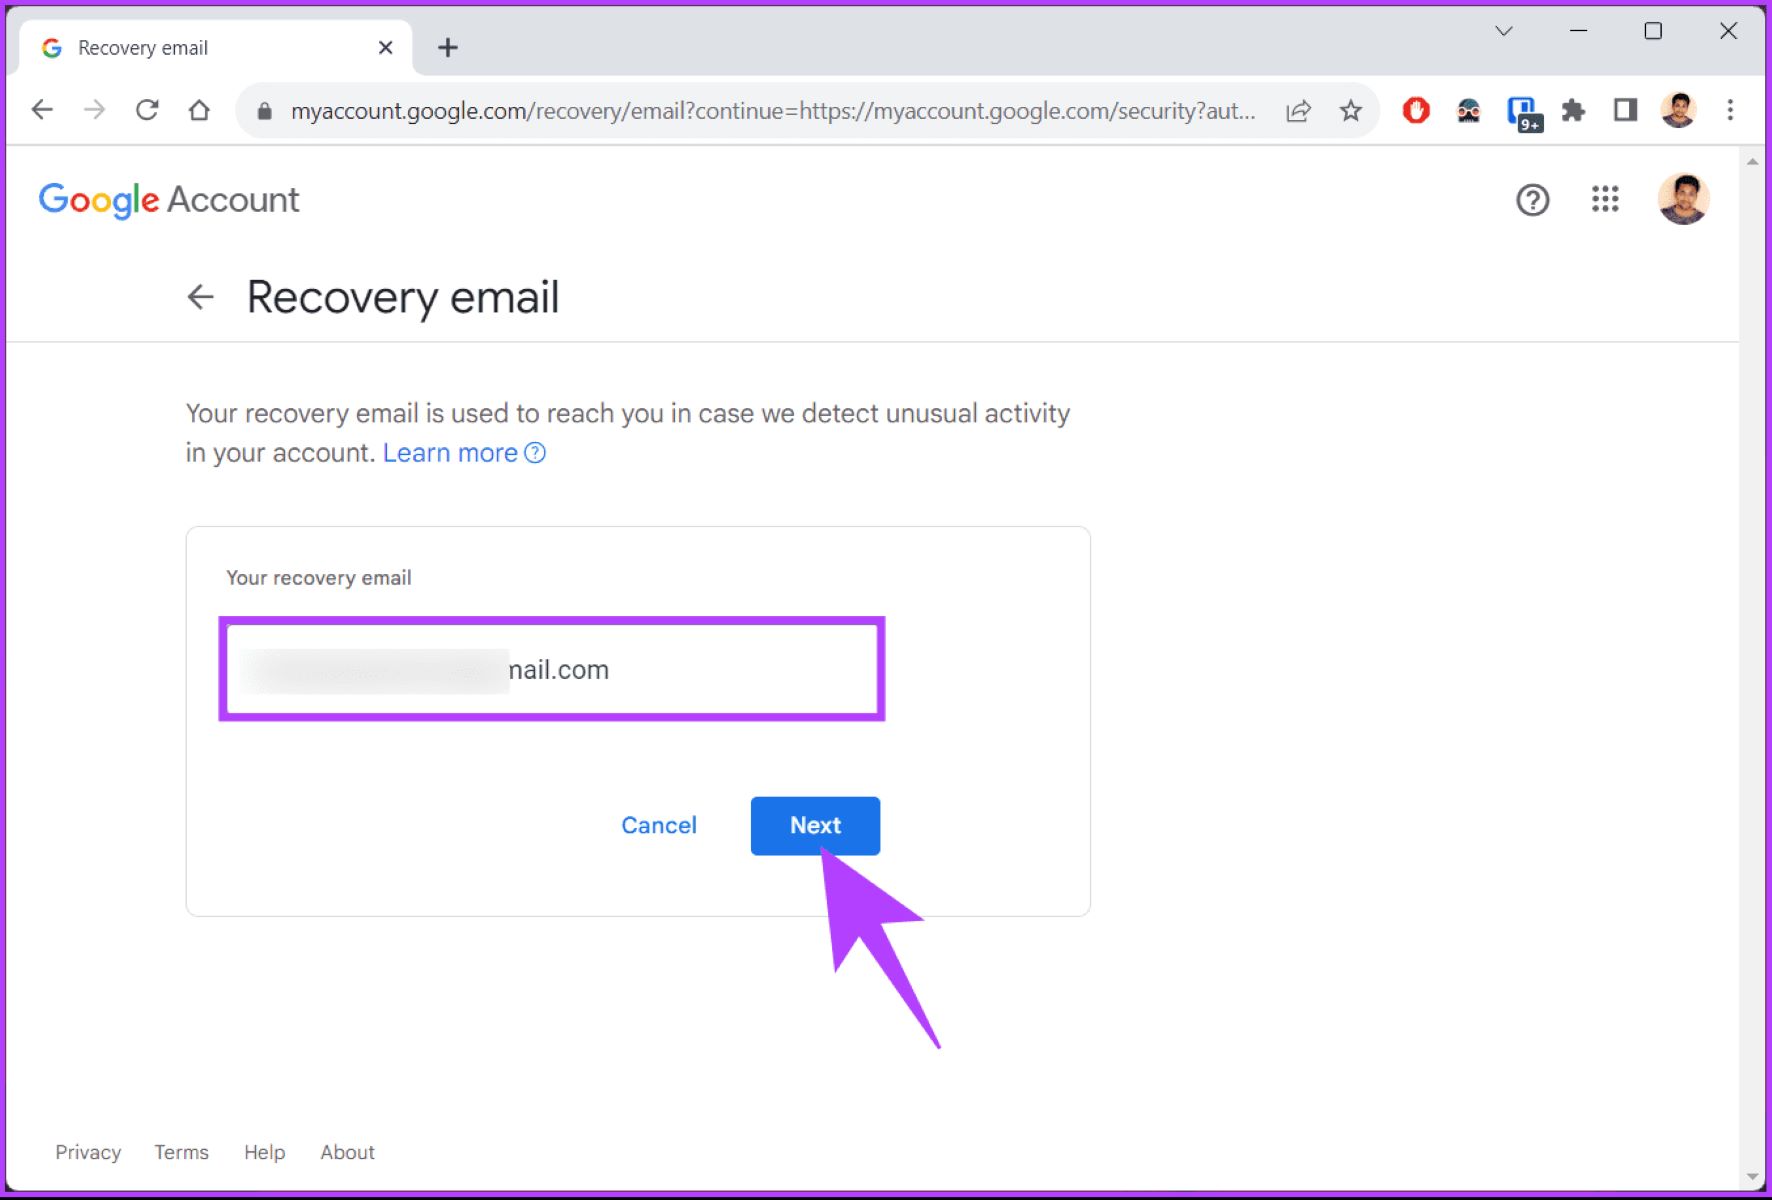
In the page that appears after entering your password, you will see a field labeled “New email address.” This is where you will input the email address you want to change to. Make sure to enter the full email address correctly, including the domain name (e.g., example@gmail.com).
After entering your new email address, click the “Next” button to proceed. Gmail will then check the availability of the entered email address. If the address is available, you will be able to proceed with adding it to your Gmail account.
It is important to note that if the email address you want to change to is already in use or unavailable, you will have to select a different email address. Gmail will display a message indicating that the entered email address is already taken and prompt you to choose another one.
If the entered email address is available, Gmail will show a success message and give you the option to continue with adding the new address to your Gmail account. Click on the “Next” button to proceed.
Gmail will send a verification code to the newly entered email address. This code is used to confirm that you have access to the email account and can receive messages sent to that address.
Check your new email account for the verification code. Once you receive the code, enter it in the provided field in Gmail and click the “Verify” button. This will validate your ownership of the new email address.
Congratulations! You have successfully added your new email address to your Gmail account. In the next step, we will show you how to set your new email address as the primary address in Gmail.
Step 4: Verify the new email address
After adding your new email address to your Gmail account, the next step is to verify its ownership. Verification ensures that you have access to the new email address and can receive messages sent to it.
Once you have entered your new email address and clicked “Next,” Gmail will send a verification code to that email address. Open your new email account and look for the verification email from Gmail.
The verification email will typically have a subject line like “Gmail Email Verification – [your new email address].” Open the email and locate the verification code.
Copy the verification code or simply click on the provided verification link in the email. This will redirect you to Gmail and automatically verify your new email address.
If you prefer to manually enter the verification code, go back to the Gmail tab where you added the new email address. Paste the code into the provided field and click the “Verify” button.
If the verification code is valid, Gmail will confirm that your new email address has been verified successfully. You will see a confirmation message on the screen, indicating that the email address is now associated with your Gmail account.
It’s important to note that if you don’t see the verification email in your inbox, check your spam or junk folders. Sometimes, the email may be filtered by mistake.
If you haven’t received the verification email, you can click on the “Resend email” link in Gmail to send another verification code to your new email address. Alternatively, double-check that you entered the correct email address when adding it to your Gmail account.
Once the verification process is complete, you have successfully verified your new email address in Gmail. The next step will guide you on setting your new email address as the primary address in your Gmail account.
Step 5: Set your new email address as the primary address
Now that you have added and verified your new email address in Gmail, it’s time to set it as the primary address for your account. Setting your new email address as the primary address ensures that it is the default address used for all outgoing communications.
To set your new email address as the primary address, go back to the Account settings page in Gmail. Remember, you can access this page by clicking on the gear icon in the top right corner and selecting “Settings” from the drop-down menu.
Once you are on the Account settings page, navigate to the “Accounts and Import” tab, which is where you added your new email address. Under the “Change account settings” section, you will see your new email address listed.
Next to your new email address, you will find a link that says “Make primary.” Click on this link to make your new email address the primary address for your Gmail account.
After clicking the “Make primary” link, Gmail will prompt you to confirm the action. It will remind you that selecting a new primary address will affect how your name is displayed and where your emails are sent by default.
Review the confirmation message and click “Proceed” or “Yes” to proceed with setting your new email address as the primary address.
Gmail will update your account settings and make your new email address the primary address. You will see a success message confirming the change.
From now on, when you compose new emails or reply to messages, Gmail will use your new email address as the default “From” address. However, keep in mind that any existing email conversations will still display your old email address, as it is tied to those specific messages.
Now that you have successfully set your new email address as the primary address, the final step is to update your email address in other platforms or services that you may use.
Step 6: Update your email address in other platforms or services
Changing your email address in Gmail is just the first step. To ensure a seamless transition, it’s important to update your new email address in other platforms or services that you use regularly. This includes social media accounts, online shopping platforms, subscription services, and more.
Here are some key points to consider and steps to follow when updating your email address:
- Social media accounts: Log in to your social media accounts such as Facebook, Twitter, Instagram, and LinkedIn, and navigate to your account settings. Look for the option to update your email address and enter your new email address. Remember to save the changes once you’re done.
- Online shopping platforms: If you have accounts with e-commerce platforms like Amazon, eBay, or Etsy, visit your account settings and update your email address in the profile or contact information section. This will ensure that you receive order confirmations and notifications at your new email address.
- Financial and banking services: If you use online banking services or have accounts with financial institutions, it’s crucial to update your email address. Visit the respective websites or contact their customer support to change your email address associated with your account.
- Subscription services: If you have subscriptions to streaming services, news outlets, or any other subscription-based services, log in to those accounts and update your email address in the account settings. This will ensure that you continue to receive important updates and communications.
- Email forwarding: To ensure that you don’t miss any important emails sent to your old email address, consider setting up email forwarding. In Gmail, you can configure email forwarding by going to the “Forwarding and POP/IMAP” section in the Account settings. This will automatically redirect any incoming mail from your old email address to your new one.
Remember to keep a record of the platforms and services that you have updated with your new email address. This will help you ensure that you haven’t missed any important accounts during the transition.
By taking the time to update your email address in various platforms and services, you can avoid missing important messages and maintain seamless communication across all your accounts.
Now that you have successfully updated your email address in Gmail and other platforms, you can enjoy using your new email address for all your online activities.
Conclusion
Changing your email address in Gmail might seem like a daunting task, but with the step-by-step guide we’ve provided, it can be a straightforward process. By following the six steps outlined in this article, you can successfully change your email address and ensure a smooth transition to your new address.
Remember to sign in to your Gmail account, navigate to the Account settings, add and verify your new email address, set it as the primary address, and update your email address in other platforms and services. Taking these steps will help you maintain uninterrupted communication and prevent any important emails from getting missed.
Keep in mind that while changing your email address does not affect your existing emails, it’s crucial to update your new email address in other platforms and services that you use regularly. This will ensure that you continue to receive important notifications, updates, and communications at your new email address.
Lastly, it’s essential to maintain the security of your new email address by regularly updating your password and enabling two-step verification if supported. This adds an extra layer of protection to your Gmail account and helps safeguard your personal information.
Changing your email address in Gmail can give you a fresh start or align your online presence with your changing needs. With the steps provided in this guide, you can confidently navigate the process and make a seamless transition to your new email address.
We hope that this guide has been helpful and that you are now well-equipped to change your email address in Gmail. Embrace your new email address and enjoy all the benefits it brings to your online experience!