Introduction
Welcome to the world of Android tablets, where you can stay connected and productive on the go. If you are an avid user of Gmail, it is essential to know how to change your Gmail account on your Android tablet. Whether you want to switch to a different email address or simply update your account information, this guide will walk you through the necessary steps.
Your Gmail account is tied to various Google services and features on your Android tablet, including email, Google Drive, Google Calendar, and more. By changing your Gmail account, you ensure that all these services are associated with the correct email address and personal preferences. It’s a straightforward process that can be completed in just a few minutes, so let’s get started!
In this guide, we will provide a step-by-step walkthrough to help you change your Gmail account on your Android tablet. We will cover everything from opening the Settings app to signing in with your new Gmail account. So, grab your Android tablet and let’s dive in!
Note: The exact steps may vary slightly depending on the version of Android running on your tablet. However, the overall process remains similar across most devices.
Step 1: Open the Settings App
To change your Gmail account on your Android tablet, the first step is to open the Settings app. The Settings app is where you can configure various system settings and manage your device’s accounts and preferences.
Here’s how to open the Settings app on your Android tablet:
- Unlock your Android tablet and navigate to the home screen.
- Swipe down from the top of the screen to access the notification panel.
- Tap on the gear icon labeled “Settings.” This will open the Settings app.
Alternatively, you can also find the Settings app in the app drawer on your Android tablet. The app drawer is a list of all the applications installed on your device and can usually be accessed by tapping on the square or circle icon at the bottom of the home screen.
Once you have successfully opened the Settings app, you are ready to proceed to the next step: tapping on the Accounts option.
Step 2: Tap on the Accounts Option
After opening the Settings app on your Android tablet, the next step is to locate and tap on the “Accounts” option. This is where you can manage all the accounts associated with your device, including your Gmail account.
Here’s how to access the Accounts option:
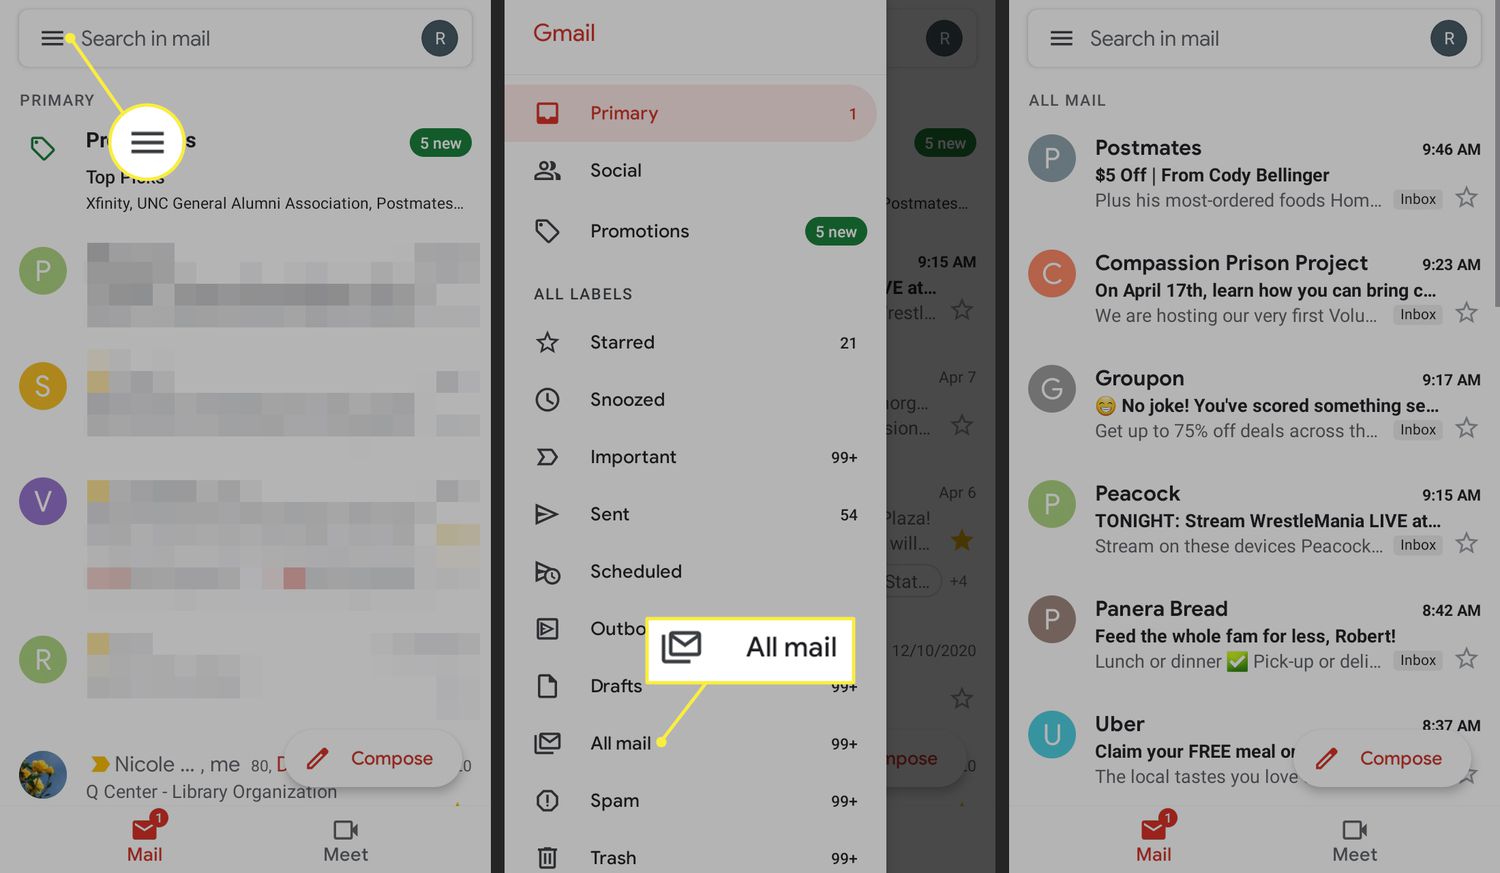
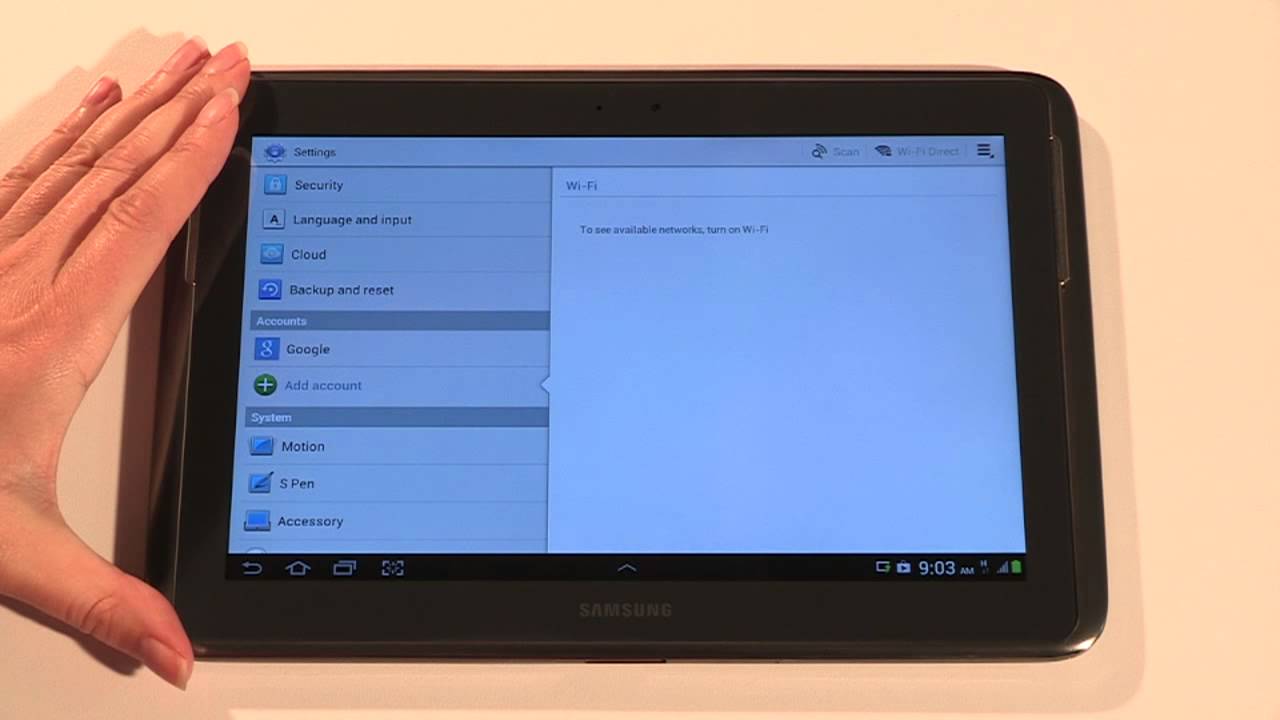
- In the Settings app, scroll down until you find the “Accounts” section. The exact location of this section may vary depending on the version of Android running on your tablet.
- Tap on the “Accounts” option. This will open a list of all the accounts currently added to your Android tablet.
The “Accounts” section is where you can view and manage various accounts, such as Google, email, social media, and more. By tapping on this option, you will be able to see the accounts that are currently linked to your Android tablet.
Now that you have accessed the Accounts option, you are ready to proceed to the next step: selecting Google from the Accounts list.
Step 3: Select Google from the Accounts list
Once you have tapped on the “Accounts” option in the Settings app, the next step is to select Google from the list of accounts. This is where you can manage your Gmail account and associated services.
Follow these steps to select Google from the Accounts list:
- In the Accounts section, you will see a list of all the accounts added to your Android tablet. Scroll through the list and look for the “Google” option.
- Tap on the “Google” option to access the settings for your Google account.
By selecting Google from the Accounts list, you will be able to view and manage various settings related to your Gmail account. This includes changing your Gmail account, managing account sync settings, and accessing other Google services linked to your account.
Now that you have selected Google from the list of accounts, you are ready to proceed to the next step: tapping on the Gmail account that you want to change.
Step 4: Tap on the Gmail Account to Change
After selecting Google from the Accounts list, the next step is to locate and tap on the Gmail account that you want to change. This will allow you to access the settings specific to that particular account.
Follow these steps to tap on the Gmail account that you want to change:
- In the Google account settings, you will see a list of all the accounts associated with your Android tablet.
- Scroll through the list and find the Gmail account that you want to change. The accounts are typically labeled with the email address associated with them.
- Tap on the Gmail account that you want to modify.
By tapping on the specific Gmail account, you will be able to access the settings and options related to that account. This includes changing the email address, updating the account name, managing notifications, and more.
Now that you have tapped on the Gmail account that you want to change, you are ready to proceed to the next step: removing the existing account.
Step 5: Remove the Existing Account
Once you have selected the Gmail account that you want to change, the next step is to remove the existing account from your Android tablet. This is necessary in order to add a new Gmail account or switch to a different email address.
Follow these steps to remove the existing account:
- In the Gmail account settings, locate and tap on the “Remove Account” option. This option may also be labeled as “Delete Account” or “Remove from Device.”
- A confirmation pop-up message will appear, asking you to confirm the removal of the account. Read the message carefully and understand the consequences of removing the account.
- If you are certain that you want to proceed, tap on “Remove Account” to delete the existing account from your Android tablet.
By removing the existing Gmail account, you are unlinking it from your Android tablet and disconnecting all associated services. It is important to note that this action will not delete your email or permanently deactivate the account; it simply removes it from your device.
Now that you have successfully removed the existing account, you are ready to proceed to the next step: adding a new Gmail account.
Step 6: Add a New Gmail Account
After removing the existing Gmail account, the next step is to add a new Gmail account to your Android tablet. This will allow you to switch to a different email address or create a new account if you don’t already have one.
Follow these steps to add a new Gmail account:
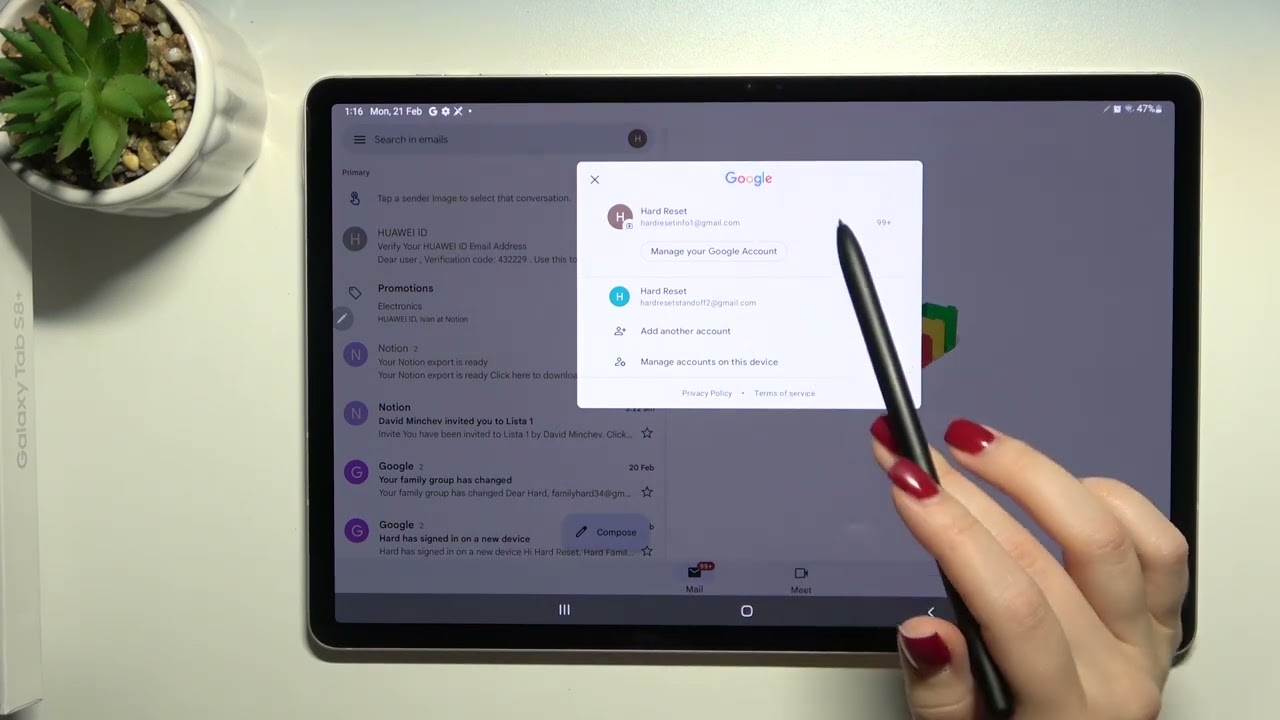
- In the Gmail account settings, tap on the option to “Add Account.” This option may be labeled as “Add another account” or “Sign in.”
- You will be presented with a list of available account types. Tap on “Google” to add a new Gmail account.
- A sign-in screen will appear, prompting you to enter your email address associated with the new Gmail account.
- Enter the email address and tap “Next” to proceed.
- On the next screen, enter the password for the new Gmail account and tap “Next.”
- Follow the on-screen prompts to complete the account setup process. This may include accepting terms and conditions, setting up account preferences, and adding recovery options.
By adding a new Gmail account, you are linking it to your Android tablet and enabling access to all associated Google services, including Gmail, Google Drive, Google Photos, and more.
Now that you have successfully added a new Gmail account, you are ready to proceed to the final step: signing in to the new account.
Step 7: Sign in to the New Account
After adding a new Gmail account to your Android tablet, the final step is to sign in to the new account. This will ensure that your Android tablet is now associated with the updated Gmail account and all its services.
Follow these steps to sign in to the new account:
- In the Gmail account settings, locate and tap on the newly added Gmail account.
- On the next screen, you will be prompted to enter the password for the new account.
- Enter the password and tap “Next” to proceed.
- If your sign-in details are correct, the new Gmail account will be successfully signed in.
Once you have signed in to the new Gmail account, you will have access to all the features and services associated with it, including email, contacts, calendars, and more. Your Android tablet will now be linked to the updated Gmail account, and all notifications and updates will be directed to this account.
Congratulations! You have successfully changed your Gmail account on your Android tablet. Now you can enjoy using your new Gmail account on your device.
Conclusion
Changing your Gmail account on your Android tablet is a simple process that can be completed in just a few easy steps. By following the instructions outlined in this guide, you can switch to a different email address or update your account information with ease.
We began by opening the Settings app on your Android tablet, then proceeded to tap on the Accounts option. From there, we selected Google from the Accounts list and tapped on the Gmail account that you wanted to change. We then removed the existing account and added a new Gmail account to your device. Finally, we signed in to the new account, ensuring that your Android tablet is now associated with the updated Gmail account.
Remember, your Gmail account is tied to various Google services and features on your Android tablet. By changing your Gmail account, you ensure that all these services are associated with the correct email address and personal preferences.
Whether you want to switch to a new email address or simply update your account information, knowing how to change your Gmail account on your Android tablet is a valuable skill. By following the steps outlined in this guide, you can easily manage your accounts and stay connected on the go.
So, grab your Android tablet and explore the possibilities of your new Gmail account. Stay connected, stay productive, and enjoy the convenience of having the right Gmail account at your fingertips!