Introduction
Adding email to your Samsung tablet can greatly enhance your productivity and keep you connected to your digital communication. Whether you use your tablet for work or personal use, having access to your email on the go is essential. Fortunately, setting up email on your Samsung tablet is a quick and simple process.
In this article, we will guide you through the step-by-step instructions on how to add email to your Samsung tablet. Whether you use Gmail, Yahoo, Outlook, or any other email service, the process is similar and can be done in just a few minutes.
Having email on your tablet allows you to check and respond to important messages, receive notifications, and stay connected to your contacts. You can easily sync your email across multiple devices, including your smartphone, computer, and tablet, ensuring that you never miss an important message.
Additionally, with the added convenience of a larger screen, you can comfortably read and compose emails, manage your inbox, and access attachments. So, let’s get started and learn how to set up email on your Samsung tablet!
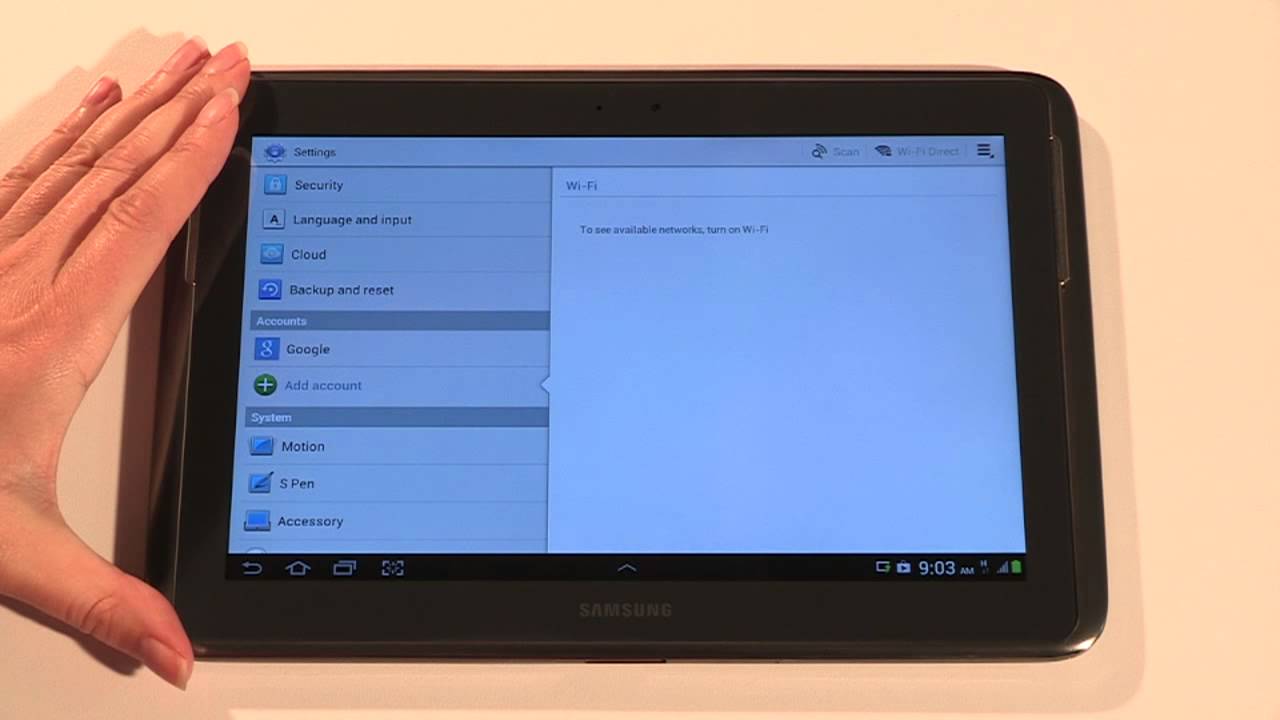
Step 1: Go to Settings
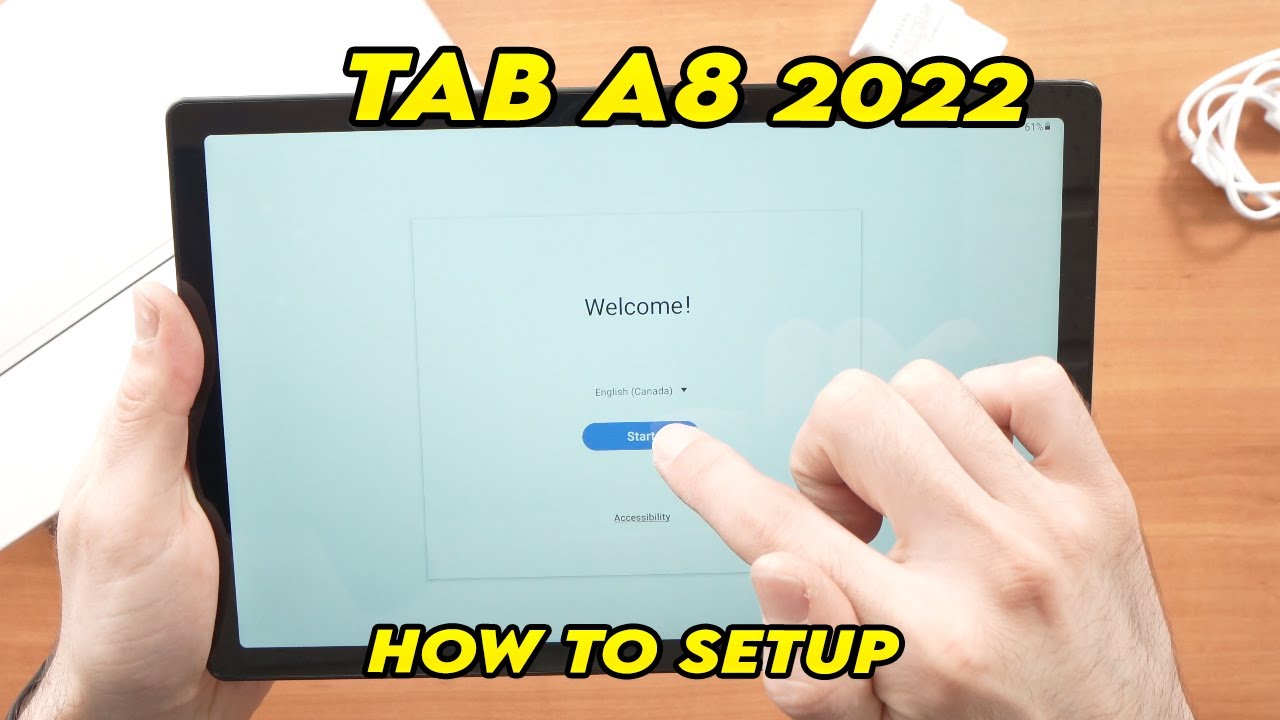
The first step to adding email to your Samsung tablet is to navigate to the Settings menu. On your tablet’s home screen, swipe down from the top of the screen to access the notification panel, then tap on the gear-shaped settings icon. This will open the Settings menu.
Alternatively, you can find the Settings app directly from the App Drawer. Simply tap the Apps icon on the home screen, then scroll through the list of apps until you find the Settings app. Tap on it to open the menu.
Once you are in the Settings menu, you will see a list of various options and settings that you can customize. This is where you can manage and configure different aspects of your tablet, including the email setup.
It’s important to note that the appearance and layout of the Settings menu may vary slightly depending on your tablet model and the version of Android it runs. However, the general steps to add email should remain the same.
Now that you are in the Settings menu, you are ready to move on to the next step and begin the process of adding your email account to your Samsung tablet.
Step 2: Tap on Accounts and Backup
After opening the Settings menu on your Samsung tablet, the next step is to locate and tap on the “Accounts and Backup” option. This section houses all the account-related settings, including adding and managing email accounts.
Scroll down the Settings screen until you find the “Accounts and Backup” option. Depending on your tablet’s interface, it may be labeled slightly differently, such as “Accounts,” “Accounts and Sync,” or “Cloud and Accounts.” Tap on the relevant option to proceed.
Once you’re in the “Accounts and Backup” section, you will see a list of all the accounts that are currently linked to your tablet. This includes your Google account, Samsung account, and any other accounts you may have previously added.
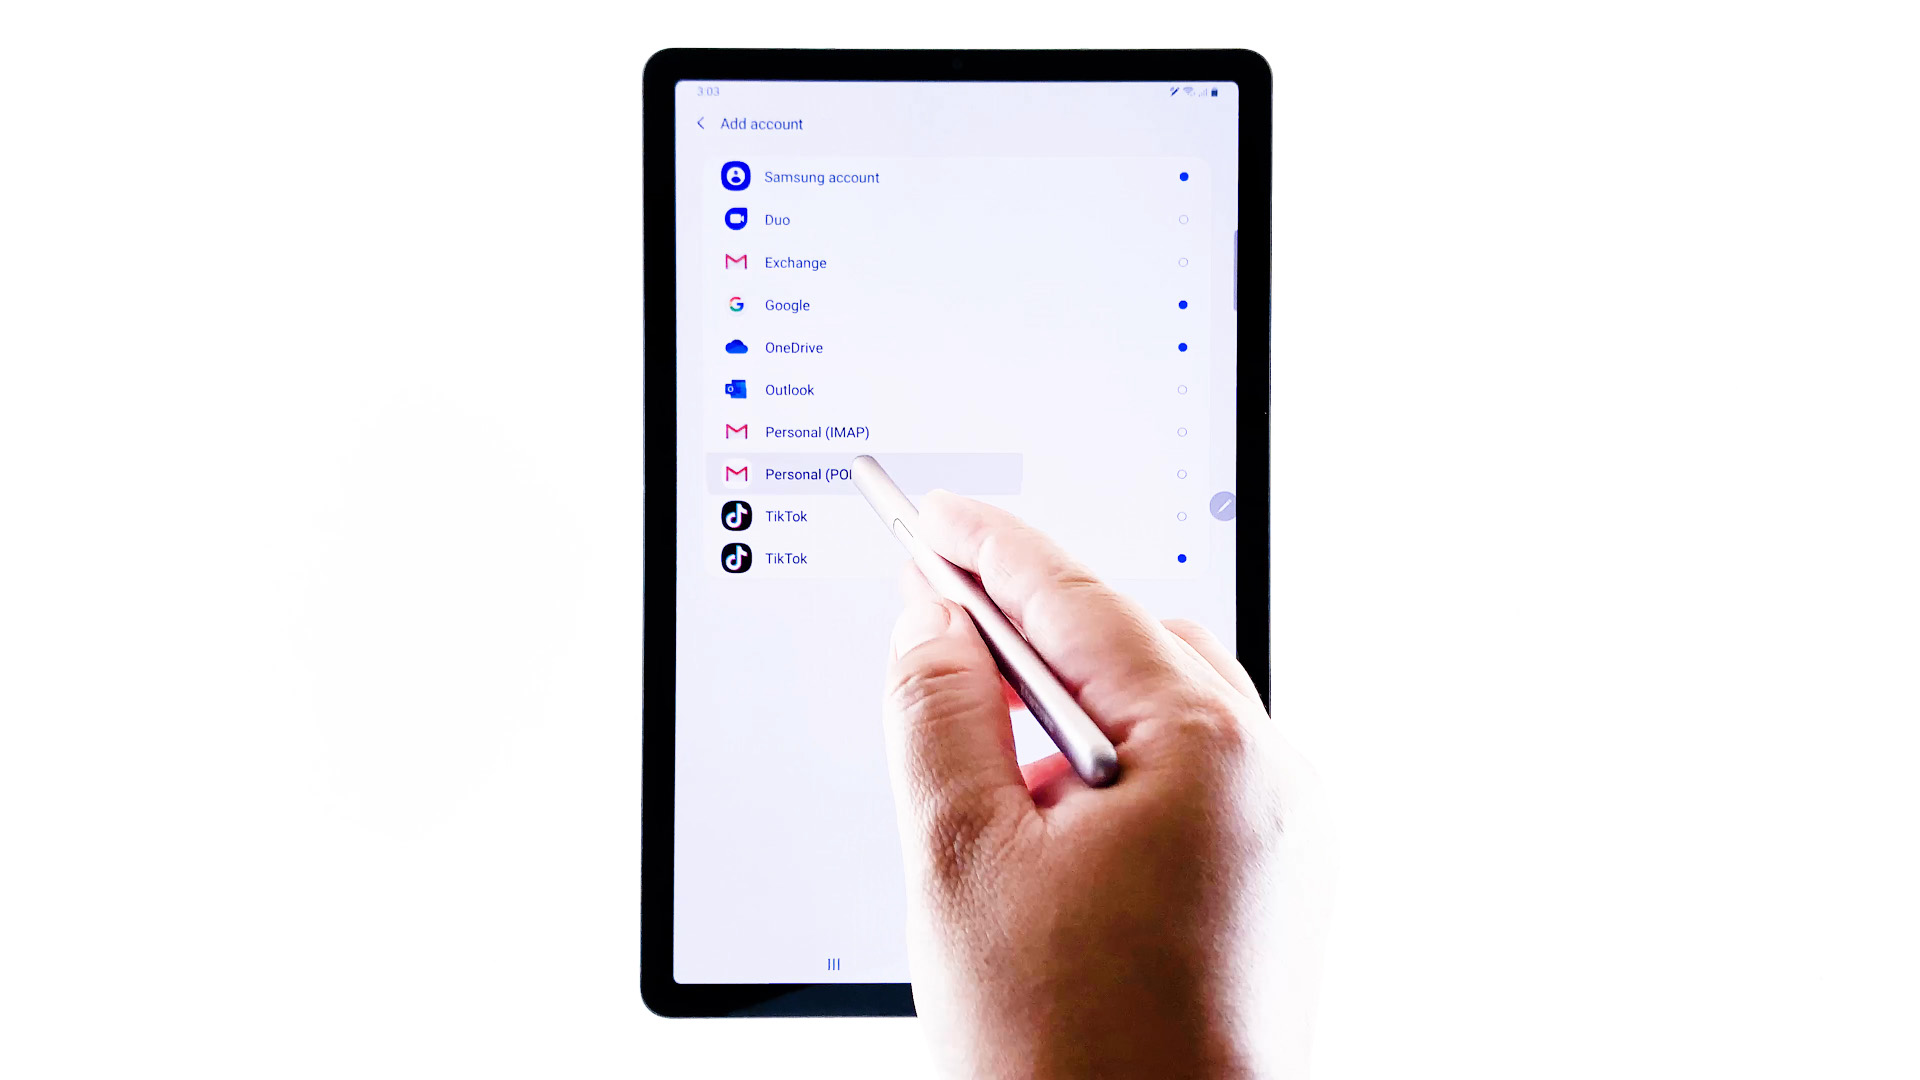
To add a new email account, tap on the “Add Account” option. This will open a list of available account types that you can choose from, such as Google, Samsung, Microsoft Exchange, Yahoo, or other email providers.
By tapping on the “Add Account” option, you are one step closer to accessing your email directly on your Samsung tablet. Proceed to the next step to select the type of email account you want to add.
Step 3: Select Add Account
Once you are in the “Accounts and Backup” section of the Settings menu on your Samsung tablet, the next step is to select the “Add Account” option. This will allow you to choose the type of email account you want to add to your tablet.
Tap on the “Add Account” option, and a list of available account types will appear. Depending on the version of Android and the apps you have installed on your tablet, you may see options such as Google, Samsung, Microsoft Exchange, Yahoo, or other email providers.
Scroll through the list of account types and select the one that corresponds to the email service you use. For example, if you have a Gmail account, tap on the “Google” option. If you have a Yahoo email account, select the “Yahoo” option.
Keep in mind that some tablets may have a separate category for “Email” or “Email Accounts” instead of individual account types. If you don’t see the specific email provider you use, check these categories for the general email account setup.
After selecting the appropriate account type, you will be prompted to sign in with your email address and password. Enter the required information and tap on the “Next” or “Sign In” button to proceed.
Once you have successfully entered your email credentials, your tablet will start the authentication process and establish a connection with your email server. This may take a few moments, depending on your internet connection and the email service provider.
Proceed to the next step to learn how to customize the email settings or skip to the final step if you’re ready to complete the email setup.
Step 4: Choose Email
After selecting the “Add Account” option and entering your email credentials in the previous step, you will now have the option to choose the specific email app or service that you want to use for your email account on your Samsung tablet.
Depending on the version of Android and the email apps you have installed, you may see multiple options to choose from. The most common options include the default email app that comes preinstalled on your tablet, as well as popular third-party email apps such as Gmail, Outlook, or Yahoo Mail.
If you prefer to use the preinstalled email app, simply tap on the option labeled “Email” or “Email” with the default app icon. This will open the built-in email app, which allows you to manage all your email accounts in one place.
If you prefer to use a different app, such as Gmail or Outlook, tap on the corresponding option. If you don’t have the app installed, you will be redirected to the Google Play Store or the respective app store to download and install it.
Choosing the email app is a matter of personal preference. Each app offers its own unique features and interface, so take some time to explore and choose the one that best suits your needs.
After selecting the email app, the setup process may vary depending on the app and email service you’re using. Follow the on-screen prompts, such as allowing necessary permissions and customizing email settings, to complete the setup for your chosen app.
Once the email app is set up, you can start accessing your email account right from your Samsung tablet. Proceed to the next step to learn how to customize additional email settings, or skip to the final step to complete the setup process.
Step 5: Enter Email Address and Password
After selecting the email app in the previous step, you will be prompted to enter your email address and password to connect your email account to your Samsung tablet.
On the login screen, you will typically see two input fields labeled “Email” or “Username” and “Password.” Tap on the “Email” or “Username” field and enter your full email address. Make sure to enter it correctly without any typos or errors.
Once you have entered your email address, navigate to the “Password” field and input your email account password. Be cautious and ensure you enter the correct password to authenticate and establish a secure connection with your email server.
If you do not remember your email account password, you can click on the “Forgot Password” or “Need Help?” link available on the login screen. This will guide you through the steps to reset your password and regain access to your email account.
When entering your password, keep in mind that the characters will be hidden for security purposes. Make sure to carefully type each character and double-check for accuracy.
After entering your login credentials, tap on the “Next” or “Sign In” button to proceed and start the authentication process. Your tablet will verify the login information and establish a connection with your email server. This may take a few moments depending on your internet connection speed and the email service provider.
If the entered credentials are correct, you will be directed to the next screen where you can customize additional email settings, such as sync frequency, notification preferences, and email signature.
Proceed to the next step to learn how to customize these settings, or move on to the final step if you’re ready to complete the email setup and start accessing your emails on your Samsung tablet.
Step 6: Customize Settings (Optional)
Once you have entered your email address and password in the previous step and established a connection with your email server, you may have the option to customize additional settings for your email account on your Samsung tablet.
The customization options available may vary depending on the email app and service you are using. However, some common settings you can typically adjust include:
- Sync Frequency: You can choose how often your tablet will check for new emails and synchronize with your email server. Options may include manual sync, every 15 minutes, every hour, or other intervals.
- Notification Preferences: You can customize the way your tablet notifies you when you receive new emails. This includes options like sound, vibration, or on-screen notifications. You may also have the ability to enable or disable email notifications altogether.
- Email Signature: You can set a personalized signature that will be automatically appended to the end of your outgoing emails. This is useful for including your name, contact information, or a professional closing message.
- Display Settings: Depending on the email app, you may have the option to customize the display settings, such as the font size, theme, or layout, to suit your preferences and improve readability.
Take some time to explore these settings and adjust them according to your preferences. Experiment with different sync frequencies and notification settings to find the balance that works best for you.
Remember that these settings are optional, and you can always revisit them later to make any necessary changes or modifications.
Once you have customized the settings to your liking, you are ready to complete the email setup. Proceed to the final step to learn how to finalize the setup process on your Samsung tablet.
Step 7: Complete Setup
You’re almost there! In this final step, you will complete the email setup process on your Samsung tablet and start enjoying the convenience of accessing your emails on the go.
After customizing any desired settings in the previous step, look for the “Finish” or “Done” button on the screen. Tap on it to finalize the email setup.
At this point, your tablet will save the settings and establish a secure connection with your email server. It will then start syncing your email account, downloading your inbox, and any other folders or labels you have configured.
Depending on the number of emails in your account and the speed of your internet connection, this initial sync may take some time. Be patient and allow your tablet to complete the sync process uninterrupted.
Once the sync is complete, you will be able to access your emails directly from the email app you selected earlier. Your inbox, sent messages, and other folders will be right at your fingertips, ready for you to browse, read, and respond to.
From the email app interface, you can compose new emails, search for specific messages, organize your inbox, and perform various other email-related tasks.
It’s important to note that your tablet will continue to sync and fetch new emails in the background, according to the sync frequency you’ve set. This ensures that you always have the latest emails available on your device.
Congratulations! You have successfully added and set up email on your Samsung tablet. You can now enjoy the convenience of accessing your email account directly from your tablet, allowing you to stay connected and productive no matter where you are.
Feel free to explore the features and options of the email app to make the most out of your email experience on your Samsung tablet.
Now that you have completed the setup process, you’re ready to embark on a seamless email journey with your Samsung tablet. Happy emailing!
Conclusion
Setting up email on your Samsung tablet is a straightforward process that allows you to stay connected and productive on the go. By following the step-by-step instructions in this guide, you can easily add your email account and start accessing your messages directly from your tablet.
The ability to check and respond to emails, receive notifications, and manage your inbox right from your tablet provides the convenience and flexibility needed in today’s fast-paced digital world.
Remember, the process may slightly vary depending on the version of Android and the email app you use. However, the general steps of going to Settings, selecting Accounts and Backup, adding the account, entering your email address and password, choosing the email app, customizing settings (optional), and completing the setup are applicable in most cases.
Make sure to enter your login credentials accurately, double-check your settings, and explore customization options to tailor your email experience to your preferences.
With email added to your Samsung tablet, you can efficiently stay connected, manage your communication, and maintain productivity whether you’re at home, in the office, or on the move.
Now that you have completed the setup, you can enjoy the benefits of having your email account accessible at your fingertips. Use your tablet to read and respond to important messages, stay updated, and maintain efficient communication with others.
Feel free to refer back to this guide whenever you need to add additional email accounts or revisit the settings of your existing account.
We hope this guide has been helpful in assisting you with adding email to your Samsung tablet. Embrace the convenience and enjoy the seamless email experience your tablet has to offer!