Introduction
Welcome to the exciting world of Samsung tablets! Whether you’re a tech-savvy individual or a novice user, setting up your Samsung tablet is a straightforward process. This step-by-step guide will walk you through the essential steps to get your tablet up and running in no time.
A Samsung tablet is a versatile device that combines the functionality of a computer with the portability of a smartphone. With features like a vibrant display, powerful processor, and extensive app ecosystem, it offers endless possibilities for productivity, entertainment, and communication.
Before diving into the setup process, it’s important to ensure that your tablet is fully charged. Using the included power adapter and cable, connect your tablet to a power source and let it charge until the battery reaches its maximum capacity. This step will ensure uninterrupted setup and usage of your tablet.
Once your tablet is charged, turning it on is as simple as pressing and holding the power button located on the side or top edge of the device. A Samsung logo will appear on the screen, indicating that the tablet is booting up. It may take a few moments for the initial setup screen to appear, so be patient.
Throughout the setup process, you’ll be prompted to make various selections and provide necessary information to personalize your tablet. This includes selecting your preferred language, time zone, and connecting to a Wi-Fi network. It’s important to have a stable internet connection during setup to download any necessary updates and access online content.
During the setup, you’ll also have the opportunity to sign in with your existing Samsung account or create a new one. A Samsung account allows you to access various Samsung services, such as Samsung Apps, Find My Mobile, and syncing data across multiple devices.
Additionally, setting up a screen lock is crucial for ensuring the privacy and security of your tablet. You can choose from various options, including a PIN, pattern, or fingerprint recognition, depending on the tablet model. It’s recommended to choose a screen lock method that is secure and easy for you to remember.
Once these initial steps are complete, you can personalize your tablet by adjusting various settings to suit your preferences. This includes customizing the home screen layout, adding widgets, and choosing your preferred theme or wallpaper.
Now that you have a brief overview of the setup process, let’s dive into each step in detail. Follow along, and soon you’ll be ready to explore the endless possibilities of your Samsung tablet.
Step 1: Charging the Tablet
Before you can begin setting up your Samsung tablet, it’s crucial to ensure that the device has enough power to complete the setup process. Start by locating the included power adapter and cable.
Connect one end of the cable to the charging port on your tablet. The charging port is typically located on the bottom or side of the device. Make sure the connection is secure to prevent any interruptions in the charging process.
Once the cable is connected to the tablet, plug the power adapter into a power outlet. Ensure that the outlet is functioning correctly by testing it with another device or appliance. If the outlet is working, you should see a small light on the power adapter indicating that it is receiving power.
Now, it’s time to let your tablet charge. Depending on the tablet model and the current battery level, the charging process may take a couple of hours. It’s recommended to allow your tablet to charge until the battery reaches its maximum capacity. This will ensure that you have an adequate amount of power for the setup process and for using the tablet once it’s fully set up.
During the charging process, it’s important not to use your tablet. Using the device while it’s charging can increase the charging time and may even put additional strain on the battery. Instead, let your tablet charge undisturbed until the battery indicator shows it’s fully charged.
Once your tablet is fully charged, you can disconnect it from the power source by removing the cable from the charging port. Make sure to unplug the power adapter from the power outlet as well.
Now that you’ve charged your Samsung tablet, you’re ready to move on to the next step: turning on the device and starting the setup process. Remember to keep your tablet charged regularly to ensure optimal performance and to avoid running out of battery during usage.
Step 2: Turning on the Tablet
With your Samsung tablet fully charged, it’s time to power it on and begin the setup process. Turning on your tablet is a simple process that can be done in a matter of seconds.
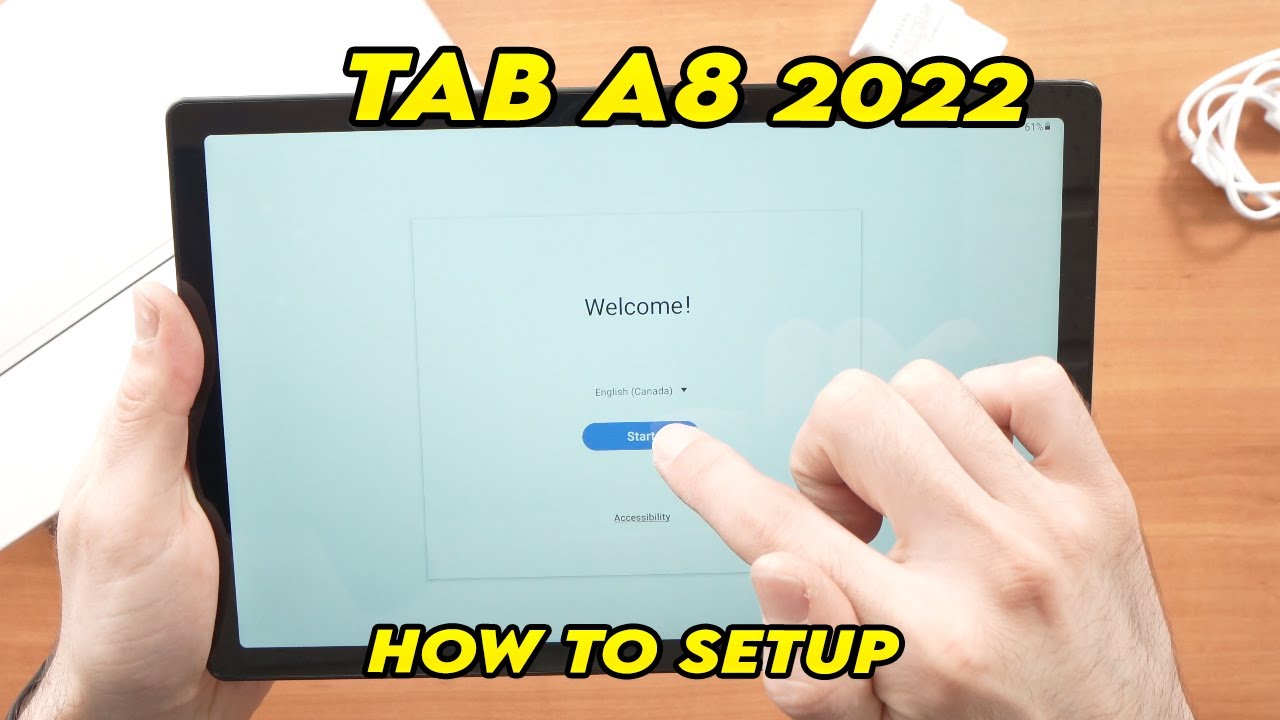
Locate the power button on your tablet. Depending on the model, it can be found on the side, top, or even on the front of the device. Press and hold the power button until you see the Samsung logo appear on the screen. This indicates that the tablet is booting up.
Be patient while your tablet is starting up. It may take a few moments for the initial setup screen to appear. Once the setup screen appears, you’re ready to embark on the journey of personalizing your tablet and making it truly yours.
During the setup process, you’ll be guided through various screens to make selections and enter information. These steps include selecting your preferred language, setting the time zone, and connecting to a Wi-Fi network.
To navigate through the setup screens, follow the on-screen instructions and use the touchscreen to make selections. If the touchscreen is not responding properly, make sure you’re using clean, dry hands and that the screen is not obstructed by any protective film or debris.
Once you’ve completed the initial setup, your tablet will be ready for further customization and personalization. You can explore the various settings and options within the operating system to tailor the tablet to your preferences.
Now that you know how to turn on your Samsung tablet and start the setup process, you’re one step closer to enjoying the incredible features and functionalities it offers.
In the next step, we’ll delve into the process of selecting your language and time zone, as well as connecting your tablet to a Wi-Fi network.
Step 3: Selecting Language and Time Zone
Once your Samsung tablet is turned on, you’ll be prompted to select your preferred language and time zone. These settings allow you to personalize your tablet to match your location and language preferences.
To begin, you’ll usually see a list of available languages on the screen. Scroll through the list and select the language that you want to use on your tablet. Once you’ve made your selection, confirm it by tapping on the corresponding option.
After selecting the language, you’ll be prompted to choose your time zone. This step ensures that your tablet displays the correct local time on the lock screen and within various applications.
Look for your geographic region in the list and tap on it. Depending on your location, there may be multiple time zones to choose from. Select the one that corresponds to your current location or the one that you prefer.
It’s important to choose the correct time zone to ensure that your tablet’s clock is accurate and synchronized with the local time. This will help you stay organized, keep track of appointments, and manage your schedule effectively.
If you’re unsure about the correct time zone to select, you can always consult a reliable source or use the automatic time zone setting if it’s available on your tablet. The automatic time zone feature uses the device’s location services to determine the correct time zone based on your physical location.
Once you’ve selected your language and time zone, your tablet will save these settings, and you can move on to the next step of the setup process.
In the next step, we’ll explore how to connect your tablet to a Wi-Fi network, which is essential for accessing online content and downloading updates for your device.
Step 4: Connecting to Wi-Fi
One of the key steps in setting up your Samsung tablet is connecting it to a Wi-Fi network. This allows you to access the internet, download apps, browse the web, and enjoy various online services.
To connect to a Wi-Fi network, you’ll need to be within range of a network that you have permission to use. Here’s how you can do it:
1. Swipe down from the top of the screen to access the quick settings panel. Tap on the Wi-Fi icon to enable Wi-Fi if it’s not already turned on.
2. Your tablet will scan for available Wi-Fi networks in the vicinity. A list of detected networks will appear on the screen. Choose the network you want to connect to by tapping on its name.
3. If the selected network is password-protected, a prompt will appear asking you to enter the password. Use the on-screen keyboard to enter the correct password and then tap “Connect.”
4. Wait for your tablet to establish a connection with the Wi-Fi network. Once connected, you’ll see a Wi-Fi symbol displayed on the status bar, indicating a successful connection.
It’s important to note that some networks may require additional steps, such as accepting terms and conditions or entering other authentication details. Follow the on-screen instructions to complete any necessary steps for connecting to the network.
If you’re unable to find any available networks or are having trouble connecting to a specific network, ensure that you’re within range of the Wi-Fi signal and that the network is functioning properly. You can also try restarting your tablet and the Wi-Fi router to resolve any temporary connectivity issues.
Once connected to a Wi-Fi network, you’ll have access to the internet and can continue with the remaining setup steps for your Samsung tablet.
In the next step, we’ll discuss agreeing to the terms and conditions, which is an essential part of setting up your tablet.
Step 5: Agreeing to the Terms and Conditions
As you continue setting up your Samsung tablet, you’ll likely encounter a step where you need to agree to the terms and conditions. This step ensures that you understand and abide by the terms set forth by Samsung and any associated service providers.
When prompted, you’ll typically see a screen displaying the terms and conditions. It’s important to take the time to read through these terms, as they outline the rights and responsibilities of both you and Samsung as you use the tablet and its associated services.
The terms and conditions may cover various aspects, such as privacy policies, software usage restrictions, warranty information, and limitations of liability. These terms differ from product to product, so it’s crucial to review them carefully.
If you agree with the terms and conditions, you can proceed by tapping on the “Agree” or “Accept” button, usually located at the bottom or the end of the screen. This indicates your consent to abide by the terms set forth.
In some cases, you may have the option to review specific sections of the terms and conditions or access a detailed version of the agreement. Should you have any concerns or questions, it’s recommended to review these sections or seek further information before proceeding.
If you do not agree to the terms and conditions, you may be prevented from proceeding with the setup process on your Samsung tablet. Keep in mind that certain features and services may require your agreement to function properly.
By agreeing to the terms and conditions, you acknowledge your commitment to using the tablet responsibly and understand the conditions under which Samsung provides its services.
Once you have agreed to the terms and conditions, you can continue with the setup process and move on to the next steps involved in personalizing your Samsung tablet.
In the next step, we’ll look at the importance of signing in or creating a Samsung account, which unlocks additional features and services on your tablet.
Step 6: Signing in or Creating a Samsung Account
Signing in or creating a Samsung account is a crucial step in setting up your Samsung tablet. A Samsung account allows you to access a wide range of services, including Samsung Apps, Find My Mobile, and seamless synchronization of data across multiple devices.
If you already have a Samsung account, you can sign in by selecting the “Sign In” option on the setup screen. Enter your credentials, such as your email address and password, to log in to your existing account. This will link your tablet to your Samsung account and enable you to access your personalized services and settings.
If you don’t have a Samsung account, you can create one by selecting the “Create Account” or “Sign Up” option. Follow the on-screen instructions to provide the necessary details, such as your email address, password, and other requested information. It’s recommended to choose a strong and unique password to protect your account.
After creating your Samsung account, you may be prompted to verify your email address. This step ensures the security and validity of your account. Check your email inbox for a verification email from Samsung and follow the provided instructions to complete the verification process.
Once you have signed in or created a Samsung account, your tablet will sync with your account, and you’ll have access to additional features and services. This includes the ability to download apps from the Samsung Apps store and easily restore your data on a new device if needed.
Signing in or creating a Samsung account also enables you to take advantage of Find My Mobile, a service that allows you to locate, lock, or remotely wipe your tablet in case it’s lost or stolen. This feature provides peace of mind and added security for your device.
Having a Samsung account also allows you to seamlessly sync and access your data, such as contacts, calendars, and notes, across multiple Samsung devices. This synchronization feature enhances your productivity and ensures that your important information is always up to date.
Now that you have successfully signed in or created a Samsung account, you can proceed with the setup process and move on to the next steps involved in personalizing your Samsung tablet.
In the next step, we’ll explore the importance of setting up a screen lock to protect your tablet’s privacy and security.
Step 7: Setting up a Screen Lock
Setting up a screen lock is an essential security measure to protect the privacy of your Samsung tablet. A screen lock prevents unauthorized access to your device and ensures that only you can unlock and use it.
To set up a screen lock, follow these steps:
1. Go to the Settings menu on your Samsung tablet. You can access the Settings app by swiping down from the top of the screen and tapping on the gear icon or by locating the app on the home screen or app drawer.
2. Within the Settings menu, find and select the “Security” or “Lock Screen” option. The precise location and name may vary depending on the tablet model and version of the operating system.
3. Within the security settings, locate the “Screen Lock” or “Lock Screen Type” option and tap on it. You’ll be presented with various screen lock options to choose from.
4. The available screen lock options may include PIN, pattern, password, or biometric methods like fingerprint or face recognition, depending on the capabilities of your tablet. Select the option that you prefer and follow the on-screen instructions to set it up.
5. When setting up a PIN, pattern, or password, choose a combination that is both memorable for you and secure. Avoid using easily guessable patterns or personal information that is easily obtainable.
6. If your tablet supports biometric screen lock methods like fingerprint or face recognition, follow the instructions to enroll your biometric data. These methods offer convenient and secure ways to unlock your tablet quickly.
7. Once you have set up your desired screen lock method, you’ll be prompted to confirm it. Enter your PIN, pattern, or password again to finalize the setup.
Setting up a screen lock is crucial to protect your personal data, apps, and accounts in the event that your tablet falls into the wrong hands. It provides an extra layer of security and peace of mind in case your tablet gets lost or stolen.
Remember to keep your screen lock method and any associated credentials confidential. Avoid sharing your PIN, pattern, or password with others, and be cautious while unlocking your tablet in public spaces to protect your privacy.
With a screen lock set up on your Samsung tablet, you can confidently use your device knowing that your information is secure.
In the next step, we’ll explore how to personalize the settings of your tablet to suit your preferences and needs.
Step 8: Personalizing the Tablet Settings
After setting up the basic security measures for your Samsung tablet, it’s time to dive into personalizing the settings to suit your preferences and needs. Personalizing your tablet allows you to customize various aspects, such as the home screen layout, notifications, sounds, and more.
To access the settings menu, swipe down from the top of the screen to reveal the quick settings panel. Locate the gear icon and tap on it to open the Settings app. Alternatively, you can find the Settings app on the home screen or in the app drawer.
Once in the Settings menu, you’ll see a list of different categories and options. Here are a few key settings you can personalize:
Display: Adjust the brightness, screen timeout, wallpaper, and font size to enhance your viewing experience.
Sounds and Vibration: Customize your ringtone, notification sound, and vibration settings to reflect your personal style.
Notifications: Manage your notification preferences for each app installed on your tablet. You can choose whether to allow or block notifications, customize their appearance, and set notification priorities.
Privacy: Control permissions for apps, manage your location settings, and review app permissions to ensure your data is protected.
Accessibility: Adjust accessibility features to accommodate specific needs, such as enabling text-to-speech, magnification, or enabling color inversion for better visibility.
Accounts: Add and manage your email, social media, and other accounts to stay connected and synchronize your data across devices.
Backup and Restore: Enable automatic backup of your tablet’s settings, apps, and data to a Samsung account or a cloud storage service to ensure that your information is safe.
Date and Time: Customize the date and time settings, enable automatic date and time, and configure time zone preferences.
These are just a few examples of the settings you can personalize on your Samsung tablet. Take some time to explore all the available options and configure them according to your preferences and needs.
Remember to regularly check the settings menu to stay up to date with any new features or options that may become available through software updates.
Personalizing the settings of your Samsung tablet allows you to create a device that is tailored to your individual preferences, making it more intuitive and enjoyable to use.
In the next step, we’ll explore adding and organizing apps on the home screen of your tablet for quick and convenient access.
Step 9: Adding and Organizing Apps on the Home Screen
The home screen of your Samsung tablet serves as a central hub for accessing your favorite apps and widgets. Personalizing the home screen layout allows you to organize your apps in a way that is most convenient and efficient for you.
To add an app to your home screen, follow these steps:
1. Locate the app drawer icon on your home screen. It is usually represented by a grid of small squares or dots. Tap on this icon to open the app drawer, where you’ll find all of your installed apps.
2. Scroll through the app drawer and find the app you want to add to the home screen. Long-press on the app icon until the home screen appears.
3. While still holding the app icon, move it to the desired location on the home screen. Release your finger to drop the app in that spot.
4. Repeat these steps to add more apps to the home screen. You can add as many apps as you like, arranging them in a way that makes sense to you.
To organize and customize your home screen further, you can:
Create Folders: Group related apps together by dragging one app icon onto another. This will create a folder that can be expanded by tapping on it, revealing the apps within. Use folders to categorize your apps, such as creating a folder for games or productivity apps.
Resize Widgets: Widgets are interactive app components that can display information or provide quick functionality. To resize a widget, long-press on it until you see the resize handle, then drag it to the desired size.
Move and Remove Apps: To move apps or remove them from the home screen, long-press on the app icon until options appear at the top of the screen. You can then drag the app to another location or drag it to the “Remove” or “Delete” option to remove it from the home screen.
Create Multiple Home Screens: If you have many apps, you can create additional home screens by swiping to the left or right of the existing home screen. To switch between home screens, swipe left or right.
By adding and organizing apps on the home screen, you can minimize the time spent searching for frequently used apps, making your Samsung tablet more efficient and user-friendly.
In the next step, we’ll explore how to transfer data from an old device to your new Samsung tablet.
Step 10: Transferring Data from an Old Device
When setting up your new Samsung tablet, you may want to transfer data from an old device to ensure a smooth transition and continuity of your important files, contacts, and settings. Samsung provides several methods to transfer data from your old device to your new tablet.
One of the most convenient ways to transfer data is through the use of Samsung Smart Switch, a mobile app that allows you to transfer content seamlessly between devices. Here’s how you can use Smart Switch:
1. On your new Samsung tablet, download and install the Smart Switch app from the Google Play Store.
2. On your old device, ensure that you have the latest version of Smart Switch installed. You can download it from the respective app store depending on your old device’s operating system.
3. Open Smart Switch on both devices and follow the on-screen instructions to establish a connection between them. You can use a USB cable, Wi-Fi direct connection, or even a computer with the Smart Switch software installed.
4. Once the devices are connected, select the types of data you want to transfer, such as contacts, messages, photos, videos, apps, and even settings. You can choose to transfer all data or select specific items.
5. Start the transfer process and wait for the data to be transferred from the old device to the new tablet. The time taken depends on the amount of data being transferred.
In addition to Smart Switch, you can also transfer data using other methods such as cloud storage services, Bluetooth, or even manually copying files using a computer. These methods may vary depending on the devices you’re using and the data you want to transfer.
Remember to back up your data on your old device before initiating the transfer process to avoid any data loss or potential complications.
By transferring data from your old device to your new Samsung tablet, you can seamlessly continue using your favorite apps, access your important files, and have your contacts readily available.
In the next step, we’ll explore the importance of updating software and apps on your Samsung tablet to ensure optimal performance and security.
Step 11: Updating Software and Apps
After setting up your Samsung tablet, it’s crucial to regularly update the software and apps to ensure optimal performance, security, and compatibility with the latest features and enhancements. Samsung periodically releases software updates that address bugs, improve performance, and provide new features.
To check for software updates on your Samsung tablet, follow these steps:
1. Go to the Settings menu on your tablet by tapping the gear icon located either on the quick settings panel or the app drawer.
2. Scroll down and tap on the “Software Update” or “System Updates” option. The exact name and location may vary depending on the tablet model and operating system version.
3. Tap on the “Check for Updates” or “Download Updates Manually” option. Your tablet will connect to the update server to check for available updates.
4. If an update is available, follow the on-screen prompts to download and install it. Make sure your tablet is connected to a stable Wi-Fi network, as updates can be large in size.
In addition to software updates, it’s equally important to keep your apps up to date. App updates often include bug fixes, performance improvements, and new features.
To update apps on your Samsung tablet, you can follow these steps:
1. Open the Google Play Store app on your tablet.
2. Tap on the menu icon (usually represented by three horizontal lines) located in the top-left corner of the screen. This will open the side menu.
3. From the side menu, tap on “My Apps & Games” or “Updates” to view a list of apps that have updates available.
4. Tap on the “Update” button next to each app you want to update, or tap on the “Update All” button to update all available apps at once.
Ensure that you have a stable internet connection during app updates, as large updates may take some time to download and install.
By regularly updating the software and apps on your Samsung tablet, you can experience improved performance, enhanced security, and access to new features and functionalities.
In the next step, we’ll explore some common troubleshooting tips to help you resolve any issues you may encounter with your Samsung tablet.
Step 12: Troubleshooting Common Issues
While Samsung tablets are known for their reliability, you may occasionally encounter some common issues that can be easily resolved. Here are some troubleshooting tips to help you overcome these problems:
1. Tablet not turning on or unresponsive: If your tablet doesn’t turn on or becomes unresponsive, try holding down the power button for about 10 seconds to force a restart. If that doesn’t work, ensure that the battery is charged and try connecting it to a power source.
2. Wi-Fi connectivity issues: If you’re experiencing Wi-Fi connectivity issues, try turning Wi-Fi off and back on, ensuring that you’re within range of the Wi-Fi signal, or restarting your router. You can also try “forgetting” the Wi-Fi network on your tablet and re-adding it.
3. Apps crashing or freezing: If apps on your tablet are crashing or freezing, try closing the app and reopening it. You can also try clearing the app’s cache or data by going to Settings > Apps, selecting the problematic app, and tapping on “Clear cache” or “Clear data.”
4. Slow performance: If your tablet is running slowly, try closing unused apps, clearing cached data, and restarting your device. You can also consider uninstalling unnecessary apps or performing a factory reset if the issue persists.
5. Battery draining quickly: If your tablet’s battery is draining quickly, try adjusting the screen brightness, disabling background app refresh, and limiting the use of power-hungry features like Bluetooth or GPS. You can also check for any problematic apps that may be consuming excessive battery power.
6. Touchscreen not responding: If the touchscreen is unresponsive or behaving erratically, ensure that it’s clean and dry, as dirt or moisture can affect its performance. If the issue persists, restart your tablet or perform a software update to fix any touchscreen-related bugs.
7. Storage space issues: If you’re running out of storage space on your tablet, try clearing unnecessary files, uninstalling unused apps, or moving media files to an external storage device or cloud storage.
If these troubleshooting tips don’t resolve the issue, consider contacting Samsung customer support or visiting an authorized service center for further assistance. They can provide specialized guidance and repair services to address any hardware or software issues.
Remember to regularly keep your tablet updated with the latest software and app updates, as they often include bug fixes and performance improvements that can resolve common issues.
By following these troubleshooting steps, you can overcome common issues and enjoy a smooth and trouble-free experience with your Samsung tablet.
Conclusion
Congratulations! You’ve successfully set up your Samsung tablet and personalized it to suit your needs. By following the steps outlined in this guide, you’ve learned how to charge your tablet, turn it on, select language and time zone, connect to Wi-Fi, agree to terms and conditions, sign in or create a Samsung account, set up a screen lock, personalize the tablet settings, add and organize apps on the home screen, transfer data from an old device, update software and apps, and troubleshoot common issues.
With your Samsung tablet now fully set up, you’re ready to embark on an exciting journey of productivity, entertainment, and communication. Explore the vast array of apps, games, and content available on the device. Stay connected with friends and family, capture and share memories through the tablet’s camera, and customize settings to make the tablet truly your own.
Remember to regularly update your tablet’s software and apps to ensure optimal performance, security, and access to the latest features. Additionally, if you encounter any issues, refer back to the troubleshooting steps provided in this guide or seek assistance from Samsung customer support.
With your new Samsung tablet in hand, the possibilities are endless. Enjoy the seamless integration of technology into your daily life, and embrace the convenience and versatility that this device offers. Whether for work or play, your Samsung tablet is a powerful tool that can enhance your digital experience and make life more enjoyable and efficient.
Now, go ahead and explore all the amazing features of your Samsung tablet. Embrace the potential it holds and make the most out of your digital journey!