Introduction
Welcome to the digital world of Apple’s ecosystem! If you’re a proud owner of a Mac computer, you’ve probably already discovered the convenience of iMessage, Apple’s messaging platform that allows you to send texts, photos, and videos seamlessly between your Apple devices. But did you know that you can also add your phone number to iMessage on your Mac?
By adding your phone number to iMessage, you can enjoy the same messaging experience that you have on your iPhone or other Apple devices. This means you can send and receive messages from your phone number directly on your Mac, without having to reach for your iPhone every time.
Whether you want to streamline your messaging or simply have the freedom to respond from your Mac, adding your phone number to iMessage is a straightforward process. In this article, we’ll guide you through the steps to add your phone number to iMessage on your Mac, so that you can stay connected wherever you are.
Step 1: Open the Messages App
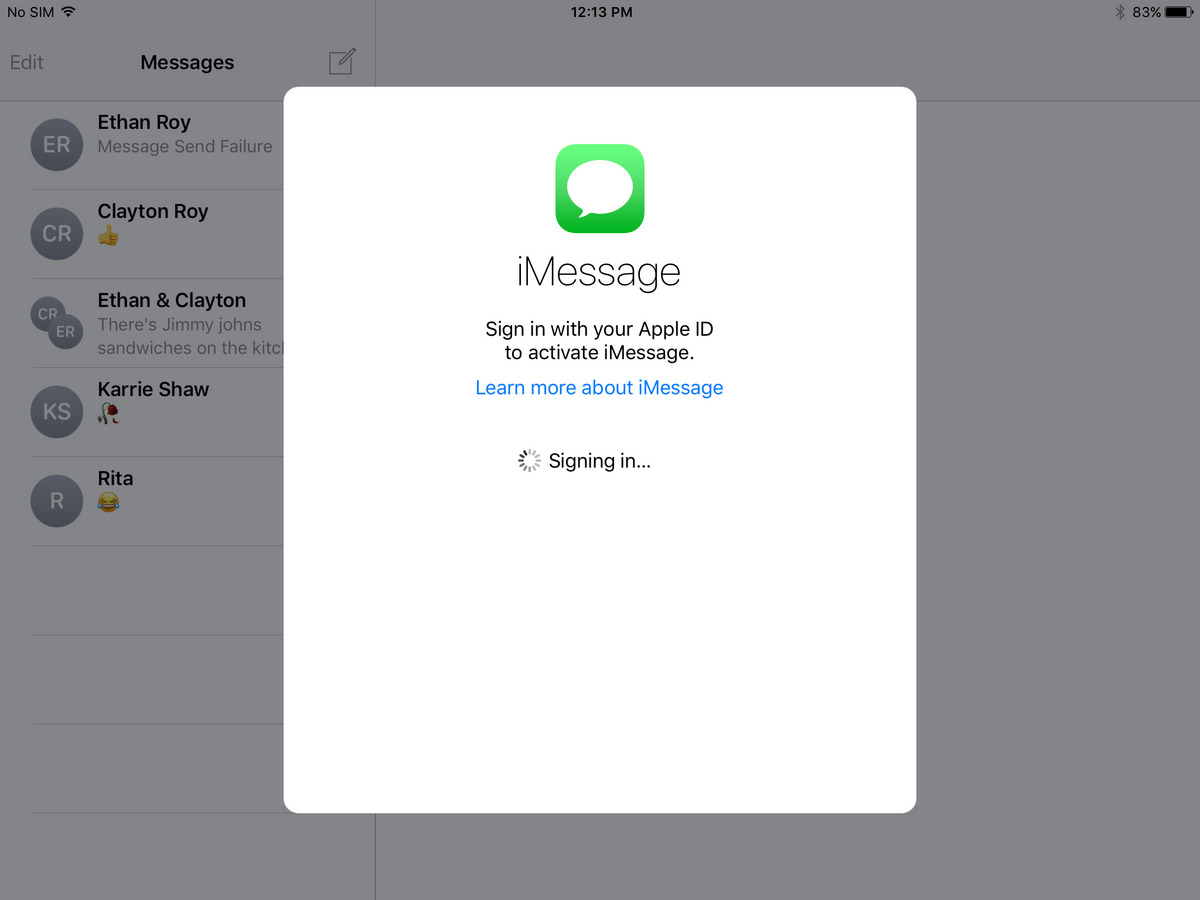
To begin the process of adding your phone number to iMessage on your Mac, the first step is to open the Messages app. You can find this app in your Applications folder or by searching for it using Spotlight.
Once you’ve located the Messages app, click on it to open it. The app will launch, and you’ll be greeted with the familiar messaging interface where you can see your previous conversations and start new ones.
If you are already signed in with your Apple ID, you’ll see your messages and contacts. If not, you will need to sign in with your Apple ID to proceed. This is important because your Apple ID is what allows you to sync your messages across all your devices.
Taking a moment to familiarize yourself with the Messages app is also useful. You can explore its features and settings to fully customize your messaging experience on your Mac. Now that you have the Messages app open, let’s move on to the next step to add your phone number to iMessage.
Step 2: Go to Preferences
Once you have the Messages app open on your Mac, the next step is to go to the Preferences menu. To access the Preferences, click on “Messages” in the menu bar at the top of your screen. A dropdown menu will appear, and from there, select “Preferences.”
Alternatively, you can use the keyboard shortcut “Command + ,” (comma) to quickly open the Preferences menu. This shortcut is handy if you’re a frequent user of keyboard shortcuts and want to save time navigating through menus.
Clicking on the “Preferences” option opens a new window where you can customize various settings for your Messages app. This is where you’ll find options for your iMessage settings, including adding or removing phone numbers and email addresses associated with your Apple ID.
By accessing the Preferences menu, you’re one step closer to adding your phone number to iMessage on your Mac. Let’s move on to the next step and continue the process.
Step 3: Click on the iMessage tab
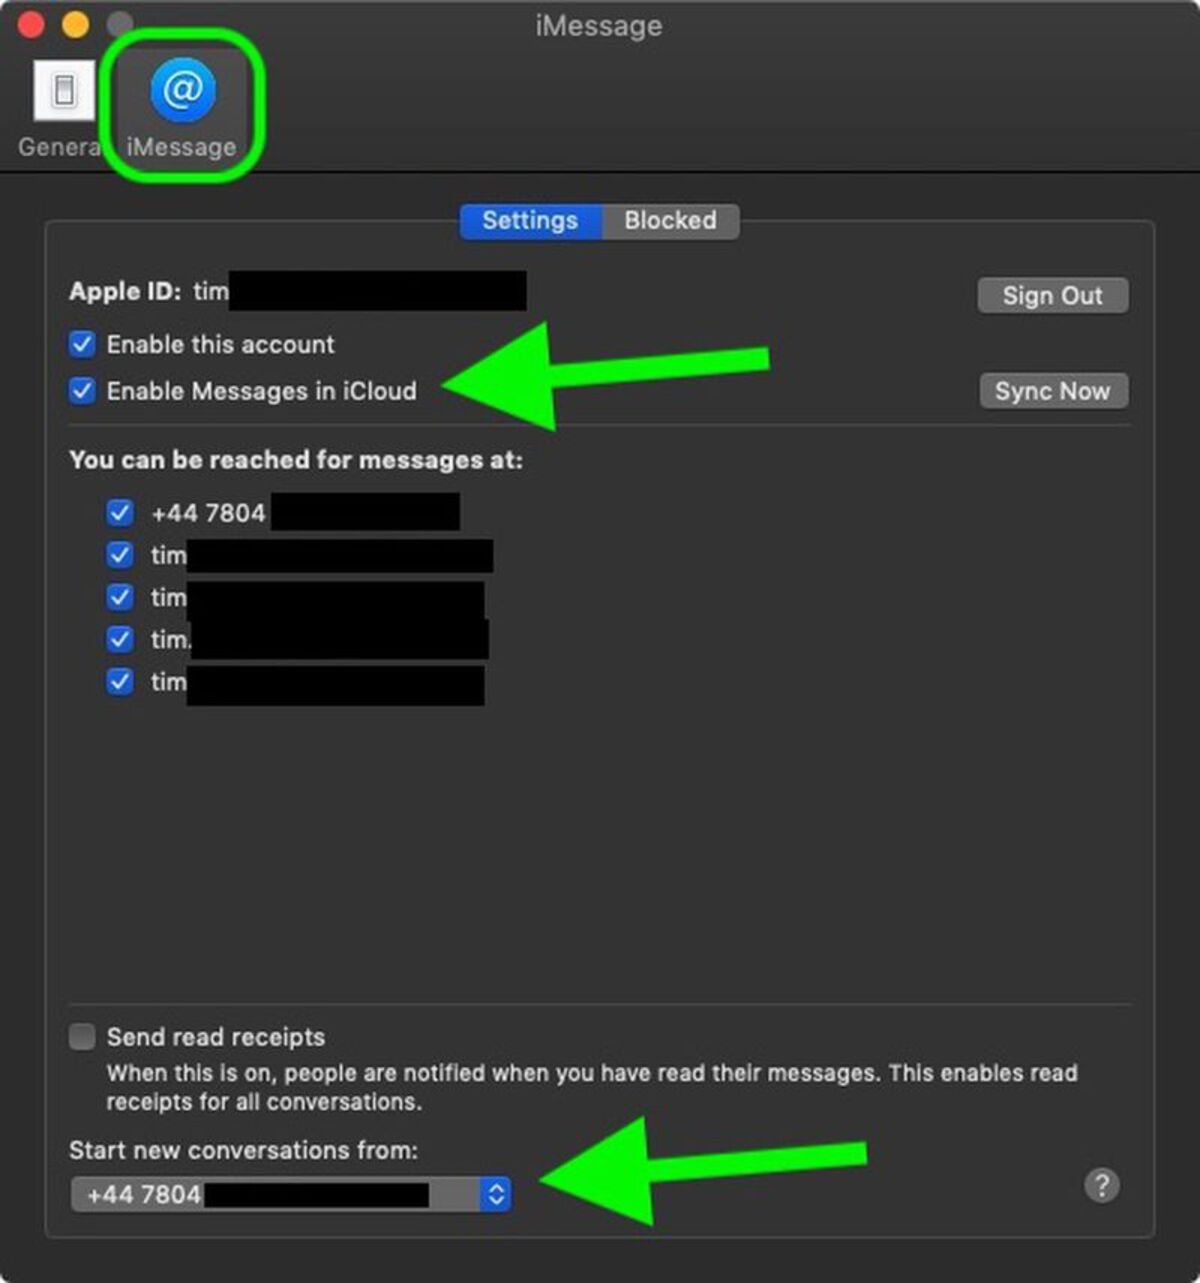
Now that you have accessed the Preferences menu in the Messages app, the next step is to click on the “iMessage” tab. The iMessage tab is where you’ll find the specific settings related to iMessage, including the option to add your phone number.
Once you click on the iMessage tab, you’ll see a list of settings and options available for iMessage on your Mac. This is where you can manage your iMessage account, view and edit your contact information, and configure other preferences.
In addition to adding your phone number, you can also choose to enable other forms of contact, such as email addresses or FaceTime, to receive messages on your Mac. This gives you the flexibility to receive and respond to messages using various methods.
By clicking on the iMessage tab, you’re one step closer to adding your phone number to iMessage on your Mac. Let’s move on to the next step and continue the process.
Step 4: Check the “Enable this account” box
With the iMessage tab open in the Preferences menu, the next step is to check the “Enable this account” box. This option is crucial for adding your phone number to iMessage on your Mac.
The “Enable this account” box is located at the top of the iMessage tab, and it should be accompanied by your Apple ID and email address. By enabling this account, you are allowing your Mac to synchronize messages with your other Apple devices, such as your iPhone or iPad.
To check the “Enable this account” box, simply click on it. You should see a checkmark appear inside the box, indicating that the option has been selected. This checkbox ensures that your phone number and other contact information associated with your Apple ID are now available for iMessage on your Mac.
By enabling this account, you’re taking a significant step towards adding your phone number to iMessage on your Mac. Let’s move on to the next step and continue the process.
Step 5: Add your Apple ID and password
After checking the “Enable this account” box, the next step is to add your Apple ID and password. Your Apple ID is the unique identifier that connects your devices and allows you to access various Apple services, including iMessage.
Within the iMessage tab of the Preferences menu, you’ll find a field labeled “Apple ID.” Click on this field and enter the email address associated with your Apple ID. Make sure you enter it accurately to avoid any login issues.
Once you’ve entered your Apple ID email address, click on the adjacent password field. Here, you’ll enter the password associated with your Apple ID. Be sure to enter it carefully, as passwords are case-sensitive.
If you’ve correctly entered your Apple ID and password, your Mac will verify the credentials and establish a connection with your iMessage account. This will enable you to send and receive messages using your phone number on your Mac.
Adding your Apple ID and password is an essential step in the process of adding your phone number to iMessage on your Mac. Now that you’ve successfully entered your credentials, let’s move on to the next step and continue the process.
Step 6: Select your phone number
With your Apple ID and password entered, it’s time to select your phone number. This step allows you to choose which phone number associated with your Apple ID you want to use for iMessage on your Mac.
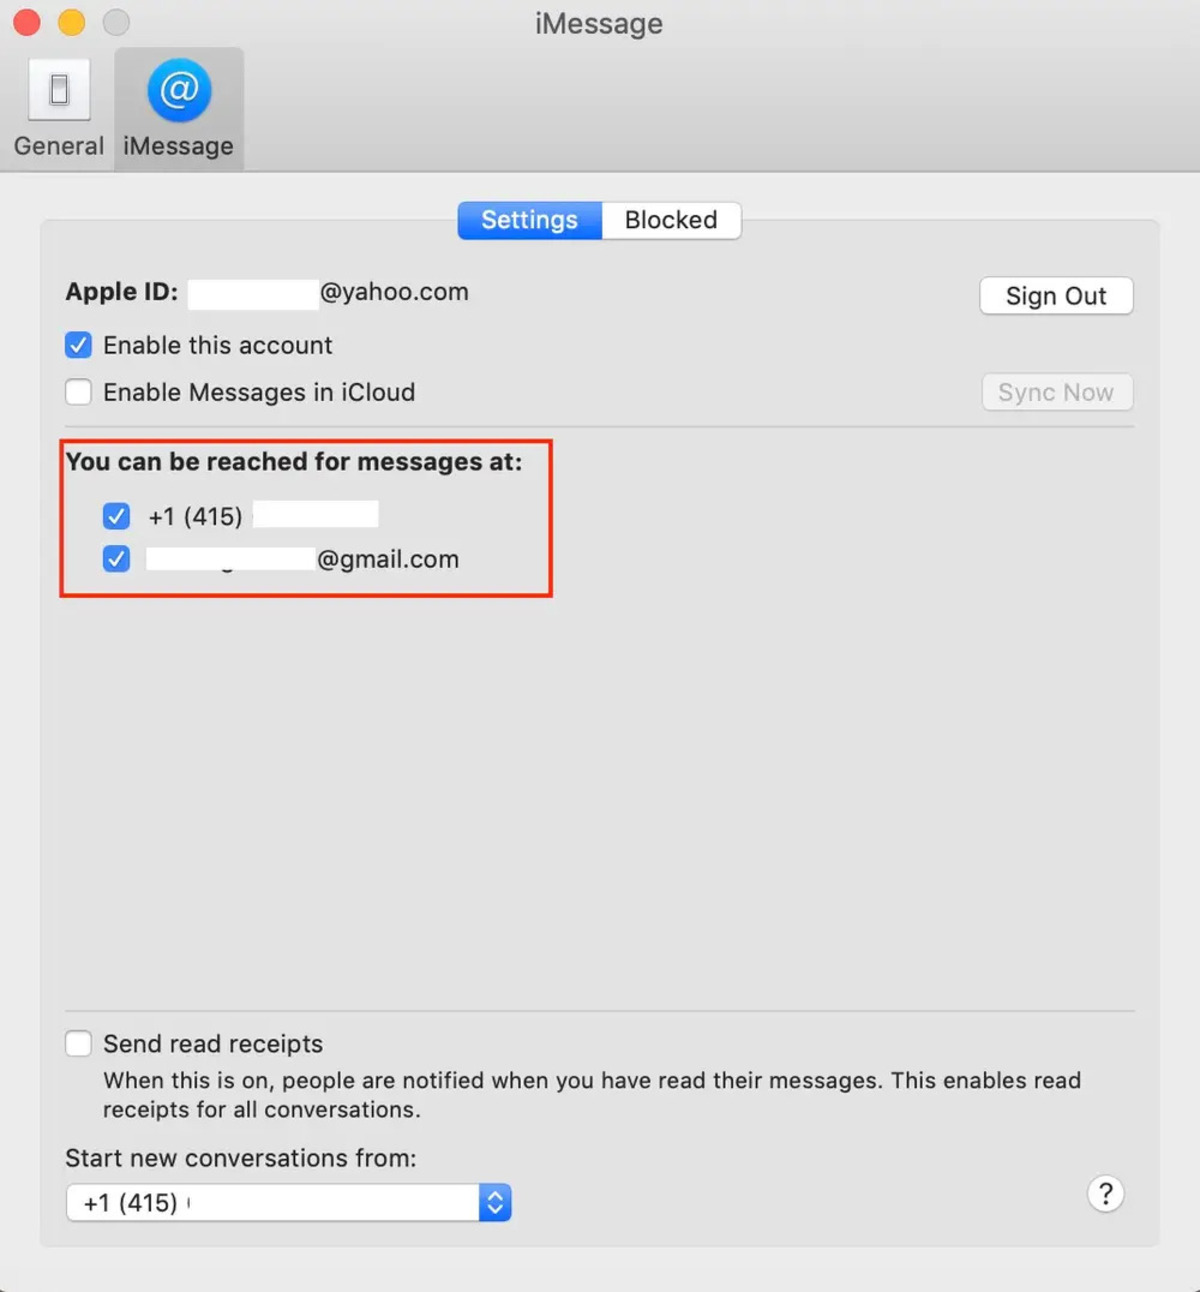
Within the iMessage tab of the Preferences menu, you should see a section labeled “You can be reached for messages at:”. Underneath this section, you’ll find a list of phone numbers and email addresses associated with your Apple ID.
Locate your phone number in the list and click on it to select it. A checkmark should appear next to your chosen phone number, indicating that it’s now the default number for iMessage on your Mac.
If you can’t find your phone number in the list, make sure it’s properly linked to your Apple ID on your iPhone or other Apple devices. You may need to sign in with the same Apple ID and ensure that your phone number is added and verified under the “Phone” section of your Apple ID settings.
By selecting your phone number, you’re specifying which number you want to use for iMessage on your Mac. This ensures that messages sent to your phone number will also appear on your Mac, allowing you to seamlessly communicate across devices.
Now that you’ve selected your phone number, let’s move on to the final step and complete the process of adding your phone number to iMessage on your Mac.
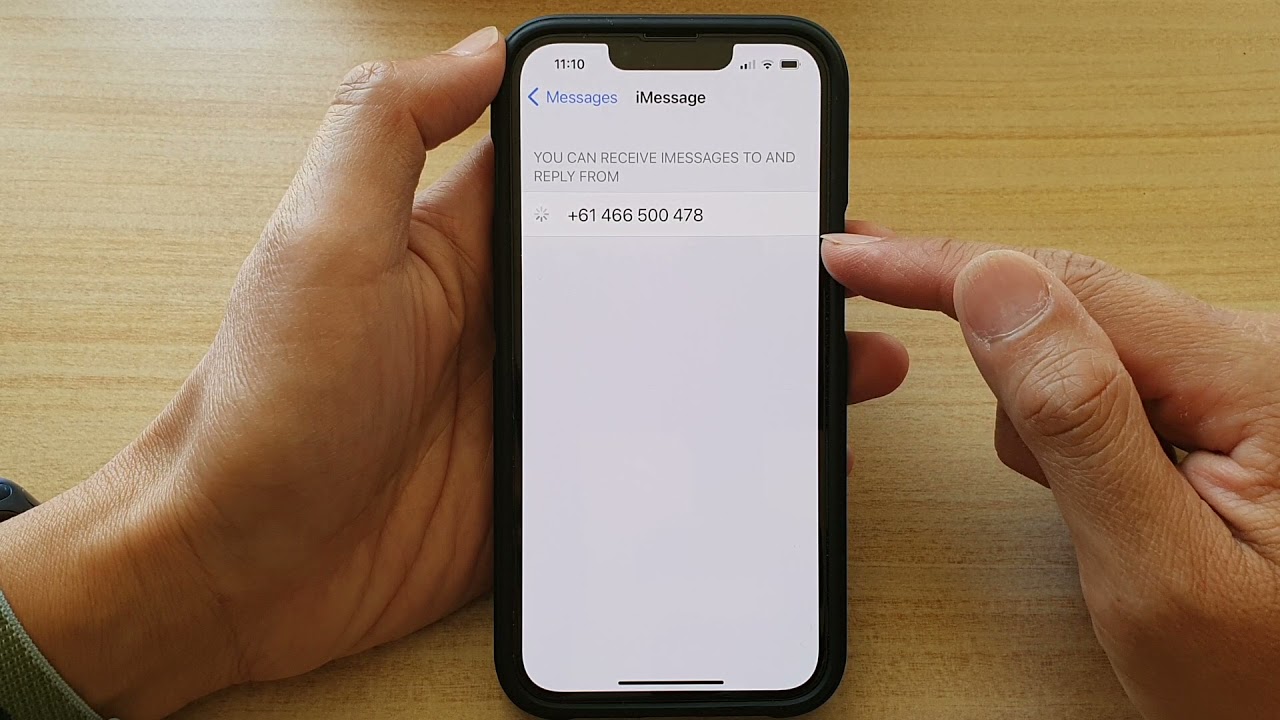
Step 7: Verify your phone number
The last step in adding your phone number to iMessage on your Mac is to verify your phone number. Verification ensures that your phone number is associated with your Apple ID and allows you to send and receive messages using that number.
After selecting your phone number in the previous step, you may see a prompt asking you to verify your phone number. This verification process usually involves receiving a verification code on your iPhone or another trusted Apple device associated with the same Apple ID.
To verify your phone number, you’ll need to have your iPhone or another trusted Apple device nearby. Once you receive the verification code, enter it in the prompted field on your Mac. This confirms that you have access to the phone number and allows iMessage to link it to your Apple ID on your Mac.
If you don’t receive the verification code or face any issues during the verification process, ensure that your iPhone or other Apple devices are signed in with the same Apple ID and connected to the internet. Additionally, make sure that your phone number is correctly registered with your Apple ID under the “Phone” section of your Apple ID settings.
By successfully verifying your phone number, you have completed the process of adding your phone number to iMessage on your Mac. Congratulations! You can now enjoy the convenience of sending and receiving messages directly from your phone number on your Mac.
Conclusion
Adding your phone number to iMessage on your Mac is a straightforward process that allows you to stay connected and seamlessly communicate across your Apple devices. By following the steps outlined in this guide, you can enjoy the convenience of sending and receiving messages directly from your phone number on your Mac.
We started by opening the Messages app and accessing the Preferences menu. From there, we clicked on the iMessage tab and checked the “Enable this account” box. Next, we added our Apple ID and password, followed by selecting our phone number. Finally, we verified our phone number to complete the process.
Now that your phone number is added to iMessage on your Mac, you can enjoy the benefits of a unified messaging experience. You’ll be able to send messages, photos, and videos from your phone number directly from your Mac, eliminating the need to switch back and forth between devices.
Remember, keeping your Apple devices synchronized by adding your phone number to iMessage ensures that you never miss an important message, no matter which device you’re using at the moment. It offers flexibility and convenience, allowing you to stay in touch with friends, family, and colleagues effortlessly.
So go ahead, add your phone number to iMessage on your Mac, and enjoy the seamless communication experience that Apple’s ecosystem provides. Stay connected, stay productive, and make the most out of your Apple devices.