Introduction
Welcome to the world of Grammarly, a powerful tool that can take your writing to the next level. If you’re a Mac user and want to enhance your writing skills and eliminate pesky grammar and spelling errors, you’re in the right place. Adding Grammarly to your Mac is quick and easy, and in this article, we’ll show you how.
Grammarly is a renowned writing assistant that provides real-time suggestions to improve your writing. From spotting grammar mistakes to offering vocabulary enhancements, it’s like having an editor by your side. Whether you’re a student, professional, or just someone who wants to polish their writing, Grammarly can be a game-changer.
Adding Grammarly to your Mac will unleash its full potential, allowing you to seamlessly access its features across applications and websites. With the Grammarly app installed, you can confidently write emails, compose social media posts, write reports, or work on any other writing project with peace of mind.
In the following steps, you’ll learn how to sign up for a Grammarly account, download and install the Grammarly for Mac app, enable it for all text fields, and configure the settings according to your preferences. Once set up, Grammarly will help you become a more effective and efficient writer.
So, without further ado, let’s dive into the step-by-step process of adding Grammarly to your Mac.
Step 1: Sign up for a Grammarly account
The first step in adding Grammarly to your Mac is to sign up for a Grammarly account. To do this, follow these simple steps:
- Go to the Grammarly website using your preferred web browser.
- Click on the “Sign Up” button, usually located at the top right corner of the website.
- You will be presented with several options to create your account. You can sign up using your email address, Google account, or Facebook account. Choose the method that is most convenient for you.
- If you choose to sign up with your email address, enter your email and create a password. Make sure to use a strong and unique password to protect your account.
- Once you’ve filled in the necessary information, click on the “Sign Up” button to create your Grammarly account.
- Grammarly may ask you to confirm your email address by clicking on a verification link sent to your email. Follow the instructions provided in the email to complete the verification process.
- After verifying your email, you’ll be directed to your Grammarly account dashboard.
Congratulations! You have successfully signed up for a Grammarly account. Now you’re one step closer to adding Grammarly to your Mac and improving your writing skills.
If you already have a Grammarly account, simply sign in using your existing credentials to proceed to the next step.
Step 2: Download the Grammarly for Mac app
Now that you have a Grammarly account, the next step is to download the Grammarly app for your Mac. Follow these steps to get started:
- Open your preferred web browser on your Mac.
- Go to the Grammarly website and sign in to your account using your credentials.
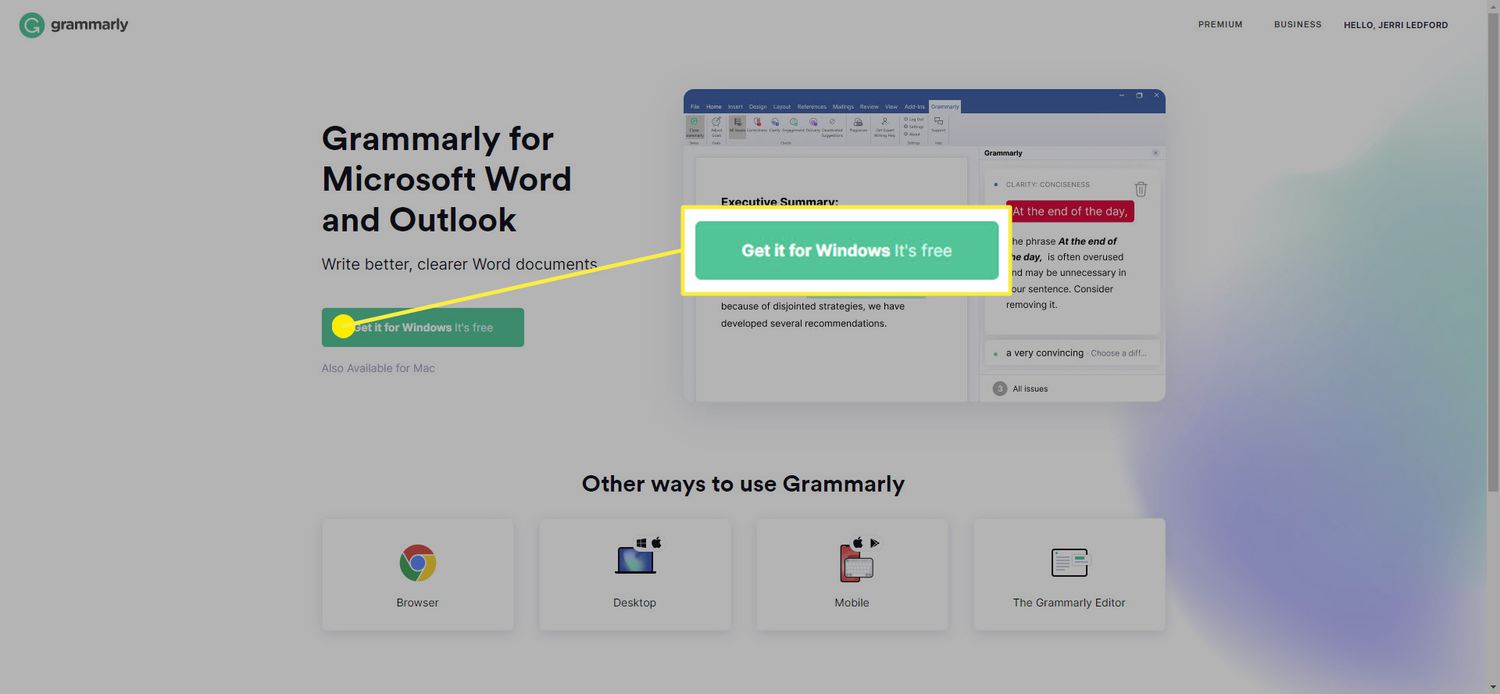
- Once you’re signed in, locate the download option on the Grammarly website. It is usually found on the homepage or in the header menu.
- Click on the download option to initiate the download process.
- A prompt may appear asking you to confirm the download. Click “OK” or “Save File” to proceed.
- The Grammarly app will then begin to download to your Mac. The download time may vary depending on your internet connection speed.
- Once the download is complete, locate the downloaded file in your Mac’s Downloads folder.
- Double-click on the downloaded file to begin the installation process.
- Follow the on-screen instructions to install the Grammarly app on your Mac.
- After the installation is complete, you can close the installation window.
Now that you have downloaded and installed the Grammarly app, you’re ready to move on to the next step and start using Grammarly on your Mac.
Make sure to keep the Grammarly app file in a safe place on your Mac in case you need to reinstall it in the future or update to a newer version.
Step 3: Install the Grammarly app on your Mac
Now that you have successfully downloaded the Grammarly app for your Mac, it’s time to install it. Follow these simple steps to install the Grammarly app:
- Locate the downloaded Grammarly app file on your Mac. It is usually saved in your Downloads folder, unless you specified a different location during the download process.
- Double-click on the Grammarly app file to initiate the installation process.
- A pop-up window may appear, asking for your confirmation to open the file. Click on “Open” or “OK” to proceed.
- The Grammarly installation wizard will launch. Follow the on-screen instructions carefully to install the app on your Mac.
- Read and accept the end-user license agreement, if prompted.
- Choose the installation settings based on your preferences. You can usually leave the default settings as they are, unless you have specific requirements.
- Click on the “Install” button to begin the installation process.
- The installation may take a few minutes, depending on your Mac’s performance and the size of the app.
- Once the installation is complete, you will see a confirmation message that the Grammarly app has been installed successfully.
- Close the installation wizard and locate the Grammarly app in your Applications folder.
Congratulations! You have now successfully installed the Grammarly app on your Mac. The next step is to enable Grammarly for all text fields so that it can assist you in improving your writing across various applications and websites.
Keep in mind that you may need administrative privileges on your Mac to install the Grammarly app. If you face any issues during the installation process, make sure to reach out to Grammarly’s support team for assistance.
Step 4: Enable Grammarly for all text fields
Now that you have installed the Grammarly app on your Mac, it’s time to enable it for all text fields so that Grammarly can start assisting you in improving your writing. Follow these steps to enable Grammarly for all text fields:
- Open any application or website where you want to use Grammarly.
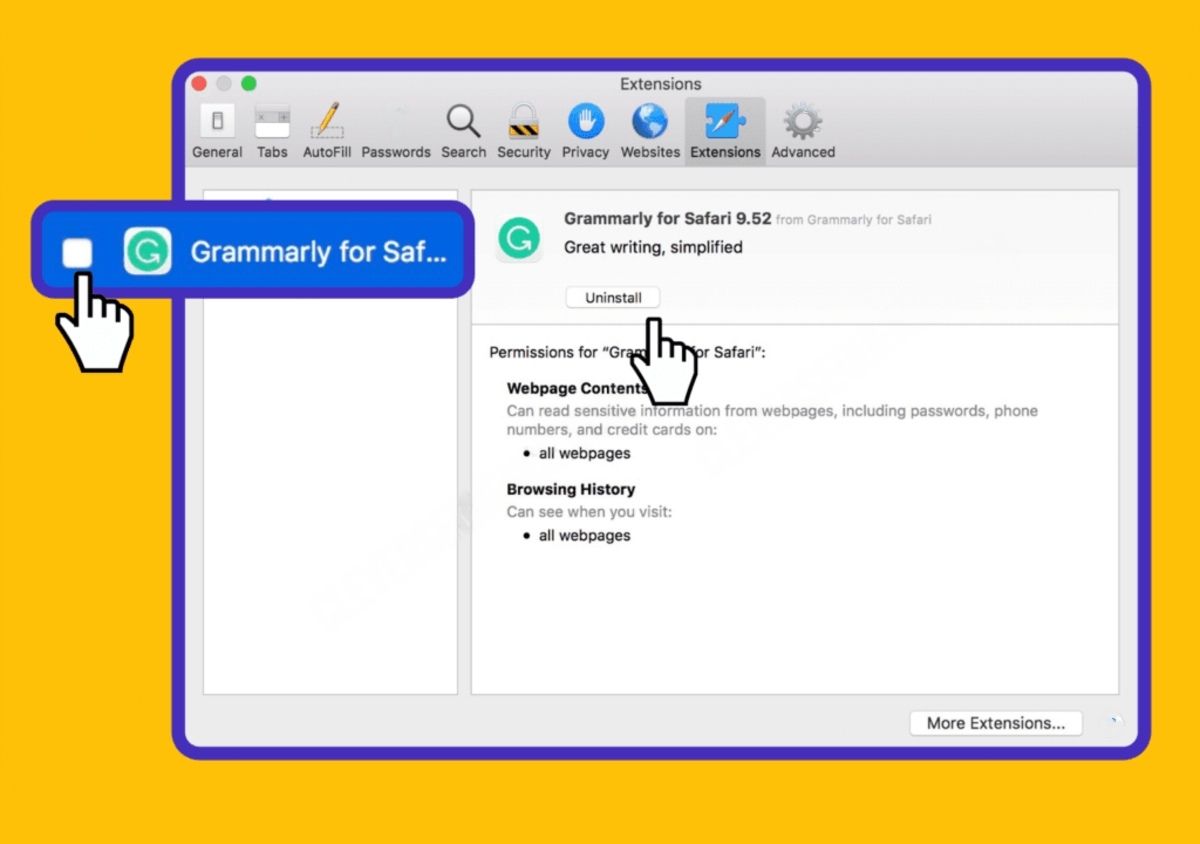
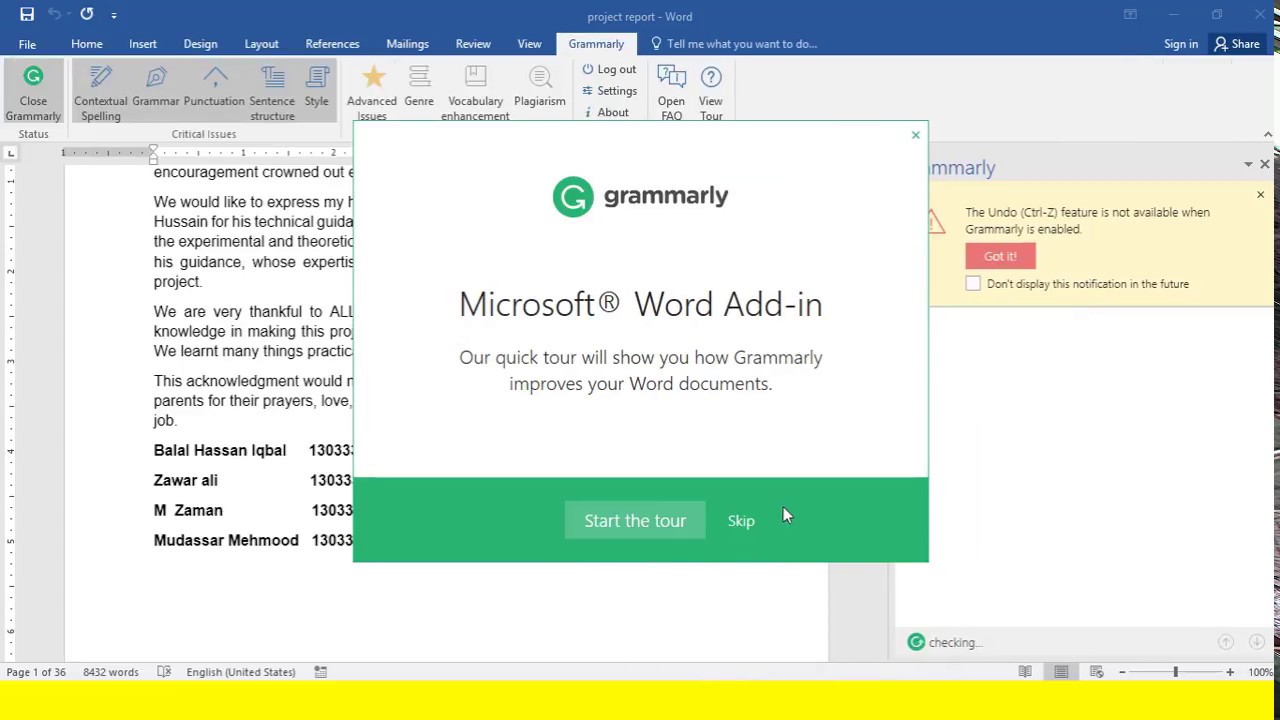
- For most applications, such as Microsoft Word or Google Docs, you will see the Grammarly extension icon in the toolbar of the application. Click on the icon to enable Grammarly.
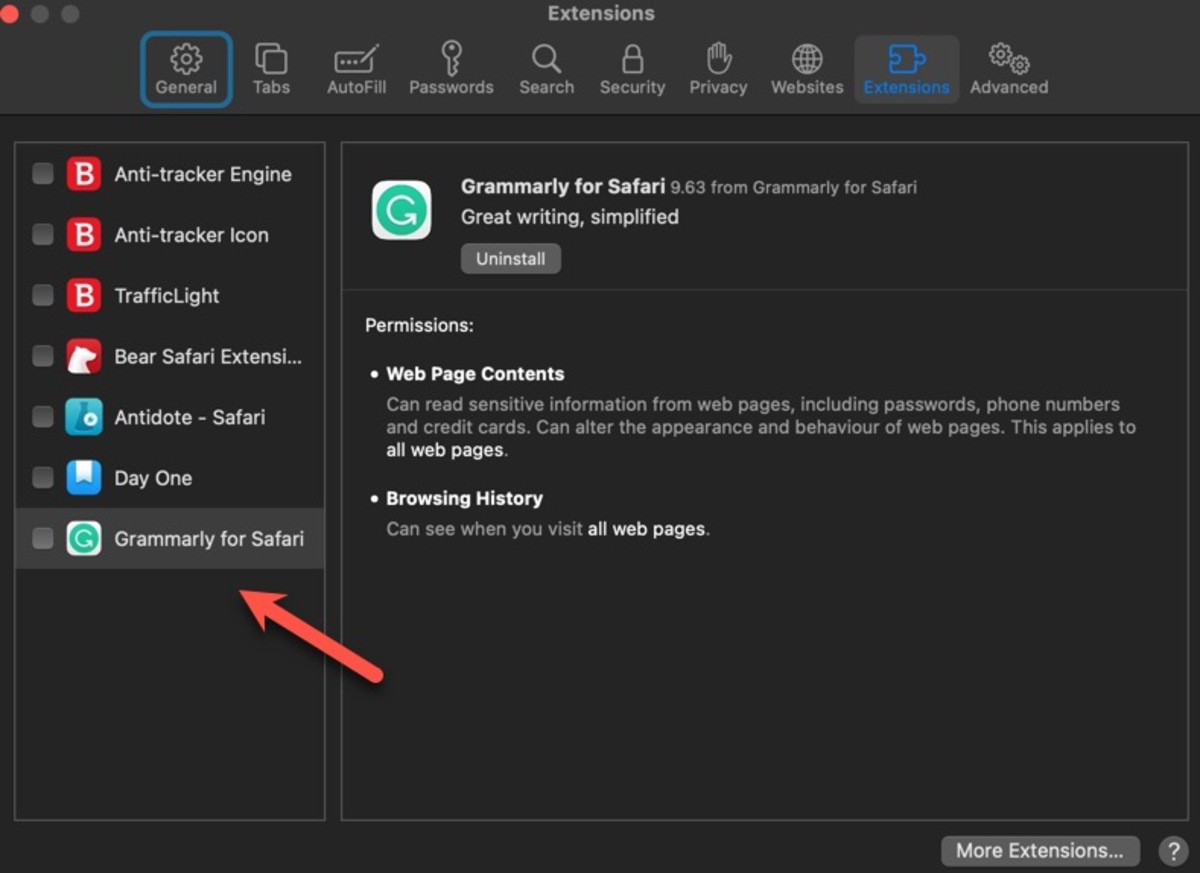
- If you do not see the Grammarly extension icon, you may need to manually enable it. In some applications, you can find the extension in the “Extensions” or “Add-ons” menu.
- Click on the Grammarly extension icon to open the Grammarly sidebar.
- The Grammarly sidebar will provide you with real-time suggestions and corrections as you type.
- If you are using a web browser, such as Chrome or Safari, Grammarly will automatically detect text fields on web pages and display the Grammarly extension icon. Simply click on the icon to enable Grammarly for that specific text field.
- To enable Grammarly for all text fields in your web browser, click on the Grammarly extension icon and select “Enable for all sites” or a similar option.
- Grammarly will now be enabled for all text fields in the selected application or web browser.
That’s it! You have successfully enabled Grammarly for all text fields on your Mac. Now, as you type in any application or website, Grammarly will provide you with suggestions to improve your grammar, spelling, punctuation, and style.
Remember to review the suggestions provided by Grammarly and make the necessary adjustments to enhance the quality of your writing. You can also customize Grammarly’s settings to suit your specific needs, which we’ll cover in the next step.
Step 5: Configure Grammarly settings for your needs
Grammarly offers a range of settings that you can customize to ensure it fits your writing style and preferences. Follow these steps to configure Grammarly settings according to your needs:
- Click on the Grammarly extension icon in the toolbar of your application or web browser.
- In the Grammarly sidebar, click on the “Settings” option.
- A new tab or window will open, displaying the Grammarly settings panel.
- Explore the various settings available, including language preferences, writing goals, tone detection, vocabulary enhancement, and more.
- Adjust the settings according to your preferences. For example, you can choose whether to receive suggestions for clarity, engagement, or formality.
- Customize the level of correction you want Grammarly to provide – from basic checks to more advanced suggestions.
- Toggle on or off specific writing genres or types, such as academic, business, or casual writing.
- Make use of the personal dictionary feature to add words or phrases that you commonly use, but may be flagged by Grammarly.
- Once you have configured your desired settings, close the settings panel.
By configuring the Grammarly settings, you can tailor the tool to align with your specific writing needs. This way, Grammarly can provide suggestions and corrections that are in line with your writing goals and style.
Feel free to revisit the settings panel at any time to make further adjustments, allowing Grammarly to continuously adapt and improve your writing experience.
Now that you have configured Grammarly settings for your needs, you’re ready for the final step – start using Grammarly on your Mac and reap the benefits of its powerful writing assistance.
Step 6: Start using Grammarly on your Mac
Now that you have successfully set up Grammarly on your Mac and customized the settings to fit your writing needs, it’s time to start using Grammarly and reap the benefits it offers. Follow these steps to begin using Grammarly on your Mac:
- Open any application or website where you want to use Grammarly to enhance your writing.
- If you’re using an application, such as Microsoft Word or Google Docs, ensure that the Grammarly extension is enabled by checking for the Grammarly extension icon in the toolbar.
- If you’re using a web browser, Grammarly will automatically detect text fields on web pages and display the Grammarly extension icon. Simply click on the icon to activate Grammarly for that specific text field.
- As you type, Grammarly will highlight any grammar, spelling, punctuation, or style errors in real-time.
- Review the suggestions and corrections provided by Grammarly in the sidebar or by hovering over the underlined words or phrases.
- Consider the suggestions provided by Grammarly and make the necessary edits to improve the overall quality of your writing.
- Grammarly’s suggestions can range from simple spelling corrections to more advanced grammar and style enhancements. Take advantage of the feedback to refine and polish your writing.
- Make sure to save your work regularly to ensure that any changes you make based on Grammarly’s suggestions are preserved.
By utilizing Grammarly on your Mac, you will be able to produce higher-quality writing with improved grammar, spelling, and style. Whether you’re writing an email, creating a document, or composing a social media post, Grammarly will be there to assist you every step of the way.
Remember to rely on your own judgment as well when considering Grammarly’s suggestions. While Grammarly is a powerful tool, it’s important to use it as a guide and not solely rely on its recommendations.
With Grammarly by your side, you can confidently tackle any writing task on your Mac and take your writing skills to new heights.
Conclusion
Congratulations! You’ve successfully learned how to add Grammarly to your Mac and take advantage of its powerful writing assistance. By following the step-by-step instructions in this guide, you’ve set up Grammarly, enabled it for all text fields, configured the settings according to your needs, and started using Grammarly to enhance your writing.
Grammarly is a valuable tool that can elevate the quality of your writing, help you catch grammar and spelling errors, and provide valuable suggestions for improving your writing style. Whether you’re a student, professional, or anyone who wants to refine their writing skills, Grammarly is an indispensable asset.
Remember to review the suggestions provided by Grammarly and use your own judgment to determine which changes are suitable for your specific writing style and purpose. Grammarly is there to guide you, but ultimately, you’re in control of your own writing process.
As you continue to use Grammarly on your Mac, you’ll witness improvements in the clarity, accuracy, and overall effectiveness of your writing. It will become an indispensable companion, ensuring that your written communication stands out.
So, enjoy the benefits of Grammarly and unleash your writing potential. From emails to essays, reports to social media posts, Grammarly will support you in crafting clear, concise, and error-free content.
Keep exploring Grammarly’s features and settings to make the most out of this powerful tool. And don’t forget to regularly update the Grammarly app on your Mac to access the latest enhancements and improvements.
Now, it’s time to unleash your creativity and confidently express your thoughts with Grammarly by your side. Happy writing!