Introduction
Welcome to the world of effective writing with Grammarly in Word on Mac! In today’s digital age, clear and error-free writing can significantly impact our personal and professional lives. Grammarly, a popular online writing assistant, offers a range of tools and features to help improve your writing skills and enhance your written communication.
Whether you’re a student, a professional, or a content creator, Grammarly can be an invaluable tool in refining your written content. From correcting grammar and spelling mistakes to providing suggestions for improving your writing style, Grammarly is designed to support you in your writing journey.
In this article, we will guide you through the process of installing Grammarly on your Mac, enabling it in Microsoft Word, and utilizing its powerful features. We will also delve into the functionality of the Grammarly plagiarism checker and offer insights into adjusting its settings to suit your writing needs. Additionally, we will explore the benefits of upgrading to the Grammarly Premium subscription for even more advanced writing assistance.
By the end of this guide, you will have a solid understanding of how to make the most of Grammarly in Word on your Mac and ultimately improve your writing skills, efficiency, and accuracy. So let’s dive in and unlock the full potential of this remarkable writing tool!
Installing Grammarly on Mac
Installing Grammarly on your Mac is a simple and straightforward process. Here’s how you can get started:
- Visit the Grammarly website on your preferred web browser.
- Click on the “Apps” tab in the upper-right corner of the page.
- Choose “Download for Mac” from the drop-down menu.
- Once the download is complete, open the installation file and follow the on-screen instructions to install Grammarly on your Mac.
- Once the installation is complete, you will be prompted to create a Grammarly account. You can either sign up using your email address or with your Google or Facebook account.
- After creating your account, you can start using Grammarly in your web browser by logging in to your account or proceed to integrate it with Microsoft Word for a seamless writing experience.
By following these steps, you will have successfully installed Grammarly on your Mac. Now, let’s move on to enabling Grammarly within Microsoft Word to harness its powerful writing assistance capabilities.
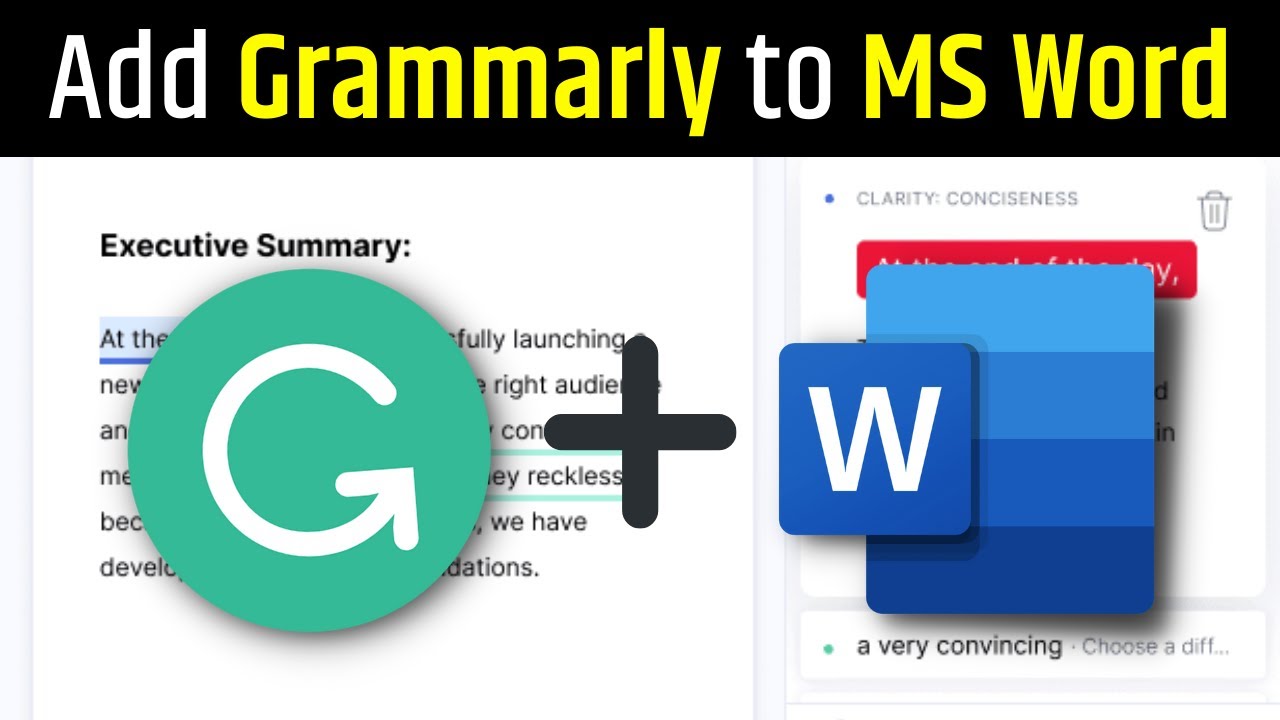
Enabling Grammarly in Microsoft Word
Once you have Grammarly installed on your Mac, you can easily enable it within Microsoft Word to enhance your writing experience. Here’s how:
- Open Microsoft Word on your Mac.
- In the top menu, click on “Preferences.”
- Under the “General” tab, click on “Grammarly.”
- Click on the “Sign In” button and enter your Grammarly account credentials.
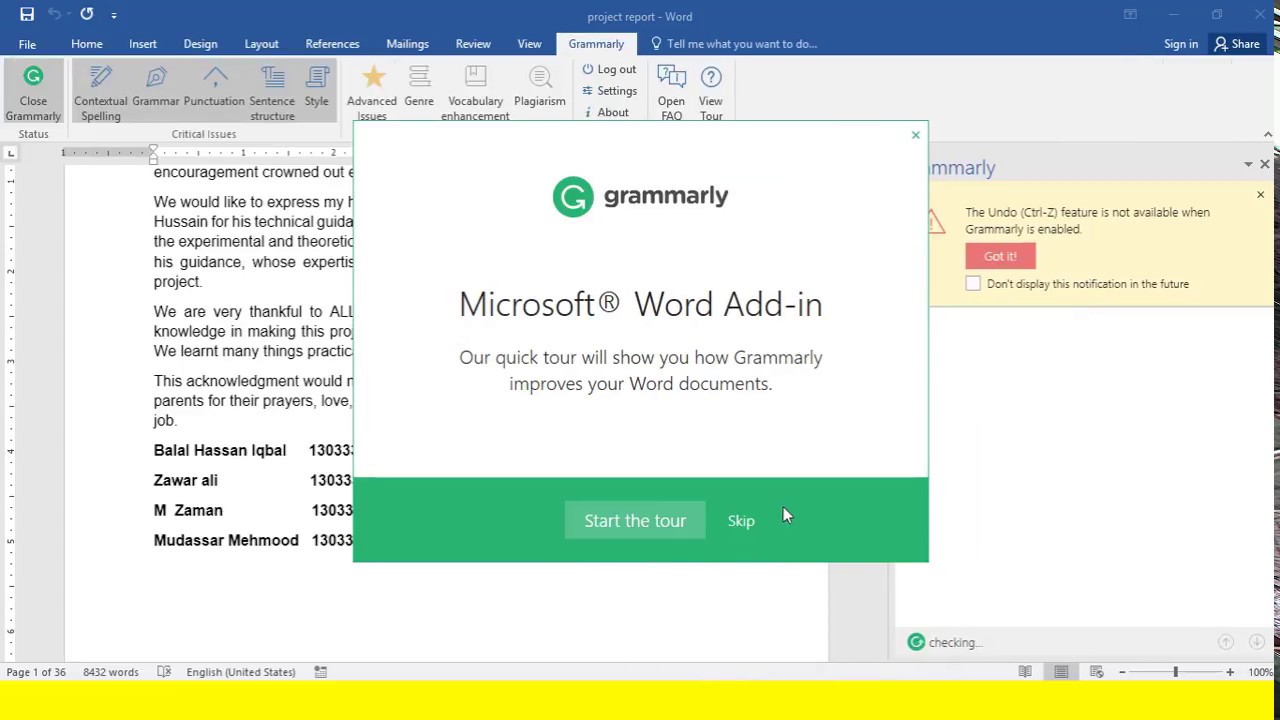
- Once signed in, you will see the Grammarly sidebar appear on the right-hand side of your Word document.
- Now, you can start writing your document as usual, and Grammarly will automatically analyze and provide suggestions to improve your writing.
Enabling Grammarly in Microsoft Word allows you to access Grammarly’s comprehensive writing assistance directly within the Word interface. The Grammarly sidebar will display suggestions for grammar, spelling, punctuation, clarity, engagement, and delivery as you write.
Additionally, Grammarly will provide real-time feedback, highlighting potential errors and offering suggestions for improvement. This real-time assistance ensures that you can catch and correct mistakes as you go, saving you time and enhancing the overall quality of your writing.
With Grammarly seamlessly integrated into Microsoft Word, you can write confidently, knowing that you have a powerful writing assistant at your fingertips. Let’s now explore how Grammarly can help you check grammar and spelling in your documents.
Checking Grammar and Spelling
Grammar and spelling errors can undermine the credibility and clarity of your writing. Luckily, with Grammarly in Word on Mac, you can easily catch and correct these errors. Here’s how:
- As you write in Microsoft Word, Grammarly will automatically underline potential grammar and spelling mistakes in real-time.
- To review Grammarly’s suggestions, simply click on the highlighted word or phrase.
- A Grammarly card will appear with a description of the error and suggested corrections.
- If you agree with Grammarly’s suggestion, you can click on it to automatically apply the correction to your text.
- If you disagree with Grammarly’s suggestion or want to explore alternative options, you can click on the “See More” option to view additional suggestions.
- To ignore Grammarly’s suggestion for a specific word or phrase, you can click on the “Ignore” option.
Grammarly’s advanced algorithms and extensive database help it identify a wide range of grammatical and spelling mistakes, ensuring that your writing is clear, concise, and error-free. By leveraging Grammarly’s suggestions, you can significantly improve the overall quality of your documents, whether it’s an important email, an academic assignment, or a professional report.
Additionally, Grammarly provides contextual suggestions, ensuring that your writing is not only grammatically correct but also maintains the appropriate tone and style. It can help you avoid using repetitive words, detect unclear sentence structure, and highlight instances of wordiness.
By utilizing Grammarly in Word on your Mac, you can confidently produce polished and professional writing that is free from embarrassing typos and grammar mistakes. Next, let’s explore Grammarly’s writing suggestions and how they can further enhance your writing skills.
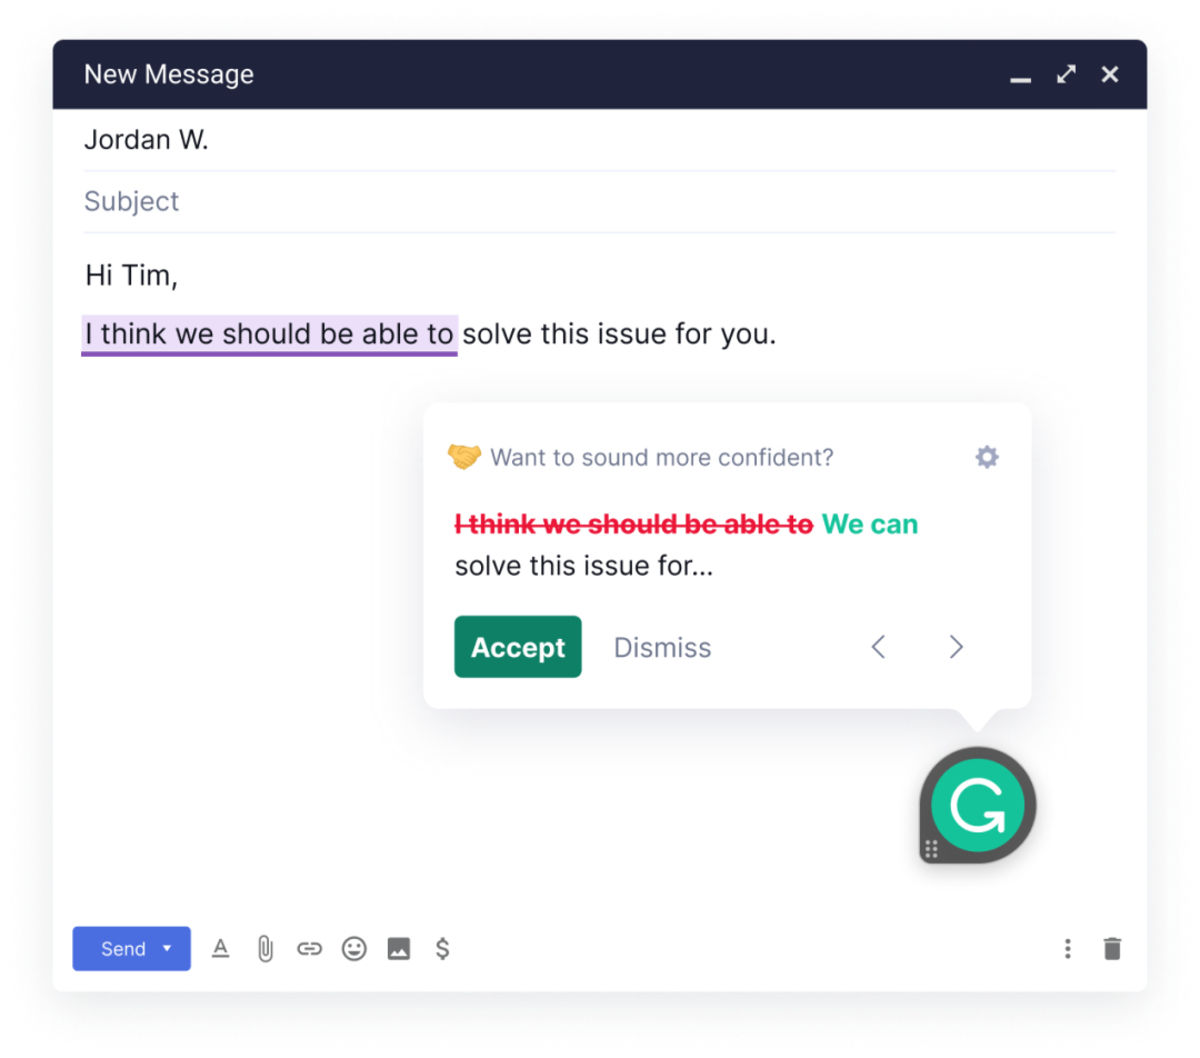
Using Grammarly’s Writing Suggestions
Grammarly offers a range of writing suggestions that go beyond just checking grammar and spelling. These suggestions are designed to improve the overall clarity, style, and effectiveness of your writing. Here’s how you can make the most of Grammarly’s writing suggestions:
- As you write in Microsoft Word with Grammarly enabled, the sidebar will display various types of suggestions, such as clarity, engagement, delivery, and more.
- Click on each suggestion to expand the details and understand how you can improve your writing in that particular area.
- Grammarly will provide specific recommendations and explanations to help you refine your writing style and enhance the overall effectiveness of your content.
- Take the time to review and consider each suggestion before making any changes to your text.
- With Grammarly’s suggestions, you can strengthen your writing by eliminating wordiness, improving sentence structure, and enhancing the overall flow and coherence of your text.
- Additionally, Grammarly will highlight instances where you may have used passive voice excessively or employed improper tone or formality for your intended audience.
The writing suggestions provided by Grammarly empower you to take your writing to the next level. They offer invaluable insights and recommendations that can help you communicate your message more effectively, engage your readers, and ensure that your writing is clear, concise, and impactful.
By incorporating Grammarly’s writing suggestions into your writing process, you can develop stronger written communication skills and improve the quality of your documents, no matter the context or purpose.
Now that we’ve explored Grammarly’s writing suggestions, let’s move on to another powerful feature: the Grammarly plagiarism checker.
Reviewing Grammarly’s Plagiarism Checker
Plagiarism is a serious offense that can have severe consequences in both academic and professional settings. Luckily, Grammarly provides a built-in plagiarism checker to help ensure the originality of your work. Here’s how you can make use of Grammarly’s plagiarism checker:
- In the Grammarly sidebar, click on the “Plagiarism” option.
- Grammarly will analyze your text and compare it to a vast database of published works, websites, and academic papers.
- Once the analysis is complete, Grammarly will provide you with a percentage indicating the level of originality of your text.
- If there are any instances of potential plagiarism, Grammarly will highlight them and provide suggestions on how to rephrase or cite the content appropriately.
- Review the flagged sections and make any necessary changes to ensure your work is free from plagiarism.
The Grammarly plagiarism checker is an invaluable tool for anyone concerned about maintaining the integrity of their writing. It can help you avoid accidental plagiarism by identifying instances where your text closely matches existing sources.
By taking advantage of Grammarly’s plagiarism checker, you can ensure that your work is original, properly cited, and free from unintentional replication. This is particularly essential for academic papers, research projects, articles, and any other form of written content that requires the presentation of unique and ethically-sourced information.
Now that we’ve explored Grammarly’s plagiarism checker, let’s proceed to the next section and discover how you can adjust Grammarly’s settings to tailor it to your specific writing needs.
Adjusting Grammarly’s Settings
Grammarly offers a range of customizable settings that allow you to tailor the tool to your unique writing style and preferences. Here’s how you can adjust Grammarly’s settings to suit your needs:
- In the Grammarly sidebar, click on the “Settings” option.
- Explore the different categories of settings, such as goals, tone, formality, and domains.
- Under the “Goals” category, you can specify your writing intent, whether it’s to inform, persuade, describe, or entertain.
- The “Tone” setting enables you to choose the appropriate tone for your writing, whether it’s formal, neutral, or informal.
- Under “Formality,” you can select the level of formality you want Grammarly to maintain throughout your writing.
- The “Domains” setting allows you to specify the type of writing you’re working on, such as academic, business, technical, or creative.
- Make the desired adjustments in each category to match your writing style and preferences.
By adjusting Grammarly’s settings, you can ensure that the tool provides suggestions and feedback that align with your specific goals, tone, and intended audience. This level of customization enhances the accuracy and effectiveness of Grammarly’s suggestions, making it an even more valuable writing assistant.
Furthermore, Grammarly allows you to add words to your personal dictionary, ensuring that specific terms, names, or technical vocabulary are not flagged as errors or suggested for modification.
Remember to regularly review and update your settings as your writing needs may change based on different projects, contexts, or personal preferences.
Now that we’ve explored how to adjust Grammarly’s settings, let’s move on to understand the benefits of upgrading to Grammarly Premium for an even more advanced writing experience.
Upgrading to Grammarly Premium
While the free version of Grammarly offers powerful writing assistance, upgrading to Grammarly Premium unlocks additional advanced features and benefits. Here’s why you may consider upgrading:
- Advanced Grammar and Clarity Checks: Grammarly Premium offers more advanced grammar and clarity checks, helping you achieve a higher level of writing proficiency.
- Vocabulary Enhancement: With Grammarly Premium, you gain access to an expanded vocabulary enhancement feature, which provides suggestions for more impactful and engaging word choices.
- Plagiarism Detection: Upgrade to Grammarly Premium to enjoy enhanced plagiarism detection, allowing you to ensure the originality of your work and avoid unintentional plagiarism.
- Writing Style and Tone Adjustments: Grammarly Premium allows you to fine-tune the tone and style of your writing, ensuring that it consistently aligns with your intended audience and purpose.
- Advanced Writing Insights: Premium users receive more detailed insights and personalized suggestions to help them refine their writing skills and improve their overall writing quality.
- 24/7 Customer Support: Grammarly Premium subscribers enjoy priority access to 24/7 customer support, ensuring prompt assistance and resolving any questions or concerns.
By upgrading to Grammarly Premium, you can take your writing to new heights and benefit from a host of additional features designed to enhance your writing skills and productivity.
Grammarly Premium offers excellent value for students, professionals, writers, and anyone committed to producing high-quality written content. It provides an extra layer of support and guidance to ensure that your writing is polished, accurate, and highly effective.
Now that we’ve explored the benefits of upgrading to Grammarly Premium, you are well-equipped to make an informed decision about unlocking the full potential of this remarkable writing tool.
In this article, we have covered the installation process, enabling Grammarly in Microsoft Word on Mac, checking grammar and spelling, utilizing Grammarly’s writing suggestions, reviewing the plagiarism checker, adjusting Grammarly’s settings, and exploring the benefits of Grammarly Premium. By leveraging Grammarly in Word on your Mac, you can confidently produce error-free, impactful, and professional writing in any context.
So, start using Grammarly in Word on your Mac today and witness the transformative power of this incredible writing assistant!
Conclusion
Grammarly in Word on Mac is a game-changing tool that empowers you to write with confidence and produce exceptional content. By following the simple steps to install Grammarly on your Mac and enabling it in Microsoft Word, you can unlock a world of writing assistance and refinement.
With Grammarly, you can not only catch and correct grammar and spelling errors but also receive valuable suggestions to improve your writing style, clarity, and overall effectiveness. The real-time feedback and in-depth analysis offered by Grammarly allow you to strengthen your writing skills and produce polished, professional, and error-free documents.
By using Grammarly’s plagiarism checker, you can ensure the originality of your work and avoid unintentional replication. This valuable feature helps you maintain the integrity of your writing and adhere to ethical standards, particularly in academic and professional environments.
Additionally, Grammarly’s customizable settings allow you to tailor the tool to suit your specific writing needs. Whether it’s adjusting the tone, formality, or goals of your writing, Grammarly provides a personalized writing experience that enhances your productivity and enhances the impact of your content.
For those looking to take their writing to the next level, upgrading to Grammarly Premium grants access to advanced features, including enhanced grammar checks, vocabulary enhancement, and more detailed writing insights. This premium version offers a comprehensive suite of tools to assist in refining your writing skills and producing exceptional content.
In conclusion, Grammarly in Word on Mac is an invaluable tool for anyone seeking to improve their writing proficiency and produce high-quality, error-free documents. Whether you’re a student, a professional, or a content creator, Grammarly is here to support and elevate your writing experience. So, make use of this powerful tool, unleash your writing potential, and witness the significant impact it can have on your written communication.