Introduction
Grammarly is a widely-used writing tool that helps users improve their writing skills and enhance the quality of their written content. Whether you’re a student, professional, or just someone who wants to communicate more effectively, Grammarly can be a valuable asset in your writing process. With its advanced grammar and spell checking capabilities, vocabulary enhancement suggestions, and plagiarism detection, Grammarly ensures that your writing is error-free, clear, and engaging.
Using Grammarly is a straightforward process that requires downloading and installing the software, creating an account, and customizing the settings according to your preferences. Once installed, Grammarly can be used in various ways, including in web browsers, Microsoft Word, and even on mobile devices. It offers additional features and benefits for those who choose to upgrade to Grammarly Premium.
Whether you’re a native English speaker or someone who is learning the language, Grammarly is an invaluable tool that can help you improve your writing skills and boost your confidence. In this tutorial, we’ll guide you through the process of turning on Grammarly and making the most out of its features. So, let’s get started!
Step 1: Downloading Grammarly
The first step in using Grammarly is to download the software onto your computer or device. Grammarly is available for Windows, Mac, iOS, and Android platforms, making it accessible to a wide range of users.
To download Grammarly, follow these simple steps:
- Visit the Grammarly website at www.grammarly.com.
- Click on the “Apps” tab, located at the top of the page.
- Select the appropriate version of Grammarly for your device by clicking on the relevant download button.
- Once the download is complete, open the installer file and follow the on-screen instructions to install Grammarly on your device.
Once the installation process is complete, you’re ready to move on to the next step and start using Grammarly to improve your writing.
Downloading Grammarly is a quick and simple process that ensures you have access to the tool whenever you need it. With Grammarly installed on your device, you’ll be able to seamlessly integrate it into your writing workflow, no matter what platform or application you’re using.
Step 2: Installing Grammarly
After downloading the Grammarly software onto your computer or device, the next step is to install it. The installation process is straightforward and only takes a few minutes to complete.
Here’s how to install Grammarly:
- Locate the installer file that you downloaded from the Grammarly website.
- Double-click on the file to open it.
- Follow the prompts in the installation wizard to complete the installation process.
- Once the installation is finished, Grammarly will be ready to use.
During the installation process, you may be asked to log in to your Grammarly account or create a new one if you don’t have an existing account. This step is important as it will allow you to save your preferences, documents, and access Grammarly across multiple devices.
Once the installation is complete, Grammarly will integrate itself into various applications and platforms, depending on the version you have installed. This ensures that Grammarly is readily available whenever and wherever you’re writing, enabling you to receive real-time suggestions and corrections as you type.
Installing Grammarly is crucial to fully unlock its potential and benefit from its powerful writing-enhancement features. By taking a moment to install Grammarly, you’ll be well on your way to improving the clarity, accuracy, and effectiveness of your writing.
Step 3: Creating a Grammarly Account
If you’ve completed the installation of Grammarly, the next step is to create an account. By creating an account, you’ll gain access to additional features and benefits that Grammarly offers exclusively to its registered users.
Here’s how to create a Grammarly account:
- Open the Grammarly application on your computer or device.
- If you’re not automatically prompted to log in, click on the “Log in” button in the upper-right corner of the screen.
- Click on the “Sign up” option to create a new account.
- Provide your email address, create a strong password, and select your writing goals and proficiency level. These details will help Grammarly tailor its suggestions and feedback to your specific needs.
- Click on “Sign up” to create your Grammarly account.
Once your account is created, you’ll have access to additional features, such as the ability to save and access your documents across different devices, track your writing progress, and receive personalized writing insights.
It’s important to note that you can also sign up for Grammarly using your Google or Facebook account, making the account creation process even more convenient.
By creating a Grammarly account, you’re taking full advantage of the wide array of features and benefits the tool has to offer. Having an account allows Grammarly to provide you with a more personalized writing experience, helping you achieve your writing goals more effectively.
Step 4: Customizing Grammarly Settings
Once your Grammarly account is created, it’s time to customize the settings to tailor the tool to your specific preferences and writing style. Customizing Grammarly settings allows you to receive suggestions and corrections that align with your individual needs and preferences.
Here’s how to customize Grammarly settings:
- Open the Grammarly application on your computer or device.
- Click on your profile picture or username in the upper-right corner of the screen to access the settings menu.
- From the dropdown menu, select “Settings” to open the settings page.
- Explore the different tabs and options in the settings page to customize Grammarly to your liking.
- Some of the customization options include selecting your preferred language, setting goals for your writing, adjusting the severity of the grammar and spelling checks, and enabling or disabling writing style suggestions.
- Take your time to review and modify the settings to match your specific preferences.
- Once you’re done customizing the settings, click on the “Save” or “Apply” button to save the changes.
By customizing Grammarly settings, you can ensure that the tool provides you with accurate and beneficial suggestions while keeping in line with your personal writing style and goals. Remember, the settings can be adjusted at any time, so feel free to experiment and fine-tune them according to your evolving needs.
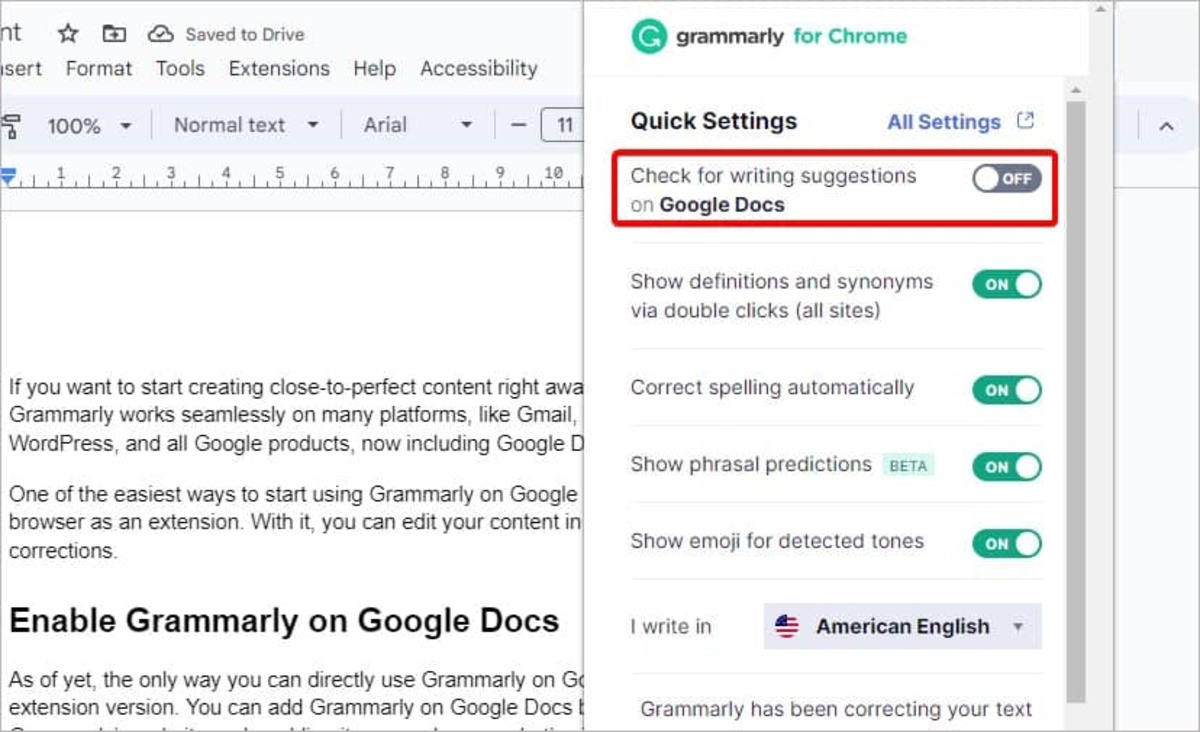
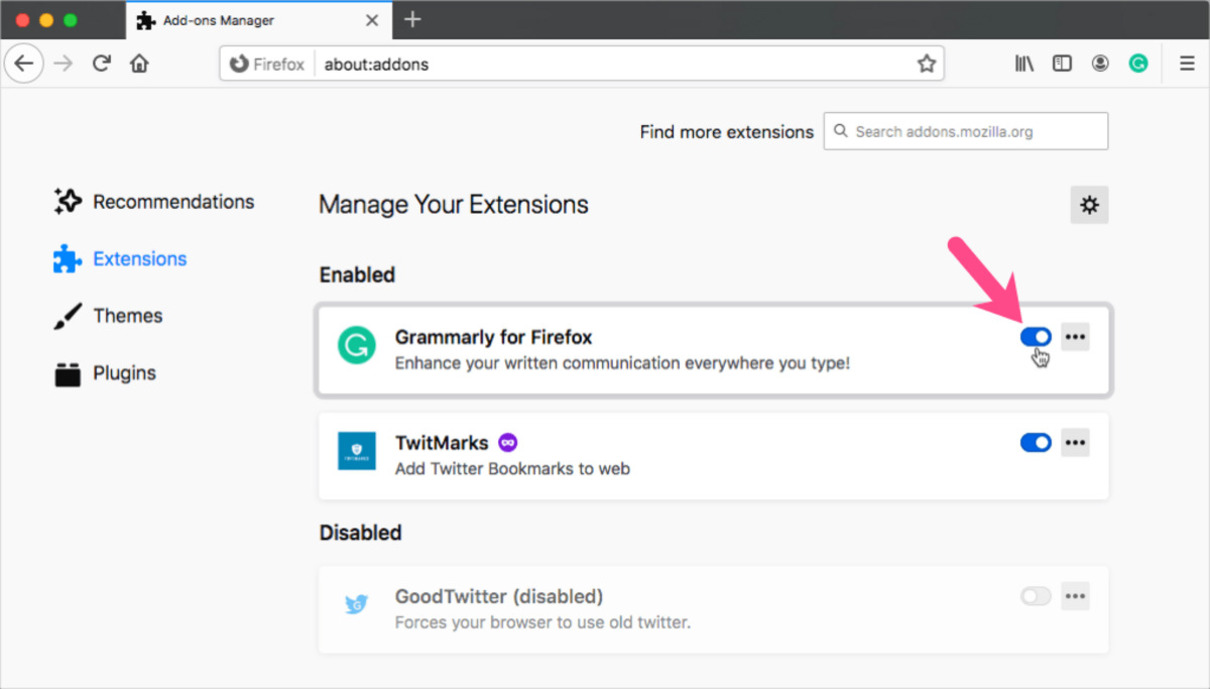
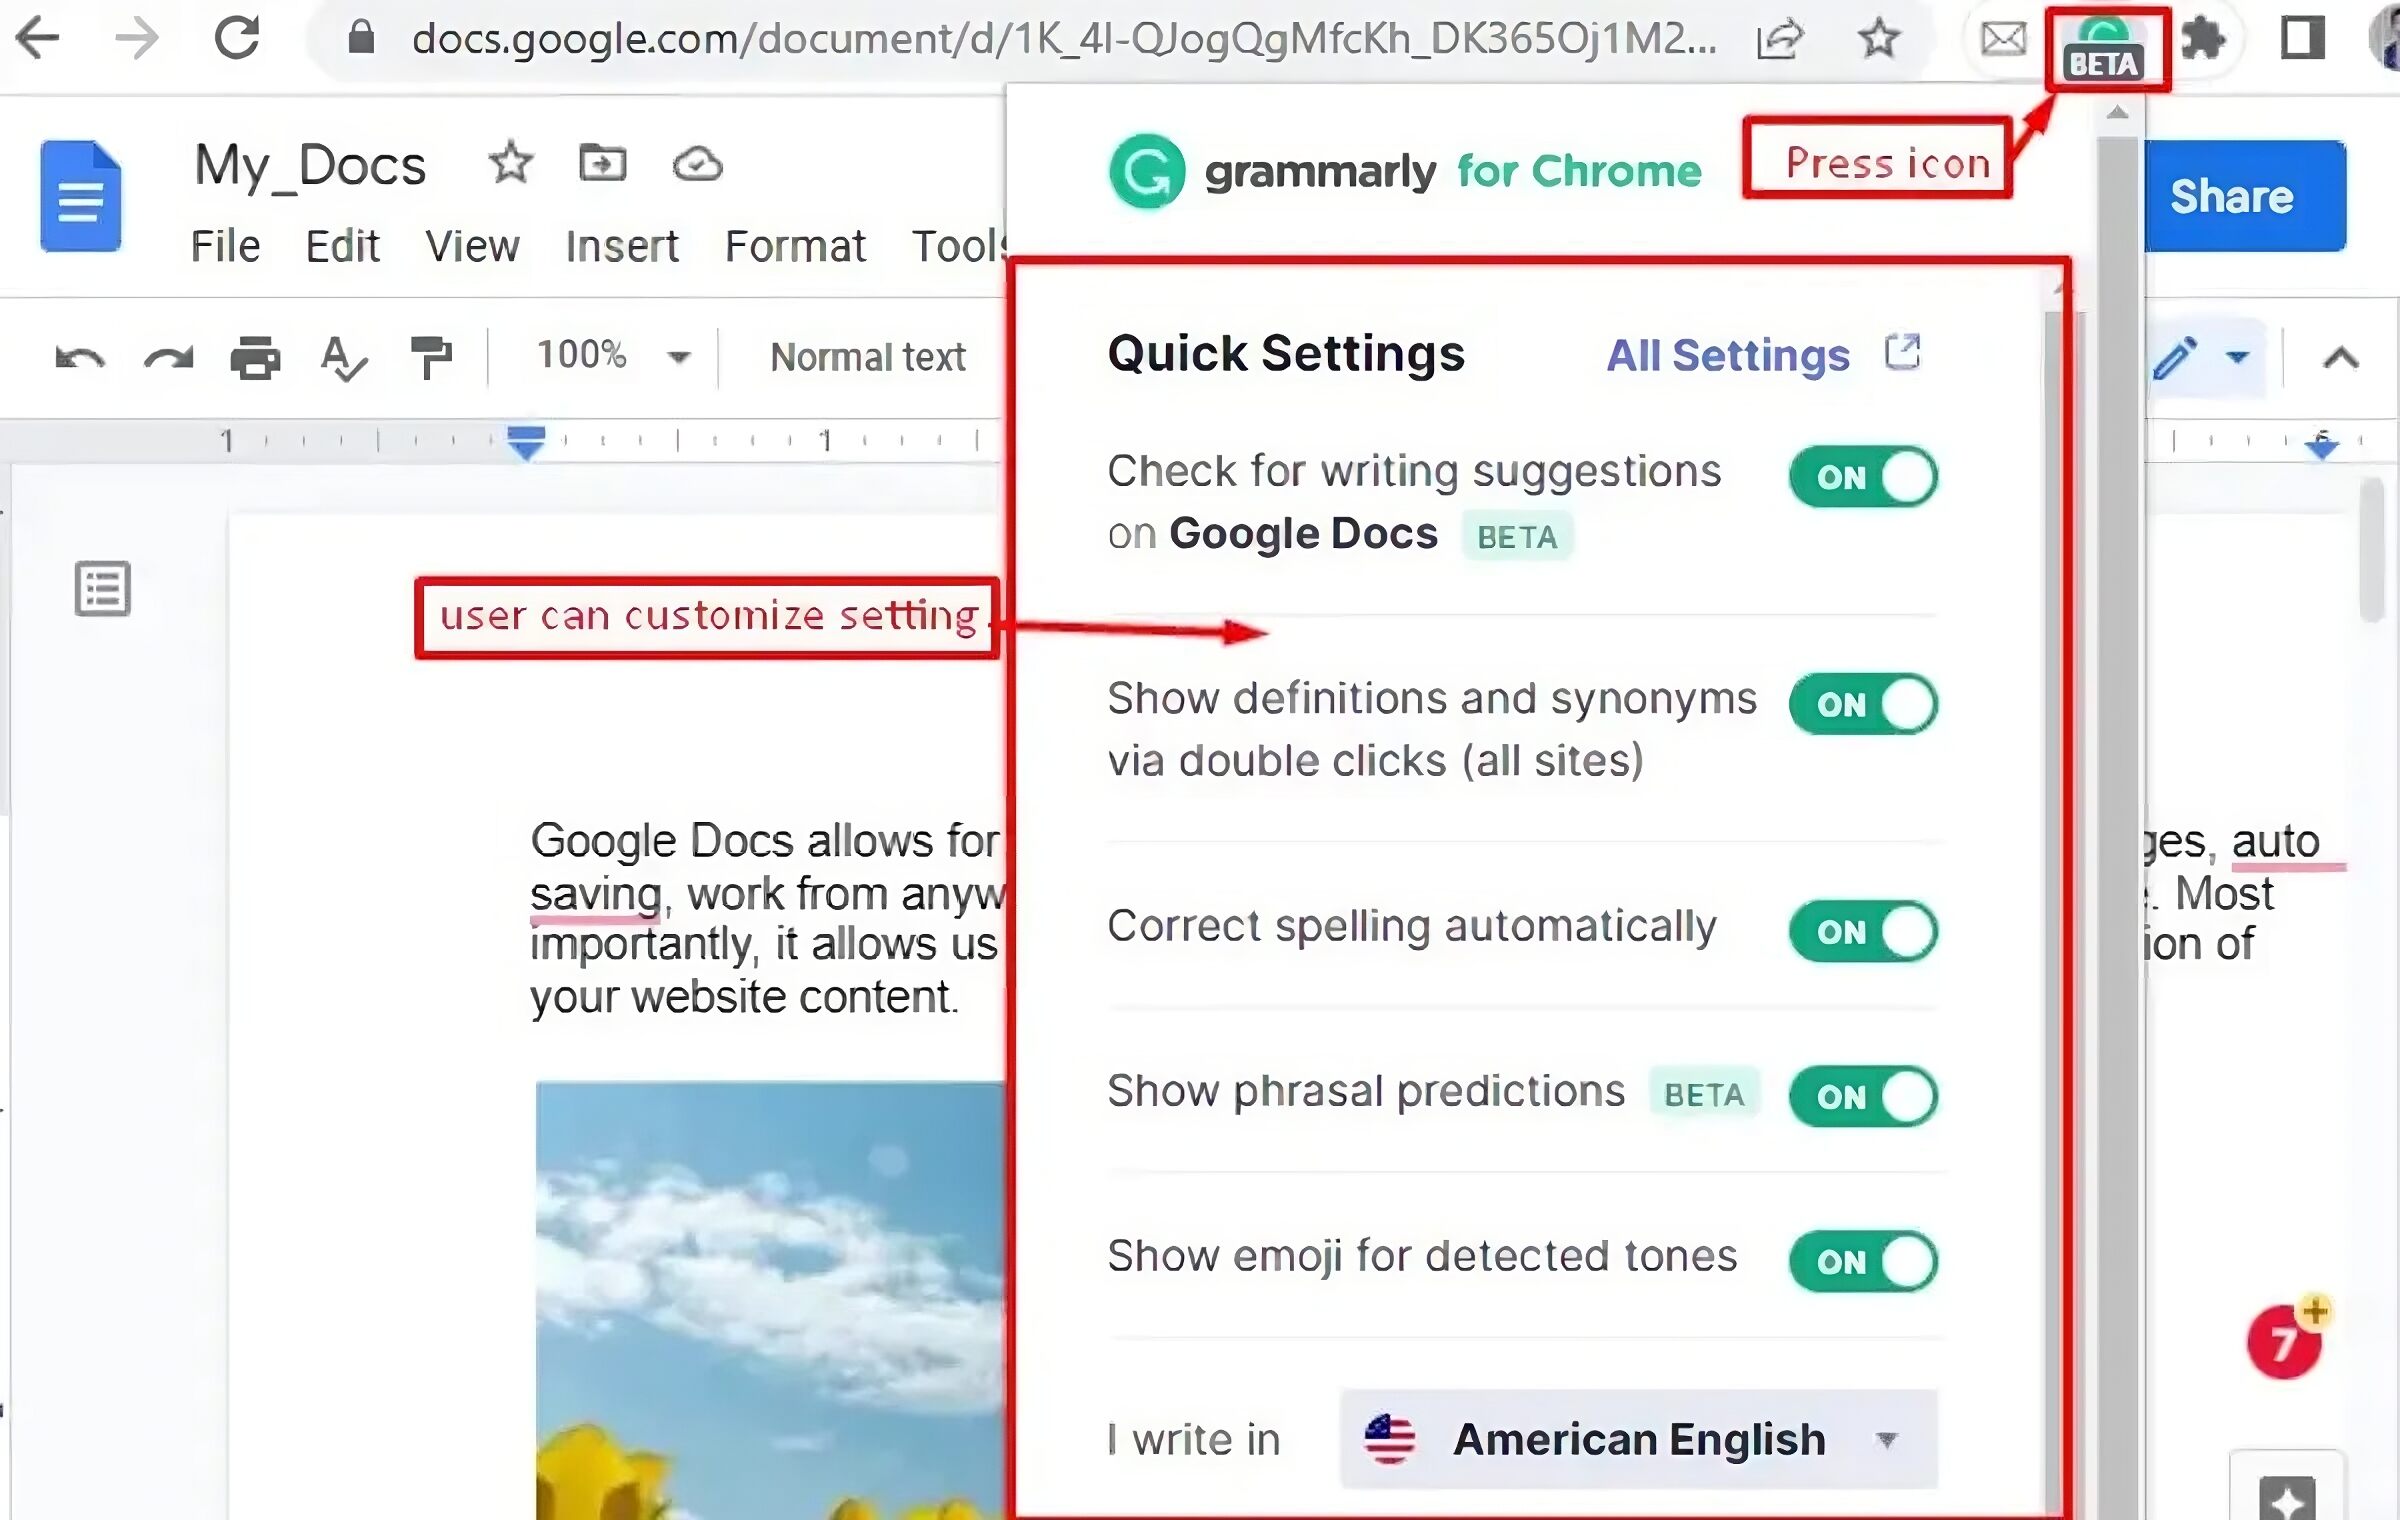
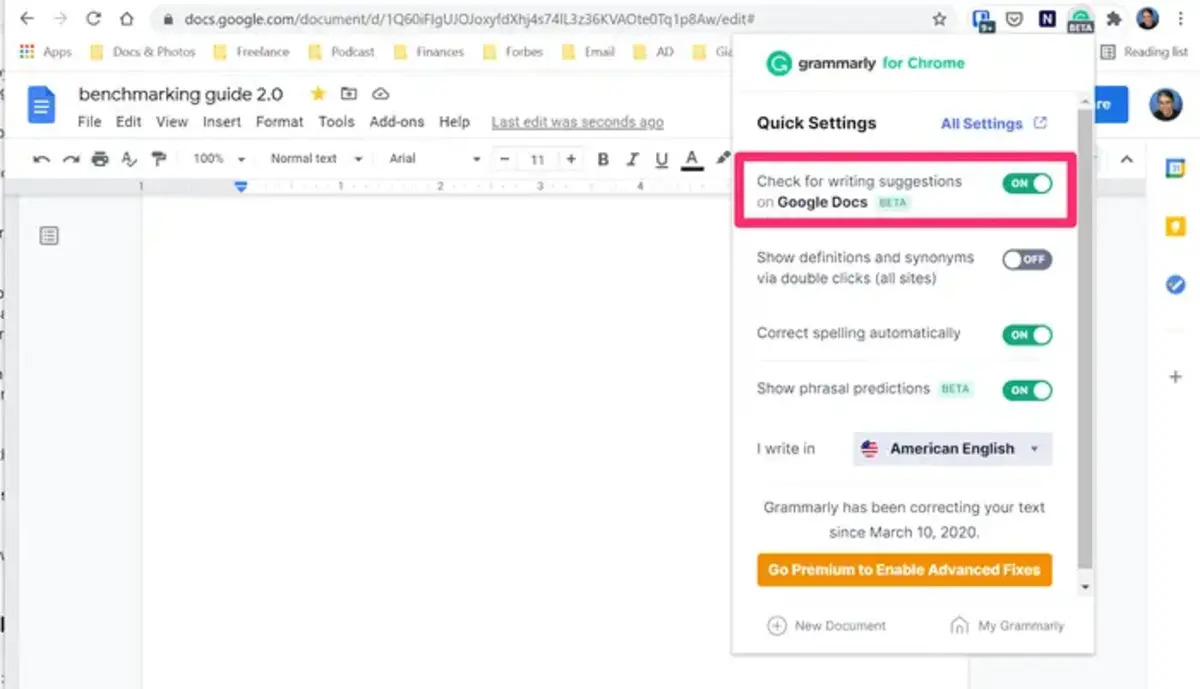
Step 5: Using Grammarly in Web Browsers
One of the convenient ways to utilize Grammarly is through web browsers. Grammarly is compatible with popular browsers like Google Chrome, Mozilla Firefox, and Microsoft Edge. By using Grammarly in your web browser, you can receive real-time suggestions and corrections as you type, ensuring that your online writing is polished and error-free.
Here’s how to use Grammarly in web browsers:
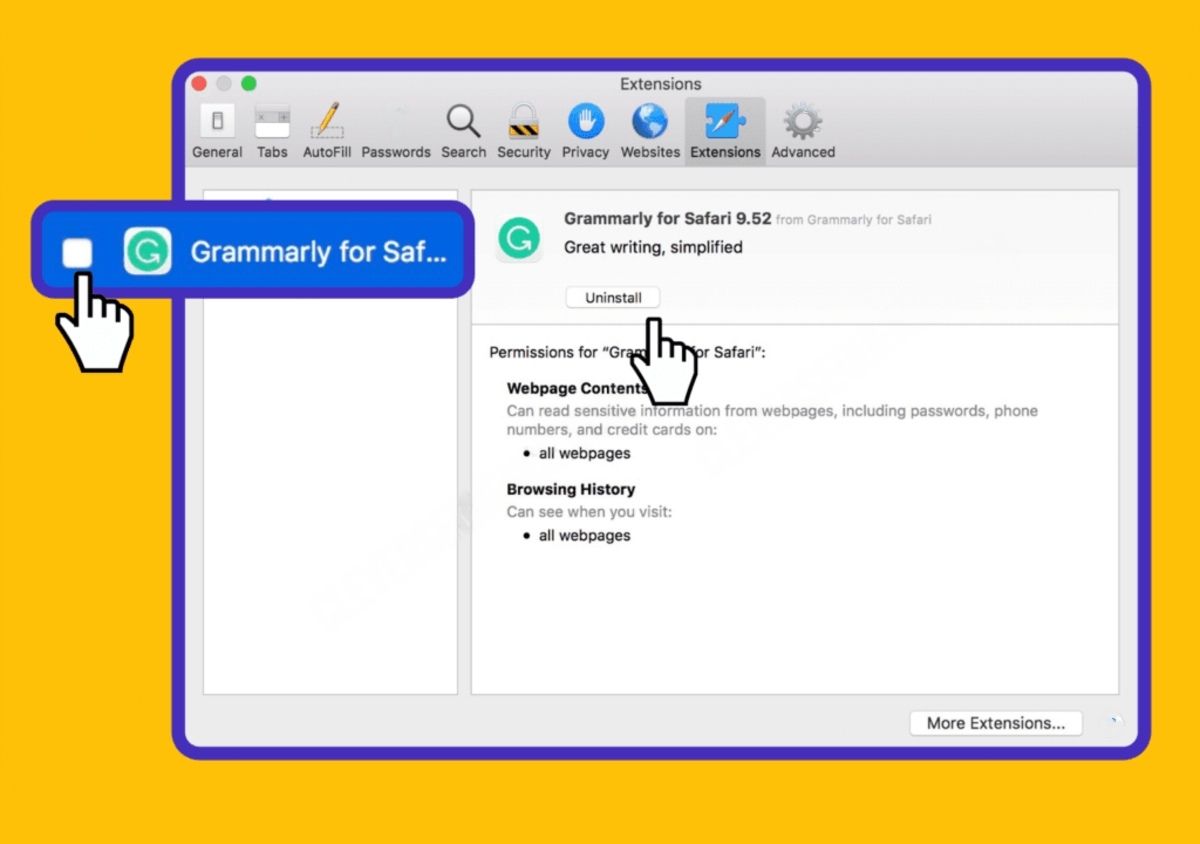
- Ensure that you have the Grammarly browser extension installed. If you haven’t installed it yet, visit the Grammarly website and click on the “Apps” tab to download and install the appropriate browser extension for your browser.
- Open your web browser and navigate to the website or platform where you want to write, such as an email composition window, a social media post, or a content management system.
- Once you’re on the writing platform, you’ll notice the Grammarly icon in the text input field or toolbar of your browser.
- Click on the Grammarly icon to activate the Grammarly editor. You’ll see a sidebar appear where you can view and interact with Grammarly’s suggestions and corrections.
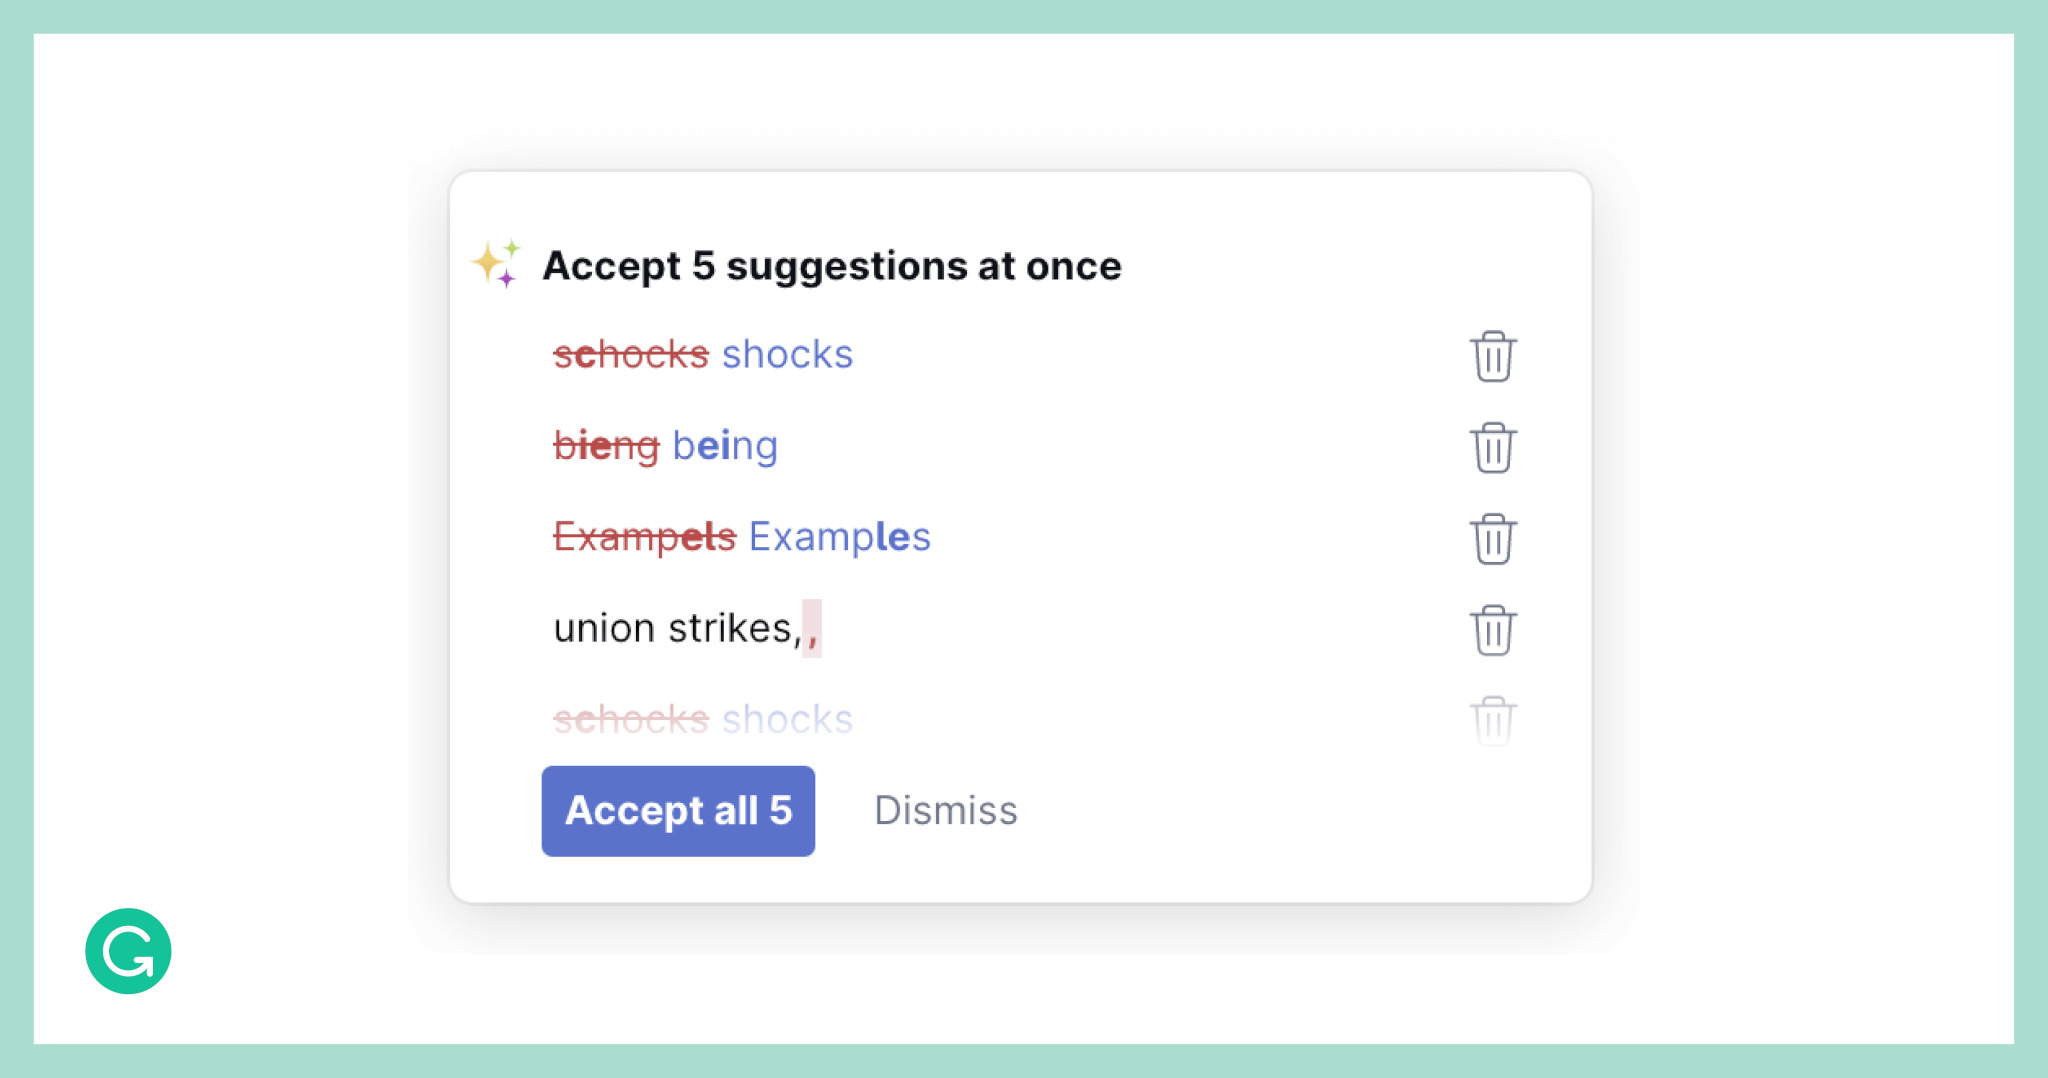
- As you type, Grammarly will automatically analyze your text and highlight any errors or areas for improvement.
- Click on the highlighted words or phrases to view Grammarly’s suggestions and select the appropriate correction option.
- Grammarly will also provide explanations and examples to help you understand the grammar rules and improve your writing skills.
- Continue writing and make use of Grammarly’s real-time feedback to refine your content.
Using Grammarly in web browsers allows you to enhance your writing in various online contexts, ensuring that your emails, social media posts, blog comments, and other online contributions are clear, concise, and error-free.
Remember to periodically review and implement Grammarly’s suggestions to improve your writing skills and create compelling online content.
Step 6: Using Grammarly in Microsoft Word
If you frequently use Microsoft Word for your writing tasks, you can seamlessly integrate Grammarly into your Word documents. Grammarly offers a dedicated add-in for Microsoft Word, which allows you to receive real-time suggestions and corrections directly within the Word application.
Here’s how to use Grammarly in Microsoft Word:
- Ensure that you have the Grammarly add-in for Microsoft Word installed. If you haven’t installed it yet, visit the Grammarly website and download the add-in specifically designed for Microsoft Office.
- Open Microsoft Word on your computer and create a new document or open an existing one.
- You’ll notice a new “Grammarly” tab in the Word ribbon menu at the top of the screen.
- Click on the “Grammarly” tab to access the Grammarly add-in.
- If you’re using Grammarly for the first time in Word, you may be prompted to log in to your Grammarly account.
- Start writing or editing your document in Microsoft Word.
- As you type, Grammarly will automatically analyze your text and highlight any errors or areas for improvement.
- Click on the underlined words or phrases to view Grammarly’s suggestions and select the appropriate correction option.
- Grammarly will provide explanations and examples to help you understand the grammar rules and improve your writing skills.
- Continue writing and make use of Grammarly’s real-time feedback to refine your content.
- You can also access additional Grammarly features, such as the document score, by clicking on the “Open Grammarly” button in the Grammarly tab.
Using Grammarly in Microsoft Word allows you to improve your writing skills within the familiar interface of Word. Whether you’re working on an important report, an academic paper, or any other type of document, Grammarly will provide you with valuable suggestions to enhance the clarity, grammar, and overall effectiveness of your writing.
Remember to review and implement Grammarly’s suggestions to continuously improve your writing and create professional-quality documents in Microsoft Word.
Step 7: Using Grammarly on Mobile Devices
Grammarly is not limited to desktop or laptop computers; it is also available for mobile devices, allowing you to improve your writing skills on the go. Whether you use an iOS or Android device, Grammarly offers a mobile app that seamlessly integrates with your writing tasks.
Here’s how to use Grammarly on mobile devices:
- Open the app store on your mobile device, such as the App Store for iOS or Google Play Store for Android.
- Search for “Grammarly” and download and install the Grammarly app.
- Once the app is installed, open it and either log in to your Grammarly account or create a new one if you don’t have an existing account.
- Allow the app to access necessary permissions, such as accessing your keyboard for real-time suggestions.
- Open any text editing app on your mobile device, such as a note-taking app or email composer.
- As you type in the text editing app, Grammarly will provide real-time suggestions and corrections, similar to the desktop experience.
- Tap on the underlined words or phrases to view Grammarly’s suggestions and select the appropriate correction option.
- Grammarly will also offer insights and explanations to help you understand the grammar rules and improve your writing skills.
- Continue writing and using Grammarly’s feedback to enhance your content while on your mobile device.
Using Grammarly on mobile devices empowers you to improve your writing skills wherever you are. Whether you’re composing an email, taking notes for an important meeting, or working on other writing tasks, Grammarly ensures that your writing is error-free and effective.
Remember to review and implement Grammarly’s suggestions to continually enhance your writing skills and create polished content on your mobile device.
Step 8: Upgrading to Grammarly Premium
While Grammarly offers a free version with robust writing enhancement features, upgrading to Grammarly Premium unlocks a range of additional benefits and advanced functionalities. Grammarly Premium provides comprehensive writing support, making it a valuable investment for those who want to take their writing to the next level.
Here’s how to upgrade to Grammarly Premium:
- Open the Grammarly application on your computer or mobile device.
- Click on your profile picture or username to access the settings menu.
- From the dropdown menu, select “Go Premium” or “Upgrade to Premium”.
- You’ll be redirected to the Grammarly Premium subscription page.
- Select the subscription plan that best fits your needs, such as monthly, quarterly, or annual.
- Enter your payment details and complete the subscription process.
- Once your payment is confirmed, your Grammarly account will be upgraded to Premium.
With Grammarly Premium, you’ll gain access to features such as advanced grammar and punctuation checks, vocabulary enhancement suggestions, genre-specific writing style checks, and plagiarism detection.
Grammarly Premium is especially beneficial for professionals, students, and anyone who requires impeccable and error-free writing. It provides tailored suggestions and insights that can help refine your content, improve your writing skills, and make a lasting impression on your audience.
By upgrading to Grammarly Premium, you’ll have the advantage of advanced writing support and enhanced features, enabling you to produce high-quality and professional-level writing with ease.
Conclusion
Grammarly is an essential tool for anyone looking to enhance their writing skills and improve the quality of their written content. With its advanced grammar and spelling checks, vocabulary enhancement suggestions, and plagiarism detection capabilities, Grammarly ensures that your writing is error-free, clear, and engaging.
Throughout this tutorial, we’ve covered the steps to get started with Grammarly, including downloading and installing the software, creating a Grammarly account, customizing the settings, and using Grammarly in web browsers, Microsoft Word, and on mobile devices. We’ve also discussed the benefits of upgrading to Grammarly Premium for additional features and advanced functionalities.
By following these steps and integrating Grammarly into your writing process, you’ll be able to produce well-crafted and polished content, whether it’s for academic purposes, professional projects, or everyday communication.
Remember, Grammarly is more than just a grammar checker. It’s a powerful tool that provides valuable feedback, helps you refine your writing style, and improves your overall communication skills. With practice and consistent use, Grammarly can enhance your writing proficiency and boost your confidence in conveying your ideas effectively.
So, embrace the power of Grammarly, make it an essential part of your writing routine, and watch your writing skills flourish!