Introduction
Grammarly is a highly popular writing assistant tool that helps users improve their writing by checking for grammar, spelling, punctuation, and style errors. While Grammarly can be a valuable tool for many individuals, there may come a time when you want to turn it off temporarily or remove it altogether.
Whether you need to disable Grammarly in your web browser, turn it off on your Windows or macOS device, remove it from your mobile device, or uninstall it completely from your computer, we’ve got you covered. In this article, we will guide you through various methods to turn off Grammarly, depending on your specific needs.
It’s worth noting that turning off Grammarly doesn’t mean that you won’t be able to use it again in the future. You can always reactivate it or reinstall it whenever you need its assistance. So, without further ado, let’s explore the different methods to disable Grammarly and regain control over your writing experience.
Method 1: Turning off Grammarly in the Web Browser
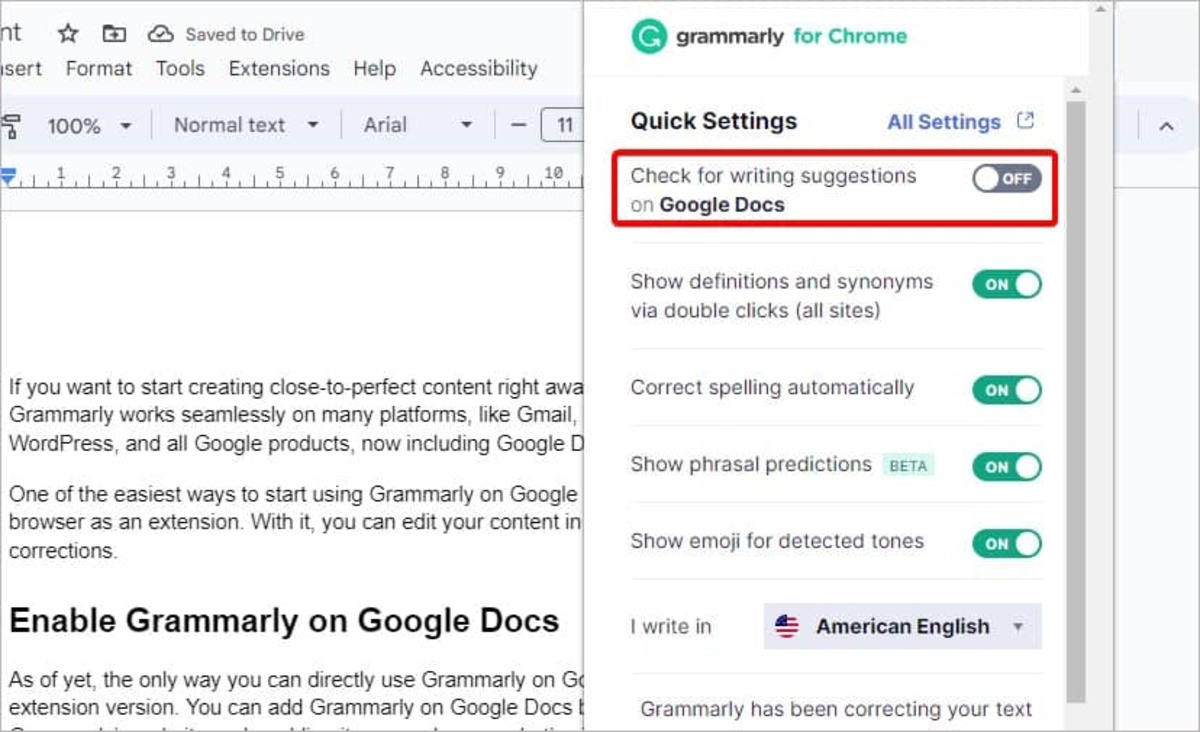
If you primarily use Grammarly through a web browser extension, such as Chrome, Firefox, or Safari, disabling it is a simple process. Here’s how you can turn off Grammarly in your web browser:
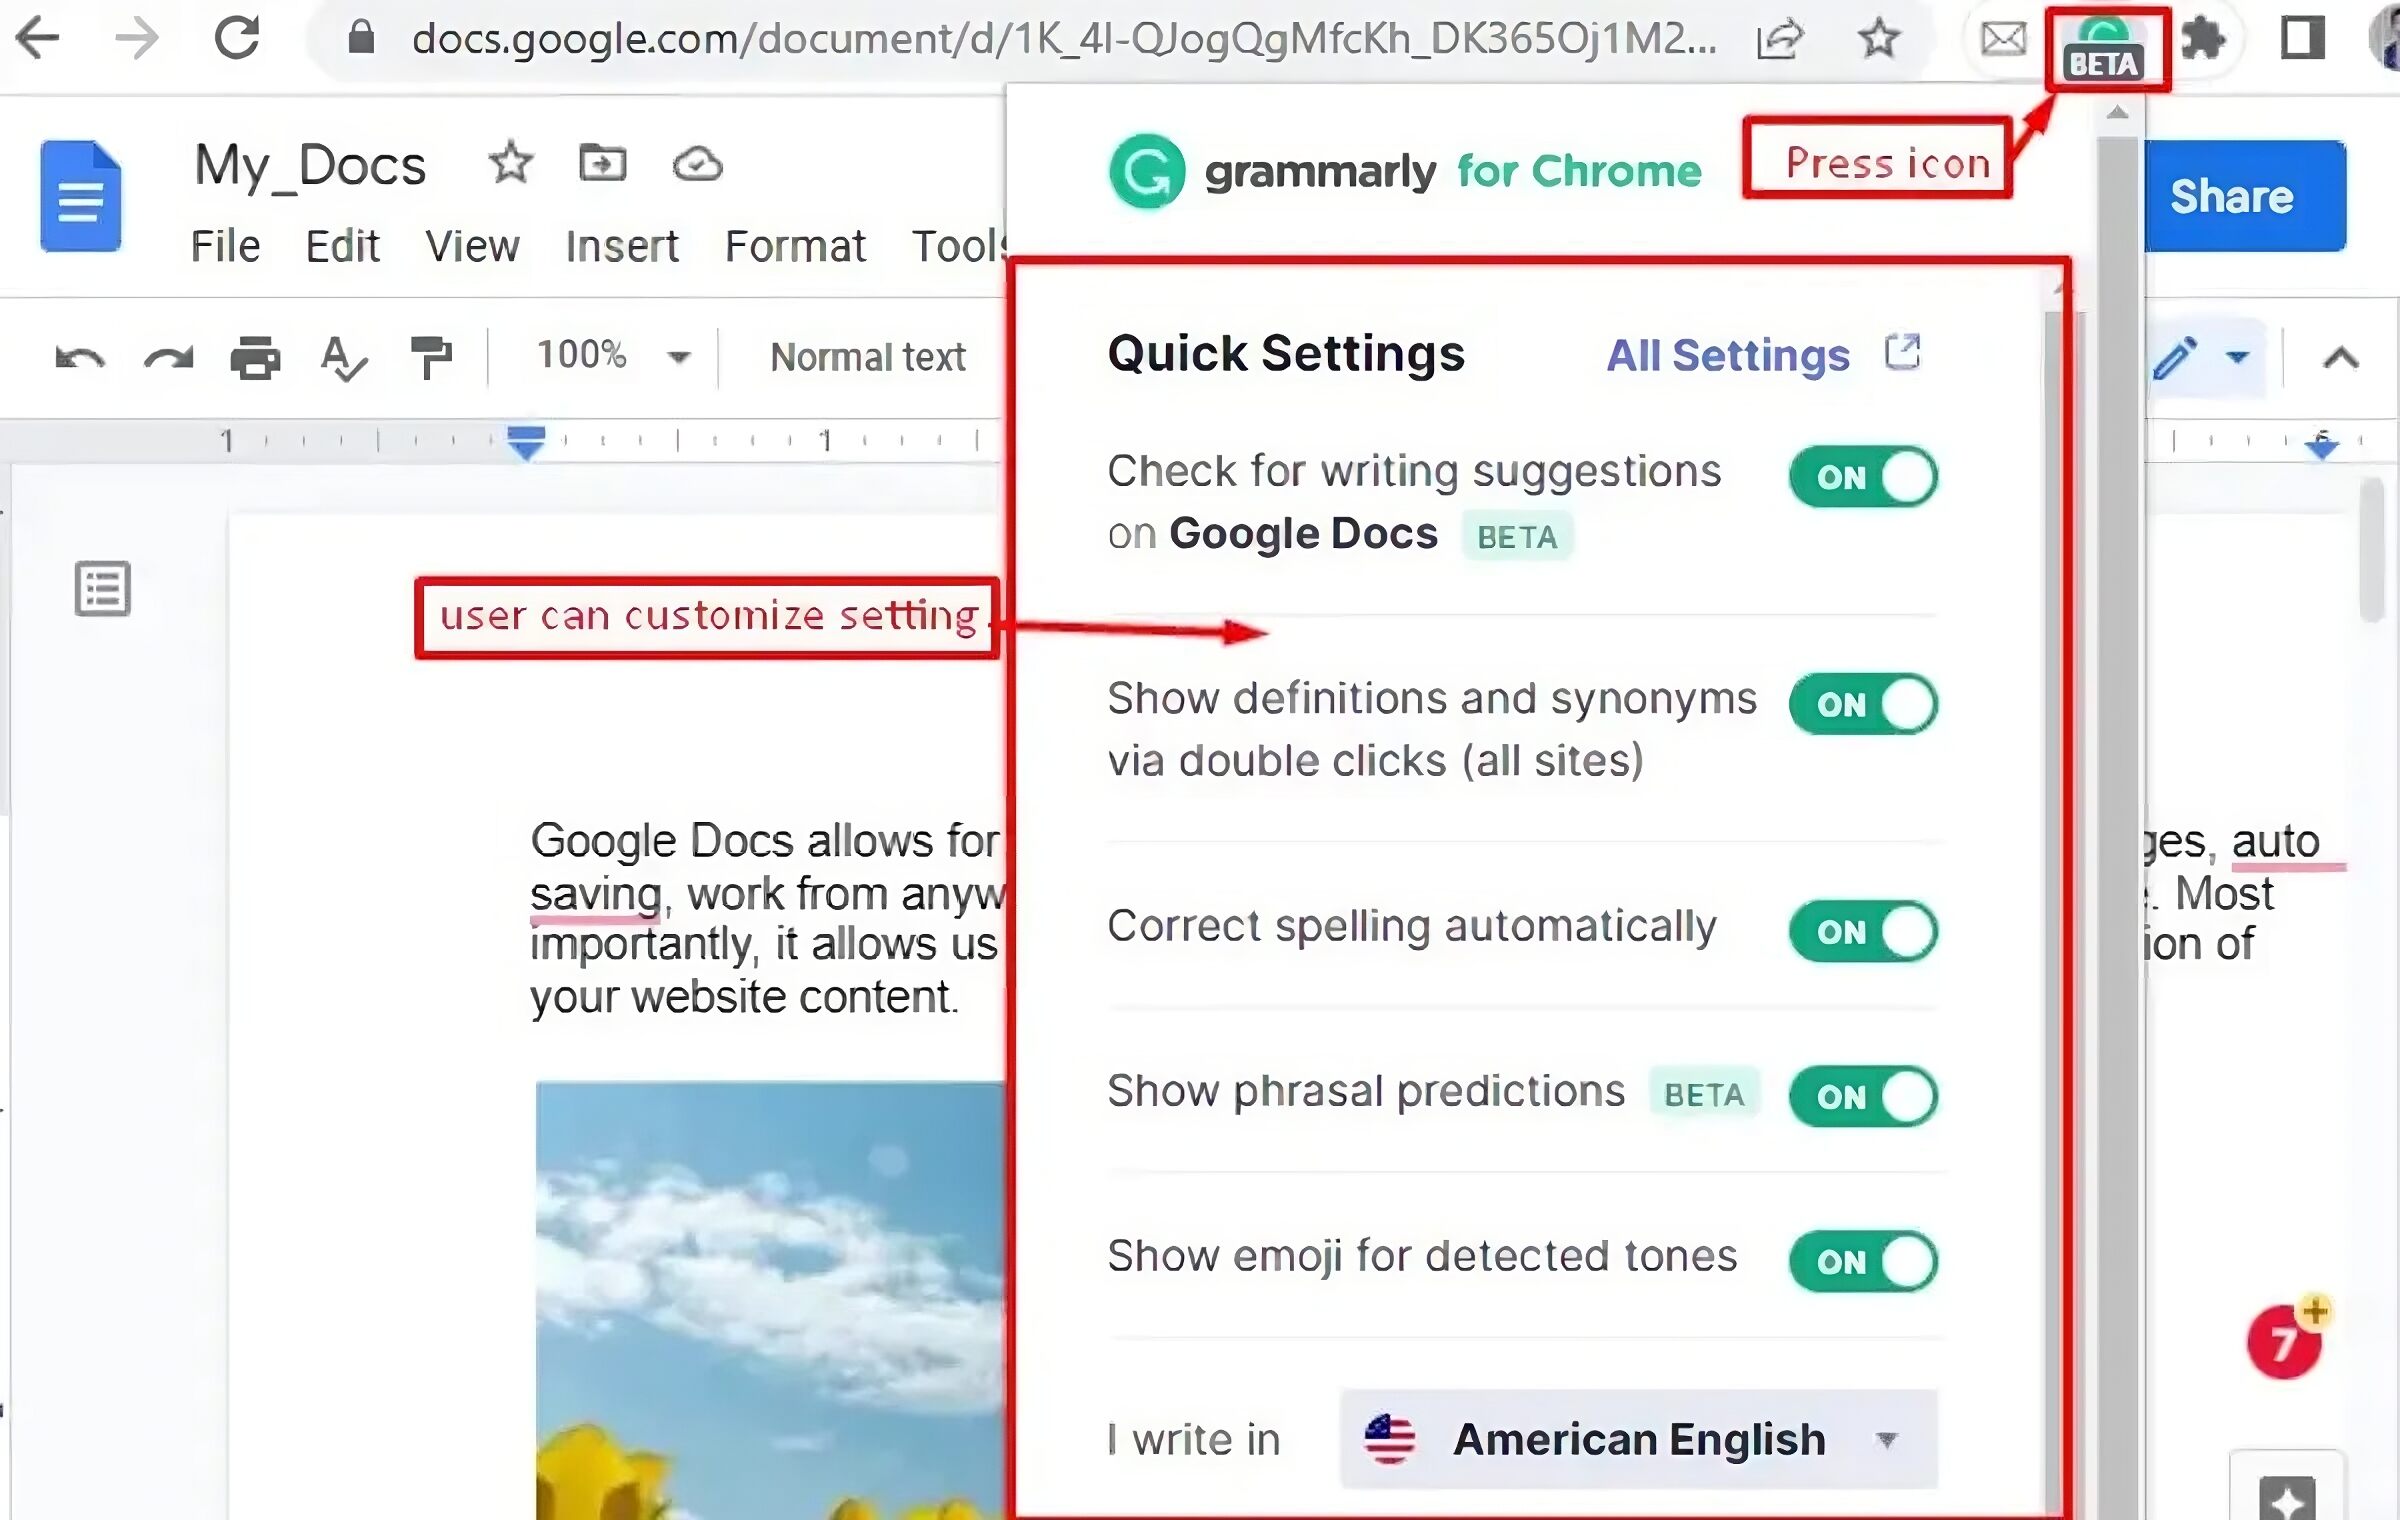
- Start by locating the Grammarly extension icon in your browser’s toolbar. It is usually represented by a capital “G” or the Grammarly logo.
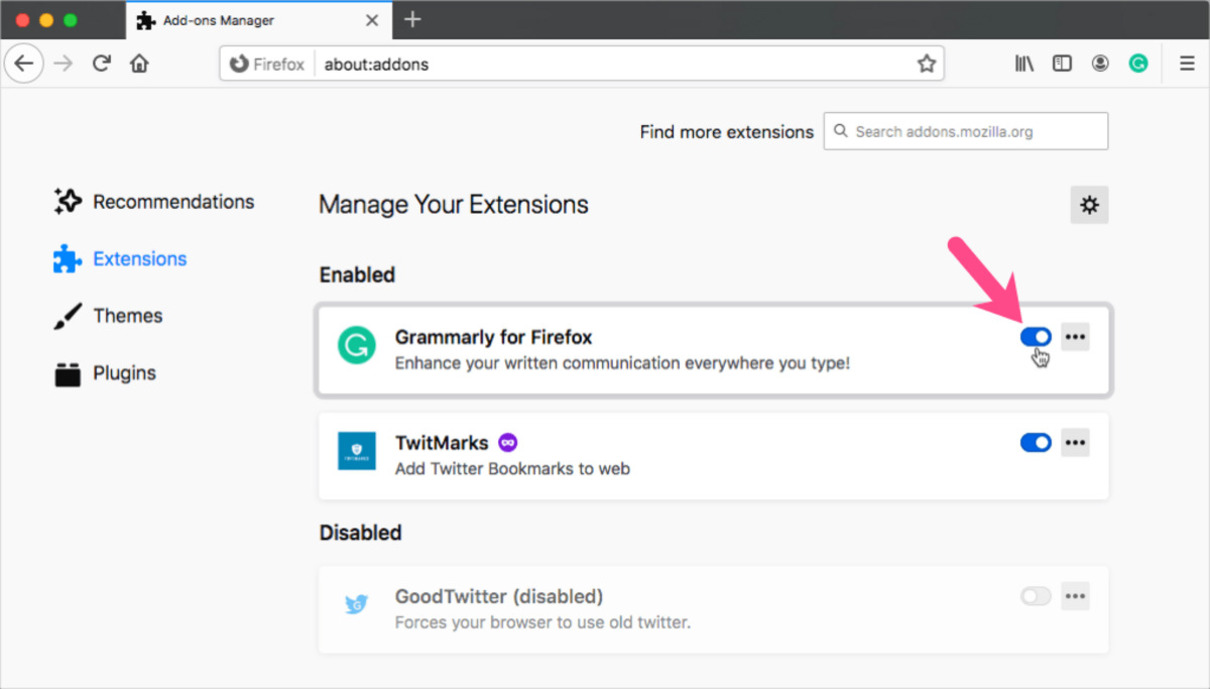
- Right-click on the Grammarly icon and select the “Manage Extensions” or “Manage Add-ons” option from the context menu.
- A new tab or window will open, displaying the list of installed extensions. Look for Grammarly in the list and click on the “Disable” or “Turn Off” button next to it.
- After disabling Grammarly, refresh your web page to ensure that the changes take effect.
Once you’ve completed these steps, Grammarly will be temporarily disabled in your web browser. You won’t receive any suggestions or corrections from Grammarly until you choose to enable it again.
It’s worth mentioning that the process of disabling Grammarly in different web browsers may vary slightly. However, the basic steps outlined above should provide a good starting point regardless of the browser you are using.
Method 2: Disabling Grammarly on Windows or macOS
If you have Grammarly installed on your Windows or macOS device as a standalone application, turning it off is a straightforward process. Here’s how you can disable Grammarly on your computer:
- Locate the Grammarly icon in your system tray (Windows) or menu bar (macOS). It is typically represented by a capital “G” or the Grammarly logo.
- Click on the Grammarly icon to open the Grammarly application.
- In the Grammarly window, select the three-dot menu icon (also known as the “hamburger” icon) located at the top-left corner.
- From the dropdown menu, navigate to the “Settings” option and click on it.
- In the Settings menu, you will find an option to disable Grammarly. Toggle the switch to turn off Grammarly temporarily.
Once you have disabled Grammarly through the application settings, it will stop providing suggestions and corrections in your writing. You can easily re-enable Grammarly by following the same steps and toggling the switch back on.
If you prefer not to see the Grammarly icon in your system tray or menu bar, you can also choose to exit the Grammarly application altogether. Right-click the Grammarly icon and select the option to exit. This will disable Grammarly until you launch the application again.
Remember, disabling Grammarly on your Windows or macOS device is reversible. You can turn it back on whenever you want to resume using its writing assistance features.
Method 3: Removing Grammarly from Mobile Devices
If you have been using Grammarly on your mobile device, such as an Android smartphone or an iPhone, and you no longer wish to have it installed, you can easily remove it. Here’s how you can remove Grammarly from your mobile device:
- Locate the Grammarly app on your home screen or in your app drawer.
- Tap and hold the Grammarly app icon until your device enters edit mode.
- Drag the Grammarly app icon to the “Uninstall” or “Remove” option that appears at the top or bottom of your screen.
- Confirm the uninstallation by selecting “OK” or “Uninstall” when prompted.
The Grammarly app will be completely removed from your mobile device once you complete these steps. This means that you will no longer have access to Grammarly’s writing assistance on your mobile device.
If you later decide that you want to use Grammarly again, you can visit the Google Play Store (for Android devices) or the App Store (for iOS devices) and reinstall the Grammarly app.
Removing Grammarly from your mobile device is a permanent action. Make sure you are certain about your decision before proceeding with the uninstallation process.
Note: The exact steps for uninstalling apps may vary slightly depending on the make and model of your mobile device and the operating system version you are using. Please refer to your device’s user manual or the respective app store documentation for more specific instructions.
Method 4: Uninstalling Grammarly from Your Computer
If you have Grammarly installed directly on your computer and you no longer wish to use it, you can uninstall it to remove it completely. Here’s how you can uninstall Grammarly from your computer:
- On Windows:
- Open the Control Panel by searching for it in the Windows search bar.
- In the Control Panel, select “Uninstall a program” or “Programs and Features” (depending on your version of Windows).
- A list of installed programs will appear. Find Grammarly in the list and click on it.
- Select the “Uninstall” or “Remove” option, and follow the prompts to complete the uninstallation process.
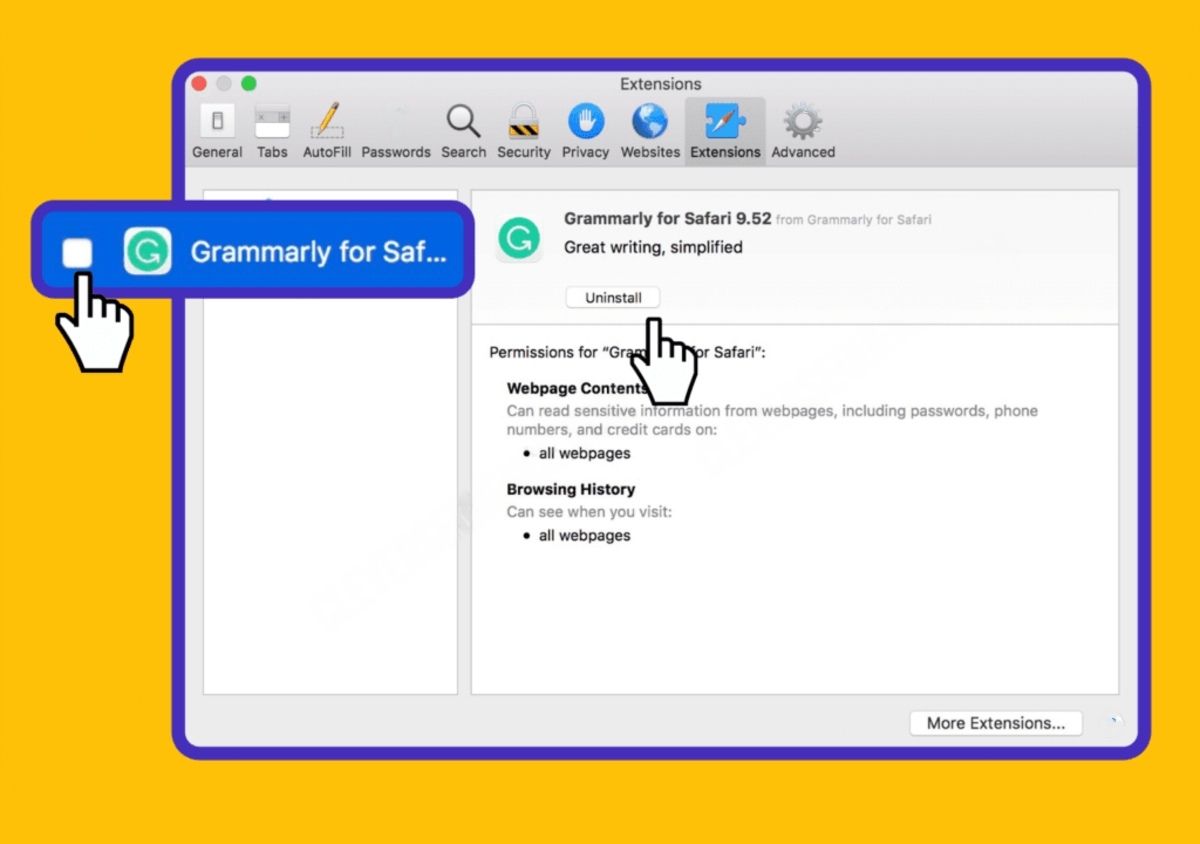
- On macOS:
- Open the Finder.
- In the menu bar at the top of the screen, click on “Go” and select “Applications” from the dropdown menu.
- Locate Grammarly in the Applications folder.
- Drag the Grammarly app to the trash bin icon on your Dock or right-click on Grammarly and select “Move to Trash”.
- To completely uninstall Grammarly, empty your trash bin by right-clicking on it and selecting “Empty Trash”.
By following these steps, you will successfully uninstall Grammarly from your computer. This means that all Grammarly files and settings will be removed, and you won’t have access to Grammarly’s writing assistance anymore.
If you ever decide to reinstall Grammarly in the future, you can visit the Grammarly website and download it again.
Remember, uninstalling Grammarly is a permanent action. Make sure you have made the necessary backups or have alternative writing tools in place before proceeding.
Please note that the exact steps for uninstallation may vary slightly depending on your operating system and the version of Grammarly you have installed.
Conclusion
In this article, we have explored various methods to turn off, disable, or remove Grammarly depending on your specific needs. Whether you want to temporarily disable Grammarly in your web browser, turn it off on your Windows or macOS device, remove it from your mobile device, or uninstall it completely from your computer, you now have the knowledge to do so.
Turning off Grammarly gives you the flexibility to choose when and how you utilize its writing assistance features. It can be helpful when you want to write without constant suggestions or corrections or when you prefer to use alternative writing tools.
Remember, disabling or uninstalling Grammarly doesn’t mean saying goodbye forever. You can always reactivate it, reinstall it, or even explore other writing assistant tools if you find the need for them later on.
By following the step-by-step instructions provided in this article, you should be able to easily turn off Grammarly in your web browser, disable it on your Windows or macOS device, remove it from your mobile device, or uninstall it completely from your computer.
Now that you have the knowledge to take control of your Grammarly usage, you can enjoy a more personalized writing experience, tailored to your needs and preferences.
So, go ahead and give these methods a try, experiment with different settings, and find the writing workflow that works best for you. Happy writing!